Sealing your asphalt or concrete driveway today protects it from water, chemicals, and UV damage, slows crack formation, and keeps drainage clear for long-lasting durability. Start with thorough surface prep: clean, dry, and repair cracks or potholes. Choose the right sealant for your substrate—flexible for asphalt, penetrating for concrete—and apply in cool, dry conditions with consistent coats and proper curing. Avoid rushed jobs or bad weather. If you keep going, you’ll gain deeper tips and troubleshooting techniques.
Why You Should Seal a Driveway to Prevent Cracks
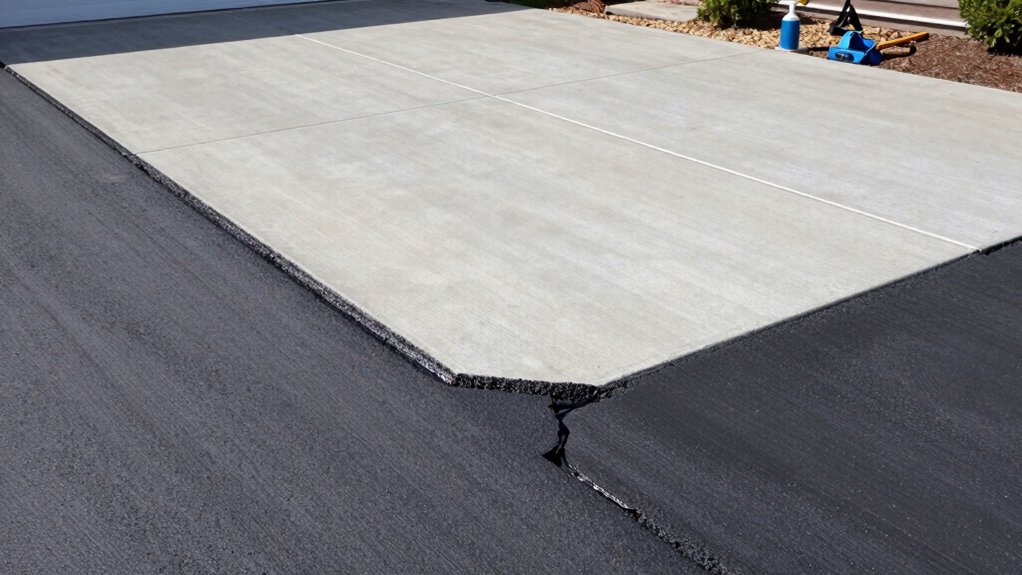
Sealing your driveway helps prevent cracks by providing a protective layer that blocks water, salts, and chemicals from penetrating the surface. When you seal, you reduce freeze-thaw damage and limit oxidation that weakens asphalt or concrete over time.
This preservation slows deterioration, helping you avoid costly repairs down the line. Regular sealing also maintains color and surface texture, improving visibility and safety.
If you notice minor fatigue, address it early with timely pothole repair to prevent enlargement and further compromise. Sealing creates a uniform barrier that minimizes moisture intrusion, which is essential for long-term durability.
Over time, proper maintenance supports driveway expansion control, preserving structural integrity and extending service life, while delaying more invasive, disruptive, and expensive fixes.
Asphalt vs. Concrete: How Sealing Differs
Although both asphalt and concrete respond to sealant differently, the fundamental difference lies in how each material absorbs and interacts with seal coats. You’ll notice asphalt accepts sealant quickly due to its porous surface, while concrete resists absorption and requires penetrating varnish-style products for durable protection.
This affects sealant durability and long-term performance, so you choose formulations that suit each substrate.
- Asphalt favors fast-drying, flexible coatings
- Concrete benefits from deeper-penetrating, film-forming products
- Surface absorption guides maintenance frequency and recoat timing
Understanding these contrasts helps you apply the right sealer, maximize longevity, and prevent early wear.
When to Seal: Timing for Best Results
Timing is everything when sealing asphalt or concrete, because the right window maximizes protection and minimizes rework. You’ll achieve lasting results by choosing a dry, mild period with no precipitation in the forecast for 24 to 48 hours.
Check surface temperature ranges recommended by the sealant manufacturer; most products require a moderate surface temperature to cure properly without premature drying or washout. Avoid sealing in extreme heat, cold, or humidity, which can shorten Sealant longevity and invite premature failures.
Apply when the surface is fully dry after cleaning, and when overnight lows won’t drop below the product’s minimum cure temperature. Plan for a stable weeklong stretch of favorable weather to ensure a full, durable cure and ideal protection.
What to Do First: Surface Prep Essentials
Before applying sealant, start with thorough surface prep to guarantee adhesion and a long-lasting finish. You must address the surface itself first, not just the surrounding area, to prevent early failures. Focus on removing contaminants and smoothing imperfections so the coating bonds properly. Surface cleaning and proper equipment selection are your keys to success.
- Clear debris, dirt, and vegetation from cracks and joints.
- Repair cracks and fill potholes to create a uniform plane.
- Choose appropriate tools and sprayers or rollers for even coverage.
Use a stiff brush, leaf blower, or pressure washer as needed, but avoid damaging edges. Test a small area first to confirm compatibility with your sealant. Keep the surface dry and cool before application, and follow manufacturer guidelines for timing between prep and sealant.
How to Choose a Driveway Sealant: Materials, Pros, and Cons
Choosing the right driveway sealant starts with understanding the available materials and how they perform in real-world conditions. You’ll compare asphalt-emulsion sealants, coal-tar-based options, acrylic or rubberized acrylic coatings, and concrete-specific sealants.
Each material offers different durability, flexibility, and drying times. For instance, asphalt emulsions cure quickly but may require more frequent reapplication, while coal-tar products resist UV damage but carry higher environmental concerns.
Consider sealant compatibility with your surface type, traffic load, and climate, since mismatches can cause peeling or cracking. Evaluate long-term costs, not just upfront price.
Also weigh environmental impact, including volatile organic compounds and sustainability of the resin. Your choice should balance performance, maintenance needs, and safety for people and pets.
How to Apply Driveway Sealant: The Step-by-Step Process
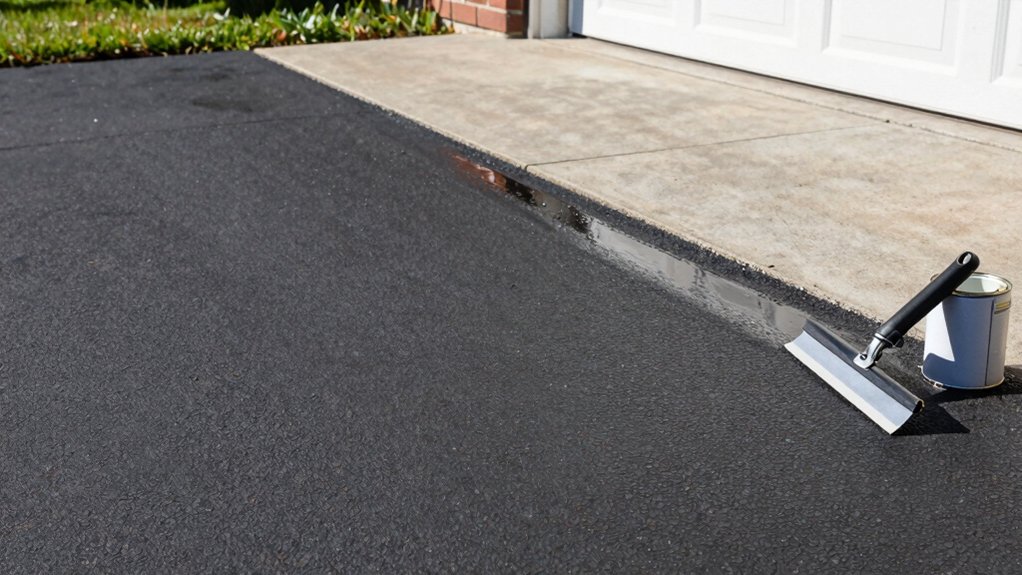
You’ll start by prepping the surface, cleaning and repairing any cracks, to guarantee the sealant adheres properly.
Then you’ll follow the application techniques guide, choosing the right roller, brush, or spray method for your surface and climate.
Finally, you’ll review drying times and recoat windows to finish with a durable, even seal.
Surface Preparation Steps
To guarantee your driveway sealant adheres properly, start with thorough surface prep: clean all debris, repair cracks and pits, and remove any oil stains so the sealant can bond evenly.
- Inspect the surface for voids and loose material, then patch with the appropriate filler.
- Power-wash or scrub to achieve surface cleaning, allowing full drying before coating.
- Remove everything that could trap moisture or debris, including weeds and dust.
Proper prep ensures sealant durability and a uniform finish. Use a stiff broom to sweep, and verify dry, solid substrate before application. Avoid applying over damp patches or lingering contaminants.
Prioritize consistent surface textures to prevent ridges or bubbles, and test a small area if you’re unsure. This step minimizes failure risk and promotes long-lasting results.
Application Techniques Guide
So, how do you apply driveway sealant smoothly and effectively, from start to finish? Begin by inspecting for cracks and repairing them, then clean the surface thoroughly to remove dust, dirt, and vehicles’ residue.
Choose the correct sealant type for your pavement and temperature, and pour or load it into a wide, clean tray or sprayer.
Apply in thin, even coats, using a quality squeegee or roller to avoid puddling. Maintain a steady pace, crossing seams in multiple passes for uniform coverage.
Allow proper drying between coats, and avoid traffic as recommended by the manufacturer.
This careful method improves sealant longevity and boosts application efficiency, ensuring durable protection against moisture, UV damage, and freeze-thaw cycles.
Store leftovers properly for future touchups.
Common Sealing Mistakes and How to Avoid Them
Poor prep and poor timing are the top sealing mistakes you’ll encounter. If you skip proper surface cleaning and drying, or seal in unsuitable weather, you’ll trap moisture and fail early.
Plan around preparation pitfalls and weather factors to guarantee you lock in a durable seal.
Preparation Pitfalls To Avoid
Before you seal, prioritize a solid prep because a sloppy surface invites defects. Preparation pits threaten adhesion and longevity, so you must lock in proper steps now.
- Ensure surface cleaning removes oil, dirt, and loose debris that can hinder sealant durability.
- Repair cracks and fix spalling before applying any coating to avoid trap failures.
- Remove previous sealant remnants and let the surface dry thoroughly for even, reliable bonding.
The goal is a uniform, sound substrate that supports consistent coating thickness. Skipping cleaning or rushing repairs creates air pockets and cracking later, undermining Sealant durability and overall performance.
Keep tools ready, follow manufacturer guidelines, and test a small area first. A disciplined prep yields a smoother finish, stronger adhesion, and longer-lasting protection for your driveway.
Timing And Weather Factors
Timing and weather play a decisive role in sealant performance, so align sealing with favorable conditions rather than rushing after prep. You should plan around seasonal fluctuations and forecast accuracy, not just when you finish cleaning.
Temperature considerations matter: too cold or too hot—especially extremes—compromise film formation and adhesion. Work only within the manufacturer’s recommended temperature range, avoiding early morning dew or late-day heat shimmer.
Drying and cure times lengthen in cool, damp conditions, while heat accelerates VOC volatilization and can cause pinholes or streaking. Check humidity as well, since high moisture slows cure and traps solvent.
If rain is possible, postpone. Maintain uniform surface temperature, avoid shade edges, and apply in consistent, narrow passes for even coverage and film thickness.
Aftercare and Maintenance Tips for Lasting Protection
To protect your sealed asphalt or concrete driveway, establish a simple, regular maintenance routine from the start. You should monitor surface condition, clean debris promptly, and reseal when the coating shows wear. Consistent care extends protection against cracking and moisture intrusion.
Seasonal changes affect expansion and contraction, so adjust your approach as temperatures shift, addressing high-traffic stress and UV exposure. Drainage solutions must channel water away from edges to prevent pooling and undermining the coating.
- Inspect annually for cracks and wear, reseal as needed
- Clean with a gentle broom and water; avoid harsh abrasives
- Reassess grading and drainage after heavy rainfall or melting snow
Troubleshooting: What to Do If the Seal Fails
If you notice the seal beginning to fail, don’t wait for visible gaps to grow. Start a targeted assessment to identify whether deterioration comes from poor adhesion, UV exposure, or weathering. Inspect for peeling, soft spots, and texture changes, noting timing and temperature during application.
For insufficient Sealant longevity, reapply only where coatings remain sound, or strip and reseal if substrate damage is evident. Address minor cracks with prompt crack repair before resealing, since untreated fissures can propagate under pressure.
Use compatible materials compatible with existing sealant layers and surface textures. Prepare the area, clean thoroughly, and follow manufacturer guidelines for cure times.
If failures recur, consider switching sealants or adjusting application thickness to optimize durability.
Frequently Asked Questions
How Long Does Sealing Asphalt or Concrete Last?
Sealing typically lasts 3–5 years for asphalt and 2–4 years for concrete, depending on traffic. You’ll notice cracks if weather impact accelerates wear; choose a compatible sealant composition and reseal when performance declines.
Can Sealing Fix Existing Cracks or Potholes?
Sealing can fix minor cracks and potholes temporarily, but you’ll need crack filling and pothole repair to restore structure. About 85% of asphalt issues improve after proper crack filling, though severe damage may require resurfacing.
Is DIY Sealing Cheaper Than Hiring a Pro?
DIY sealing is cheaper upfront, but the cost comparison depends on material quality and tools you already own; hiring a pro may save time and avoid mistakes. Consider your skill requirements and warranties before deciding.
Should You Seal in Cold or Hot Weather?
Seal in moderate temperatures—neither scorching nor freezing. Maintain temperature considerations, and apply sealant when conditions are above recommended minimums. Timing matters: perfect Sealant application timing keeps your coating durable and your driveway looking great for years.
Do Color/Tint Additives Affect Sealant Durability?
Color additives generally don’t hinder sealant longevity; choose quality pigments, and follow product guidelines. You’ll still get good UV resistance, adhesion, and protection, with color options barely affecting durability when properly applied and cured.
Conclusion
Sealing your driveway is like sheathing a shield over your home’s doorway. When you prep, choose the right sealant, and apply with steady hands, you banish small cracks before they bite deeper. If you stay on schedule and maintain it, your drive stays smooth and stout, resisting water, sun, and wear. Ignore the signs, and trouble booms back louder than a thunderclap. Seal today, and enjoy a longer, cleaner, wiser driveway tomorrow.