
To clean your washer, start with a quick exterior wipe, check hoses, and remove standing water. For front-loaders, wipe the gasket folds and leave the door ajar to dry; for top-loaders, inspect dispensers and drum edges after each use. Run a hot have cycle with vinegar or a cleaner monthly, then wipe seals and dispensers again. Use the right detergent amounts to avoid residue. If you keep going, you’ll master deeper cleaning tips and pro tips.
Why a Clean Washing Machine Makes Laundry Easier
A clean washing machine runs more efficiently, prevents odors, and protects clothes. When you keep the drum and seals mold-free, you minimize residue that can hinder detergent effectiveness and clog bearings. Regular cleaning reduces the chance of soap scum buildup, so you’ll see better laundry results with every load.
With a clean machine, detergent effectiveness stays high, meaning you use the right amount and still get bright colors and clean whites. You’ll also notice easier laundry stain removal because fabrics aren’t re-soiled by musty odors or trapped grime.
Routine maintenance shortens wash cycles, lowers energy use, and extends appliance life. In short, cleanliness translates to more reliable performance and less rewashing.
Front-Load vs Top-Load: Washing Machine Cleaning Needs Explained
Front-load machines tend to accumulate more lint around the door seal, so you’ll want to check and clean the gasket regularly.
Top-load units often show detergent residue differences, meaning you may need to adjust how much you use and where you put it.
In either case, knowing these cleaning quirks helps you keep your washer running efficiently.
Front-Load Lint Buildup
If you have a front-load washer, lint buildup in the door seal and drum can affect performance and odor, so addressing it promptly helps maintain cleanliness and efficiency.
Lint accumulation often starts in the gasket folds and on drum surfaces where dryer lint can lodge during cycles. Regular inspection after each wash helps you spot pockets before they turn stale or moldy. Focus on removing visible fibers and wiping seals with a damp cloth.
Run an empty hot water cycle with a cup of white vinegar or a purpose-made cleaner to loosen debris, then rinse thoroughly.
Prioritize filter cleaning if your model includes a lint or debris filter, and clear it according to the manufacturer’s instructions.
This routine minimizes odors and preserves washer efficiency.
Top-Load Detergent Differences
Top-load and front-load washers use different detergent requirements, and understanding these differences helps you clean more effectively. For top-load machines, you’ll typically use high-efficiency (HE) detergent only if the model specifies it; otherwise, use the detergent type recommended by the manufacturer.
Detergent types matter because too much suds can impair rinsing and encourage residue buildup. You’ll notice that dosing for top-loads often differs from front-loads, affecting cleaning effectiveness. Always check the label for capacity and water hardness adjustments.
Choose detergents formulated for high-suds control if your top-load isn’t HE-compatible. This knowledge helps you prevent buildup and maintain performance over time.
- Detergent types impact suds, rinse, and residue
- Proper dosing boosts cleaning effectiveness
- Manufacturer guidance governs compatibility
- Water hardness alters detergent needs
- Consistent use preserves machine health
Is Your Washer Dirty? Quick Dip Test to Decide
Ready to gauge cleanliness fast? Use the quick dip indicator to spot the dirt level and decide your next step, with a simple dirt level clue guiding your actions.
Remember the wait time tips to let the test settle before you interpret the results.
Quick Dip Indicator
Is your washer truly clean, or is unseen grime building up? The Quick Dip Indicator helps you decide if a deeper clean is needed. You dip a small strip into the washer’s drum or dispense area, read the color, and compare to the chart.
If the result signals trouble, address detergent residue and odor detection issues before the next cycle. A simple fail usually means more thorough cleaning is due, not replacement.
- Use the strip exactly as directed
- Compare color to the provided scale
- Note any persistent odor after wash cycles
- Check detergent buildup on dispensers
- Plan a targeted cleaning routine promptly
Consistency matters: rapid testing guides you to effective maintenance without guesswork.
Dirt Level Clue
Dirt Level Clue: Is your washer dirty enough to slow down cleaning? You can gauge this quickly with a simple dip test. Fill a cup with water and a touch of detergent, then dip a clean white cloth or paper towel into the drum near the agitator or central filter path.
Run a short wash and inspect the cloth afterward. If you see visible grime, lint, or discolored residues, your dirt level is higher than ideal. That indicates you should increase cleaning frequency or adjust your load size, water temperature, and detergent amount accordingly.
Even modest grime signals that buildup exists between cycles. Use this clue to schedule proactive cleanings before odors emerge and efficiency drops.
Consistency matters more than intensity for sustained performance.
Wait Time Tips
To decide if your washer needs attention, perform a quick wait-time check after a cycle finishes: if you notice lingering dampness, musty odors, or residual grime around the tub or door seal, it signals buildup and the need for a targeted clean.
- Look for moisture pockets near seals and gaskets
- Note any musty smell as a sign of biofilm
- Check around the detergent drawer for residue
- Observe if clothes feel damp or plus-scented after drying
- Track your laundry frequency and detergent types used
Keeping a steady routine helps: adjust laundry frequency if you run full loads less often, and rotate detergent types to prevent buildup. Regular checks reduce deep-clean needs and protect drum integrity.
Pre-Clean Steps: Reset Detergent Levels and Odor Sources
Resetting your detergent levels and neutralizing odor sources starts with a quick inventory of your washer’s basics. You’ll check current detergent amounts, confirm your cartridge or dispenser isn’t clogged, and note any recent changes to products.
Next, assess odor sources by sniffing the drum and gasket areas for mildew or residue. Remove loose items and wipe seals with a mild, unscented cleaner.
If you use high-efficiency, verify the correct detergent type and recommended dose to prevent oversudsing.
Run a quick empty cycle with hot water and a splash of white vinegar or a manufacturer-approved cleaner if smells persist.
Document findings, adjust dosing, and plan routine maintenance intervals to maintain consistent detergent levels and minimize odor sources.
Everyday Cleaning Routine for Front-Load Washers
Now that you’ve addressed detergent levels and odor sources, you’ll establish an everyday cleaning routine tailored for front-load washers. You control the cadence and keep buildup at bay with a simple, repeatable regimen.
Focus on Cleaning frequency to prevent mold and soap scum, and choose Detergent types that suit your machine’s needs and local water. Implement quick checks after each cycle and monthly deep-dedicated steps to sustain performance without intrusion.
- Run a hot-water cycle with a washing machine cleaner or white vinegar monthly
- Wipe door gasket and drum edge after every use
- Leave the door ajar to promote air drying
- Use only recommended Detergent types and measured amounts
- Inspect filters and hoses quarterly for blockages
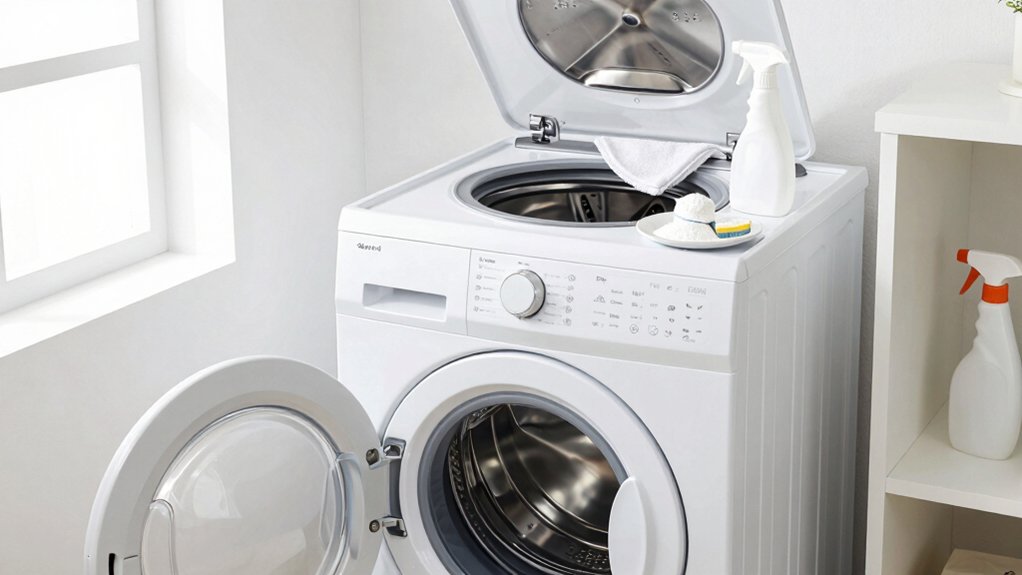
Everyday Cleaning Routine for Top-Load Washers
Before you run a load, complete the pre-wash check to remove lint and wipe the lid seal.
Regularly clean the detergent drawer to prevent buildup and make certain you’re using the right amount of detergent for top-load cycles.
This routine keeps your washer fresh and improves performance, setting the stage for ongoing maintenance.
Pre-Will Cleaning Steps
To prep your top-load washer for a clean cycle, start with a quick wipe-down of the exterior and a check of the lid, gaskets, and dispensers.
Before loading, address common issues to prevent repeats:
- Inspect seals for lint accumulation and wipe away fibers
- Remove any standing water in the drum with a quick towel sweep
- Check the detergent dispenser for buildup and clear clogs
- Verify hoses aren’t kinked or leaking
- Run a brief rinse to clear loose debris from the drum rim
These steps help minimize detergent residue and surface residue that can degrade performance. Skipping them invites imbalances and smells.
You’ll notice smoother cycles and cleaner results when you tackle these routine checks first.
Detergent Drawer Maintenance
Detergent drawer maintenance is a quick, practical step you can add to your daily routine to keep top-load washers running smoothly. You should routinely remove the drawer and rinse residue under warm water, using a soft brush to reach corners. Dry thoroughly before reassembling to prevent mold growth.
Wipe the surrounding cavity with a damp cloth, paying attention to any soap build-up that can hinder dispensing. Run a short empty cycle with hot water and a cup of vinegar or a commercial cleaner to flush remaining deposits every few months.
Establish a cadence: inspect weekly, clean monthly, and adjust detergent amounts to avoid overflow. These maintenance tips help prevent clogging and ensure consistent dispensing, preserving performance and prolonging your machine’s life.
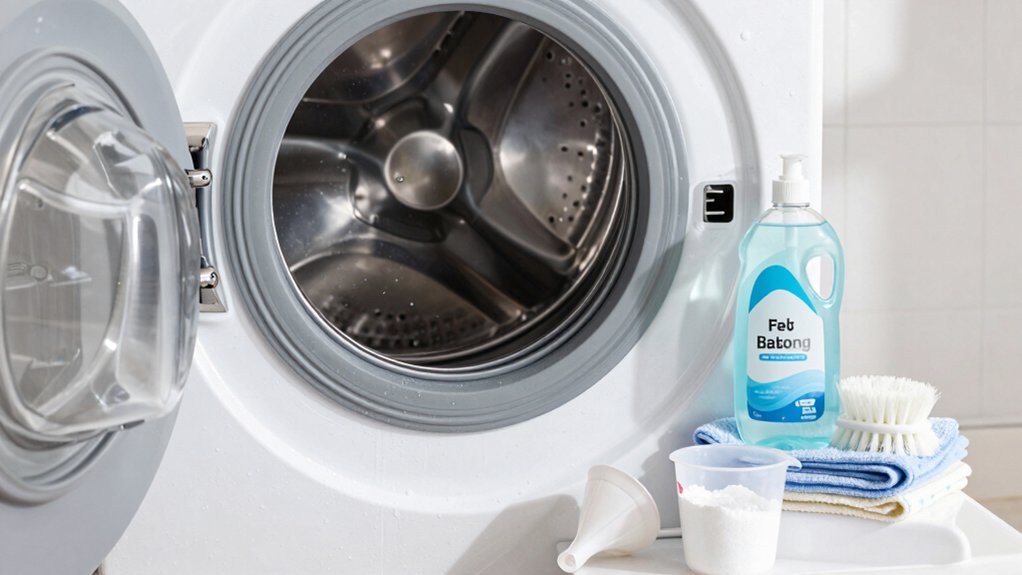
When and How to Run a Washer Clean Cycle
If you notice musty odors, residue buildup, or slower draining, it’s time to run a washer clean cycle. Run it monthly or when you detect buildup, and follow your machine’s instructions for cleaners or natural alternatives. Use the hottest appropriate setting with no laundry, and allow an extra rinse if available.
Afterward, wipe gaskets and seals to remove loosened residue. Track washer cycle timing and cleaning frequency to establish a routine that prevents odors and inefficiency.
- Choose the recommended high-heat cycle or dedicated clean cycle
- Use the prescribed cleaner or white vinegar/baking soda as appropriate
- Run an extra rinse if buildup persists
- Wipe seals, lids, and dispensers afterward
- Log the date to maintain consistent cleaning cadence
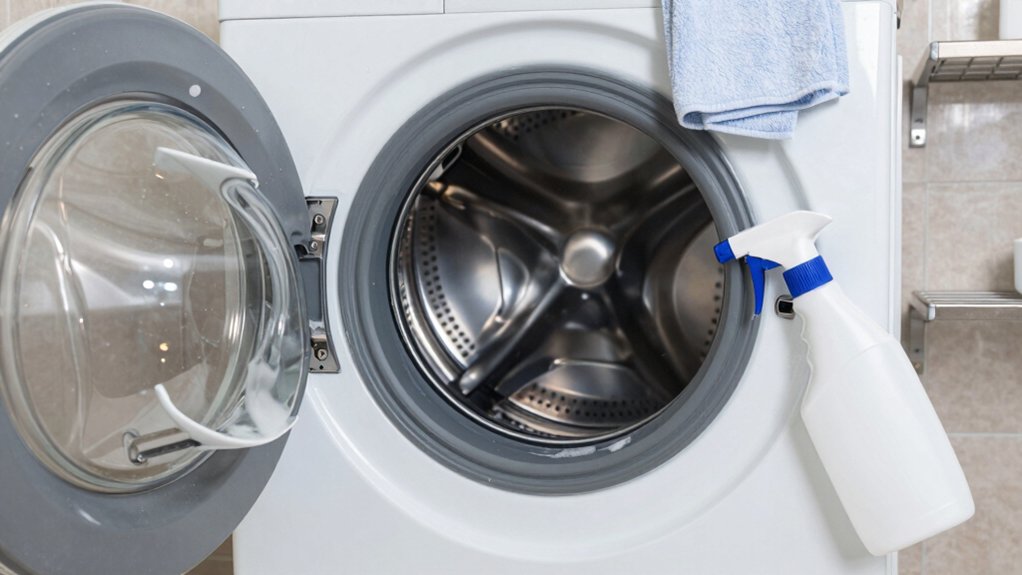
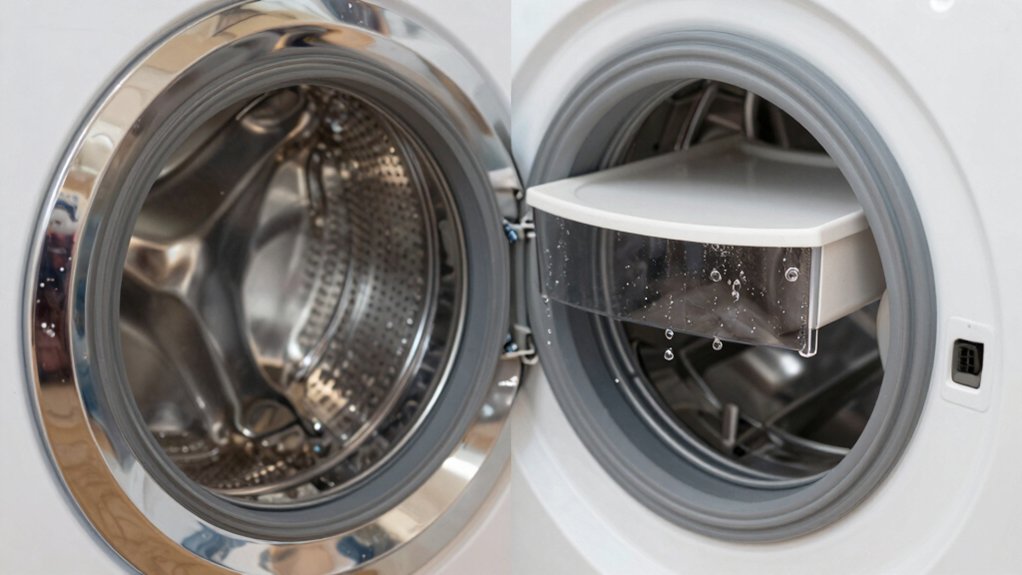
Remove Mold, Mildew, and Detergent Buildup in Your Washer Gaskets and Dispenser
After cleaning cycles, focus on the seals, gaskets, and dispensers where mold, mildew, and detergent residue tend to hide. You’ll remove buildup by inspecting the gasket area for visible mold and using a cloth soaked in hot, soapy water.
For stubborn spots, apply a diluted bleach solution or a commercial cleaner safe for your machine, then scrub gently with a soft brush. Wipe the dispenser thoroughly, ensuring all detergent residue is removed, since dispenser mildew can transfer to clothing.
Rinse with clean water and dry fully before the next load.
You’ll run a short, empty cycle to flush any remaining debris. Regular checks prevent gasket mold and keep your washer’s interior fresh and efficient.
Best Cleaners for Washing Machines and What to Avoid
Choosing the right cleaners for your washing machine matters, because the wrong products can damage seals, hoses, or coatings and leave residue that attracts more buildup.
You want products that honor detergent compatibility and won’t leave sticky films. Use approved non-abrasive cleaners or simple hot-water cycles with a small amount of bleach or vinegar when needed, but avoid mixing cleaners or overdoing cleaning frequency.
- Use cleaners labeled for washing machines
- Check detergent compatibility to prevent residue
- Avoid chlorine bleach on high-efficiency seals
- Don’t over-clean; follow recommended cleaning frequency
- Rinse thoroughly and run an empty cycle afterward
Daily Habits to Keep Your Washing Machine Fresh
Keeping your machine fresh isn’t a one-off task; it’s about simple daily habits that prevent buildup and odors from forming in the drum, gasket, and hoses. Start by using the right detergent types in appropriate amounts for your load size, avoiding overflow that can linger in seals.
Practice quick laundry sorting to prevent mixed fabrics and unexpected dye transfers that stress the drum. After each cycle, wipe the door seal and lint trap, leaving hinges and gaskets dry. Leave the door or lid ajar for a few hours to air out moisture.
Run a quick hot wash with no load once a week to deter mold, then promptly remove damp items. Consistency keeps interiors cleaner and odors at bay.
Frequently Asked Questions
Can I Use Vinegar Daily Without Harming Parts?
Vinegar safety: daily use isn’t recommended, as regular exposure can degrade seals and gaskets. You can use it occasionally for mineral buildup, but consider diluted alternatives. Daily cleaning implications: stick to mild cleaners and run an empty cycle monthly.
How Often Should I Replace Door Seals?
You should replace door seals when you notice cracking, peeling, or mold; typically every 3–5 years with regular use. Do seal inspection tips monthly, and replace promptly if damage appears to prevent leaks and odors.
Do Washers Smell After Cleaning Cycles?
Yes, washers can smell after cleaning cycles if you don’t address detergent residue and mold buildup; run a hot cycle with vinegar or baking soda, then wipe seals and drum to prevent lingering odors.
Is Using Bleach Safe in High-Efficiency Machines?
Bleach safety: yes, you can use it in high efficiency machines, but dilute properly and never mix with ammonia. Run a quick rinse after to avoid residue, and opt for non-chlorine alternatives if you have sensitive fabrics or odors.
Can I Clean a Washer Without Removing Hoses?
Yes, you can clean a washer without removing hoses. You’ll target hose removal and internal access by running a cleaning cycle, wiping seals, and using a tub-clean product; make certain access points stay dry and hoses remain intact.
Conclusion
You stand before your washer, the drum gleaming like a sunlit pool. Steam curls from the door seal, carrying away yesterday’s damp worries. Each swoosh of hot water and factory-clean scent becomes a tiny victory, a clear window through which laundry finally breathes easy. With routine care, doors stay tight, gaskets whisper clean, and odors fade to memory. Your whites brighten, colors stay true, and the laundry room feels fresh—a quiet, confident sanctuary you’ve built with habit.


