If you’re adding en-suites to an HMO, start by testing demand in your area and pricing for privacy and convenience. Create a cost-conscious plan: prioritize safety, durability, and low-maintenance finishes, then map a phased rollout to protect occupancy and cash flow. Plan compact layouts with space-saving fixtures, couple with efficient ventilation and solid plumbing. Track costs, include contingencies, and negotiate milestone-based contracts to avoid overruns. With smart budgeting, you’ll see value rise—and there’s more to optimize as you continue.
Decide If En-Suites Are the Right Move for Your HMO

Deciding whether to add en-suites to your HMO starts with a simple question: will the investment pay off in higher rents, lower vacancy, or better tenant retention? You’ll want a clear read on your current tenancy mix, turnover rates, and the premium rent you could command.
If demand shows tenants value privacy and convenience, en-suites can justify higher overall rents and reduced vacancy. Consider upfront costs, impact on shared areas, and potential builder constraints before committing.
From a strategic standpoint, map scenarios: baseline not adding vs adding one, two, or all rooms. If the math supports a positive margin within your hold period, proceed.
Focus on luxury upgrades and aesthetic enhancements that differentiate your property while sustaining long-term profitability.
Always verify local regulations and licensing requirements.
How Much Demand Do En-Suites Unlock in Your Area?
You’ll want to map local demand indicators, like how many tenants prioritize en-suites and the average rent premium they’ll tolerate.
Compare competitor suite availability and notice gaps you could fill without oversaturating the market.
Pay attention to tenant preference signals—online inquiries, surveys, and move-in timelines—to gauge how much demand an en-suite adds in your area.
Local Demand Indicators
What kind of demand do en-suites open in your area, and how can you spot it quickly? Look for rental listings showing en-suite rooms, higher rent per tenant, and faster vacancy turnover.
Check local absorption rates—how long units stay vacant after listing; short gaps signal strong demand. Monitor inquiries about privacy, sound insulation, and dedicated bathrooms during tours, plus requests for flexible leasing terms.
Analyze building codes and landlord forums for activity around upgrades, which often correlates with higher rentability. Garden landscaping and parking solutions can boost appeal, so note if properties with gated parking or landscaped yards attract more inquiries.
Use online market data, landlord networks, and tenant surveys to triangulate demand before you invest in en-suite additions.
Competitor Suite Availability
- You sense urgency or complacency in the market, shaping your move.
- You uncover pricing leverage and demand signals that sharpen your bid.
- You identify room to differentiate before rivals respond.
Tenant Preference Signals
Ever wonder how much demand a targeted en-suite upgrade can reveal in your area? Tenant signals aren’t just buzzwords; they’re practical data. Start with tenant feedback from current tenants and recent inquiries to gauge bedrooms with ensuite potential.
Track what residents request in surveys, maintenance tickets, and move-in apps, then map those preferences to unit layouts. Cross-check with local rental listings and hospitality-style amenities to infer willingness to pay for privacy and convenience.
Use marketing strategies that test angles—highlight ensuite options in listings, photos, and floor plans, then monitor response rates and time on market. If demand spikes after emphasizing privacy, scale the signal with targeted upgrades.
In short, treat signals as a guide to prioritization, not a guess.
Budget Framework for a Cost-Conscious HMO Conversion
A solid budget framework for a cost-conscious HMO conversion starts with defining clear priorities and identifying non-negotiables, such as safety compliance and durable fixtures, before pricing every element.
You’ll map costs against practical outcomes, emphasizing energy efficiency and garden landscaping as value adds that curb long-term operating costs and boost appeal.
By forecasting contingencies and trade-offs, you retain flexibility without sacrificing quality.
Track milestones, approvals, and supplier lead times to prevent overruns, and build a transparent approvals process so every expenditure earns buy-in.
Maintain a lean contingency, then reallocate savings to critical upgrades that improve resident experience and compliance.
- You feel the momentum when costs align with measurable benefits
- You gain confidence from clear accountability and control
- You celebrate progress as efficiency compounds over time
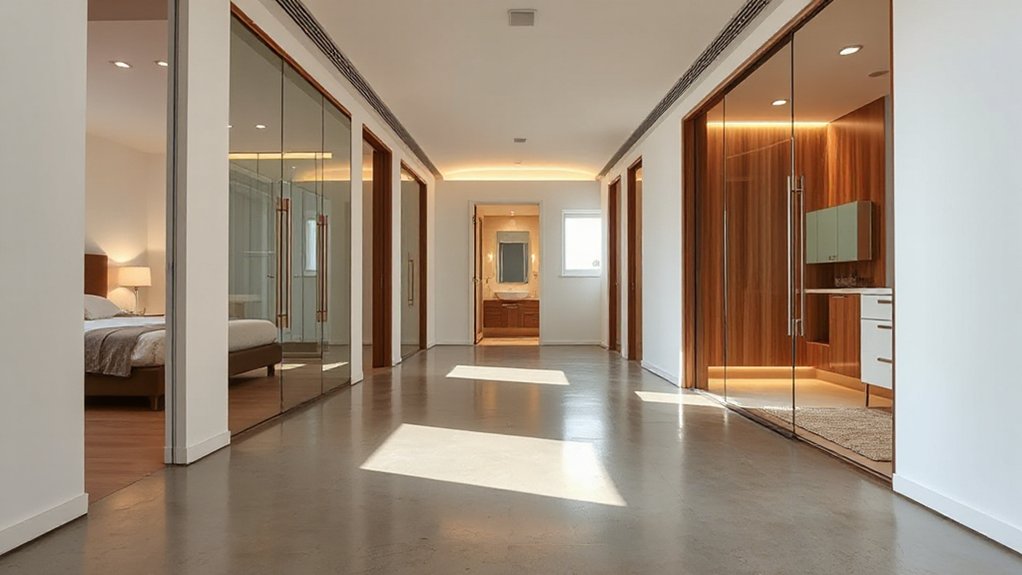
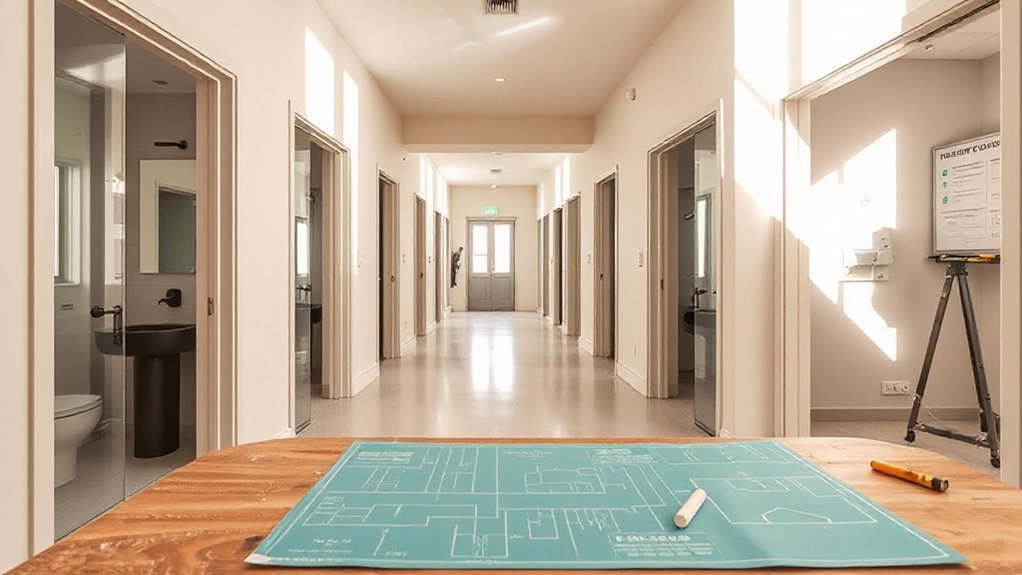
Plan the Layout for Compact HMO En-Suites
How should you approach the layout for compact HMO en-suites to maximize space and function? Start with a clear flow: private entry, efficient circulation, and logical grouping of plumbing.
Prioritize a shower over a tub, and use corner fixtures to free wall space for storage. Plan for compact yet comfortable dimensions, ensuring at least 600mm clearance for doors and 750mm for movement around fixtures.
Integrate built-in niches, recessed shelving, and a wall-hung vanity to reduce clutter. Consider moisture control and ventilation as key design criteria to prevent mold.
Coordinate with garden landscaping and parking management concepts where relevant to site planning, ensuring exterior access doesn’t disrupt internal privacy.
Revisit regulations, durability, and ease of cleaning to sustain value.
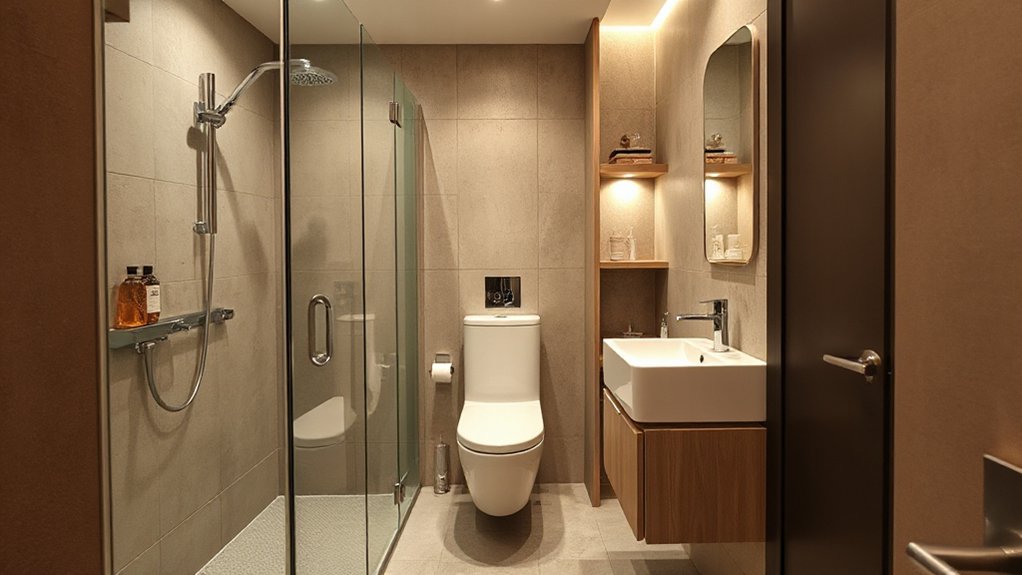
Choose Space-Saving En-Suite Fixtures for HMOs
Choosing space-saving en-suite fixtures for HMOs starts with prioritizing compact, user-friendly designs that still feel comfortable. You’ll balance form and function by selecting fixtures that maximize throughput without crowding the room, keeping pathways clear for daily use.
Focus on modular options that simplify fixture installation and future upgrades, so you stay cost-effective over time. Prioritize fixtures with built-in storage, like recessed shelves and corner alcoves, to maintain tidy en suite decor.
Choose compact shower stalls, dual-flush toilets, and slim-profile vanities to optimize footprint while preserving usability. Confirm compatibility with your electrical and plumbing layouts to avoid surprises later.
Plan with durability in mind, and label zones for maintenance access.
- Minimal footprint, maximum usability
- Built-in storage that stays tidy
- Simple, quick fixture installation planning
Durable, Affordable Materials for High-Traffic Bathrooms
When you select durable materials, you shorten replacement cycles and protect your margins in busy HMOs.
Consider budget-friendly surface options that withstand scrapes, moisture, and heavy foot traffic without sacrificing looks.
Prioritize materials that balance durability with long-term cost per use, so High-Traffic Bathrooms stay reliable and affordable.
Durable Materials Selection
Durable, affordable materials are non-negotiable in high-traffic HMO bathrooms, where wear shows fast and upkeep costs add up. You want surfaces that resist moisture, scratches, and scuffs while staying budget-friendly.
Prioritize dense, water-repellent options that tolerate daily use and quick cleanups, and favor materials that age gracefully. Eco friendly materials help you meet sustainability goals without inflating costs, while Smart home technology can extend life cycles through efficient maintenance alerts and controlled usage.
Choose seamless or tightly grouted installations to minimize grime buildup and simplify repairs. Plan for consistent finishes across en-suites to avoid frequent repurposing or overhauls.
- Long-lasting, low-maintenance surfaces
- Seamless installations that reduce upkeep
- Low-odor, eco friendly options with durable cores
Budget-Friendly Surface Options
What budget-friendly surface options hold up best in high-traffic HMO bathrooms? You want durable, affordable choices that resist grime and stains while still feeling cohesive with your aesthetic design.
Start with porcelain tiles or solid-surface countertops, both easy to clean and less prone to chipping than natural stone.
Look for high-grade laminate or vinyl plank flooring with a rigid core for moisture resistance and minimal maintenance.
For surrounds, consider pre-finished composite panels or quartz-look laminates that mimic luxury without the price tag.
Eco-friendly materials can include recycled-glass tiles or sustainably sourced wood-look composites.
Prioritize warranties, slip resistance, and color consistency across units to reduce replacement cycles and maintenance calls, keeping budgets predictable and spaces appealing.
High-Traffic Bathroom Durability
Are you choosing materials that stand up to daily wear and tear in high-traffic HMO bathrooms? You want durable, affordable picks that resist chips, stains, and moisture while still looking polished. Focus on long-lasting surfaces that handle heavy use and easy maintenance. Prioritize water resistance, slip resistance, and quick cleaning to minimize downtime and costs.
Pair sturdy foundations with subtle styling for aesthetic enhancements, plus the luxury upgrades that impress tenants without breaking the bank.
- High-density vinyl flooring that mirrors stone without the upkeep
- Porcelain tiles with enamel-coated glaze for resilience and easy wiping
- Solid-surface countertops that resist scratches and stains
These choices keep baths functional, visually cohesive, and ready for continuous occupancy.
Plumbing Basics: Water Supply, Waste, and Venting for HMOs
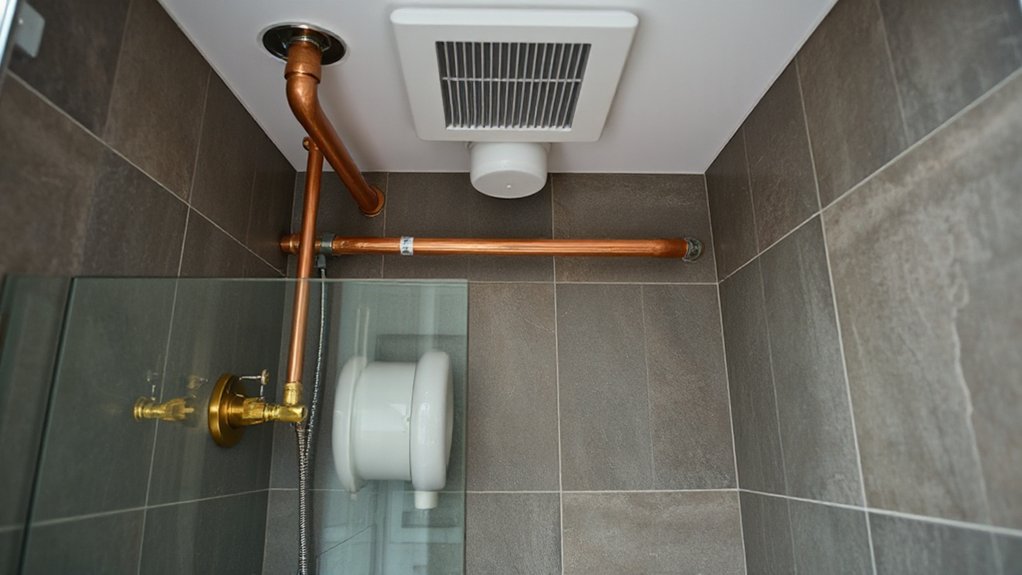
Sure, you’ll want a solid plumbing plan that keeps costs in check while supporting en-suites. Start with your water supply: map existing lines, assess pressure, and estimate fixture count per unit to size pipes correctly. Aim for two separate shutoffs per suite for maintenance and safety.
For waste, design a gravity-fed system with properly pitched drains and cleanouts accessible from each bathroom. Don’t undercut venting: each trap needs a vent to prevent siphoning and slow drainage, especially with multiple en-suites tied to one stack.
Plan future expansion, leaving room for adding fixtures without rework. Integrate garden landscaping and discreet kitchen upgrades considerations—routing lines away from aesthetic changes, and sealing penetrations to minimize heat loss and leaks.
Prioritize durable fittings and professional inspection before occupancy.
Electrical Safety and Lighting in Small Bathrooms
In small bathrooms, start with safe, bright lighting that reduces shadows and avoids glare on mirrors.
Guarantee GFCI protection and accessible switches are installed for quick shutoff and everyday use.
Choose waterproof fixtures and fittings that withstand moisture, and plan wiring and sealing to minimize risk and simplify maintenance.
Safe Bathroom Lighting
Installing safe bathroom lighting isn’t optional in a small HMO; it’s essential for daily safety and investor credibility. You’ll want lighting that reduces shadows, minimizes glare, and survives moisture.
Prioritize practical placement, labeled fixtures, and IP-rated components to prevent corrosion and shocks. Choose lighting technology that delivers consistent color rendering and low power draw, helping you manage bills without compromising comfort.
Keep circuits simple, with clear labeling and accessibility for maintenance. Track compliance with local codes and document decisions for investors.
- Reduces risk with moisture-rated fixtures and proper separation from water sources
- Improves mood and perceived value through balanced color temperature
- Lowers operating costs with efficient, durable lighting technology
GFCI and Switching
GFCI protection and proper switching are non-negotiable in small bathrooms, where moisture and confined spaces raise shock risk. You’ll want GFCI switches that provide immediate power cut-off for outlets near sinks, preventing lingering current paths.
Pair these with circuit switching that’s isolated from unrelated loads, so a bathroom surge doesn’t trip other circuits or dim lights in adjoining rooms. Use clearly labeled switches for dedicated bathroom circuits, and keep circuits simple: one feed, one switch leg, one GFCI-receptacle pair where required by code.
Install at reachable heights, with proper enclosures to protect from moisture. Test functionality monthly and after any maintenance.
Document layouts for future tenants, and coordinate with your electrician to confirm compliance and threading of cables through protected conduits.
Waterproofing Fixtures
Waterproofing fixtures in small bathrooms is essential for electrical safety and reliable lighting, so you’ll seal around sinks, tubs, and showers with moisture-rated materials and careful detailing. Focus on tight joints, gasketed connections, and properly rated enclosures to prevent leaks from undermining wiring and fixtures.
Choose luxury fixtures that tolerate damp conditions and maintain style, then blend aesthetic enhancements with solid performance. Confirm waterproofing membranes cover backsplashes and niches, and verify continuity with a tester after installation.
Plan for venting and moisture control to protect finishes and bulbs. Use color-matched sealants for a polished look, and document all specs for future maintenance.
- Elevate appeal while safeguarding safety with thoughtful material choices
- Optimize for durability and ease of access during inspections
- Invest in reliable, aesthetically refined finishes that endure
Ventilation Strategies to Prevent Moisture in HMOs
Effective moisture control starts with a clear plan: identify high-risk areas, such as kitchens, bathrooms, and laundry spaces, and prioritize ventilation upgrades accordingly.
You’ll optimize airflow by pairing exhaust fans with evenly sized ducts and confirming they vent outdoors, not into attic spaces. Use timer controls or humidity sensors to run systems during peak moisture periods, like showers and laundry loads.
Leverage natural ventilation where feasible—cross-ventilation with operable windows can supplement mechanical systems, especially during milder seasons.
Integrate indoor plants strategically to maintain air quality without increasing humidity in confined spaces.
Keep doors open between units when possible to promote airflow, and seal leaks around fixtures to prevent damp pockets.
Regularly service fans and inspect damp spots, documenting improvements over time.
Wet Room or Cubicle: Which Saves Time and Money for HMOs

Which is the smarter choice for HMOs: a wet room or a traditional cubicle can save you time and money in the long run. In this decision, you weigh install costs, maintenance, and occupant turnover.
A Wet room often reduces enclosure costs and simplifies cleaning, helping you cut ongoing expenses.
A Cubicle offers modularity, easier future reconfiguration, and potentially lower upfront risk if you already have plumbing layouts aligned.
Consider durability, sealant quality, and drainage efficiency to minimize leaks and callouts.
On balance, choose based on your budget trajectory, tenant mix, and cleaning capacity.
Wet room advantages dominate in high-occupancy settings; cubicle advantages shine when flexibility and phased upgrades matter.
- Clear maintenance path reduces stress and surprises
- Faster turnover keeps rents flowing
- Scalable options ease future design changes
HMO Compliance: Building Regs and Standards You Must Meet
You’ll start by mapping the Building Regulations Essentials to your HMO plan, so you know what must be in place before any work begins.
Use the Standards Compliance Checklist to verify fire safety, soundproofing, ventilation, and sanitary provisions align with current codes.
This sets a practical, strategic baseline for delivering compliant en-suites that withstand inspections and protect your tenants.
Building Regulations Essentials
Managing building regulations for HMOs starts with clarity on the essentials: every dwelling must meet minimum standards for safety, suitability, and health. You’ll align design, materials, and procedures to reduce risk, delays, and costs as you scale.
Key focus areas include ventilation, fire safety, drainage, and escape routes, with clear documentation for inspectors and tenants. You’ll also plan for ongoing compliance, not just initial approval, to prevent surprises later.
- You’ll create confidence with transparent standards, easing tenant trust and audits.
- You’ll prioritise practical fixes that save money and time while meeting codes.
- You’ll integrate gardening tips and pet policies thoughtfully to keep shared spaces safe and welcoming.
Standards Compliance Checklist
To meet HMO requirements, use a standards compliance checklist that covers every key area: safety, suitability, and health. You’ll map building regs, fire safety, ventilation, electrical standards, and accessibility against local guidance, then test every item before proceeding.
Prioritize airtight fire separation, egress routes, and emergency lighting; document ratings, inspections, and corrective actions.
For suitability, verify room sizes, window requirements, and sanitation facilities align with occupancy plans, while ensuring noise, heating, and insulation meet targets.
Health considerations call for cleanable surfaces, pest control, water quality, and waste management.
Integrate practical routines—gardening tips for outdoor space and cooking recipes for shared kitchens—into maintenance calendars.
Regular audits prevent costly rework, keeping upgrades compliant, efficient, and residents comfortable.
Planning Permission: When It’s Needed for En-Suites
Do you know when adding an en-suite to an HMO requires planning permission? In practice, you’ll assess changes to layout, drainage, and potential impact on the property’s use. If you’re altering the number of bedrooms or converting space, you may trigger planning checks.
Minor internal variations often don’t need permission, but external changes or structural work can. Always consult your local planning authority and prepare a concise justification for the works, including how it affects safety, access, and amenities.
Consider how garden landscaping and renewable energy considerations might influence approvals—show that improvements don’t undermine neighborhood character or sustainability goals. Plan ahead to avoid delays and roller-coaster costs.
- You’ll want certainty: anticipate hurdles before you start
- Protect timeline and budget with proactive, clear submissions
- Visualize long-term value to residents and neighbors
Permits and Approvals: A Phased, Step-by-Step Timeline
To keep your project on track, map out the Permit Timeline Milestones and lock in each approval window early.
Use the Approval Point Checklist to verify readiness before moving to the next phase, so nothing stalls your phased construction schedule.
This approach sets a clear, actionable path for securing permits and approvals with minimal backtracking.
Permit Timeline Milestones
Securing permits is a structured process, and understanding the milestones helps you stay on track. You’ll map each phase, anticipate documents, and set realistic timelines that protect your budget. A precise sequence reduces backtracking and keeps your project moving smoothly, from pre-application to final sign-off.
As you progress, align garden landscaping goals with compliance steps, so exterior improvements don’t derail approvals. Remember to integrate practical marketing strategies early, using visuals and timelines to communicate value to stakeholders.
- Track submittals and response windows to avoid delays
- Confirm site inspections align with construction milestones
- Secure final approvals before procurement and work starts
This phased approach keeps you in control, minimizes risk, and clarifies what success looks like at every milestone.
Approval Point Checklist
As you move from mapping permit milestones to the Approval Point Checklist, you’ll pin down the exact points where permits, reviews, and approvals align with your project schedule. You’ll identify which authorities issue consent, which consultants approve drawings, and where inspections trigger next steps.
Create a clear sequence: pre-submission contacts, plan checks, and final approvals, with realistic windows for each. Embed garden landscaping and kitchen upgrades considerations early, noting how site changes impact timelines and costs.
Build a decision tree that flags dependencies and potential delays, then assign owners and due dates. Track deliverables like revised plans, utility letters, and permit fees in one dashboard.
Use concise milestones to communicate progress to partners, investors, and trades, ensuring approvals never stall procurement or on-site work.
Phased Construction Schedule
How can you map a phased construction schedule that weaves permits and approvals into every stage? You’ll chart milestones, align permits with each phase, and set clear ownership. Begin with design approvals, then sequence trades to minimize backtracking. Build in buffer days for inspections and weather, and document decisions to prevent rework.
Use a phased budget that tracks costs per stage and ties to funding draws. Maintain open channels with inspectors, licenses, and project stakeholders so approvals flow as you progress. Think ahead about gardening tips for small spaces and travel destinations for planning retreats; both remind you to plan, prune, and refocus when needed.
This approach keeps momentum, reduces friction, and delivers compliant, on-time en-suites.
- Clear milestones reduce anxiety and boost confidence
- Real-time updates help everyone stay accountable
- Flexible contingencies turn delays into deliberate actions
Smart Sourcing: Selecting Contractors and Suppliers
So, how do you choose the right contractors and suppliers for adding en-suites to an HMO? Start with clearly defined requirements and a tight scope.
Vet credentials, licenses, and past project outcomes; ask for transparent timelines, warranties, and change-order processes. Seek references from similar projects and verify on-site performance before committing.
Compare proposals not just on price, but total cost of ownership, delivery reliability, and aftercare.
Build a shortlist that includes specialists for plumbing, tiling, and ventilation, plus a reputable supplier for materials.
Assess communication pace and problem-solving methods, ensuring you’ll get timely updates.
Consider interior lighting and Landscaping design implications early to avoid late-stage revisions.
Align contracts with milestone payments to protect cash flow and quality.
Affordable Fittings and Finishes That Stand Up to Tenants
Choosing affordable fittings and finishes that withstand tenant use starts with smart material choices and durable installation. You’ll prioritize resilient surfaces, compact fittings, and easy-to-clean textures that endure daily wear.
Align finishes with interior lighting plans to maximize brightness without showing scuffs, and plan quick, tidy replacements to minimize disruption.
Maintain clear tenant communication about expectations, warranties, and care routines so wear isn’t surprising.
Smart coating options can resist marks and moisture, while modular fixtures simplify updates without costly overhauls.
You’ll balance cost, longevity, and appeal, ensuring en-suites feel premium yet practical for tenants and owners alike.
- Durable, low-maintenance materials that spark pride and reduce complaints
- Thoughtful lighting integration to hide wear and boost perceived quality
- Clear, proactive tenant communication that prevents disputes and extends lifespan
Scheduling for Minimal Downtime and Tenant Disruption
Coordinating work to minimize downtime starts with a clear schedule and real-time coordination. You map when trades can access rooms, secure delivery windows, and preapprove disruptions for the least tenant impact.
Communicate a precise timeline to residents, offering flexible alternatives and reasonable compensation for unavoidable detours. Use a staggered approach: isolate one bathroom at a time, share quiet hours, and keep access routes clear.
Prioritize tasks that unlock multiple rooms, reducing total days of disturbance. Choose Eco friendly fixtures to speed install and cut back on returns.
Integrate smart storage solutions to minimize clutter, helping tenants feel organized during construction. Document progress, adjust as needed, and maintain a transparent channel for questions to preserve trust.
Phased Rollout: A Step-by-Step Build Plan for HMOs
Phased rollout is your blueprint for delivering an HMO upgrade with minimal disruption and maximum efficiency. You’ll map each phase, from design to completion, so trades align and timelines stay tight.
Begin with a clear scope, then sequence tasks to isolate disruption and preserve existing tenant comfort. Allocate budget chunks and set milestones that empower fast decisions without scope creep.
Embrace luxury amenities and eco-friendly materials where they deliver high impact at sustainable cost, and keep sourcing lean to avoid delays.
Document learnings after each phase to refine the plan for future rollouts.
- Confidence booster: you control the pace, not the problem
- Momentum: visible progress keeps tenants on board
- Precision: measurable milestones reduce waste and anxiety
Value Uplift: Measuring Upfront Cost vs Rental Gains
How do you quantify the value of upfront investments against the rent premiums they reveal? You compare total costs to incremental cash flow over a defined horizon.
Start with a clear cost baseline for en-suite build, then add targeted enhancements like garden landscaping and kitchen remodeling that boost desirability without waste.
Estimate rent uplift per room using market comps, then translate that into annual cash flow.
Subtract operating increases (utilities, maintenance, insurance) to get net annual gain.
Calculate the payback period and internal rate of return to test viability.
Use scenario analysis: best, base, and conservative cases, adjusting for occupancy risk.
Align the timing of improvements with tenant turnover to maximize impact.
Confirm the numbers tie back to your exit strategy and refinancing plans.
Risk Management: Common Pitfalls and How to Avoid Them
Common risks in adding en-suites to an HMO span cost overruns, regulatory missteps, and occupancy dips, so you should map them early. You’ll guard cash flow by forecasting contingencies, securing permits, and aligning timelines with tenants’ patterns.
Prioritize interior decor and energy efficiency to reduce waste, attract long-term renters, and stay compliant with building codes. Stay precise in contract terms, vendor scopes, and safety checks to avoid rework.
If a delay hits, reallocate resources swiftly and communicate transparently with residents to preserve trust. Use data to validate decisions and adjust line items before digging deeper.
- You’ll feel the sting of avoidable delays and learn to stop them
- You’ll gain confidence from a documented decision trail
- You’ll protect occupancy with proactive risk flags
Maintenance Playbook to Protect Long-Term Profits
A solid maintenance playbook protects long-term profits by turning reliability into routine rather than reaction. You implement a scheduled inspection cadence, track replacement cycles, and standardize vendor responses so minor issues don’t escalate into costly emergencies.
Your plan includes clear thresholds for upgrades, documented checklists, and a centralized ticketing system that flags patterns, not just incidents. Outdoor landscaping features become proactive maintenance targets, extending curb appeal and reducing water waste, while routine seasonal tweaks prevent weather-related deterioration.
Emergency preparedness stays practical: drill workflows, maintain spare parts, and assign a single point of contact for rapid coordination. You review metrics monthly, adjust budgets, and align with compliance needs, ensuring predictable costs, faster repairs, and healthier occupancy economics.
Frequently Asked Questions
How Long Does a Typical En-Suite Conversion Take?
A typical en-suite conversion takes a few weeks, depending on scale. You’ll plan strategically, weigh design considerations, and track cost comparison closely, coordinating trades efficiently. You’ll minimize disruption, secure permits promptly, and maintain steady progress toward a polished result.
What Is the Minimum Room Size for an En-Suite?
The minimum room size for an en‑suite is often about 2.0 x 2.2 meters, depending on fixtures. You’ll maximize space with smart room layout and address privacy considerations to keep the flow practical and compliant.
Can You Add an En-Suite Without Upgrading Shared Plumbing?
Yes, you can add an en-suite without upgrading shared plumbing. You’ll need careful layout, targeted plumbing modifications, and existing venting assessment. Prioritize cost-effective fixtures and space-saving design within bathroom design and plumbing modifications constraints.
Are There Grants or Tax Relief for HMOS Expansions?
Yes, you can access grant opportunities and tax incentives for HMO expansions. You should research regional programs, apply diligently, and document costs. Leverage incentives to offset renovations, streamline compliance, and maximize impact while maintaining strategic, polished project planning.
How Will En-Suites Affect Tenancy Agreements and Deposits?
En-suites can improve tenant satisfaction and justify higher deposits, but you must address legal considerations in tenancy agreements, ensuring clear terms on maintenance, access, and refund policies; draft clauses precisely to avoid disputes and preserve tenancy flexibility.
Conclusion
You’ll know if en-suites fit your HMO by weighing demand against cost, and then plan with a tight budget from day one. Stay disciplined and phased, so you don’t overspend or oversell space. Think of it as a chess game: each move—layout tweaks, compact fixtures, smart plumbing—protects your profits. Track uplift and risks as you go, refine as needed, and maintain a simple maintenance playbook to keep rents steady and tenants happy.