
First, identify the tile type and matching glaze, then gather tools (hammer, chisel, utility knife, notched trowel, replacement tile) and safety gear. Cut the surrounding grout with a grout saw, then gently pry the tile free without disturbing neighbors. Prep the subfloor, patch any dips, and ensure a flat surface. Place the replacement tile with fresh adhesive, align patterns, and reseat. Match grout color, apply, wipe, and seal. If you keep going, you’ll master a seamless repair.
Identify Tile Type for Replacement

Before you replace a tile, identify the tile type you’re dealing with. Start by observing glaze, body composition, and edge detail. If you see a ceramic body with a smooth, glossy glaze, note whether it’s glazed ceramic, porcelain, or quarry tile, as this affects adhesive choice and grout compatibility.
Check for a recognizable tile pattern that repeats across the floor; this helps confirm stock or a close match. Measure thickness and verify it aligns with surrounding tiles to prevent lippage.
Inspect the substrate for underlayment type, since some tiles require different thin-set formulations. Document color and finish, considering whether your goal is a perfect match or a close replica. When you’re certain, search for a matching glaze variation if exact color isn’t available.
Gather Tools, Safety Gear, and Prep
Start by gathering the right tools, safety gear, and prep materials in one organized kit to streamline the repair. You’ll need a hammer, chisel, pry bar, utility knife, rubber mallet, tape measure, square, notched trowel, grout float, and replacement tile.
Wear safety glasses, gloves, knee pads, and a dust mask; lay down drop cloths and tongue depressors for cleanup. Prepare the work area with a waterproof barrier and painter’s tape.
Pre-clean the surface to remove loose debris; note any loose grout and damaged backing. For tile cleaning, have a mild detergent and sponge ready to restore the surrounding tile sheen.
Mix grout using the specified ratio, then set aside for compatibility with your tile. Verify spacings and level before removing the old tile to avoid misalignment.
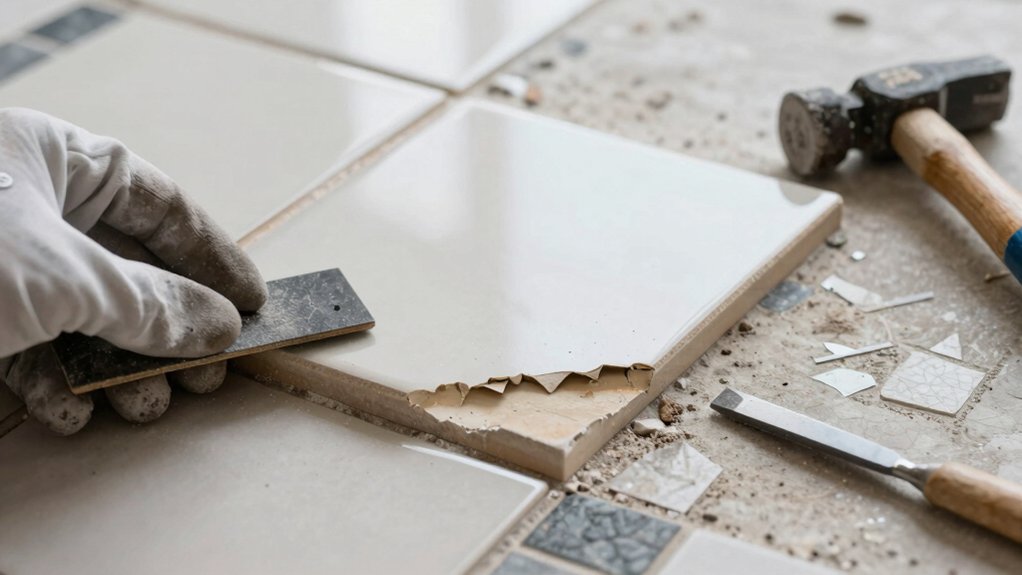
Remove the Damaged Tile Without Damaging Surroundings
To remove the damaged tile without harming surrounding work, cut through the grout around it with a grout saw or oscillating tool, staying just deep enough to loosen the piece without gouging the backing. Gently pry the tile free with a thin putty knife, working beneath the edges to prevent cracking adjacent tiles. If the tile resists, apply a bit more downward pressure while easing it outward.
Inspect surrounding grout for looseness and clean debris promptly to maintain control. Remember tile maintenance basics: avoid forcing pieces, reseal edges if needed, and check for hollow sounds after removal. Keep a steady pace, and replace with minimal disturbance to adjacent patterns.
Decorative patterns require careful edge handling to preserve continuity and symmetry.
- Use a grout saw for precise isolation
- Pry with a thin tool to limit stress
- Check grout integrity after removal
- Clean debris before proceeding
- Preserve surrounding decorative patterns
Prep Subfloor for Replacement and Set the Tile
Once the old tile is out, inspect the subfloor for any damage, spreading levelness checks across the surface and addressing dips or cracks with a suitable patching compound.
Perform a subfloor inspection to verify flatness within 1/8 inch over 6 feet; note high spots and low areas.
Clean and dry the surface, removing dust, debris, and adhesive remnants.
Select a cementitious patch if needed, then feather edges to blend with surrounding substrate.
Choose adhesive based on tile type, substrate, and environmental conditions; confirm open time and cure guidance from the manufacturer.
Allow patched areas to cure fully before installation.
Apply backer board or level spacer if required by system, then lay tiles in a dry layout, ensuring consistent grout lines and proper spacing.
Match Grout Color and Seal the Repair
Carefully match the grout color to the surrounding tile before sealing the repair. You’ll want color matching to blend the repair with the existing grout lines, then apply grout sealing to protect the joint.
Use a small brush to test color in a hidden area before full application, and wipe excess grout promptly for a clean finish. After curing, seal the grout to reduce moisture penetration and staining.
- Choose a grout color that matches the dominant shade in the surrounding area
- Apply a thin, even layer of grout sealant along the repaired joint
- Wipe excess sealant with a dry cloth before it cures
- Allow the sealant to cure per product instructions
- Inspect for uniform color and a sealed, stain-resistant grout line
Troubleshooting and Common Pitfalls to Avoid

Common pitfalls pop up when replacing a broken tile, so plan ahead and test steps on a small area first. You’ll save time by confirming substrate flatness, tile thickness, and adhesive compatibility before full-scale work.
Avoid rushing grout, as premature cleaning can smear color and reveal gaps. If you encounter a stubborn old mortar, do a controlled removal to prevent substrate damage; use a margin tinner to protect surrounding tiles.
Always mix thin-set to manufacturer specs; too thick or thin compromises bond. Measure expansion joints and maintain correct tile spacing to prevent cracking after cure.
Seek DIY pitfalls to anticipate, then verify results with a test tile in the same layout. For complex cases, consult professional advice to avoid voiding warranties or undermining stability.
Frequently Asked Questions
How Long Does Grout Curing Typically Take After Replacement?
Grout curing typically takes 24 to 72 hours, depending on product and conditions. You should avoid heavy traffic and moisture during this period. For best results, follow tile installation directions, maintain temperature, and allow proper ventilation.
Can I Reuse Old Tiles if the Glaze Is Intact?
Yes, you can, if glaze is intact and tiles aren’t warped. Start with tile removal, then verify adhesive compatibility; reusing requires clean, stable backing and matching mortar. Anecdote: reuse saved a leaky project, conserving costs.
What Causes Tiles to Crack Again After Replacement?
Cracking again usually means subfloor instability or poor tile installation techniques. Check subfloor stability, address movement, and guarantee proper mortar and spacing. Use precise tile installation techniques, adjust for expansion, and allow adequate curing to prevent future cracks.
Is There a Difference Between Cement Board and Plywood Subfloors?
Difference exists: cement board handles moisture better than plywood. For long-lasting floors, prioritize proper floor preparation and moisture barriers, especially beneath tiles; use cement board in wet areas, guarantee flatness, and seal joints to prevent flexing.
Should I Seal New Tiles Immediately or Wait?
Yes, you should seal immediately after installation. Follow a sealant application schedule that matches your product’s guidelines, spacing initial coats and reapplications to optimize durability and stain resistance. Keep a consistent sealant application routine for maintenance certainty.
Conclusion
You’ve found the crack, not the catastrophe. With a careful plan, you swap the tile and keep the rhythm of the floor intact. Don’t rush the removal or the set; precision protects surrounding tiles and subfloor. Prep thoroughly, choose a matching grout, and seal the repair to blend in. If the job resists, retreat to a fresh approach rather than force a poor fix. In short, steady hands, clear steps, and a patient finish restore the quiet, seamless surface.


