
Start by deciding what to keep, donate, or trash, focusing on essential tools and safe, usable items. Map your space into prep, assembly, and cleanup zones, placing high-use tools near entry and benches.Use vertical storage by tool type; group items, label zones, and keep cords neatly coiled. Establish a simple daily maintenance routine to inspect gear and tidy up. After you set gaps, paths, and access, you’ll gain speed—and there’s more to optimize if you keep going.
Decide What to Keep, Donate, or Trash
Before you touch any bins or shelves, decide what to keep, donate, or trash. You approach this step with precision, listing items you use regularly and those you never touch.
Separate possessions into three clear categories: keep, donate, trash. For each item, confirm its condition, frequency of use, and potential for resale or reuse.
Focus on essential tools, parts, and supplies, discarding duplicates and expired items. Apply consistent criteria: functionality, safety, and value.
Implement tool labeling and safety signage as you go; label kept items by category and purpose, and place warnings on hazardous materials.
Maintain a running tally of donates and discarded items to track progress. This disciplined approach minimizes clutter and speeds future access, enabling a streamlined, efficient workspace.
Map Space and Define Workflow Zones
With your kept items identified, map out the space and establish clear workflow zones to support efficient work. You’ll define zones for prep, assembly, and cleanup, placing high-use tools near entry points and workbenches.
Measure aisles to ensure at least 36 inches of clearance for each path, and mark primary routes with tape or floor markers to reinforce consistency.
Apply labeling strategies that describe function, not just contents, so you can locate items quickly and reduce motion. Position frequently used items at mid-height and keep rarely used equipment in secondary areas.
Create a simple, repeatable flow: from messy intake to organized staging, then to finished work. Regularly review zone effectiveness and adjust to optimize, not complicate, your daily tasks.
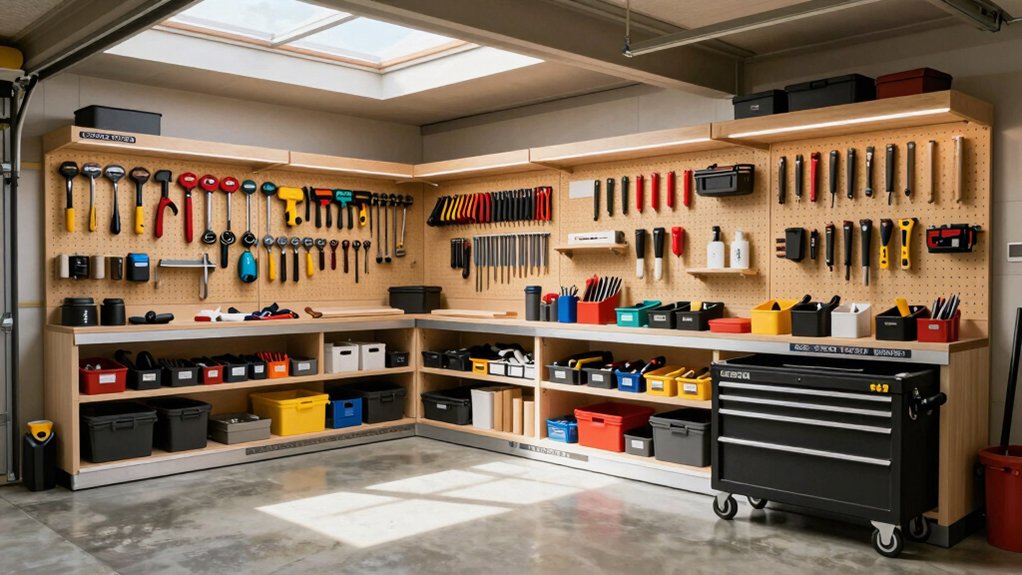
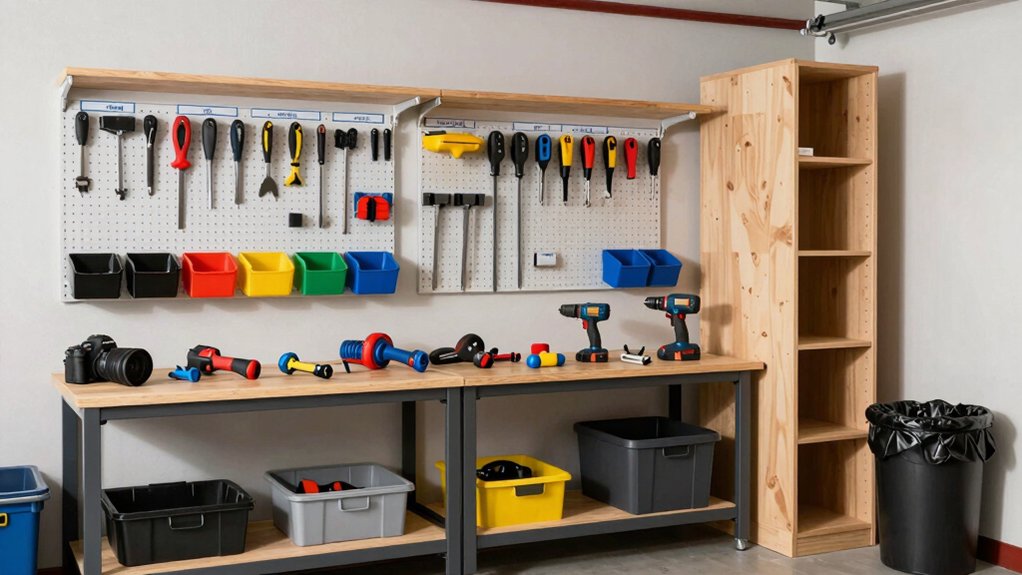
Choose Vertical Storage by Tool Type
Vertical storage by tool type keeps items accessible without crowding surfaces. You’ll group by function, placing frequently used tools at arm height and rare ones higher or lower to minimize digging. Use wall mounted racks for bulkier items and quick-grab hardware, so you can repeat access without rummaging.
Implement modular shelving to tailor space as your collection grows, adjusting dividers and bins for screwdrivers, pliers, and measuring tools. Tag zones clearly to prevent cross-use and maintain sightlines. Keep cords and hoses coiled neatly on hooks near the work surface to reduce clutter.
Reevaluate quarterly to confirm fit and adjust.
- wall mounted racks optimize reach and visibility
- modular shelving supports scalable, organized layouts
- clear labels reinforce consistent tool placement
Implement a Simple Maintenance Routine
Implement a simple maintenance routine by scheduling quick, daily checks that keep your shed organized and functional. You’ll start with a clear checklist: inspect tools for rust, wear, or damage; tighten loose fasteners; test safety guards; verify blades are sharp where appropriate; and confirm cords, hoses, and extensions are coiled properly.
Maintain a visible maintenance schedule near the workbench, updating it each day with completed tasks. Prioritize tool safety by removing clutter that could cause trips or misplacement and returning items to their designated spots. Empty trash and sweep small debris to prevent buildup.
Record any recurring issues and address them promptly to sustain reliability. This disciplined cadence reduces downtime and supports consistent, efficient use of space.
Test, Adjust, and Lock in the System
Now that your routine is in place, you’ll test each system to verify it behaves as intended, make precise adjustments, and lock the setup so it stays reliable.
You’ll validate pathways, labels, and accessibility, ensuring tools return to their designated spots after use. Observe load times, switch responses, and safety indicators, noting any deviations.
Implement fine-tuning to storage optimization: adjust dividers, rails, and shelving heights for constant access.
Enforce safety protocols by confirming guards, locks, and disconnects function correctly, and that airflow remains unobstructed.
Document results, establish repeatable checks, and confirm all changes meet your standards before finalizing.
Your system should now resist drift and support efficient, incident-free operation.
- Verify functionality and accessibility, updating procedures as needed
- Calibrate components for consistent performance and fast recovery
- Lock in procedures, train users, and maintain ongoing reviews
Frequently Asked Questions
How Often Should I Reassess My Tool Inventory?
You should reassess your tool inventory every six months, performing a quick inventory audit and a seasonal review. You’ll identify gaps, duplicates, and wear, then adjust purchases and storage accordingly with precise, methodical steps and documented results.
What Budget Should I Allocate for Shelving?
You’ll likely allocate about 300–700, depending on scope, and you’ll spot savings when you compare prices. Budget planning guides your shelving materials, so you choose sturdy steel or wood, align with space, and optimize layout through coincidence.
Which Moisture Controls Prevent Tool Rust Best?
Moisture controls that prevent tool rust best are using moisture barriers and rust inhibitors. You should install vapor barriers, dehumidify, and apply rust inhibitors regularly, maintaining steady humidity and dry storage, so metals stay protected and ready for use.
How Can I Label Items for Quick Retrieval?
A striking 92% of organized users report faster retrieval. You label items with color coding and a label maker, keeping categories clear, summaries visible, and shelves uncluttered, so you grab exactly what you need every time you search.
What Safety Steps Protect Against Tool Injuries?
You implement tool safety by wearing eye and hand protection, inspecting power cords, and using guards. Follow injury prevention steps, keep a tidy workspace, unplug when changing bits, and store tools properly to minimize accidental injuries.
Conclusion
You’ll organize your shed so fast it feels like magic—except it’s pure method. Decide what to keep, donate, or trash until every item earns its keep. Map space and carve out workflow zones that practically whisper, “move here.” Use vertical storage by tool type so every hammer has a home and every screw a purpose. Maintain with a simple routine, then test, tweak, and lock it in. The result? Precision, efficiency, and a garage that runs on instinct.


