Stamped concrete can mimic stone, brick, or paver looks while staying durable and low maintenance. Start by choosing patterns with irregular edges and subtle grain to avoid repetition, then layer colors for depth—base tones with lighter shadows in recessed areas. Add borders to define zones for dining, lounging, and pathways, and use edges to anchor seating. Seal with a matte topcoat to keep colors vibrant and slip-resistant. If you keep exploring, you’ll discover more design tweaks and tips.
Patterned Stamp Options: Stone, Brick, and Paver Looks
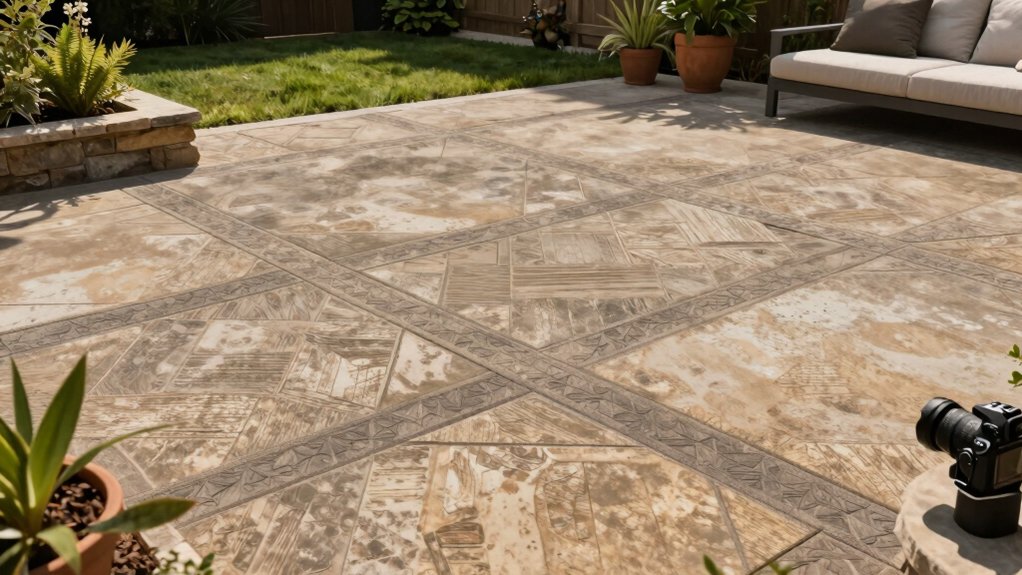
When you’re choosing a patterned stamp for your patio, stone, brick, and paver looks each bring a distinct feel and practical benefits. You’ll weigh texture, slip resistance, and installation ease to match your space.
Stamped concrete patterns let you mimic natural materials with controlled color and depth, giving a cohesive, low-maintenance result.
For stone looks, choose irregular edges and subtle grain to reduce repetitive patterns.
Brick options benefit from tighter grout lines and linear layouts that emphasize clean, classic lines.
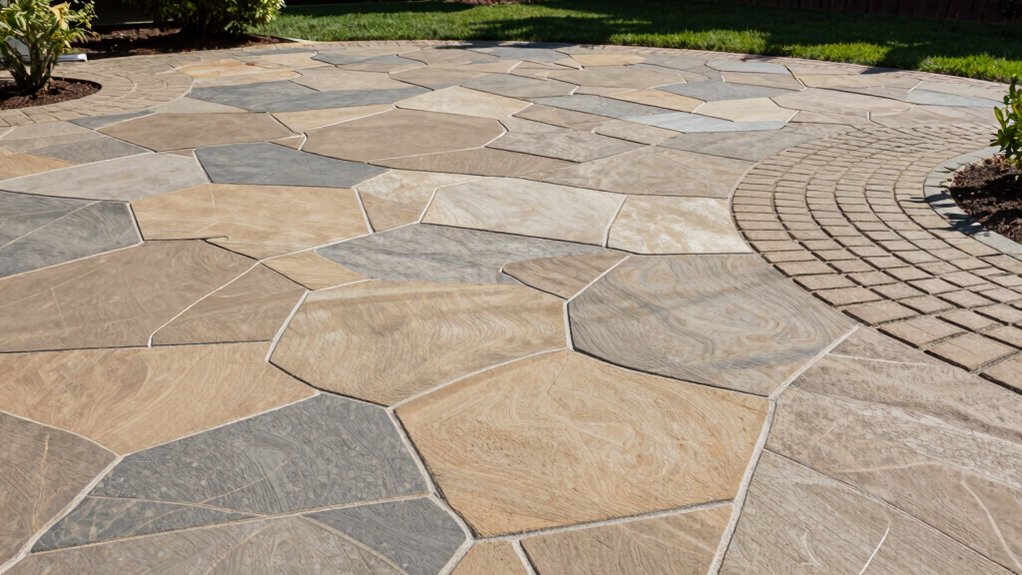
Paver-inspired stamps work well with modular layouts, improving joint spacing and staggered patterns.
Border design options can frame the area, guiding traffic and creating visual boundaries.
Verify stamp alignment, joint spacing, and sealer compatibility to maintain durability and visual appeal.
Color Techniques to Elevate Your Patio
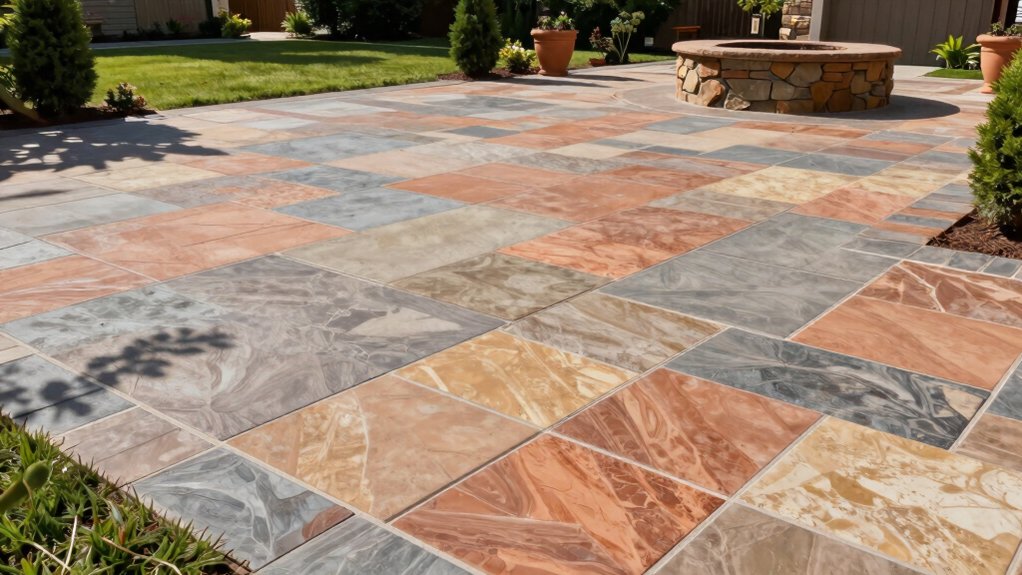
Color depth starts with choosing complementary tones and layering stains to create contrast without overpowering your stamp pattern.
Use stain layering tactics to build subtle shadows and highlights. Then seal for longevity to lock in color and resist wear.
You’ll want to test colors on a small area first and document your steps to make certain of consistent results across the patio.
Color Depth Techniques
To add depth to your stamped concrete patio, start with a color plan that layers base tones, accent hues, and subtle antique washes. You’ll want a restrained palette that mirrors nearby hardscape and landscape, then introduce contrast through controlled color blending.
Apply a medium base color first, keeping consistency across large areas, so joints stay cohesive. Add secondary tones selectively in recessed stamps or crevices to create natural shadowlines. Use a proprietary stain or dye with a breathable finish to prevent blotching, and test on sample boards to predict saturation.
When choosing paver patterns, align them with your stamping motif for visual rhythm without competing tones. Finally, seal with a matte topcoat to preserve depth, while allowing slight color variation to read as authentic stone.
Stain Layering Tactics
Stain layering gives your stamped patio depth without overhauling the base color. You’ll plan a simple sequence: test a small area, choose two complementary stains, and apply in light, controlled passes.
Start with a base wash that enhances the pattern’s grooves, then rain a lighter, translucent tone into the recessed lines to catch texture. Apply the second color selectively along crevices to mimic natural shadow, widening or narrowing strokes to suit your design.
For garden pathways, stagger color edges to guide foot traffic while maintaining visual cohesion. Keep damp, wipe excess promptly, and seal later only after full color equilibrates.
Use decorative borders to frame the pattern; a narrow charcoal or aged tan accent heightens contrast without overpowering the core motif.
Sealing for Longevity
Sealing your stamped patio is the final step that locks in color, protects the surface, and extends its life. To maximize longevity, choose a breathable, polymer-modified sealer with UV blocking and slip resistance.
Apply thin, even coats using a quality roller or sprayer, following manufacturer directions for cure times and recoat windows. Sweep and clean thoroughly before sealing to prevent trapping dust or debris.
For color depth, test on a hidden area first and stagger coats if needed, avoiding over-application that can create glossiness or whitening.
After sealing, monitor joints and reseal every few years based on traffic and climate.
Plan landscape integration and lighting enhancements to showcase the finished look while preserving the seal’s protection.
Texture and Finish Choices for Realistic Depth
You’ll explore realistic texture depth by pairing stamped patterns with varied stamp pressure and release timing to mimic natural surfaces.
Try finishing techniques that add subtle color washes, dry brushing, or faux grout lines to enhance shadows and tactile realism.
Focus on consistency in depth and edge definition across the slab to keep the look cohesive and believable.
Realistic Texture Depth
Realistic texture depth starts with the right base and careful motif planning, so you can create natural-looking variation that won’t wear flat over time. You’ll focus on depth cues: subtle grain, relief, and directional wear patterns that mimic natural stone.
Choose depth-influenced stamps and release patterns that produce varying shadows and edges, not uniform surfaces. For durability, guarantee your base is solid and well-compacted, with proper joint spacing to prevent cracking from seasonal movement.
When staining, opt for eco-friendly staining that penetrates, not merely coats, preserving texture and color variation. Test patches first to confirm contrast and seepage control.
Consider sealers that enhance matte texture without gloss, maintaining tactile realism. Remember: stamped concrete durability hinges on thoughtful execution and consistent maintenance.
Finishing Techniques Variations
Building on the idea of depth from the base and stamps, Finishing Techniques Variations focus on how texture and color come together to heighten realism. You’ll refine relief by varying press patterns and using light-pressure tools to create micro-textures that mimic natural surfaces.
Choose stamped concrete patterns with subtle, irregular edges to avoid a flat look, then add color blends that mimic stone or pavers rather than uniform dye. Consider a reactive stain for natural depth or a breathable acrylic sealer to protect color without gloss overkill.
Decorative borders frame the patio, guiding the eye and adding contrast. Apply a dilute darker wash to crevices for shadow, and seal with a satin finish for a practical, walkable surface that ages gracefully.
Designing for Small Urban Lots
Designing for small urban lots requires smart space planning and multi-functional details, so your stamped concrete patio feels larger while still serving daily needs. You’ll maximize footprint with a linear layout that mirrors your surroundings and invites flow between indoors and out.
Choose a monochrome or restrained color palette to avoid visual clutter, then add subtle texture patterns to create depth without overwhelming narrow spaces. Use border inlays and narrow stepping bands to define zones for seating, dining, and a compact grill area.
Incorporate landscape integration with vertical planters or slim planter walls to blur boundaries between patio and yard. For privacy screening, select lightweight screens or trellises with climbing vines that don’t trap heat or restrict sightlines.
Prioritize durable, low-maintenance materials for year-round usability.
Maintenance, Sealing, and Longevity Tips
After installing a stamped concrete patio, keeping it looking sharp and performing well hinges on regular upkeep and smart protections. You’ll seal the surface to prevent moisture intrusion and UV damage, then re-seal every 2–3 years or as manufacturer guidance directs.
Clean spills promptly with mild soap and water; avoid harsh cleaners that can damage the finish. Use a soft-bristle broom or hose to remove debris, and never pressure-wash at high pressure, which may erode the stamp pattern.
Schedule routine inspections for cracks, chips, or fading, addressing issues early to preserve texture and color. Consider landscape integration when choosing sealing tones to blend with surroundings, and weigh cost considerations of materials, labor, and reapplication over time to maximize longevity.
Accessory Ideas: Edging, Borders, and Outdoor Living Spaces
Edging, borders, and outdoor living spaces finish a stamped concrete patio with defined edges and functional zones you’ll actually use. Start with clean lines: choose a contrasting edging to visually separate patio from garden beds or turf, then add borders that echo your home’s architectural style.
For practical zones, reserve a dining area with a weatherproof table and chairs, a lounge nook, and a walk-through path. Consider linear borders with low-maintenance plantings to reduce debris and keep sightlines open.
Integrate garden lighting along edges and steps to extend usability after dark without glare. Plan furniture arrangements first, then tailor borders to hide utility access and anchors.
Use compact planters to soften corners and maximize traffic flow, ensuring safe, inviting circulation throughout the space.
Conclusion
Your stamped patio isn’t just concrete—it’s a doorway to outdoor living you can control. You’ve learned how pattern, color, and texture fool the eye, how to tailor designs for tight lots, and when to seal for lasting beauty. Yet the real payoff hides just beyond the next test of weather and foot traffic. Will your next choice reveal the depth you hoped, or spark a new question? Stay curious, plan smart, and you’ll uncover the payoff you’ve been inching toward.