
Wraparound extension costs can vary widely, but you’ll want a clear view of what drives them—staffing, specialized supports, and practical updates like landscaping or decor that fit your family’s needs. You’ll also face hidden fees, timing factors, and potential change orders, so thoughtful budgeting now helps prevent surprises later. Stay with me as we break down core cost drivers, pricing methods, and smart ways to lock in value—so you’re better prepared when you start this project.
What Wraparound Extensions Entail and Why Budgeting Matters
Wraparound extensions are intensive, family-centered services designed to keep kids connected to their communities while addressing complex needs. You engage in a coordinated plan that blends support for caregivers with targeted services for the child, focusing on stability, safety, and growth.
You’ll collaborate with a team that shares information, sets measurable goals, and monitors progress regularly. The process includes assessment, planning, and resource linking, plus ongoing coaching to reinforce positive routines at home and in the broader environment.
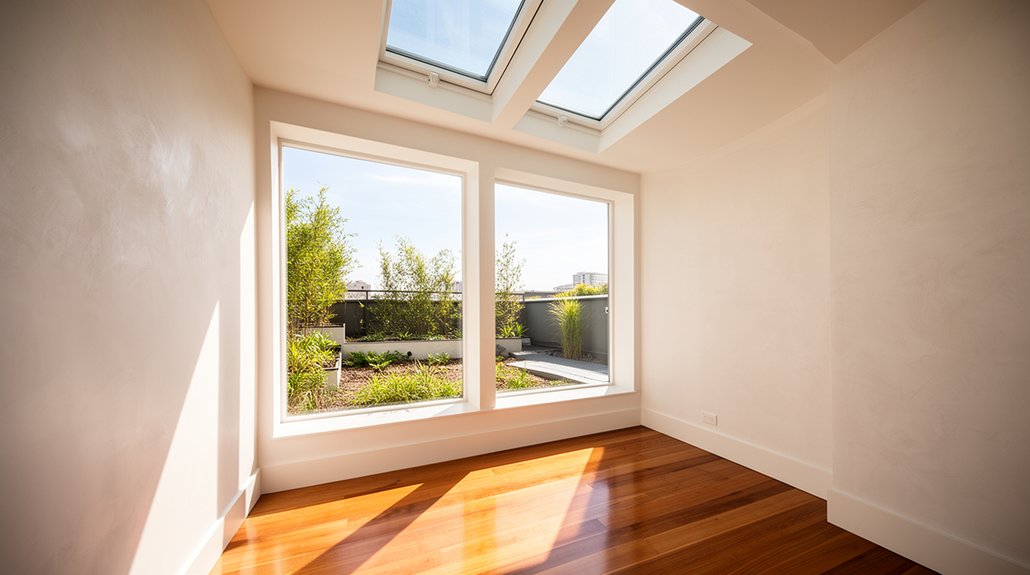
You’ll see planning integrate practical elements—like garden landscaping to create calming outdoor spaces and interior decor adjustments to foster a sense of belonging—without overhauling daily life.
Budgeting matters to guarantee services align with family strengths, capacities, and community supports, sustaining long-term, hopeful outcomes.
What You’ll Pay: Core Cost Drivers in Wraparound Projects
You’ll start by examining the core cost drivers that shape wraparound projects, from staffing and services to overhead.
Next, consider how resource allocation impacts both budget and outcomes, and how timing can shift costs as you implement.
Finally, keep timeline factors in mind, because implementation speed and sequencing often drive additional expenses.
Core Cost Drivers
Direct supports drive staffing needs, while coordinating with external partners can add administrative time and travel. When you plan, think about the level of crisis response, the duration of engagement, and the number of specialized interventions needed.
Design aesthetics and material textures enter subtly through the environment you create for families—comfortable spaces can affect engagement and outcomes, potentially reducing time in services.
Resource Allocation Impacts
Effective resource allocation shapes what families actually receive and how efficiently outcomes are achieved. In this section, you’ll see how resource planning directly influences service depth, timing, and match to family needs.
When you map personnel, supports, and funding, you’re eyeing both immediate supports and sustainable capacity, avoiding gaps that derail progress. Your budget assessment highlights what’s feasible within current constraints and where trade-offs may arise, helping you prioritize core services without sacrificing safety or quality.
Be explicit about roles, caseloads, and travel requirements, so costs align with expected outcomes rather than assumptions. You’ll also want to monitor variability in intensity and duration, ensuring funds reflect actual use.
Clear planning reduces surprises and supports transparent, accountable decisions for families and wraparound teams.
Implementation Timeline Factors
Implementing wraparound work hinges on a realistic timeline, because every scheduled activity—team meetings, family check-ins, and in-home supports—drives cost in predictable ways. In this topic, you’ll see how timing choices shape total investment.
Timeline factors include kickoff speed, wait times for approvals, and the rhythm of service delivery, all of which influence staffing, travel, and materials. You’ll weigh concurrent tasks against sequential steps to avoid idle capacity or duplicative trips.
Consider how garden landscaping and interior decor projects can affect scheduling windows, vendor lead times, and contingency buffers. A tight yet feasible schedule reduces delays and cost overruns, while ample buffers protect quality.
Plan with stakeholders, review milestones, and document changes to maintain transparent, accountable pacing.
Understanding Contractor Pricing: How Bids Are Built
Understanding contractor pricing starts with recognizing how bids are built from clear components. You’ll see how bid items break down into labor, materials, and overhead, so you can compare apples to apples.
We’ll discuss how each element affects total costs and what questions to ask before you approve.
Bid Components Breakdown
So how do contractors turn a project into a bid you can trust? A Bid Components Breakdown reveals how each line item supports the project’s goals, risks, and timing. You’ll see how pricing reflects scope, contingencies, and site-specific factors, not guesswork.
The goal is transparency, so you understand what you’re paying for and why. In practice, expect clear categories that tie to outcomes like Roofing materials and Foundation repair, ensuring costs align with the work required and quality standards. This fosters informed decisions and reduces surprises later.
- Clear scope-to-cost mapping
- Risk and contingency sizing
- Supplier and material considerations
Labor and Materials Pricing
Design trends drive material selections, affecting both upfront price and long-term value, so ask how a trendy choice ages with use. Material durability matters, too: sturdier options may save replacement costs, but require different installation steps and warranties.
Your contractor should explain allowances, contingencies, and potential price swings caused by supply chain shifts. By understanding how labor rates, material choices, and timing interact, you gain insight into bids and can spot meaningful differences beyond sticker price.
Hidden Fees You’ll Encounter Before You Sign
Hidden fees can pop up when you least expect them, and spotting them before you sign is essential. You’ll want to read the contract line by line, noting any add-ons, surcharges, or annualized costs that aren’t explicit up front. Hidden fees can derail your budget, so ask for a transparent breakdown and written estimates.
Align these charges with your project management plan and aesthetic considerations, so you know why each cost exists and how it supports the finish you envision. Don’t be pressured into decisions; request time to review, compare, and confirm.
- Unclear processing or permit fees that aren’t itemized
- Change-order penalties or automatic rate increases
- Fees linked to expedited scheduling or project scope tweaks
Material Choices That Drive the Total Cost

Material choices can dramatically sway the bottom line, so it helps to weigh options early and realistically. When you select materials, you impact both upfront costs and long-term performance.
Consider material durability: sturdier options may cost more now but save on frequent maintenance or replacements later. If you’re aiming for longevity, you’ll likely prioritize durability over the cheapest initial price.
On the flip side, opting for lighter, lower-cost materials can reduce installation time and upfront dollars, but may require sooner attention or replacement.
Aesthetic appeal matters too, because your choice affects appearance and resale value. Balance looks with durability to avoid trade-offs you’ll regret.
In short, assess how long you expect the extension to last and how you want it to look over time.
Labor Efficiency: Scheduling, Productivity, and Costs
You’ll see how scheduling efficiency metrics and labor cost optimization work together to reduce waste and boost output.
By tracking turnaround times, shift utilization, and task sequencing, you can uncover where productivity gains are most attainable.
Let’s start by identifying practical, data-driven ways to balance labor costs with project pace and quality.
Scheduling Efficiency Metrics
How do you measure the impact of scheduling on labor efficiency, productivity, and costs? You assess timing accuracy, task sequencing, and buffer management to reveal true throughput.
You’ll track cycle times, on-time starts, and overtime frequency to gauge responsiveness and reliability. The goal is to align schedules with project milestones and stakeholder communication so teams aren’t waiting or duplicating effort.
Use concise dashboards that highlight variances and root causes, not just totals. Balance workloads to prevent burnout while preserving quality.
Your measures should translate into actionable adjustments that improve throughput, while preserving safety and morale.
- Track cycle times and on-time starts to spotlight bottlenecks
- Monitor overtime frequency and recovery of schedule slippage
- Tie adjustments to project milestones and stakeholder communication for clarity
Labor Cost Optimization
Optimizing labor costs starts with tightening scheduling, boosting productivity, and controlling expenses without sacrificing safety or quality. You’ll align shifts with demand, minimize downtime, and reduce overtime by forecasting needs more accurately.
Track productivity metrics daily, identify bottlenecks, and empower crews to solve small issues on site. Invest in cross-training so people can cover critical tasks without delays, while maintaining clear safety protocols.
When choices affect material durability or later maintenance, compare lifecycle costs rather than upfront price alone. Favor design flexibility that accommodates variable workloads, allowing you to adjust staffing without rework.
Streamline procurement for essential tools and protective gear to prevent interruptions. Clear communication, transparent goals, and measurable progress keep costs predictable and projects progressing smoothly.
Permits, Inspections, and Fees: What to Expect
Permits, inspections, and fees are a standard part of any wraparound extension project, and understanding them upfront helps you avoid delays. You’ll navigate the permit process with clear steps, timelines, and realistic expectations, so you stay on track from day one.
Know that fees vary by location and scope, but gray areas aren’t inevitable when you ask for itemized estimates and speak with the official reviewer early.
For inspections, plan ahead by scheduling promptly and confirming required documentation to prevent hold-ups. Stay proactive about approvals, so you don’t lose momentum.
- Clear permit process milestones and typical timelines
- How to confirm inspection scheduling and required paperwork
- Common fee categories and budgeting tips
Design Changes: Managing Scope Creep and Fees
Design changes are a common part of wraparound extensions, and handling scope creep early keeps costs predictable and projects on track. You’ll often adjust layouts, finishes, or materials as you refine needs, but fixed budgets hinge on disciplined change control.
When you spot a potential drift, document the rationale, expected impact, and revised costs, then secure written approvals before proceeding. Prioritize decisions that deliver the most value, and set a clear timeline to minimize disruption.
Design innovation should meet practical goals without ballooning fees; test concepts with quick references and phased implementations. Also weigh Material durability in any modification—stronger materials may reduce long-term maintenance, lowering total life-cycle costs.
Communicate trade-offs honestly to all stakeholders, aligning expectations and avoiding surprise charges.
Foundation and Structural Essentials That Affect Price
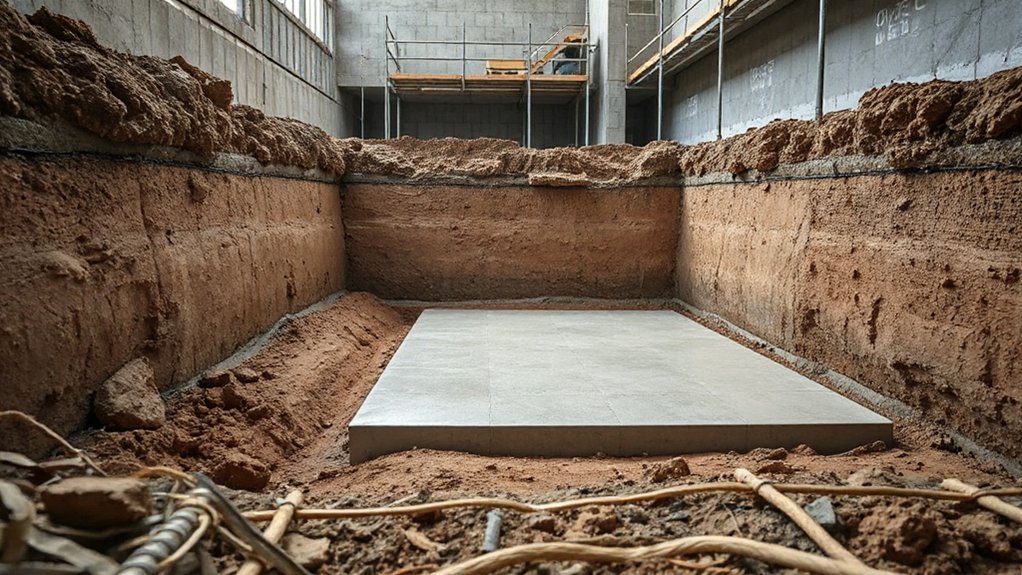
Foundation and structural costs hinge on the strength and configuration of what’s beneath and around the building. You’ll notice that soil quality, load paths, and foundation type drive estimates more than you expect, so projects often pause for a professional assessment early on.
Site access, drainage, and soil preparation influence costs just as much as steel, concrete, and timber. You’ll also factor in how landscaping design and interior decoration choices affect space planning and load distribution, not just aesthetics.
Precision for foundation design reduces future fixes and change orders, saving time and money in the long run.
- Site survey and soil testing requirements
- Foundation type and reinforcement needs
- Drainage, grading, and stabilization considerations
Roofing, Windows, and Exterior Finishes: Cost Considerations
When you’re planning a wraparound extension, your roofing, windows, and exterior finishes are major cost drivers tied to material longevity and maintenance needs. You’ll want to weigh upfront quality against long-term durability, since longer-lasting options can reduce frequent repaints, repairs, and energy losses.
We’ll start by examining how material choices, warranty coverage, and climate impact overall value and ongoing costs.
Cost Drivers For Exterior
Roofing, windows, and exterior finishes drive upfront costs and ongoing maintenance, so understanding the main costs helps you make smart choices early. When you plan, you’ll weigh weather resistance, energy efficiency, and maintenance needs, balancing initial spend with long‑term savings.
Your decisions affect Landscaping costs and Insurance considerations, so factor landscaping layout and protective buffers into your budget and timelines.
- Material durability and warranty impacts
- Local climate and contractor availability
- Aesthetic choices vs. long‑term maintenance
Material Longevity Factors
Material longevity in roofing, windows, and exterior finishes matters because durable choices reduce future repair costs and downtime. When you plan, consider weather exposure, maintenance needs, and material warranties.
Roofing longevity depends on proper installation, ventilation, and choosing certified products suited to your climate. Windows last longer with quality seals, energy-efficient glass, and correct flashing to prevent leaks.
Exterior finishes benefit from durable coatings, proper surface preparation, and periodic cleaning to resist fading and moisture damage. Balancing up-front costs with life-cycle savings is essential, so you don’t chase frequent fixes.
Think about garden design implications of durable exteriors, like low-maintenance cladding that complements outdoor spaces.
Inside, align with interior decor goals, ensuring materials harmonize with fixtures, colors, and textures for cohesive, enduring appeal.
Utilities, Wiring, and HVAC: Systems You’ll Install
You’ll be wiring, plumbing, and climate-control systems that keep a home comfortable and safe, so planning these utilities early saves time and money later. You’ll map circuits, pipes, and ducts alongside layout choices like garden landscape and interior decor, ensuring everything fits without clashes.
Expect trade-offs between energy efficiency, cost, and convenience, but the payoff is reliable comfort with fewer interruptions. Rely on professional layouts for safety and code compliance, and budget for permits, panels, and smart controls that can grow with your needs.
- Coordinating electrical, plumbing, and HVAC routes to minimize waste and future rework
- Selecting efficient systems that align with your design goals, including garden landscape and interior decor
- Scheduling phased installations to reduce disruption and keep your project on track
Insulation, Drywall, and Finishes: The Final Touches
Insulation, drywall, and finishes may feel like the final polish, but they’re foundational to comfort, energy use, and appearance. You’ll seal gaps to prevent heat loss and drafts, choose drywall textures, and select finishes that endure daily wear.
Proper insulation also supports quieter rooms and improved temperature consistency, reducing your long-term bills.
When planning, account for interior lighting placement and color choices that enhance perceived space and mood without overloading circuits.
Finishes influence maintenance, staining, and resale value, so pick materials with proven durability and easy cleaning.
Landscaping features should harmonize with indoor light and color, guiding sightlines from the interior to the yard.
Coordinate these steps early with trades to avoid rework and guarantee a cohesive, efficient finish.
Timeline Realities: Delays and How They Increase Cost

Delays aren’t just frustrating bumps in the timeline; they quietly push up your total cost. Timeline realities show how scheduling slips ripple through every phase, from permits to deliveries, and each delay compounds, compounding cost pressure.
You’ll feel the impact most where design aesthetics meet feasibility, as changes to materials or finishes slow decisions and push labor forward. Understanding the historical context helps you gauge why timelines extend and what to expect next. Stay proactive: track milestones, confirm lead times, and communicate early to reduce knock-on effects.
By recognizing pattern and pace, you protect your budget.
- Permitting backlogs and approval waits stretch both time and expense
- Material lead times shift, forcing substitutions or overtime
- Change orders during delays magnify costs and disrupt flow
Building a Realistic Wraparound Budget and Contingency
Creating a realistic wraparound budget and contingency isn’t about guessing; it’s about building a practical, transparent plan that accounts for uncertainty from the start. You’ll establish base estimates grounded in historical context, then test them against likely contingencies and market shifts.
List line items clearly—construction, permitting, inspections, and alignment with accessibility needs—so you can see where funds flow. Build a contingency tier that matches risk levels for each category, not a single, blunt cushion.
Include a cultural significance allowance for community impact, permits, and partner coordination, so stakeholders feel respected. Track assumptions openly, document decision dates, and revise as realities shift.
Communicate early with lenders, trustees, and families to preserve trust, reduce surprises, and keep the project financially steady throughout the wraparound process.
How to Compare Bids Effectively (Avoid Sticker Shock)
When you compare bids, start by reading the details closely and noting what’s included or excluded.
Compare unit costs directly to see where prices differ, and don’t ignore any hidden fees that can surprise you later.
This approach helps you spot real value and avoid sticker shock.
Read Bid Details Carefully
Reading bid details carefully is essential to avoid sticker shock and make smart decisions. When you review bids, you look beyond the total price and check inclusions, timelines, and responsibilities relating to interior design and landscaping planning.
You’ll spot hidden fees, contingencies, and scope gaps that can derail a project later. Ask for itemized line items and clear specifications so you know exactly what you’re getting. This helps you compare apples to apples and avoid surprises that blow your budget.
- Verify scope alignment with interior design and landscaping planning goals
- Confirm timelines, milestones, and payment schedules
- Request exclusions, contingencies, and warranty terms upfront
Compare Unit Costs Directly
To compare bids effectively and avoid sticker shock, start by evaluating unit costs rather than just the total price. You’ll paint a clearer picture of what you’re paying for and where value lies.
Break bids into line items like materials, labor, and subcontractor fees, and compare apples to apples across options. For garden landscaping, a bid might show per-square-foot planting, edging, and soil prep; for interior decorating, look at per-square-foot finish work, furniture assembly, and delivery.
Prioritize bids that offer transparent unit rates and note any assumed quantities. If one proposal seems cheaper, confirm what’s included and what isn’t to avoid surprises later.
Use unit-cost clarity to guide decisions without sacrificing quality or your budget.
Watch for Hidden Fees
Hidden fees can derail a budget, so spot them early by asking for a complete breakdown of every line item and potential add-ons. When you compare bids, focus on scope clarity, timeline impacts, and how changes are priced, so you’re not surprised later.
Watch for markup on materials, permits, and contingency allowances that aren’t explicitly justified. Tie bids to your goals, like garden landscaping, or interior decor, so you know what’s essential versus optional.
Ask for a fixed price where possible, and request unit costs for labor and subcontractors to verify fairness. Request references and recent project photos to gauge consistency and quality.
- Verify line-item inclusions and exclusions
- Compare material grades and warranty terms
- Clarify change-order procedures and fees
Value vs. Budget: What Adds Long-Term Worth
Balancing value and budget means looking beyond upfront price to what long-term worth the wraparound extension delivers. You’ll weigh durability, adaptability, and how the project enhances daily living, not just your initial investment.
When garden aesthetics blend with interior design, the extra space becomes a cohesive lounge of light, flow, and usability. This integration increases resale appeal and personal satisfaction.
Long-term worth isn’t only about saved future remodeling costs—it’s about predictable maintenance, energy efficiency, and material longevity. Choose quality that supports evolving needs, so you won’t outgrow the structure too soon.
- Prioritize durable materials that support both garden aesthetics and interior design goals
- Favor energy-efficient systems and low-maintenance finishes
- Consider adjustable layouts that accommodate changing family needs
Planning for Change Orders: Process and Pricing Options
Planning for change orders starts with a clear, collaborative process that keeps your project on track and within budget. You’ll define who approves changes, how costs are tracked, and when adjustments trigger rebaselining.
Establish a formal request workflow, with documented scope, time impact, and price implications, so nothing slips through the cracks.
For pricing options, consider time-and-materials, lump-sum adjustments, and contingency-based allowances, each with transparent calculations and limits.
Historical context matters: review past change orders to identify recurring drivers and average cost ranges, then tailor caps and review cadence to your project.
Be mindful of zoning regulations: ensure proposed changes remain compliant, and factor any permit fees or approvals into the pricing model.
Clear communication minimizes disputes and accelerates decisions.
Next Steps: Kick Off Your Wraparound Project Today
Now that you’ve laid the groundwork with a clear change-order process, it’s time to kick off your wraparound project today. You’ll align goals, set a realistic timeline, and confirm responsibilities so everyone stays engaged and accountable.
Begin with a kickoff meeting to review design intent, budget guardrails, and milestones, then maintain open communication as decisions evolve. Track progress with a simple dashboard, not a maze of forms.
Ground your choices in design trends and prioritize material durability to avoid rework. Keep expectations honest, and address risks early to protect schedule and costs.
- Confirm scope, roles, and decision authorities
- Identify potential design trend shifts and durability concerns
- Establish a lightweight, repeatable change-log and approval cadence
Frequently Asked Questions
How Can Wraparound Projects Affect Resale Value?
Wraparound projects can boost resale value if they enhance living space and energy efficiency, improving market appeal; however, overbuilding might price you out of the market. You’ll attract buyers seeking extra comfort and practical benefits.
Are Financing Options Available for Wraparound Costs?
“Where there’s a will, there’s a way.” You can access Financing options and Cost coverage for wraparound costs, helping you manage payments, align budgets, and move forward with confidence in your project.
What Is the Typical Contingency Reserve for Changes?
A typical contingency reserve varies, but you should plan 10–20% of the project budget for changes. You’ll do contingency planning and adjust the budget as needed, making timely budget adjustments to cover surprises.
Do Local Permit Timelines Impact Overall Budget?
Yes, permit delays can impact your budget; they often require schedule shifts and additional fees, prompting budget adjustments. You’ll want contingency planning for approvals and clear deadlines to minimize surprises and protect your project’s financial health.
How Do Weather Delays Specifically Raise Costs?
Weather-related delays inflate crew idle time and project duration, driving overtime, equipment rental, and material storage costs. You’ll see cost escalation as weather disrupts sequencing, forcing rework and expedited orders to compensate for lost productivity and schedule slippage.
Conclusion
You’ve got this. By understanding core costs, hidden fees, and smart material choices, you’ll build a wraparound extension that fits your family’s needs without derailing your budget. Stay transparent with contractors, plan for change orders, and keep a contingency buffer handy. With thoughtful decisions, your project becomes smoother and more sustainable than you’d expect—like a lighthouse guiding you through a sea of surprises. Your durable, energy-efficient space is within reach, and you’ll feel the relief flood in.


