
To insulate around windows and doors, start by locating drafts at frames, sills, joints, and thresholds, then distinguish drafts from solidly insulated areas. Measure gaps accurately with a credit card or ruler, so you choose the right weatherstripping—narrow gaps suit adhesive-backed foam, wider or irregular gaps benefit vinyl or tubular seals, and door sweeps handle the bottom. Prep surfaces clean and dry, apply seals firmly, and seal irregulars with foam backer rods and caulk. You’ll tighten seals and save energy, with more tips ahead.
Quick Audit: Find Drafts Around Windows and Doors
A quick draft check helps you pinpoint drafts around windows and doors quickly. You’ll start at the most exposed spots: edges of frames, gaps near sills, and the meeting lines between wall and trim.
Use a simple test: move slowly and feel for cold air as you pass a palm along the frame, then inspect that area for obvious gaps. For a quick visual, shine a light at night to reveal daylight seams.
If you sense drafts, consider practical remedies first: thermal curtains to block convection, window films to reduce heat transfer, weatherstripping along the sash, and sealant at obvious leaks.
Prioritize upgrades that fit your climate and budget, then retest to confirm improvement.
Identify Gaps: Drafts vs. Non-Gaps
You’ll learn to distinguish drafts from non-drafts so you can target gaps accurately. Spot potential gaps with clear indicators and test seal effectiveness to confirm where air leaks originate.
This approach keeps your insulation fixes precise and efficient, avoiding wasted effort.
Drafts vs. Non-Drafts
Drafts are the gaps that let outside air flow in, while non-drafts are areas where insulation blocks that movement. You’ll distinguish them by observing steady, cold drafts near frames, handles, and loose seals versus steady surfaces where insulation remains effective.
Air leakage describes drafts, revealing where weatherstripping should focus. Non-drafts indicate well-sealed zones where drafts aren’t present, showing you where insulation already performs.
Your goal is to reduce air leakage everywhere, but prioritize spots that directly impact indoor comfort. Treat drafts as measurable problems you can fix with weatherstripping, door sweeps, and properly aligned sashes.
In contrast, non-drafts reflect built-in efficiency you should preserve. By addressing drafts first, you optimize comfort while minimizing energy waste and maintaining consistent indoor temperatures.
Spotting Potential Gaps
Spotting Potential Gaps means quickly distinguishing where air leaks and where insulation already blocks them. You’ll scan for air movement around frames, sashes, and thresholds, noting where drafts feel strongest and where you sense still air resistance. Use a simple touch test: run hands along edges, feel for cool or warm pockets that signal gaps.
Compare observed paths to known exterior barriers, recognizing that not every cold line means missing insulation; some are controlled by exterior barriers and higher-level assemblies. Differentiate between persistent drafts and zones sheltered by insulation materials.
Mark high-priority trouble spots, especially joints, corners, and transition points where weatherstripping may degrade. Prioritize repairs that preserve continuity, reduce heat loss, and preserve the effectiveness of your exterior barriers.
Testing Seal Effectiveness
Testing seal effectiveness means distinguishing drafts that indicate gaps from air movement that’s already blocked by insulation or barriers. You’ll assess performance by feeling with a hand near seams, watching for cool air flow, and listening for whistling or fluttering.
Turn off fans and close vents to reduce noise and noise artifacts. Conduct testing with doors and windows closed, then recheck after applying weatherstripping.
Compare baseline temperatures around frames with a reliable thermometer or infrared camera if available. Note persistent drafts at contact points, hinges, and corners, which signal gaps to seal.
Consider how insulation materials influence results—dense behind-the-face foam, caulk, and brush or door sweeps can reduce leakage. Achieving tighter seals supports energy savings and improves overall comfort.
Choose Weatherstripping by Gap Type
To select the right weatherstripping, match it to the gap type you’re sealing—this guarantees a tight, lasting seal. You’ll choose based on how the gap forms and where it sits: doors, windows, or frames.
Types of weatherstripping vary by material and profile, so know your gap’s behavior first. For wide, drafty edges, use door sweeps or compression bulks; for narrow gaps, adhesive-backed foam or rubber profiles work best. Narrow, irregular gaps benefit from flexible V-strip or tubular weatherstripping that compresses without buckling. Corner gaps around sashes or jams respond to interlocking or bulb seals.
Practice gap identification by gently probing with a credit card or thin blade to sense resistance. Choose options designed for exterior exposure and UV resistance for durability.
Measure Accurately for the Right Size
Measure accurately for the right size by taking precise, multiple readings of every gap around windows and doors. Precision prevents thermal bridging and guarantees you select weatherstripping that preserves insulation R value. Don’t guess—measure vertical, horizontal, and depth with a tape measure, noting the narrowest point. Record gaps at sill, jamb, and head margins, then compare to manufacturer sizes to avoid compression that wastes energy.
Expect variations between wind-pressed and settled frames; use the smallest reading for a snug fit. Choose material thickness to maintain a continuous seal without warping. Plan for expansion and contraction across seasons, and verify you’re aligning with the intended insulation R value of the system.
- Measure once, measure twice, and measure again at each gap.
- Note height, width, and depth, including recessed regions.
- Cross-check readings against the product’s size chart.
Prep Surfaces for a Tight Seal
Start by cleaning your work surfaces so nothing interferes with the seal. Make certain of dryness before you apply any sealant. Then inspect for gaps and address them now.
This prep sets up a tight, lasting seal around windows and doors.
Clean Work Surfaces
Clean surfaces are the foundation of a tight seal. You prepare the area so weatherstripping adheres evenly and lasts. Start by removing dust, grease, and chatter from edges, frames, and sills with a microfiber cloth and a mild cleaner. Confirm the surface is dry before proceeding, since moisture can compromise adhesion and reduce effectiveness.
Then, smooth any rough spots or old residue that could create gaps. Finally, inspect surroundings for trim or hardware that could interfere with the seal, addressing them as needed.
- Clear the work zone and wipe down all contact points.
- Wipe frames, sills, and jambs with a clean, dry cloth to remove moisture and debris.
- Check for lingering residues like sealing paint or paint drips, and address with light sanding if necessary. Also consider insulating curtains for larger openings.
Dryness Before Seal
Before sealing, make sure the surface is completely dry. Dryness before seal is essential for a durable bond.
You should remove moisture from the framing, sill, and jambs using a clean cloth and, if needed, a heat gun or aacket on a low setting—never scorching. Check for lingering damp spots, especially in corners and porous material like wood.
Achieve even dryness across the area to prevent premature sealant failure. The goal is a uniform, moisture-free base that helps the weatherstripping adhere firmly.
Plan your dryness preparation steps before applying any sealant. When you proceed, ensure the surface is free of dust, oils, and debris that could compromise adhesion. This prepares for proper sealant application and minimizes gaps after installation.
Inspect for Gaps
Gaps undermine a tight seal, so inspect all around windows and doors for openings you can’t see at first glance. You’ll look for light, drafts, and feel cold air near every edge. Start with the most obvious spots: where frames meet walls, along sill joints, and at the crevices of window frames and door thresholds.
Measure gaps with a credit card or a thin tool to gauge width, then note any uneven surfaces that could hinder weatherstripping adhesion. Prepare by cleaning dust and residue from the perimeter so sealant bonds firmly. Then, address inconsistencies before applying material, not after.
- Check window frames for daylight and uneven gaps.
- Test door thresholds for air leaks and moisture intrusion.
- Mark areas needing surface prep to ensure proper adhesion.
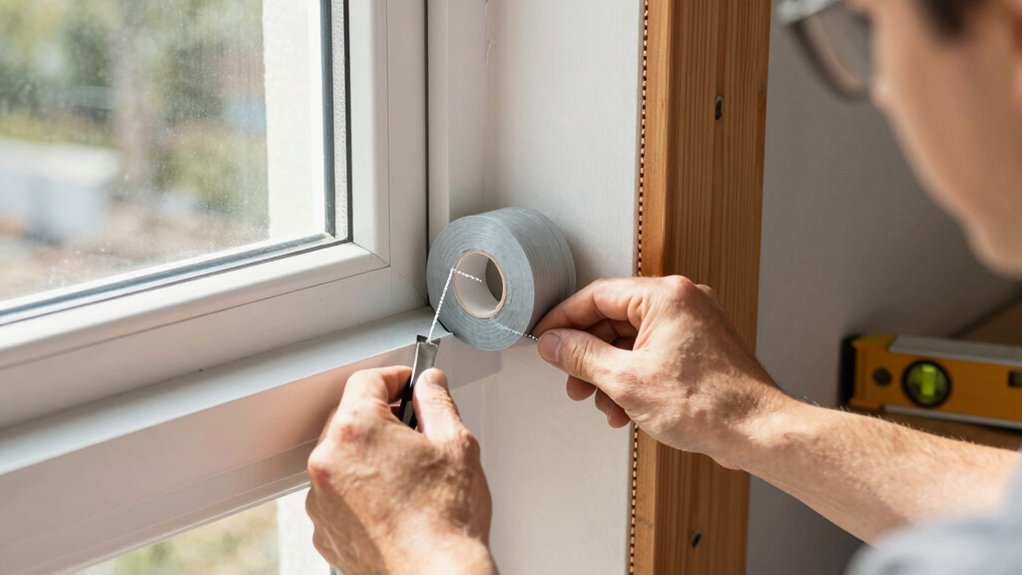
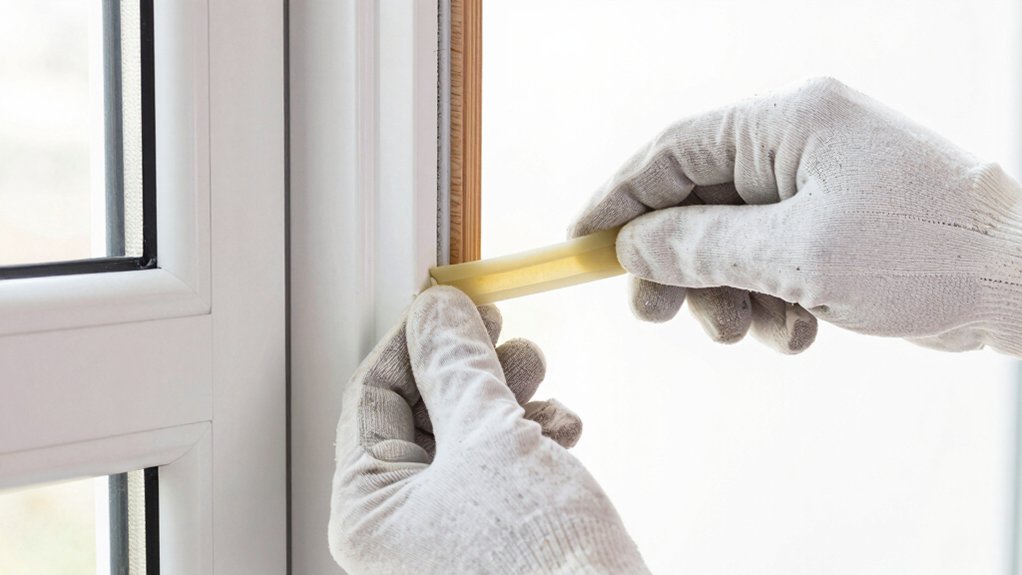
Apply Tape Weatherstripping to Cracks
To seal narrow openings effectively, apply tape weatherstripping directly to cracks around windows and doors. You press the tape along clean, dry surfaces, aligning it with the crack’s edge for a tight seal. Remove backing gradually as you smooth the tape to prevent air pockets or bubbles.
Use the correct width for each crack, choosing one of the types of weatherstripping that form a continuous barrier without gaps. Press firmly to ensure adhesion—no loose ends. Avoid overlapping tape excessively, which creates ridges and shortens life.
Common installation mistakes include applying tape over dust or moisture and placing tape over irregular edges. Recheck the seam after door or window movement to confirm sustained contact. This method improves efficiency without major material changes.
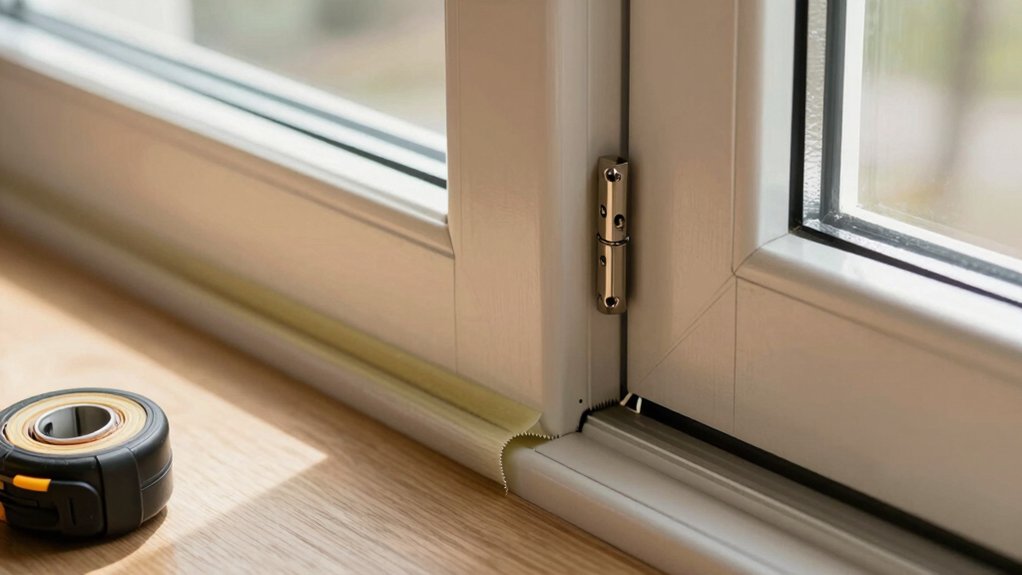
Install Tubular or Compression Weatherstripping on Doors
You’ll install tubular or compression weatherstripping on doors to seal gaps effectively. We’ll cover how to check door clearance, choose the right type, and apply sealing tips for a tight fit.
This sets the stage for consistent performance and energy savings.
Install Tubular Weatherstripping
Tubular weatherstripping seals doors by compressing across the gap, so start by measuring the door’s height and the jamb’s width to choose the correct size. You’ll fit the tube into the groove or onto the edge, then press firmly to seal leaks around the frame.
1) Choose tubular or compression options based on door type and gap size, matching to the door height and jamb width for a tight fit.
2) Install with a steady, even push along the entire length, avoiding twisting or stretching that creates gaps or creases.
3) Check for consistent compression and test with a light draft; replace any damaged sections and remove old residue.
Note: types of weatherstripping and common installation mistakes guide your approach, preventing wasted materials.
Compression Door Sealing Tips
Careful prep makes a tight seal: choose tubular or compression weatherstripping based on door type and gap size. Then measure the door height and jamb width to pick the right size.
Install the strip evenly, keeping it aligned with the door edge for a uniform seal. If you’re using foam tape, apply it in a continuous, smooth strip along the frame where gaps form, avoiding excessive thickness that blocks the hinge side.
For heavier drafts, add a door sweep at the bottom to close the last seam, ensuring it seals without binding as the door operates.
Test by closing firmly and feeling for airflow; adjust alignment or add shims if needed. Keep hardware clear of contact to prevent wear.
Proper Door Clearance Checks
To guarantee a proper seal, start with a clear gap assessment: measure the door height and jamb width, then verify the existing clearance around the door, including the hinge and latch sides. You’ll install tubular or compression weatherstripping after confirming space, so check for uniform gaps and draft detection opportunities before choosing materials.
Ascertain the door closes fully without sticking, so the weatherstripping sits flush.
- Assess door clearance around all edges to locate high and low spots.
- Test draft detection by running a lighted match or incense near seams at multiple heights.
- Record measured gaps and plan weatherstripping thickness accordingly for even compression.
Seal Irregular Gaps With Foam Backer Rods and Caulk
When sealing irregular gaps around windows and doors, foam backer rods first fill the larger voids, then caulk seals the remaining seams. You insert the rod to support the sealant and prevent three-point compression.
Choose a rod diameter that matches the gap, typically marked on the package, and press gently so it sits flush with the surfaces. Cut excess rod with a utility knife after placement.
Apply a compatible caulk in a continuous bead along the joint, tooling it for a smooth finish. This approach accommodates window framing irregularities and door hinge gaps without creating undue stress.
Make certain clean, dry surfaces before application and avoid overfilling to prevent cracking or peeling over time.
Test for Drafts and Adjust With a Door Sweep
Test for drafts around doors and adjust with a door sweep to save energy. You’ll verify gaps quickly, using door sweep testing to confirm effectiveness and make precise adjustments.
After installation, run draft detection tools to pinpoint remaining leakage at the frame, threshold, and hinge side. If you feel air, you’re not done; refine the seal until you’re airtight.
- Identify gaps with draft detection tools, noting floor and sill movement.
- Test door operation with the sweep installed, ensuring no rubbing or binding.
- Recheck common leak points and adjust fasteners or weatherstripping pressure for ideal seal.
Maintain and Replace Weatherstripping Over Time
Weatherstripping isn’t set-and-forget; it ages like any sealant and loses elasticity, sticks, or tears. You’ll keep the seal tight by tracking weatherstripping longevity and acting before gaps appear. Establish a maintenance schedule that matches your climate and door or window usage.
Inspect annually: look for cracks, compression, or missing adhesive, and test for drafts at all sides. If you notice stiffness or peeling, replace the worn sections promptly to maintain performance. Use compatible profiles and adhesive or compression caulk as needed, ensuring a full-contact seal.
Label replacements with date stamps so you know when to review again. Keep spare seals on hand and batch-install in a single session when possible, reducing repeated disruption. Regular upkeep saves energy and preserves comfort.
Frequently Asked Questions
How Often Should Weatherstripping Be Inspected for Wear?
You should inspect weatherstripping at least twice a year. Establish a maintenance schedule and look for signs of deterioration like cracks, gaps, or compression. If you notice wear, replace promptly to maintain efficiency and avoid drafts.
Can Weatherstripping Affect Interior Humidity Levels?
Yes, weatherstripping can affect interior humidity and condensation. It improves sealing, reducing drafts, which helps humidity control by limiting moisture exchange with the outside air and minimizing interior condensation on cool surfaces.
Which Materials Are Best for Irregular Window Gaps?
Foam tape grips irregular gaps best, but you’ll note stiffness and compression vary; rubber gasket handles large, uneven voids. You’ll choose foam tape for precision, rubber gasket for bulk, keeping gaps tight and drafts politely defeated.
Do Double-Glazed Windows Need Different Weatherstripping?
Yes, double-glazed panes don’t require special weatherstripping materials beyond standard options, but you should choose seals compatible with low thermal bridging and fit snugly. Use weatherstripping materials rated for high humidity and consistent compression.
Is It Normal for Doors to Stick After Sealing Gaps?
Yes, small sticking can happen after sealing gaps. Check door alignment and adjust hinges as needed; avoid forcing. Use door adjustment if needed, and assess sealant durability around frames to make certain it doesn’t bind or peel over time.
Conclusion
You finish the quick audit, aware of fragile gaps that could betray your warm air. Each choice—tubular, foam, caulk—seems simple, yet the real test lies in how you seal the last stubborn crack. You measure, prep, and press, patience tightening around the frame. A door sweep waits, ready to seal the final breach. Then you hold the breath, listen for stillness, and realize the room isn’t hushed by chance but by your careful, closing craft. The draft’s fate is in your hands.


