To repair a hole in a hollow-core or solid wood door, start by identifying the hole, door type, and nearby hardware. Prep the surface by cleaning, removing loose material, and lightly sanding. For hollow-core doors, back the patch with lightweight filler and flexible tape; for solid wood, use a durable patch that matches grain. Fill, overfill slightly, and sand smooth. Seal exposed end grains, reattach hardware, and finish to blend. If you keep going, you’ll master a lasting, seamless fix.
Identify the Hole and Confirm Door Type

To identify the hole and confirm your door type, start by inspecting the hole’s size, shape, and location. You’ll determine if it’s a surface blemish, a chipped edge, or a deeper cavity.
Check the door’s construction: hollow-core versus solid wood, and note any visible hardware nearby. If hinges or plates remain attached, measure screw holes and hinge placement to guide repair planning.
This step helps you choose an appropriate method, avoid overpacking, and reduce edge cracks. While evaluating, consider paint color matching for future touch-ups, ensuring a seamless finish.
If you find damaged hinge areas, plan for door hinge repair first, so alignment stays true. Document findings briefly to reference during patch selection and matching.
Pick the Patch Method by Door Type
You’ll tailor your patch method to your door type, since hollow doors need different support than solid ones. Consider how patch choices align with door specifics, so you pick the right material and technique.
This sets the stage for precise, durable repairs without extra fluff.
Door Type Specifics
Door types dictate the patch method you should use, so start by identifying your door material and construction.
If you have a hollow-core door, you’ll likely use a lightweight filler, a backing patch, and flexible joint tape to preserve the hollow feel.
For solid wood, match grain and density with a wood filler, and plan a more robust patch that can hold screws and hinges.
Consider door hinge placement when planning repairs, since holes near hinges require extra backing or reinforced patches to maintain strength.
For painted doors, choose a compatible paint and primer to ensure color fidelity and durability.
If you expect a long-term repair, test stain or paint on a scrap edge before finishing the patched area.
Patch Method Choices
Choosing the right patch method depends on door type, size of the hole, and where it sits. You select a patch by evaluating material, depth, and the surrounding frame.
For hollow-core doors, you’ll often opt for a lightweight repair patch that clamps behind the surface and uses a skim coat to conceal. Solid wood doors tolerate solid patches that glue in and then finish flush with the surface.
Consider backer support for larger holes to prevent telegraphed seams. When time or structure matters, alternative repair techniques like plug-and-fill or dowel reinforcement can stabilize the opening.
Decorative patch options let you tailor appearance before finishing. Always test adhesion on a hidden edge first, then sand, prime, and topcoat for a seamless blend.
Hollow vs Solid Focus
Hollow-core and solid wood doors demand different patch strategies because their materials respond differently to repairs. When you choose a patch method, consider door type first: hollow cores need lightweight, filler-based fixes that don’t tax the shell, while solid cores tolerate firmer patches that mesh with grain and weight.
For hollow doors, you’ll favor a plug-and-patch approach with a low-profile repair piece and adhesive that minimizes bulge near the door frame. For solid doors, a wood-reinforced patch aligned with grain delivers strength and invisibility.
In both cases, reattach decorative hardware only after the patch cures, and check surrounding areas for cracks. Finish to match texture and color, and ensure the door frame remains plumb and secure.
Prep the Door Surface for Repair

Before repairing, you must prep the door surface so the patch adheres well. Start by cleaning the area with a damp cloth to remove dust, grease, and old finishes. Let it dry completely.
Lightly sand the damaged edge with fine-grit sandpaper to create a smooth, receptive surface and remove glossy spots. Wipe away dust again.
If the door has a finish, you may need to scuff the surrounding paint or veneer to improve adhesion. Protect nearby hardware by masking with painter’s tape.
Check that door lock mechanisms and hinge areas aren’t loose; tighten screws if needed so you don’t disturb alignment later. Wipe once more, then apply bonding primer as directed before the repair patch.
Patch Hollow-Core Doors With Reinforcement
You’ll start by selecting the right reinforcement materials to stabilize a hollow-core door. Then place the patch so it distributes load across the core and edges, with attention to alignment and thickness.
Finally, apply practical structural repair techniques that reinforce without adding unnecessary bulk, keeping the door true and functional.
Reinforcement Materials
To reinforce a hollow-core door, you’ll first choose a patch or reinforcement kit designed for hollow cores and then fit it according to the manufacturer’s instructions. The kit supplies a rigid patch and fasteners that spread load around the hole, reducing stress on the surrounding wood.
Align the patch with the bore, trim any excess, and secure it firmly to the door’s interior surface. If the patch requires backing, install it per the kit directions to prevent sag.
Clean surfaces before adhesion, then apply any resin or adhesive as directed. Reattach hardware with appropriate screws, ensuring the door frame remains square.
Consider decorative hardware to disguise the repair, or replace it for better balance. Verify the door closes smoothly, and test the latch alignment.
Patch Placement Tips
When placing a patch on a hollow-core door with reinforcement, center the patch over the bore and align the edges with the surrounding wood for even load distribution. Confirm the reinforcement backing sits flush with the door face so the patch sits evenly.
Trim the patch if necessary to avoid protrusion that could hinder fastening. Use lightweight spackle or epoxy that dries hard without shrinking. Sand edges smooth after curing, creating a seamless transition to the door surface.
If the design features decorative inlays, plan their location before applying any patch to avoid misalignment. When removing hardware for better access, protect the surrounding finish and reattach hardware promptly.
Clean up excess compound promptly to prevent staining and ensure a crisp, durable repair.
Structural Repair Techniques
Hollow-core doors can be reinforced from inside to support a durable patch, improving load distribution and preventing future sag or crack propagation. You’ll start by exposing the damaged area and cleaning away dust.
Use a backer surface inside the hollow core, such as plywood scraps, to provide solid support behind the patch. Cut a patch to fit the opening precisely, then secure it with short screws into the backing.
Reinforce surrounding edges with wood glue and a thin coat of epoxy where needed to seal gaps. Reinstall door hardware after the patch cures, ensuring hinges and latches align smoothly.
Avoid moisture effects by sealing repaired areas and controlling humidity. Test for smooth operation, then finish with paint or stain for a seamless look.
Repair Solid Wood Doors for Lasting Durability
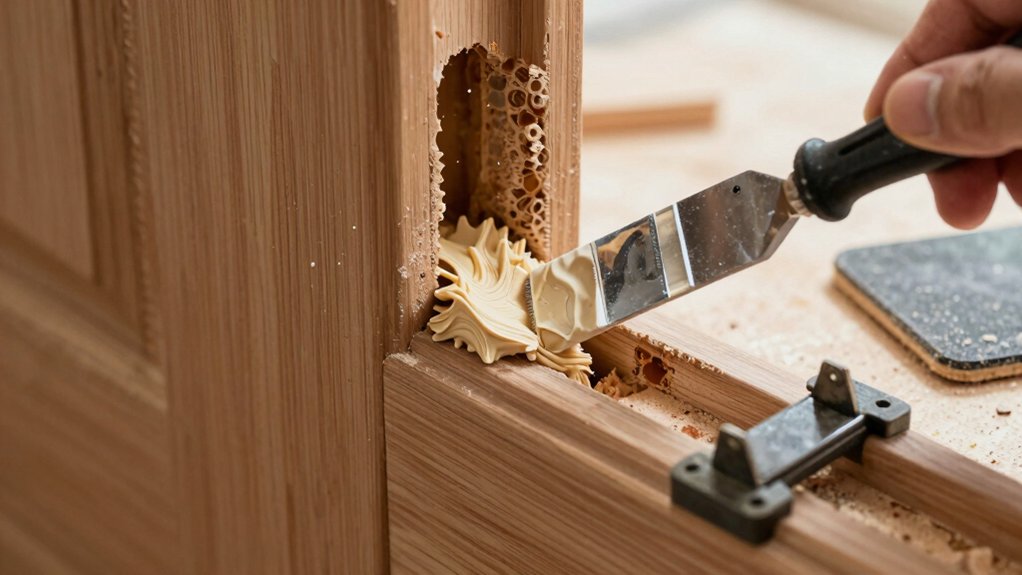
Solid wood doors resist wear better, but they can crack or warp over time. You’ll boost durability by addressing movement before it becomes a visible issue. Inspect joints for separation and tighten or replace loose fasteners, then stabilize with wood glue where appropriate.
If a panel or rail shows looseness, resecure with matching screws and ensure the door sits square in the frame. For ongoing reliability, prevent surface stress by distributing loads through proper decorative hardware selection and placement.
When hardware starts binding, perform door hinge adjustment to restore alignment and reduce stress on edges. Use penetrating oil on stiff hinges, then wipe away excess.
Finally, seal exposed end grains to slow moisture ingress, and recheck alignment after several cycles to confirm lasting performance.
Finish, Blend, and Protect the Repaired Area
Before you finish the repair, protect the area by leveling the surface, matching the sheen, and sealing it from moisture. Start with a thin feathered layer of filler where needed, then sand smooth to create a seamless *shift*.
Choose decorative finishes that mimic the door’s texture and grain, so the repair blends naturally. Wipe away dust, then apply a stain or paint matching your door’s color.
If the door is painted, opt for a matching base and topcoat to prevent blotching. For veneer or hollow-core finishes, use light, even coats and allow full drying between passes.
Finish with a clear sealant to guard against moisture and wear. Inspect under both bright and dim light to confirm a uniform, durable blend.
Frequently Asked Questions
How Long Does a Door Repair Typically Take From Start to Finish?
Usually, it takes a half to a full day, depending on damage severity and drying time. You’ll assess the door frame, do repairs, then finish with paint touch up and a final check for smooth operation.
Can You Repair a Hole Without Removing the Door From Hinges?
Yes, you can repair without removing hinges. You’ll hold the door steady, then inject epoxy, rebuild the edge, sand smooth, and touch up. If needed, consider door hinge removal or the door removal process for better access.
Which Tools Are Essential for a Permanent Door Patch?
Door reinforcement requires a file, rasp, putty knife, sanding block, spackling, leveling compound, duct tape for alignment, and clamps for permanence. You’ll achieve paint matching by priming, color-matching enamel, and careful feathering along repaired edges.
Will Repairs Affect Door Insulation or Soundproofing?
Yes, repairs can affect door insulation and soundproofing. You’ll restore some sealing with proper patching, but expect minor losses unless you reseal edges, add weatherstripping, or install a solid-core insert for improved door insulation and soundproofing.
Are Repairs Guaranteed Against Future Cracking or Warping?
Yes, repairs aren’t guaranteed for life, but you’ll get repair durability from quality methods; check warranty coverage. If you follow proper materials and techniques, you’ll maximize durability, yet conditions may affect outcomes and limit warranty coverage.
Conclusion
You’ve fixed a wound where the door once breathed. With the right patch, you’ve made its heartbeat steady again, a quiet drum in the hinge-side dusk. You chose, you pressed, you sanded, you sealed, and you watched the grain invite calm back into the room. The hole is a memory, the surface a story retold. Step back, listen to the door sigh with renewed strength, and feel the space whole again, patient, airtight, enduring.