
To repair a crack in a concrete foundation wall or floor, first assess its size and movement. If cracks are hairline and non‑moving, you can seal with a flexible filler or epoxy sealant. For wider or shifting cracks, use epoxy injections for structural stabilization or polyurethane injections to seal and tolerate movement. Clean, dry the crack, set ports if injecting, and follow cure times precisely. Use proper safety gear, and expect long-term moisture and drainage considerations—more details await to guide you step by step.
Diagnose Foundation Crack Severity: When to Repair vs. Seal
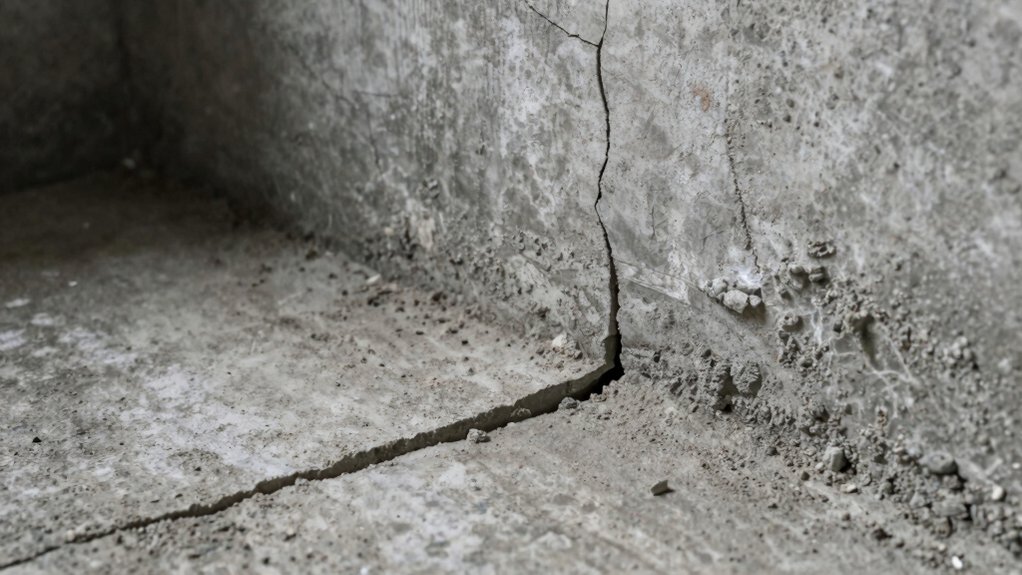
Cracks in concrete foundations aren’t all the same, so you should first assess their severity to decide whether to repair or just seal. Start by estimating width and pattern: hairline fractures may seal, while wide, continuous cracks suggest movement and warrant repair.
Check for displacement, spalling, or water intrusion, which flag more serious issues. Consider exposure to moisture, freeze–thaw cycles, and soil conditions.
If cracking is localized and non-structural, sealing with appropriate products can be effective, but emphasize proper surface preparation and cure. For ongoing concerns, investigate foundation drainage and moisture control—poor drainage often accelerates cracking and hidden damage.
Document crack locations, monitor changes, and consult a professional if you notice widening, walls bowing, or doors misaligning. Prioritize moisture management to protect longevity.
Assess Structural Risk: Wall Cracks Requiring Structural Repair
Structural cracks that visibly misalign, trap doors, or bow walls signal a high risk and often require structural repair rather than cosmetic fixes.
You’ll assess indicators like crack width, patterns (S-shaped, stepped), ongoing widening, and displacement at windows or doors to decide if repair is necessary.
When these indicators are present, you should treat the issue as structural and consult a qualified professional for repair options.
Structural Crack Indicators
When evaluating wall cracks for structural risk, focus on indicators that suggest the crack compromises stability. Look for patterns that align with load transfer failures or ongoing displacement, not cosmetic gaps. Key signs include widening, increasing width over time, and opening at multiple elevations. Be alert for offsets, stair-step progression, or cracks that align with joints, columns, or corners.
Separations across the wall, sagging floors nearby, or doors and windows that don’t close properly signal mounting concern. Daily monitoring should confirm whether movement has stopped or accelerates. Addressing moisture is essential to prevent deterioration; plan for foundation waterproofing and moisture control as you assess repair options.
- Crack width change over time
- Alignment with structural elements
- Multi-elevation propagation
- Signs of ongoing movement or displacement
Repair Necessity Criteria
How do you determine when a wall crack warrants structural repair? You assess risk by size, location, orientation, and progression.
Vertical and stair-step cracks wider than about 1/4 inch, or those widening over time, typically signal structural concern.
Horizontal cracks, especially those accompanied by bowing, sagging, or tie-rod signs, demand urgent evaluation.
Cracks at corners or near door and window openings can reflect framing stress rather than mere shrinkage.
Look for activity after freezes, heavy rains, or plumbing leaks, which implicate foundation moisture and drainage issues.
Consider concrete mixing quality and age, as poor mix or curing can worsen defects.
Address foundation drainage to reduce hydrostatic pressure, then monitor movement.
If uncertainty persists, consult a licensed structural engineer to determine repair necessity and design.
Prep for Concrete Crack Repair: Safety, Cleaning, and Surface Prep
Before you start repairing, assemble your safety gear and review the plan to match the hazard level of the crack.
Then, clean the surface to remove dust, debris, and moisture so the repair materials bond properly.
Finally, prep the area with appropriate containment and note any corners or edges that require masking or protection during the work.
Safety Gear Check
To tackle concrete crack repair safely, start with the right safety gear: a hard hat, safety glasses or a face shield, cut-resistant gloves, hearing protection, and sturdy, non-slip boots.
- Inspect gear for damage and proper fit before each job.
- Use face protection that seals against dust and chips.
- Choose gloves with grip and cut resistance, then keep spare pairs.
- Wear moisture-wicking socks and non-slip boots for stability.
In addition to gear, ensure the workspace is ventilated and free of trip hazards. Protect nearby surfaces with plastic or tarps to contain dust. Secure loose clothing and tie back long hair. Consider respirator use for dust and nuisance odors.
This prep supports foundation settlement awareness and moisture control by reducing contamination risk and improving your handling control during repairs.
Surface Cleaning Basics
Surface cleaning begins with a clear goal: remove dust, oils, and debris so the repair materials bond properly. You’ll inspect the area for loose concrete, efflorescence, and slick streaks, then choose appropriate cleaning methods.
Use a stiff brush or broom to dislodge embedded material, and apply a degreasing cleaner if oils are present. Rinse thoroughly with clean water, avoiding over-wetting that can soften the substrate.
For exterior drainage, confirm runoff away from the crack to prevent recontamination during cleaning. If you encounter stubborn mineral deposits, consider mechanical etching or a low-pressure washer; never use high-pressure tools that could widen the crack.
After drying, check surface texture and remove dust with a tack cloth. Address soil compaction nearby to prevent future settling from altering the crack’s behavior.
Wall Crack Repair Methods: Epoxy vs. Polyurethane Injections
Epoxy and polyurethane injections are common, effective methods for repairing wall cracks in concrete foundations, but they serve different purposes. Epoxy creates a rigid, high-strength bond that stabilizes structural cracks, focusing on load transfer and long-term stiffness.
Polyurethane, by contrast, remains flexible, sealing and accommodating slight movements while resisting water intrusion. You’ll choose epoxy for foundation settlement scenarios where cracks are wide and the structure needs rigidity; polyurethane suits moisture mitigation needs where ongoing settlement is limited and water leakage is a concern.
Prepare the surface, inject in stages, and cure per product instructions to optimize performance. Remember to assess moisture and movement before selecting a repair method.
- Evaluate crack width and movement
- Align choice with moisture mitigation goals
- Ensure proper surface prep
- Follow curing guidelines precisely
Hairline vs. Wide Wall Cracks: Patch and Seal Approaches
Hairline cracks respond best to patching, using a thin epoxy or masonry patch that adheres tightly without adding bulk.
For wide cracks, you’ll rely on sealing methods that close the gap and prevent water intrusion, followed by backer material or caulk to cushion movement.
Start by evaluating crack width and movement to choose the appropriate patch or seal approach and guarantee a durable, water-tight seal.
Hairline Patch Solutions
Small hairline cracks in concrete walls call for quick, targeted patch and seal solutions that prevent moisture intrusion and further widening. For hairline patching, you apply a compatible epoxy or polyurethane crack filler, then trowel smooth to match the surface. This approach emphasizes Foundation reinforcement and Moisture control, keeping the repair discreet yet durable.
Prepare the crack by cleaning and drying, then inject or pack the filler, followed by a skim coat to blend edges with the surrounding concrete. Cure per product instructions, avoiding traffic until solid. Consider a surface seal as a second step to deter dampness and reduce capillary action. Practice precise application to prevent overfilling and cracking. Focus on durable seals, not temporary fixes.
- Clean and dry the crack before sealing
- Select an epoxy or polyurethane filler designed for hairline cracks
- Inject or pack filler evenly, then smooth
- Cure fully and protect with a sealant as needed
Wide Crack Sealing Methods
Wide cracks in foundation walls require a methodical patch-and-seal approach that differs from hairline repairs. You start by cleaning the crack edges and removing loose material, then choose a sealing method suited to the crack width.
For wider gaps, apply a backing material or fabric reinforcing along with a compatible polyurethane or epoxy injection to achieve a watertight seal. Surface patches alone won’t suffice; you must embed suitable sealants into the crack to resist hydrostatic pressure.
After curing, test for leaks and recoat with a waterproof coating if needed. This process supports foundation waterproofing goals while allowing interior insulation to remain effective.
Use the right materials and proper curing to prevent future movement or infiltration, ensuring long-term stability and dry interior conditions.
Floor Slab Cracks: Repair Options by Crack Type and Severity
When you’re addressing floor slab cracks, the repair approach should match both the crack type and its severity. For common hairline or map cracks, you can often stabilize with a rigid filler and relevel if needed, addressing moisture intrusion concerns at the source.
Larger, structural cracks may require meshing or epoxy injections to restore integrity and reduce movement. Diagonal or stair-step cracks suggest settlement and warrant evaluating foundation support. Always verify moisture intrusion paths and soil moisture before proceeding.
Prioritize durable fixes that prevent recurrence and consider grading and drainage improvements to curb future movement.
- Assess crack size, orientation, and movement trend
- Choose treatments aligned with crack type and severity
- Address moisture intrusion and drainage
- Reassess foundation settlement risks and monitor over time
Crack Sealing vs. Filling: When to Use Filler or Caulk
Crack sealing and filling serve different purposes, and choosing between them depends on crack movement, size, and location.
You seal small, non-structural shrinkage cracks with a flexible filler that remains slightly elastic, then apply a compatible waterproof coating to cap and protect the surface.
If the crack transfers movement or widens with seasonal shifts, you’ll fill it with a more rigid material or use a combination approach that accommodates movement while keeping water out.
For wider or shifting cracks, consider sealants that stay elastic and sealable seams at expansion joints.
In both cases, guarantee compatibility with surrounding concrete and with existing waterproof coatings.
Remember to address expansion joints and drain paths to prevent future water intrusion.
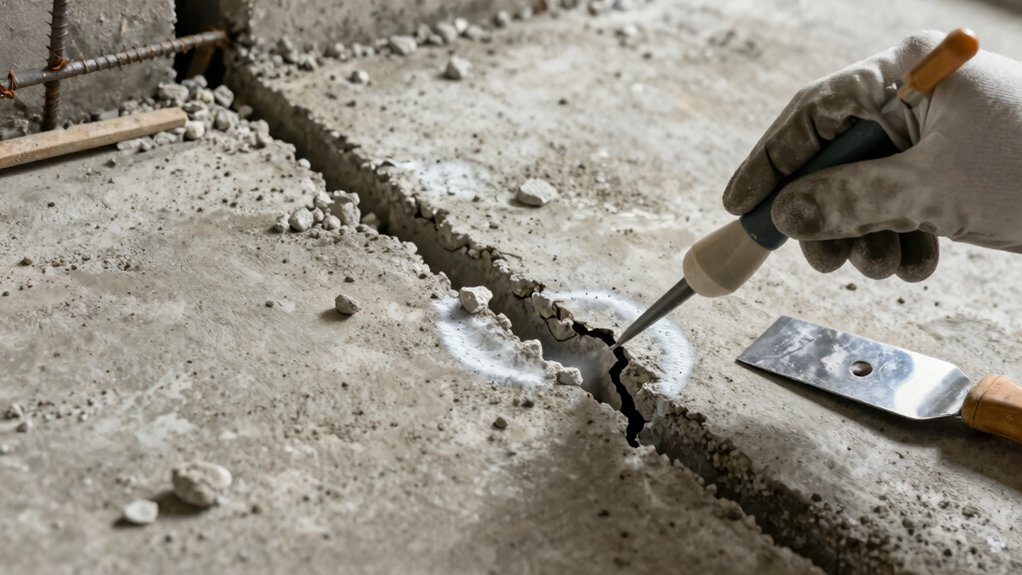
Epoxy and Polyurethane Injections: Step-by-Step Application
Epoxy and polyurethane injections provide a robust way to restore structural integrity and halt water intrusion in cracked foundations. You perform injections through drilled ports, seal joints, and inject resin or foam in a controlled sequence to fill voids and bond surfaces.
Begin with epoxy for structural cracks, then use polyurethane where active moisture is present to block seepage and accommodate slight movement. Monitor pressure carefully to avoid over-injection and ensure complete penetration.
- Assess crack size, moisture flow, and placement of injection ports
- Select epoxy for load-bearing cracks; polyurethane for active moisture or movement
- Meter resin volumes and cure times to optimize penetration
- Verify stabilization and moisture control after final injection
Foundation settling considerations and moisture control remain central to lasting results.
Drying, Curing, and Preventing Future Cracks
Drying, curing, and preventing future cracks begin with controlling moisture and allowing materials to reach their designed strength. You’ll want consistent moisture conditions during concrete cure, horizontal and vertical surfaces treated to minimize evaporation while still venting excess humidity. Maintain neutral, moderate temperatures and avoid rapid drying, which can induce cracking.
After installing patches, verify that all sealants and coatings cure according to manufacturer specs, then monitor for hairline movement or new damp spots.
Moisture control is essential: address groundwater intrusion, manage interior humidity, and ensure proper drainage away from the foundation. Insulation strategies help stabilize surface temperatures, reducing freeze-thaw stress that promotes cracking.
Document any changes and plan periodic checks to catch creeping cracks early and preserve long-term stability.
Tools, Safety Gear, and Maintenance for Foundation Repairs
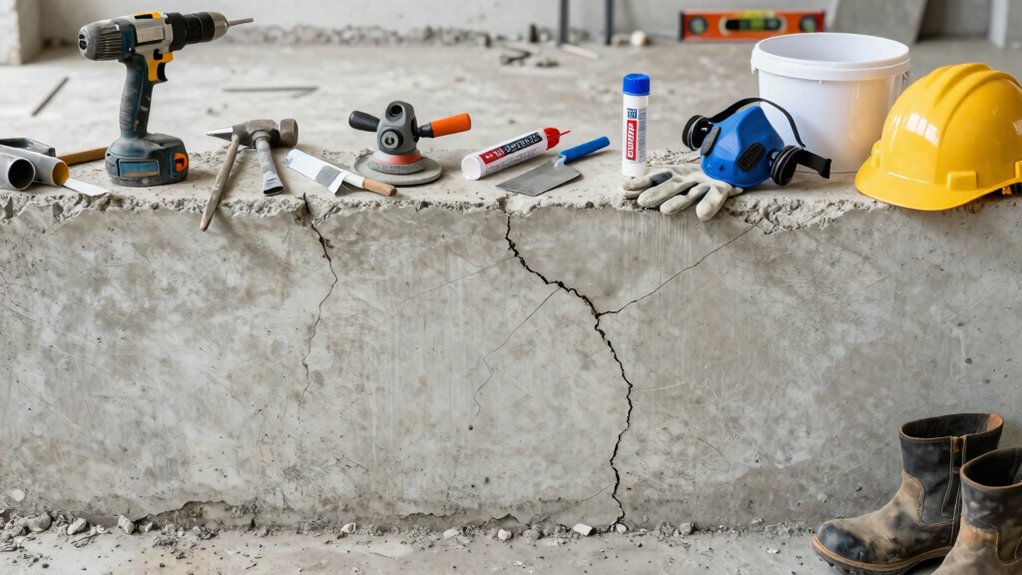
With the right tools and gear, you can implement repairs confidently and safely, building on the moisture-control measures you established earlier. Choose durable items designed for concrete work and personal protection.
Key components include a chisel or hammer drill, mixer or paddle, prep tails, trowel, junto for crack filling, and an acceptable caulk or epoxy system. Select boots, goggles, gloves, and a respirator or dust mask to prevent exposure to dust and chemicals.
Maintain your workspace and follow stamped directions for each product. Confirm you have proper ventilation and a plan for moisture barriers around the repair area.
Regularly inspect the site and test Foundation drainage compatibility after repairs to prevent future leaks.
- Personal protective gear
- Proper tooling and mixing
- Moisture barriers integration
- Drainage and inspection schedule
Frequently Asked Questions
How Long Does Epoxy Injection Take to Cure Fully?
Epoxy curing typically takes 24 to 72 hours to reach handling strength, with full cure often extending up to seven days in cooler or damp conditions. Your repair timeline depends on temperature, humidity, and epoxy formulation.
Can Minor Wall Cracks Indicate Major Structural Failure?
Did you know 90% of minor wall cracks don’t threaten structure? You should assess with foundation monitoring and crack sizing to determine risk, then consult a pro; minor signs can escalate without timely action.
Do Foundation Cracks Always Mean Water Intrusion?
No, foundation cracks don’t always mean water intrusion. You should schedule a foundation inspection to assess severity, then consider waterproofing solutions if moisture is present. Early evaluation helps prevent future damage and protects structural integrity.
Are DIY Repairs Guaranteed to Last or Require Professional Help?
DIY repairs aren’t guaranteed to last; you’ll likely face DIY pitfalls, so seek professional assessment for lasting results. You’ll save time and money, but a pro’s evaluation confirms crack causes and appropriate fixes beyond DIY limitations.
What Maintenance Prevents Crack Recurrence After Repairs?
You should schedule ongoing waterproofing techniques and foundation reinforcement checks, perform annual inspections, clean gutters, and control moisture. Maintain proper drainage, address new hairline cracks promptly, reapply sealants as needed, and monitor movement to prevent recurrence.
Conclusion
If you don’t fix it now, you’ll wake up someday to a crack that hobbles your whole life—literally. You’ll watch future leaks multiply like unruly relatives, walls bow, floors sag, and your budget balloon into a monster you can’t tame. But you can choose different: diagnose correctly, select the right repair, seal or inject properly, and monitor diligently. Take control, act with precision, and you’ll sleep soundly knowing your foundation stands firm for decades. Your home, unshakable.


