

To install a peel-and-stick backsplash with minimal mess, start by evaluating the surface for adhesion and cleaning any grease or residue. Choose a durable, moisture-ready material, then wipe the area with soap and water followed by isopropyl alcohol. Measure, mark, and cut precisely, dry-fitting panels before peeling backing. Apply from a corner, pressing firmly to seal seams and avoid air pockets. Finish with a light roll and wipe away residue; you’ll soon master flawless, cleanup-free results. More tips await.
Assess Surfaces for Peel-and-Stick Adhesion
Before you install peel-and-stick backsplash, start by evaluating the surfaces for adhesion. You’ll conduct a quick surface check to ensure a solid bond. Begin with a visual inspection for flaking, peeling paint, or grease buildup; note any shiny or nonporous areas.
For a reliable adhesion assessment, perform a simple surface testing: clean a small patch, apply a test strip, press firmly, and wait 15 minutes to gauge grip. If the strip pulls away easily, the surface likely needs preparation or isn’t suitable.
Address issues by cleaning with a degreaser, sanding glossy zones, or priming porous substrates. Record findings, then proceed only after the test confirms strong adhesion.
This disciplined surface testing reduces risk and improves long-term durability.
Choose Peel-and-Stick Materials for Kitchens
Selecting the right peel-and-stick material for a kitchen comes down to durability, ease of cleaning, and fit with your cabinet and countertop tones. First, prioritize material durability; choose heavy-duty vinyl or laminate options rated for moisture and heat exposure behind a splash zone. Look for a proven adhesive system that won’t lift at edges after a few days of cooking humidity.
Next, assess design versatility: select patterns and textures that align with your overall aesthetic, from stone-look to subtle solids. Consider light reflectivity and color depth to hide fingerprints.
Finally, verify installation practicality—choose panels with gridlines or peel-and-stick backing that align with your layout, minimizing waste. A balanced choice delivers lasting style and simple maintenance.
Prepare Surfaces: Clean, Patch, and Dry
To guarantee a strong peel-and-stick bond, clean the surface thoroughly, patch any holes or gouges, and dry completely before you start. Start with a scrub of soap and water, then wipe with isopropyl alcohol to remove grease.
Use lightweight spackle or patch compound to fill dents; sand smooth once dry. Wipe away dust with a tack cloth. Check for evenness—fill high spots, feather edges.
Address moisture concerns before proceeding; moisture control is critical to prevent bond failure. If you have oily film or soap scum, repeat cleaning until the surface reads clean under light.
For paint preparation, sand glossy areas lightly to create a key, and rewipe. Ensure the wall is totally dry and free of moisture before you apply the backing.
Measure, Mark, and Cut Accurately
Precision starts with smart marking and clean cuts. Use a sharp pencil or marking knife for exact lines, and double-check against templates before you cut.
Match your cut with the blade’s kerf and test-fit before final placement.
Precise Marking Techniques
Accurate marks set the foundation for a flawless peel-and-stick backsplash. You’ll approach each measurement with precision, then transfer lines cleanly to the backing material. Use a sharp pencil and a straight edge to minimize smear and misreads, and double-check against the template matching you prepared.
- Align templates to walls first, then mark edges with a light, consistent stroke
- Measure twice, mark once, and verify with a second tool for cross-checks
- Test adhesive on a hidden area to confirm bonding before full exposure
- Include cut allowances for expansion, then recheck entire layout after marking
Keep markings crisp, transfer to the panel without smudging, and confirm that cut lines align with your layout before peeling.
Accurate Cutting Methods
You’ve laid a solid groundwork with precise markings; now keep that accuracy moving into cutting. Measure twice, cut once, and use a sharp utility knife with a straightedge to prevent frayed edges. Score along the mark first, then apply firm, even pressure to complete the cut.
For tricky angles, make a series of shallow passes rather than one deep slice to avoid tearing. Align cuts to tile patterns and avoid waste; place long sections on a stable surface and test fit before peeling backing.
Choose adhesive types compatible with your wall and the backsplash material, and account for expansion gaps at edges. Label pieces as you go to maintain sequence, and clean the cut edges to ensure close, clean joints.
Plan Layout for Seamless Alignment
Plan your layout with precision by mapping out the seam lines, edge gaps, and focal points before you apply any peel-and-stick panels. Use a dry-fit to verify alignment, adjusting for walls that aren’t square and ensuring consistent gaps across all tiles.
Keep these essentials in mind: layout planning, seamless alignment tricks, and a final dry-fit check to confirm everything lines up before you commit.
Layout Planning Essentials
To guarantee seamless alignment, start with a clean baseline: measure your wall, mark a plumb line, and snap a chalk guide where the backsplash will begin.
Then plan the layout to minimize cuts and ensure visual balance. Think in patterns, align grout lines, and consider color coordination to unify the space.
- Center the design on key features (sockets, windows) for focal balance.
- Map tile patterns to avoid awkward cuts at edges.
- Verify height placement with cabinets to maintain consistent margins.
- Pre-test color coordination with sample swatches before sticking.
Adopt a deliberate workflow: confirm verticals first, then horizontals, and finally adjust for any minor shifts.
This discipline reduces waste and secures a professional, clean result.
Seamless Alignment Tricks
Seamless alignment starts with a rock-solid baseline: guarantee verticals are plumb and horizontals align with existing features before laying any tile. Start by snapping a laser line or chalk guide as your primary reference. Check edge alignment at every corner; if a tile edge lies off, adjust the entire run rather than patching later.
Use full, repeatable patterns to minimize micro-adjustments—pattern matching across joins prevents visible seams. Favor symmetric cuts at both ends to avoid lopsided visuals. Dry-fit mentally, then mark only critical cut points to conserve materials.
Mix tiles from the same batch and stagger joints to distribute tolerances evenly. Keep a tight measurement routine: measure twice, cut once, then align edges with the guiding line for a clean, continuous look.
Dry-Fit Before Installation
Dry-fit first to confirm layout before you commit. You’ll map the pattern on the wall, test panel positions, and verify alignment with edges and outlets. This step prevents miscuts and saves cleanup later.
- Check material compatibility between the backsplash sheets and your wall surface.
- Confirm edge-to-edge spacing with a dry run, not tape marks.
- Rehearse cutting and trimming at corners, joints, and outlets.
- Assess surface preparation needs, including dust-free and clean backing.
Proceed only if everything sits flat and straight. If a panel lifts or bows, adjust the layout and reseat until you’re sure it adheres evenly. This dry run minimizes wasted material and ensures a seamless final look.
Install Peel-and-Stick Backsplash: Step-by-Step

If you’re ready to refresh your kitchen fast, installing a peel-and-stick backsplash begins with a clean, dry surface.
Next, measure and mark a straight starting line to ensure alignment.
Peel a small section of backing and place the first tile, pressing firmly to enroll adhesive strength evenly.
Work corner to corner, smoothing each panel with a plastic deck spatula to remove air pockets and prevent gaps.
Align edges carefully; use a level if needed to maintain a true grid for decorative patterns.
Trim as required with a sharp utility knife, re-pressing edges after cuts.
Keep panels flat during installation and wipe away residue promptly.
Finally, wipe the surface again to verify full contact and consider a light, 24-hour cure before use.
Cut and Fit Around Outlets, Corners, and Edges
When cutting and fitting around outlets, corners, and edges, start by turning off power and removing any screws or covers to access the box openings. You’ll trim carefully to expose precise outlet cutouts and smooth corner fitting, ensuring the backing sits flat against the wall.
Measure, cut, and test-fit before committing adhesive to avoid gaps. Use a utility knife for clean lines and maintain alignment with adjacent tiles; press firmly to prevent air pockets.
Trim around outlets first, then shape at corners, so you retain full coverage and a seamless look. Finish by smoothing edges with a scraper.
- Verify power is off and covers are removed before cutting
- Align for consistent gaps and clean outlet cutouts
- Ply edges near corners for a snug fit
- Press and roll to secure adhesion evenly
Troubleshooting Adhesion and Finishing Touches
Adhesion issues can derail a backsplash project fast, so start by verifying the surface is clean, dry, and free of dust or grease before you proceed.
If粘合力 still wanes, re-clean with isopropyl alcohol and let it dry completely.
Push each tile firmly, then grip and press along seams with steady, even pressure for 10–15 seconds.
For stubborn spots, lightly warm the backing with a hair dryer to improve tack, then reseat.
Check alignment from multiple angles before final pressure.
If a panel won’t adhere, lift and reapply after a brief recheck of surface texture.
Finishing techniques matter: roll seams with a clean roller or smoothing tool to prevent air pockets.
Avoid over-stretching; crisp edges heal faster and look sharper.
Clean-Up and Maintenance Tips
To keep your peel-and-stick backsplash looking sharp, perform a quick post-install sweep to remove dust and stray debris. Then wipe surfaces with a damp microfiber cloth and a mild detergent if needed.
- Use a soft sponge for stubborn smudges and avoid abrasive pads to protect the finish.
- Establish simple maintenance routines: weekly wipe-downs and monthly full-clean checks.
- Store cleaning tools in a designated spot to prevent cross-contamination of kitchen surfaces.
- Rinse cloths and sponges frequently to prevent streaks and residue buildup.
These practices keep adhesion intact and prevent grime buildup.
For tough spots, try a gentle solution of water and mild soap, then rinse and dry promptly. Regular upkeep minimizes repair risk and preserves the backsplash’s appearance.
Frequently Asked Questions
How Long Does It Take for the Adhesive to Cure Fully?
Adhesive curing typically takes 24 to 48 hours to reach full strength. For a ideal installation timeline, avoid moisture and heavy traffic during that period, and check manufacturer guidelines for any temperature or humidity specifics.
Can Peel-And-Stick Backsplash Be Removed Without Damage?
Yes, you can remove it without damage with careful adhesive removal and proper surface preparation. Start gently peeling, heat to loosen, use a plastic scraper, then clean residue. Check patches, reseal, and reprepare the surface for reapplication.
Will Heat From Appliances Affect Adhesion Over Time?
Heat effects can loosen adhesives over time, so yes—the heat from appliances may degrade adhesion. Appliance impact depends on proximity; keep backsplashes at safe distances and use high-temp rated strips for contact with heat-prone areas. Regular checks help.
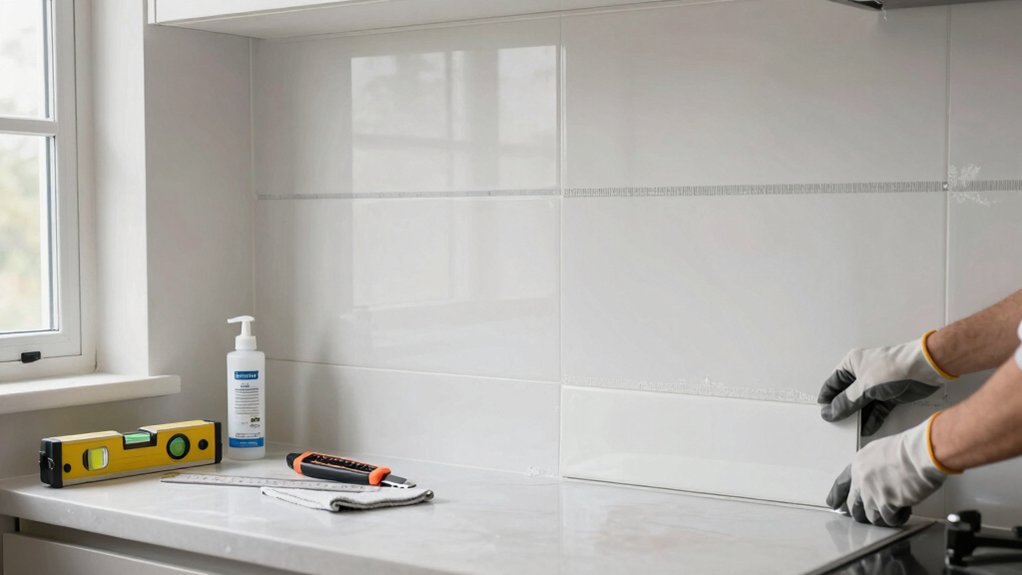
What Safety Gear Is Recommended During Installation?
Wear safety glasses and gloves. Keep a steady stance, cut away from your body, and handle tools with control. Use a mask if cutting generates dust, and wipe adhesives from skin promptly to prevent irritation.
Can the Backsplash Be Installed Over Existing Tile?
Yes, you can install over existing tile if the surface is flat and clean. Start with tile removal for any loose spots, then surface preparation to guarantee adhesion and a smooth, reliable backsplash. Anchored, you’ll avoid future hassles.
Conclusion
You’ve got this—peel-and-stick backsplashes deliver a clean look with minimal mess when you prep right. Start with a dry, smooth surface, measure twice, cut once, and align carefully for seamless seams. If edges lift, re‑press and smooth with a roller; fix any gaps with clear adhesive if needed. Keep outlets shut off and dishes away during install. Ready to transform your kitchen in hours, not days—why wait to enjoy a fresh, durable splash?


