
To balance your home’s HVAC, start by checking airflow and sealing leaks. Inspect ducts for smooth paths, tighten joints with mastic or foil tape, and seal gaps around doors, windows, and penetrations. Improve insulation to stop drafts, especially in attics and top floors. Size and maintain equipment properly, and adjust dampers or vents to even out temps. Use zoning with a central controller to prevent dead zones, and verify results with measurements. If you keep optimizing, you’ll uncover more effective strategies.
Diagnose Why Some Rooms Are Too Hot or Cold
If a room won’t reach comfortable temperatures, start with a quick check of airflow and insulation. You’ll identify hot or cold spots by noting where drafts enter and where insulation seems thin.
Verify register alignment and damper positions, ensuring doors stay closed to separate zones when needed. Inspect windows for leaks and seal gaps with weatherstripping or caulk.
Then assess whether existing heating or cooling capacity matches the room’s load. Consider applying thermal curtains at night to reduce heat loss or gain, especially on north-facing walls, and use window films to improve glazing efficiency without blocking light.
Track patterns across the day to see if sun exposure drives swings and plan targeted fixes rather than broad system changes.
Balance Airflow: Optimize Supply and Return Paths
Start by aligning ducts so supply paths deliver air evenly to each zone. A balanced system also requires equalizing the return paths, so pressure stays stable and vents perform consistently.
Aim for straightforward, precise adjustments that minimize resistance and maximize overall airflow efficiency.
Optimize Duct Alignment
To optimize duct alignment, you should map supply and return paths to minimize bends, distance, and turbulence. Then, adjust ducts so airflow moves smoothly from the furnace or air handler to every room.
Focus on straight runs, reducing sharp turns, and pairing supply trunks with appropriately sized branches.
Seal gaps with UL-listed mastic or foil tape to prevent leaks that undermine airflow optimization.
Support ducts securely to minimize vibration and shifting, which can create pressure losses and noise.
Label corridors and rooms to keep future changes precise and efficient.
Check for obstructions near registers and returns, ensuring clear airflow paths.
After adjustments, measure airflow at key rooms and compare against design figures to confirm balanced performance.
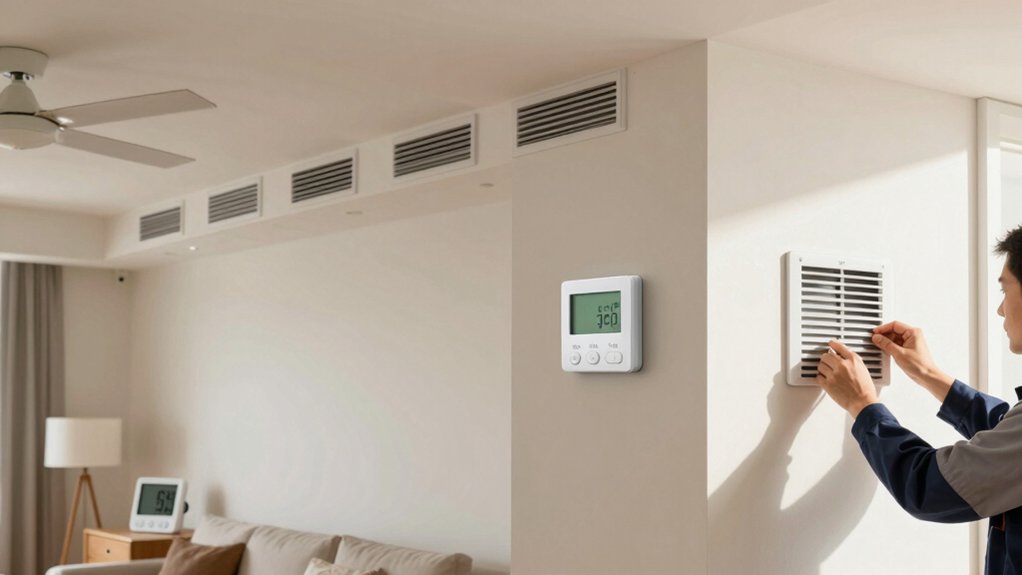
Equalize Airflow Paths
Equalizing airflow paths begins by identifying imbalances between supply and return legs and then correcting them with precise adjustments. You’ll tighten mismatches by balancing duct segments, repositioning registers, and verifying that airflow travels evenly to each zone. This reduces airflow discrepancies and improves comfort without overworking the system. Pay attention to vent placement to prevent short-circuits and ensure consistent pressure.
- Assess each zone’s airflow using a flow meter and adjust dampers for equalized delivery.
- Reposition or replace undersized or blocked vents to restore balanced supply and return paths.
- Seal gaps around registers and boots to prevent leakage that skews pressure.
- Test system performance after adjustments, confirming uniform temperatures and stable static pressure.
Seal and Insulate to Stop Drafts and Heat Loss
Sealing gaps and boosting insulation cut air leakage, so you prevent less conditioned air and save energy.
Start by identifying obvious drafts, then apply weatherstripping, door sweeps, and insulation improvements to block heat loss.
Use simple draft detection tips to verify gaps and guarantee your system runs efficiently.
Air Leakage Reduction
Air leakage is a common source of heat loss and drafts, so you should seal gaps and add insulation to keep conditioned air inside. You’ll improve comfort and reduce HVAC load by targeting obvious leaks first, then addressing smaller drafts. Focus on sealing leaks and weatherproofing doors to cut airflow paths.
- Inspect exterior penetrations and seal with appropriate caulking or foam.
- Weatherstrip doors and windows to minimize seasonal gaps.
- Seal attic and crawlspace access points to prevent upward and downward drafts.
- Add insulation where airflow is persistent and hard to seal, prioritizing the top floor and attic.
Monitor results with a blower door test or simple draft checks, and re-seal as you notice new gaps.
Insulation Improvements
Insulation enhancements start with identifying persistent drafts and areas where heat escapes, then selecting effective materials and installation methods to stop both heat loss and cold infiltration.
You’ll seal gaps first, focusing on joints around doors, windows, and service penetrations, to prevent air leakage from bypassing insulation.
Next, address attic insulation and wall insulation, where most heat loss occurs; upgrade to proper R-values for your climate and retrofit without compressing materials.
Use air-permeable breathable barriers only where necessary, and ensure vapor retarders align with existing assemblies to avoid moisture issues.
Install correctly fitted insulation with coverage that eliminates cold spots near outlets and wiring.
Finally, perform a pressure test after sealing and insulating to verify uniform temperatures and improved HVAC efficiency.
Draft Detection Tips
Draft detection is the next step after sealing gaps, so you can pinpoint remaining drafts and stop heat loss efficiently. To identify air leak sources, use a simple pressure test and visual checks around doors, windows, outlets, and vents.
Then prioritize fixes that improve draft prevention and comfort without overhauling your system. Apply these steps:
- Inspect window frames and door sweeps; replace worn weatherstripping.
- Seal electrical outlets and switch boxes with foam gaskets.
- Add caulk to exterior gaps around trim and siding.
- Use a thermal camera or incense trick to reveal hidden drafts.
Complete these actions before recalibrating airflow, ensuring even temperatures and reduced energy waste.
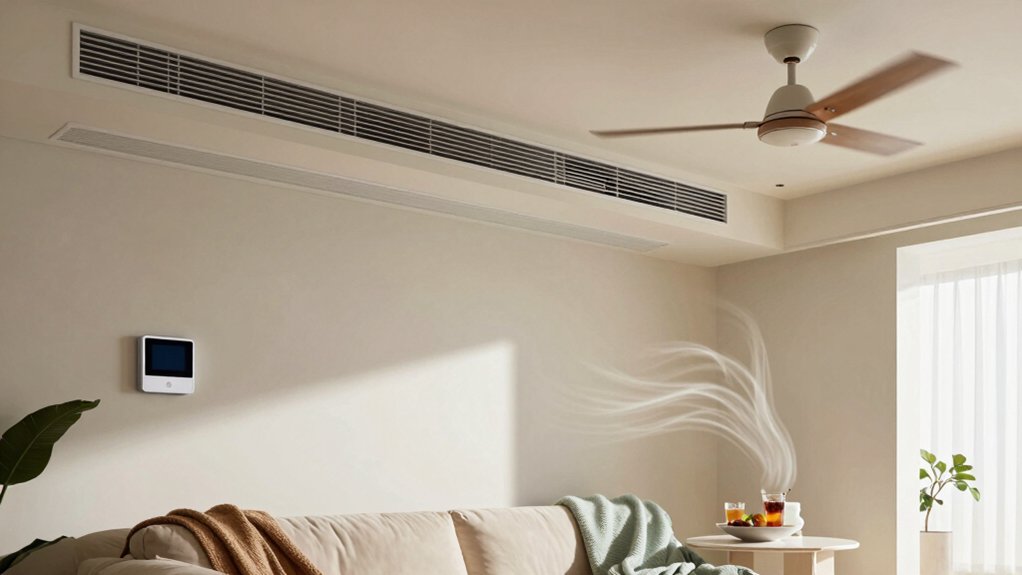
Thermostats and Zoning for Even Comfort
If you want even comfort throughout your home, start with a well-planned thermostat setup and thoughtful zoning. Your first move is selecting effective zoning controls that reflect room usage and occupancy patterns.
Use zones to limit conditioned air where it’s not needed, which reduces waste and keeps temperatures steadier. Pair this with smart thermostats that learn schedules, detect anomalies, and adjust quickly to changes in sunlight or occupancy.
Place sensors in representative rooms to capture variations without overcomplicating the system. Guarantee your thermostat communication is reliable—Wi-Fi, routing, and compatibility matter.
Integrate zoning with a single control hub when possible, so you don’t chase disparate settings. This approach minimizes dead zones, improves response time, and sustains even comfort throughout the home.
Room-by-Room Adjustments That Work
Start with a room-by-room plan that matches how you actually use each space. Then tune airflow and controls to those patterns, not generic assumptions. Every adjustment should be intentional, not accidental, and it should respect your home’s layout and occupant needs. Use decorative vents to focus air where it’s most needed, minimizing drafts at entrances or near sensitive areas. Pair that with smart thermostats to automate consistency in real time.
4 key adjustments you can implement now:
1) Prioritize sleeping areas by keeping temps steady and slightly cooler at night.
2) Elevate living rooms and kitchens with balanced supply and return air for even comfort.
3) Seal off unused rooms to reduce stray airflow.
4) Regularly update schedules based on seasonal shifts and occupancy.
Equipment Sizing, Maintenance, and Replacement Timing

Equipment sizing, maintenance, and replacement timing are the backbone of reliable comfort and efficiency. You must size equipment correctly to avoid oversizing or undersizing, which leads to uncomfortable swings and wasted energy. Start with a professional load calculation and confirm that ducts, insulation, and airflow can support the chosen unit.
Once sized, emphasize maintenance: schedule seasonal inspections, clean filters, and ensure coils, condensate drains, and fans perform at their best. Regular maintenance prevents efficiency loss and extends equipment life, reducing unexpected failures.
Replacement timing hinges on performance decline, rising energy bills, or frequent repairs rather than age alone. Track SEER ratings, refrigerant health, and compressor soundness to decide when to retire and replace components.
Adhering to precise sizing and disciplined maintenance preserves comfort and minimizes total operating costs.
Verify Improvements and Prevent Hotspots
To verify improvements and prevent hotspots, systematically confirm that changes deliver uniform cooling and comfort across zones while maintaining energy efficiency. You’ll verify results with real measurements, not assumptions, and adjust as needed.
Monitor temperature deltas, airflow balance, and occupant comfort signals to identify lingering hotspots. Use this approach to protect energy savings and ensure predictable performance.
- Measure temperature and humidity in each zone at multiple times of day
- Confirm supply differences stay within target ranges and adjust dampers or vents
- Validate system cycling and compressor runtimes align with energy efficiency goals
- Verify that smart thermostats respond appropriately to occupancy and weather shifts
Frequently Asked Questions
How Do I Know if My Ducts Are Leaking?
If you suspect duct leaks, inspect for visible gaps and listen for whistling noises. Use leak detection sensors or soapy water on joints. Seal loose connections with duct sealing and repair leaks before continuing, to improve efficiency.
Can Ceiling Fans Help Even Out Cooling in All Rooms?
Ceiling fans can help, you just optimize placement and speed. Place fans to push cool air downward in each room, use stable fan speed settings, and align multiple fans for cross-ventilation to balance temps efficiently.
What Is the Right Thermostat Setback for Energy Efficiency?
A well-chosen setback depends on your schedule, but aim for 7–9 hours at 68°F (20°C) on weekdays. Pair with thermostat calibration and setback optimization to maximize efficiency without sacrificing comfort. Recalibrate after changes or seasonally.
How Often Should I Replace Air Filters for Even Temps?
Replace your air filter every 3 months, sooner if you have pets or smoke indoors, to maintain air filter lifespan and indoor air quality. This keeps your system balanced and efficient, preventing uneven temps and reduced airflow.
Do Window Coverings Affect HVAC Temperature Balance?
Brace yourself like a seasoned conductor: yes, window coverings affect HVAC balance. Use window treatments strategically and consider insulation improvements to reduce heat gain/loss, then recalibrate vents for even temps. You’ll notice steadier comfort and lower energy use.
Conclusion
To truly balance your home’s HVAC, test a bold theory: that airflow, not just size, governs comfort. If rooms stay stubbornly uneven, you’ll likely find leaks, closed vents, or mismatched zoning at fault—proving air paths trump numbers alone. Start by sealing drafts, balancing dampers, and leveling thermostat data across zones. If issues persist, schedule a professional check for duct integrity and equipment performance. Practical tweaks beat heroic guesses, and even small fixes keep hotspots from creeping back.


