
To install a water filter under your kitchen sink, start by choosing a model that fits your needs and space, checking filtrations and certifications. Gather tools, mounting hardware, fittings, and spare tubing. Shut off cold and hot water, clear the cabinet, and protect yourself from spills. Mount the bracket level, connect the inlet to the supply valve, the outlet to the faucet line, and the drain to the waste line. Prime, test for leaks, and replace cartridges as needed; more tips await.
Choose the Right Under-Sink Filter: Criteria and Model Basics
When choosing an under-sink filter, start by identifying your water concerns—taste and odor, sediment, chlorine, or contaminants like lead—and match them to a filter’s certified capabilities. You’ll compare filtration stages, certifications (NSF/ANSI), and the specific contaminants each model targets.
Prioritize proven performance over hype; look for trusted test data and clear replacement guidance. Consider filter lifespan so you know replacement intervals and ongoing costs, and evaluate the installation costs beyond the unit price.
Examine system compatibility with your plumbing setup, flow rate, and space under the sink. Choose a model with straightforward maintenance, indicated by simple cartridge changes and accessible ports.
Finalize a decision that balances effective filtration, total cost of ownership, and reliable, long-term performance.
Assess Compatibility: Faucet, Space, and Existing Plumbing
Before you pick a filter based on certifications and contaminants, check how well it fits your faucet, space, and existing plumbing. You’ll want solid faucet compatibility to prevent leaks, mismatched threads, or poor flow. Verify the mounting height under the sink and ensure the faucet’s height clears the filter housing during operation.
Assess space around the cold water valve and ensure you won’t crowd other connections. Review your plumbing constraints, including pipe diameter, orientation, and potential interference with shutoff valves.
Consider whether the unit uses a standard 1/2-inch compression fitting or a dedicated adapter. If you have a reverse osmosis system, confirm drain line routing fits your cabinet layout.
Address any mismatches now to avoid retrofit hassles later.
Gather Tools and Materials for the Install
To start, gather the exact tools and materials you’ll need for the install, then lay them out within easy reach. You’ll want a variable wrench, adjustable pliers, and a tubing cutter for clean cuts, plus a bucket and towels for spills. Have a drill with bits and a screwdriver set on hand for mounting brackets or housings.
Assemble the filter housing, cartridges, fittings, and any necessary shut-off valves or adapters recommended by your unit’s instructions. Include Teflon tape or thread sealant, hose clamps, and spare tubing sized to your system. Prepare mounting hardware suited to your cabinet.
Check that you have a compatible filter replacement cartridge and the required filter installation steps. Confirm water pressure ratings align with the system’s specifications to ensure proper performance.
Shut Off Water, Access the Cabinet, and Prep Safely
Lift the water supply valve to shut off the cold and hot lines, then verify no flow by opening a faucet at the sink.
Access the cabinet and clear any obstacles so you can move freely. Wear eye protection and gloves for immediate protection against leaks or debris.
Check for signs of corrosion or old fittings before loosening anything. Position a small bucket and towels to catch drips; have rags ready for cleanup.
Confirm you’re working on the correct valve, and label or memorize shutoffs for future maintenance.
Plan your tool selection in advance, choosing adjustable wrenches, pliers, and a basin wrench as needed.
Prioritize plumbing safety, and proceed methodically to avoid leaks or damage.
Recheck all connections after initial loosening.
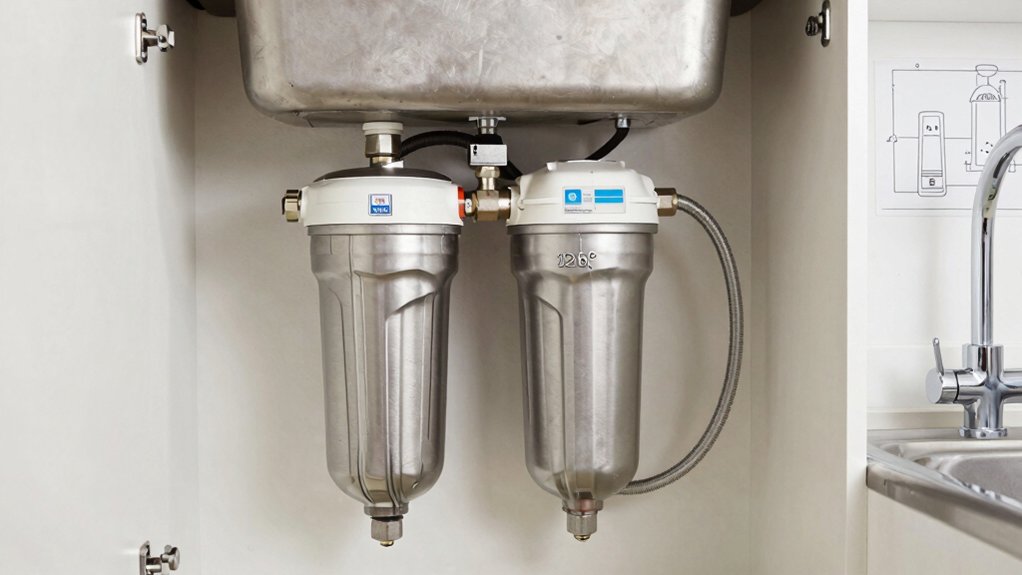
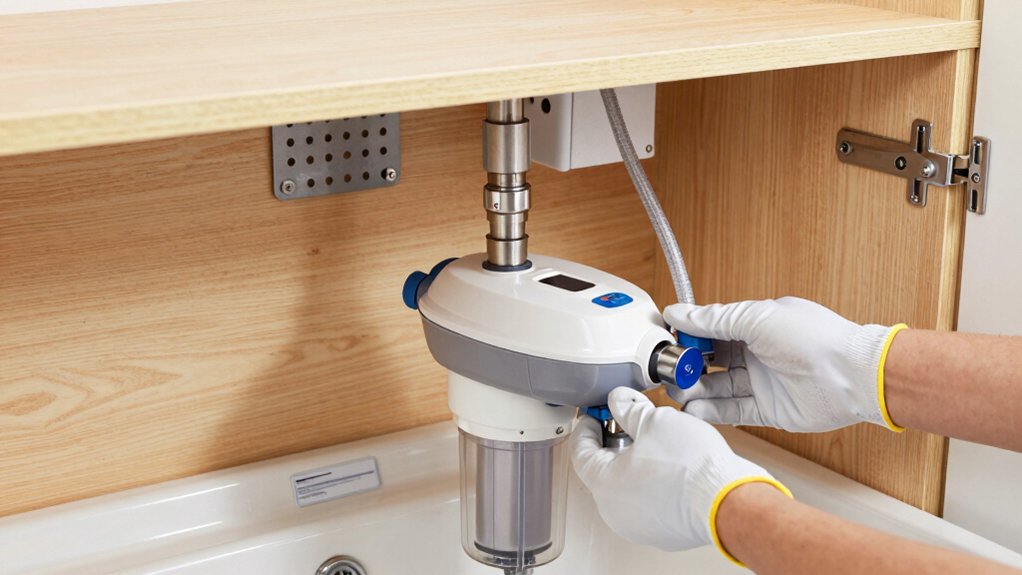
Mount the Bracket and Position the Filter
Mount the bracket securely to the cabinet wall or mounting surface, then align the filter so the unit sits straight and accessible. You’ll want a clean, level mounting to prevent wobble and ensure smooth operation.
Place the bracket screws into studs or solid backing, not drywall alone, and tighten firmly without over‑torquing. Once the bracket is secure, slide the filter housing onto the mounting rail and verify there’s no interference with drawers or doors.
Check bracket alignment from multiple angles, adjusting as needed so the unit remains vertical and centered. Confirm the housing sits flush against the mounting surface, with easy access for future filter changes.
This step establishes proper filter positioning and reliable service life from the outset.
Connect Inlet, Outlet, and Drain Correctly
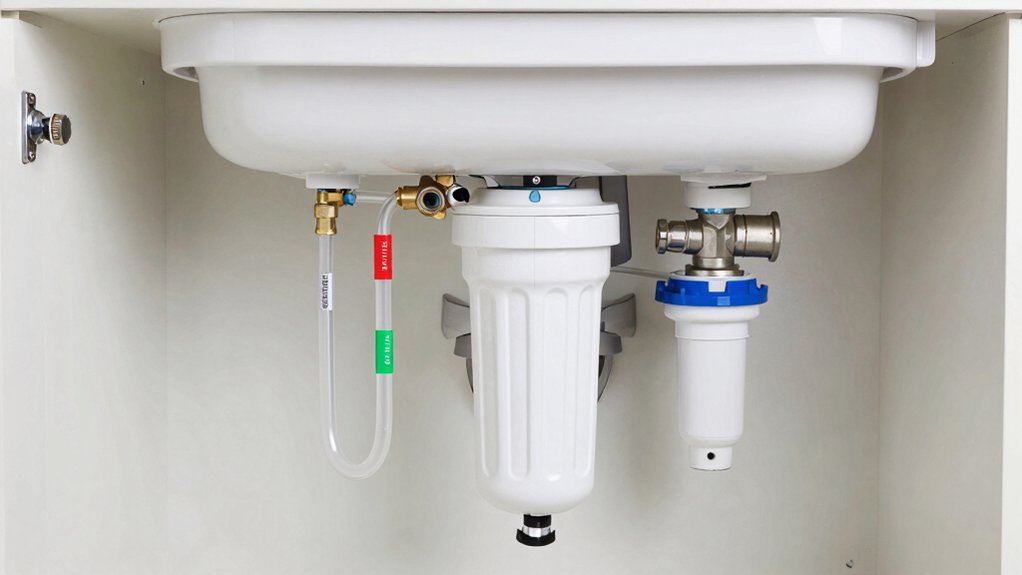
Begin by connecting the inlet, outlet, and drain with clean, secure fittings so water flows without leaks. You’ll install the inlet connection to the supply valve, ensuring a tight seal and proper threading.
Next, attach the outlet to the faucet line or supply to the filtered line, keeping tubing straight and supported to prevent kinks.
For the drain, position the discharge line into the drain saddle or waste line using a proper air gap or high-loop setup to avoid backflow.
Tighten every connection with appropriate wrenches, avoiding overtightening. Check that hoses resist tension and won’t rub against edges.
Label the lines if needed, and verify that the drain setup routes waste correctly without creating clogs.
Maintain accessible service points for future maintenance.
Prime, Test, and Leak-Check Your System
Now that the lines are secured, prime the filter, test the system, and check for leaks. Prime the filter according to manufacturer instructions, allowing the initial flow to clear air and carbon fines.
If your unit uses a pressure test, verify readings are within the recommended range and watch for drops. Open the faucet briefly to purge air; keep it running until you see a steady, clean stream.
Inspect all connections for moisture; tighten fittings if you detect drips. Run water for several minutes, then sample the output at various intervals to confirm consistent flow and no off-taste.
Confirm that water quality meets filtration standards, and document the results for compliance records. Maintain ongoing monitoring to ensure sustained performance.
Sanitize, Maintain, and Replace Filters Regularly
Regular maintenance is essential to keep your under-sink filter performing reliably. To sanitize, rinse connections, and prevent biofilm buildup, follow the manufacturer’s guidance and use the recommended sanitizing solution. Do this before reinstalling cartridges to ensure bacteria removal, and avoid cross-contamination by using clean tools and fresh liquids.
Track filter lifespan by noting installation dates and comparing against the rated hours or months. Replace cartridges on schedule, even if flow remains adequate, because reduced performance signals declining filtration capacity. After replacement, flush the system per instructions to purge air and minerals.
Inspect O-rings and housings for wear, replacing seals as needed to maintain a leak-free fit. Regular checks protect efficiency and safety, extending filter lifespan and guaranteeing consistent treated water.
Frequently Asked Questions
How Long Does a Typical Under-Sink Water Filter Installation Take?
Typically, it takes about 1 to 2 hours, depending on your setup. You’ll assess the installation timeline, handle the plumbing, and gauge complexity level. You’ll complete fixtures, test for leaks, and confirm water quality before finishing.
Can I Install Without Professional Help if I’M Handy?
Yes, you can, and your DIY feasibility is solid if you’re handy. Make sure you meet tool requirements, follow kit instructions, and plan leaks. You’ll need basic wrenches, pliers, and a sink drain adapter for a clean, secure install.
Will a Filter Affect My Faucet Water Pressure Noticeably?
A satirical note aside, yes—you’ll notice water pressure dip if your filter’s flow rate is too low. Your faucet may drip more slowly, so pick a high-flow model and guarantee proper installation to minimize impact on pressure.
Do I Need a Dedicated Cold-Water Line for the Filter?
Yes, you’ll want a dedicated cold-water line for the filter. Make sure cold water supply compatibility with your unit and that the filter is compatible with your faucet setup before installation.
How Often Should I Change the Filter Cartridges at Minimum?
You should change at minimum every 6 months, based on typical usage and cartridge lifespan. This filter replacement cadence helps maintain taste and pressure, preventing sediment buildup and ensuring peak performance. Check your manufacturer’s guidance for exact cartridge lifespan.
Conclusion
You’ve planned, you’ve checked, you’ve prepared. You’ll install with confidence, you’ll test with caution, you’ll tighten with care. You’ll follow steps, you’ll verify fits, you’ll seal joints, you’ll run water, you’ll watch for drips. You’ll sanitize, you’ll replace filters, you’ll maintain, you’ll protect your investment. You’ll enjoy cleaner water, you’ll reduce waste, you’ll save money, you’ll gain peace of mind. You’ll install correctly, you’ll succeed, you’ll own a safer kitchen.


