
To replace a light fixture safely, start by choosing a compatible fixture and gathering essential tools, then power down at the breaker and confirm the circuit is dead. Remove bulbs and shades to reduce weight, detach mounting hardware, and lower the old fixture with support intact. Wire the new fixture by connecting neutral to neutral, hot to the switched hot, and attach the ground securely, then mount it firmly and restore power to test. If you keep going, you’ll uncover more practical steps.
Choose a Compatible Fixture and Gather Essential Tools

To start, choose a fixture that matches your existing wiring and voltage, and confirm the ceiling box is rated for the fixture’s weight.
You’ll assess lighting styles to align with room function and décor, then verify fixture compatibility with your circuit.
Check the voltage label on the ceiling box and compare it to the fixture’s rating; mismatches mean unsafe operation.
Consider bulb type and size, ensuring the fixture’s base supports them and that you won’t exceed weight limits.
Inspect mounting hardware included with the fixture; if anything’s missing, don’t improvise—get the correct bracket and screws.
Gather essential tools: screwdriver, wire strippers, voltage tester, and a sturdy ladder.
Before any removal, confirm power is off at the breaker. This prepares you for a clean, safe installation.
Safety First: Power Down and Prepare to Work Safely
Power down at the breaker and verify the circuit is dead before you touch anything. Before you begin, clear the area of clutter and identify your power source. Wear eye protection and use insulated gloves as needed. Confirm you have the right tools and a stable ladder, and keep a flashlight handy in case lighting is poor.
This step is about safety governance: follow Electrical codes and verify grounding where applicable. Don’t rush or improvise—pace your movements, and test outlets with a non-contact tester to confirm no residual power.
Maintain a clean workspace, avoid jewelry, and secure pets and children away. Practice Tool safety by inspecting implements for damage and using proper technique to minimize shock risk.
Remove the Old Fixture Safely
If the power is already off, start by confirming the fixture is de-energized and the light switch is in the off position.
Then remove any glass shades or bulbs to reduce weight and prevent accidental drops.
Next, support the fixture, avoid twisting cords, and keep hands clear of conductors.
Detach the mounting hardware from the electrical box with the appropriate screwdriver, keeping screws organized.
Inspect for any visible wear on the box or bracket, and gently lower the assembly to a stable surface.
Check for hot wires, plan to secure them separately if needed.
Use a voltage tester only after disassembly to confirm no live conductors remain.
Maintain a clean work area, and label parts for orderly fixture removal and old fixture safety.
Wire It Up: Connect Wires, Attach Ground, and Verify Connections
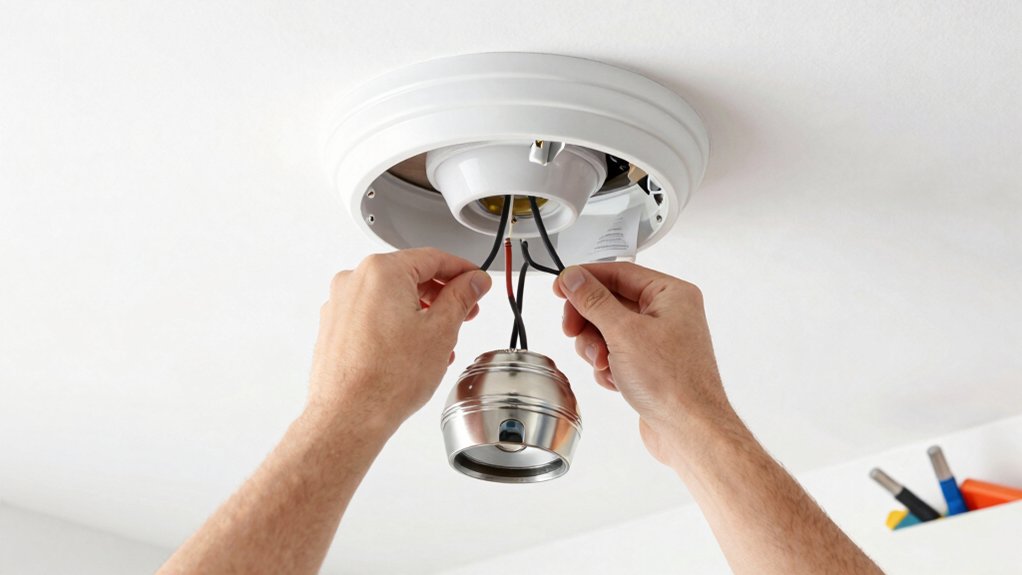
Once you’ve confirmed the circuit is de-energized, connect the fixture’s neutral (white) wire to the house neutral, then attach the hot (usually black or color-coded) conductor to the switched hot in the box. Guarantee all exposed copper is tightened under the screw terminals or wire nuts.
Verify the ground is continuous by connecting the fixture ground to the house ground, securing with a proper connector. Use color coding to distinguish wires and prevent mix-ups, matching neutrals, hots, and grounds consistently.
Twist wire nuts firmly until no insulation shows and tug gently to confirm tightness. Recheck that all connections are under screws or within approved connectors, and ensure the mounting bracket remains stable.
Do a final quick inspection for stray strands before proceeding to mount and test.
Mount, Test, and Troubleshoot the New Fixture
With the bracket secured and wires connected, mount the fixture firmly to the electrical box, then tighten all mounting screws until the unit sits flush and stable.
Once secured, restore power at the breaker and test basic operation. Turn the switch on and confirm the fixture illuminates without flicker or delay; listen for buzzing and check that the fixture remains steady.
If the bulb doesn’t light, verify the correct bulb type and seating, and recheck wire connections for solid contact. Test alternative brightness levels if present, and inspect the trim for alignment.
If issues arise, consult the troubleshooting tips: verify ground continuity, ensure compatibility with dimmers, and confirm the fixture’s rating matches the circuit.
Safety first: power off before reseating components or replacing parts.
Frequently Asked Questions
Can I Replace a Fixture Without an Electrical Box?
No, you can’t substitute a fixture without an electrical box. Electrical codes require proper boxes, and fixture compatibility depends on box type and rating. guarantee you ground correctly, use a compatible mounting, and verify box integrity before proceeding.
How Do I Handle a Ceiling Fan Fixture Replacement?
“Safety first.” You’ll handle a ceiling fan replacement by turning off power, confirming fixture compatibility, and wiring correctly, prioritizing lighting safety while preventing overloads. You’ll test, secure mounting, and maintain professional grounding for reliable, safe operation.
What Tools Are Needed for Recessed Lighting?
You’ll need a stud finder, voltage tester, drill, screwdriver, level, tape measure, ladder, and wire nuts for recessed lighting. Confirm Lighting design compatibility, fixture compatibility, housing compatibility, and electrical safety checks before installation.
Can I Mix Different Bulb Types in a New Fixture?
Yes, you should not mix bulb types in a single fixture; compatibility matters. Imagine a orchestra: each instrument must match the score. Bulb compatibility and fixture wattage guide you, preventing overload, flicker, or heat damage.
How Do I Replace a Fixture With a Dimmer Switch?
Install the dimmer by turning off power, wiring per your box, and securing the switch. You’ll need dimmer switch installation guidance, ensuring compatible dimmer types. Verify compatibility with your fixture and bulbs before testing for smooth, safe operation.
Conclusion
You’ve completed the replacement with precision and care, and your knowledge now outshines the old fixture. Keep the circuit safe and the connections solid, and you’ll enjoy reliable light for years. If anything seems off, don’t chase a fix—power down, revisit the wiring, and consult a professional. Think of this as a well–plumbed system: when all joints click into place, the whole room flows with steady, dependable brightness. Your handiwork stands ready, like a lighthouse beam.


