
Start with a site assessment: check permits, setback rules, utilities, and HOA requirements, then mark boundaries and planned edges. Plan materials, pattern, size, and color, and create a detailed design before buying. Prepare the base by grading for drainage, laying a granular sub-base, and screeding bedding sand. Lay pavers along a straight edge, keep joints at 1/4–1/2 inch, cut as needed, and install edge restraints. After laying, compact, seal, and maintain; continue to mastery beyond this guide.
Assess Site and Permits for Your Paver Patio
Before laying a single paver, assess your site and secure any needed permits. Begin with a thorough survey of sun exposure, drainage, and slope to forecast water flow and soil stability.
Check local codes for setback distances, utility lines, and HOA rules; obtain written approvals if required.
Mark property boundaries and planned patio edges, then verify that your chosen area remains unobstructed by trees or roots.
Consider landscape lighting placements early to avoid regrading later and ensure even illumination.
Plan for outdoor furniture access paths, keeping clear zones for movement.
Confirm soil compaction requirements and any required permits for earthwork or fencing.
Document permits and reviews, keep records accessible, and communicate timelines with neighbors to minimize disputes.
This prep sets a solid, compliant foundation for your project.
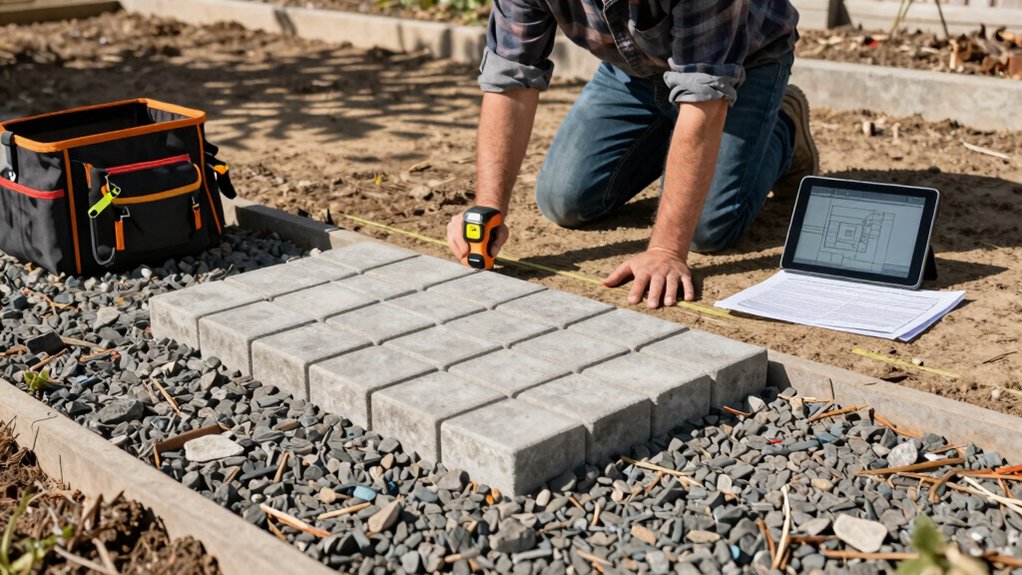
Plan Materials, Measurements, and Design for Your Paver Patio
Careful planning of materials, measurements, and design guarantees a smooth build and a durable patio. You’ll start by listing required pavers, edge restraints, and base materials, then confirm quantities with waste factors.
Decide your overall size, thickness, and layout before purchase to prevent mistakes. Consider paver color early to ensure tonal harmony with surroundings and existing structures; this affects grout lines, joint choices, and maintenance expectations.
Pattern selection sets the visual cadence—choose a layout that complements traffic flow and space constraints, and note any cut pieces needed at edges.
Measure openings precisely, including allowances for expansion gaps and drainage. Document specifications, supplier SKUs, and delivery windows to avoid delays.
Finalizing your planning, create a design sketch with measurements, color choices, and pattern. Then proceed to material procurement.
Prepare the Base: Grading, Sub-base, and Bedding Sand
With the plan in place, you’ll establish a solid foundation by grading the site, laying a proper sub-base, and installing bedding sand.
Start by grading to a slight slope for drainage planning, ensuring water runs away from structures. Remove debris, then compact the soil to a stable baseline, checking for evenness with a straightedge.
Establish a granular sub-base, typically crushed stone or coarse gravel, compacting in lifts to prevent settlement and promote drainage. Verify soil stability before moving on; any soft spots get re-compacted or filled.
Spread bedding sand evenly in a consistent depth, usually 1 inch, and screed to create a firm, level surface for paver seating.
Finally, re-check grade, edge stability, and drainage paths to prevent shifting after installation.
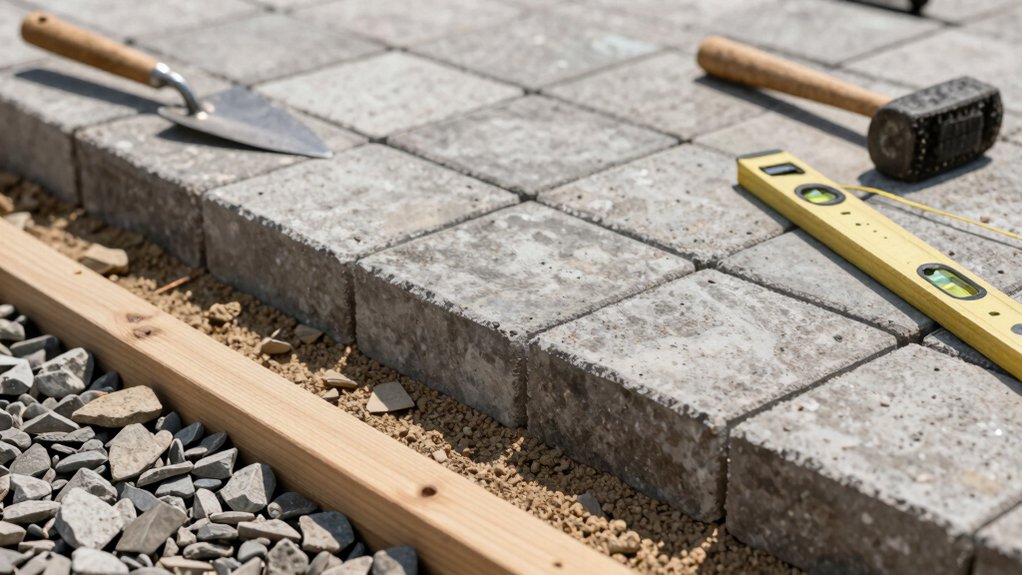
Lay the Pavers With Pattern, Cuts, and Edge Restraints
Lay the pavers in your chosen pattern, starting along a straight edge and working outward. Select a paver pattern that suits your space and minimizes cuts, then lay full units first, dry-fitting to confirm alignment.
Maintain consistent joint gaps, typically 1/4 to 1/2 inch, and cut as needed with a wet saw or angle grinder. Use a snap line to ensure straight rows and alternating courses for stability.
Once set, insert edge restraints to lock the perimeter, driving spikes at each corner and along straight runs. Tightly pack units with a rubber mallet, then sweep in joint material and compact again.
Check for level across the surface and adjust as necessary to prevent heaving or shifting. Verify evenly distributed load paths and finalize before filling gaps.
Compact, Seal, and Maintain Your Paver Patio
Once the pavers are set, compact the surface to eliminate voids and settle the units, then seal to protect against stains and weathering. After compaction, perform a routine inspection for loose or uneven pavers and address any gaps promptly. Maintain a clean surface by sweeping regularly and removing debris that can harbor weeds or hold moisture.
When you notice stains or oil spots, treat them with an appropriate cleaner before resealing. Use a consistent sealing schedule to guard against UV damage and color fading; avoid full sun during application to prevent rapid drying. For paver sealing, apply thin, even coats, allowing full cure between passes.
Implement patio maintenance by resealing every 2–5 years, depending on traffic, exposure, and wear patterns, ensuring a uniform finish.
Frequently Asked Questions
How Do I Choose the Best Paver Color for My Home?
Choosing the best paver color starts with paver color coordination; you should pick shades that match your home’s trim and roof. Match your pavers to landscape, ensuring contrast for depth without overpowering architectural features.
What Safety Gear Is Essential During Installation?
Protective gloves and safety goggles are essential. You should wear sturdy gloves for hand protection and tight-sealing goggles to shield eyes from debris, dust, and flying chips, especially when cutting or tapping pavers during installation. Stay vigilant and gloves-on.
Can I Install a Patio Over Existing Concrete?
Yes, you can install over concrete if it’s sound, flat, and crack-free. You’ll add decorative edging, guarantee proper drainage solutions, and use a suitable overlay or pavers with a durable base for lasting stability and alignment.
How Often Should I Reseal and Regrout Pavers?
You should reseal every 2–3 years and regrout as needed when joints show wear. For best results, schedule paver sealing and grout maintenance before cracks or gaps worsen, preserving color, stability, and curb appeal.
What Are Common Mistakes to Avoid With Edging Blocks?
Edging blocks: avoid misalignment, poor edging alignment, and loose joints. Check edging alignment early, secure pins, and verify block selection matches thickness. Plan for drainage; keep consistent setback. Use proper jointing and backfill to prevent shifting.
Conclusion
You’ve got the basics to lay a sturdy, lasting paver patio. If you test a theory that “good drainage prevents many problems,” you’ll see it hold true: proper grading, compacted base, and edge restraints reduce settling and weed growth. When you finish, seal and maintain it regularly to keep color and strength. Stay precise with measurements, follow the pattern, and don’t skip the sub-base. With careful steps, your patio will perform like a pro’s—trust the process and verify the results.


