Screening and recoating restores old hardwood by removing micro-scratches and dull film, then applying a fresh finish. Start by protecting the space; seal doors, vents, and furniture, and use dust containment. Choose the right grit (medium to extra-fine) and finish type (water-based or oil-modified) based on traffic. Sand evenly with a dust-m collection sander, clean between passes, and ensure edges are feathered. Apply a thin coat, cure in proper conditions, and plan a maintenance routine for lasting results—details await.
When Should You Screen and Recoat Hardwood Floors?
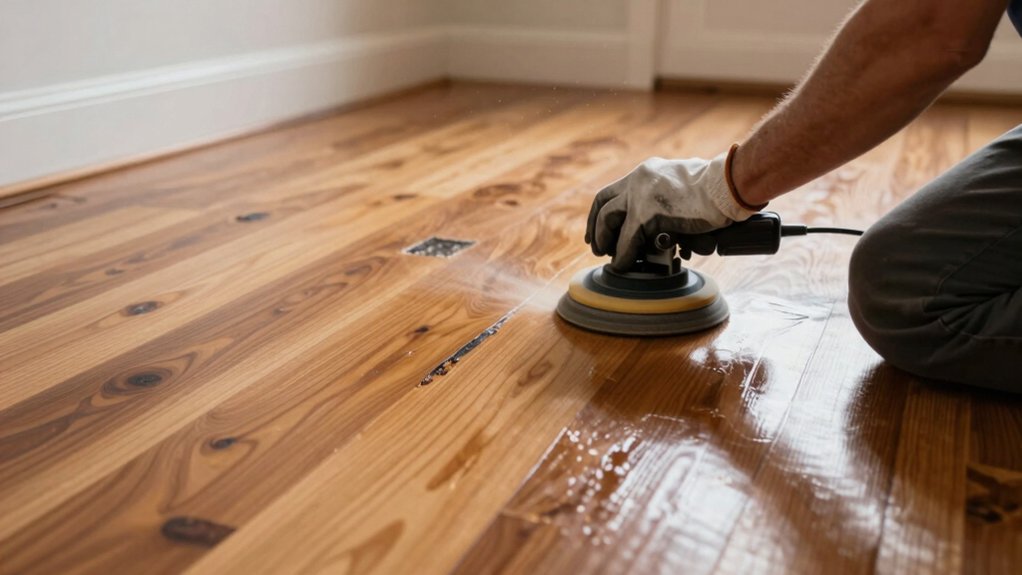
You should screen and recoat hardwood floors when the existing finish shows wear, dullness, or light scratches that a simple cleaning can’t fix. This is the practical point at which restoration becomes cost-efficient and minimizes dust disruption.
Assess traffic areas first, noting loss of gloss and micro-scratches that reveal uneven color. If the floor still has good density and minimal splinters, screen and recoat can renew protection without a full refinish.
Plan the project around your floor color selection goals, ensuring the recoat enhances tone and depth rather than masking it. Choose eco-friendly finishes that meet your durability needs and indoor air quality concerns.
This approach preserves character, reduces downtime, and yields a durable, aesthetically balanced result.
Prepare the Space: Protect People, Pets, and Surfaces
To protect people, pets, and surfaces during a floor-restoration project, start by sealing off the work area and removing or securing all furniture and valuables. Then set up barriers to control dust, and use drop cloths to cover floors and nearby items.
Use masks, goggles, and gloves for anyone entering the space, and guarantee ventilation is adequate without blowing dust toward living areas.
Identify flooring materials and any surface finishes that could react to dust or moisture, and plan containment accordingly.
Decide whether you can manage safety and cleanup yourself or if you should hire a professional versus a DIY approach for high-traffic homes.
Communicate with residents about timing, spill control, and cleanup steps to minimize disruption and protect surfaces.
Choose Grit and Coating: What to Use for Screening and Finish
Choosing the right grit and coating sets the pace for effective screening and a durable finish. Start with grit selection that matches the floor’s condition: medium for light scratches, fine for a smooth base, and extra-fine for final polish.
Use a consistent pace and avoid over-sanding edges. For coating types, pick a finish that suits traffic and exposure—water-based for quick dry times and low odor, oil-modified poly for depth and durability, or penetrating oil for a rustic look.
Test a small area to confirm adhesion and color. Apply evenly, maintain a steady rhythm, and monitor dust control. Document your choice and rationale for future touch-ups.
This choice guides sanding results and long-term durability, so choose deliberately.
Sand Safely With a Floor Sander: Techniques and Safety
Gear up with essential safety gear, from eye and ear protection to a dust mask and sturdy gloves. Master the basics of technique—even strokes, proper feed rate, and blade alignment—while keeping dust down with containment methods.
Stay prepared for the job: know your limits, pace yourself, and remove debris as you go to protect both you and the floor.
Safety Gear Essentials
When you sand floors, PPE isn’t optional—it’s essential. You’ll protect yourself by choosing the right gear and wearing it correctly. Start with protective gloves to guard your hands from splinters, dust, and finish residues, and keep a snug fit to maintain dexterity.
Eye protection is nonnegotiable: wear splash- and dust-rated goggles or a full-face shield to block fine particles. A respirator or dust mask with a P100 filter stops inhaling drywall and wood dust, especially indoors.
Use hearing protection if your sander runs loud for extended periods. Head protection isn’t usually mandatory, but keep hair and loose clothing secured.
Waterproof, durable footwear helps you grip slippery surfaces and protect feet from dropped debris. Store gear within reach and inspect it before every session.
Sanding Technique Tips
Move smoothly from PPE to technique and safety as you sand. Start with a light-pass over the floor to map high spots, then switch to aggressive grit only when needed. Use a 28–36 grit guideline for initial leveling, then step down to 40–60 grit for finish prep.
Maintain consistent pressure and keep the sander moving in an overlapping pattern to avoid burn marks. Choose sanding patterns that follow the grain for a uniform look, and rotate devices to prevent groove patterns. Protect edges and closets by feathering progressions rather than stopping abruptly.
Always verify your grit selection before each pass and clean the surface between steps to prevent grit buildup. Respect manufacturer specs, monitor dust control, and avoid over-sanding one area.
Dust Containment Methods
To contain dust effectively, set up a proactive system before you start sanding: seal off the work area, use a dust-collection sander with a high-efficiency filter, and run a shop vac alongside to capture debris at the source. You’ll create dust barriers to prevent spread and protect adjacent rooms.
Establish containment zones to control airflow, using plastic sheeting and sturdy barriers that gymnastically stop particles without impeding access. Before grinding, double-check doors and vents—seal gaps with tape and weatherstripping.
Use negative pressure by exhausting air to the outside, if possible. Clean frequently during the job, not just at the end. Maintain your equipment, replace filters, and empty bins promptly. These steps reduce cleanup time and promote a safer, neater project environment.
Clean and Inspect: Dust Removal and Surface Check
Dust and debris can ruin a refinishing job, so start with a thorough clean and surface check: remove loose dust, dirt, and grit from every floor area, then inspect for nicks, scratches, and raised grain.
You’ll tackle dust removal first: vacuum with a HEPA attachment, then wipe with a damp microfiber cloth to catch stubborn particles.
Next, perform a careful surface check for texture inconsistencies, splinters, or worn finish edges.
Address any raised grain by light sanding before recoating; don’t rush this step, as unaddressed flaws show through the new coat.
Maintain consistent airflow to prevent dust from resettling.
Keep tools close: a tack cloth, vacuum, and a small bright light help reveal hidden debris.
When done, you’re ready for a smooth, even recoat.
Apply the First Coat Evenly: Tips for a Smooth Finish
To get an even coat, use steady, overlapping passes and maintain a consistent pace to guarantee Even Coverage Techniques hold true from edge to edge.
Choose the right tooling and keep your stroke uniform for Tooling And Consistency, so the first layer lays down smoothly and evenly.
Mind the Dry Time Considerations, timing each pass to avoid lap marks and keep the finish pristine.
Even Coverage Techniques
Even coating is essential for a flawless finish, so start by prepping the floor and mixing and thinned primer or first coat as recommended by the manufacturer. You’ll aim for a uniform laydown that minimizes lap marks and reveals the grain pattern clearly. Work in small, overlapping strokes and maintain a steady pace to avoid dry edges.
Keep the applicator at a consistent angle, don’t overwork any area, and feather ends to prevent brush marks. Maintain a clean work zone, removing dust and debris between passes. When color matching, test a small area first and adjust the coat thickness accordingly before proceeding.
If you notice streaking, back off slightly on pressure and recoat once the surface tacks up. Final touch-ups should blend seamlessly for even coverage.
Tooling And Consistency
Getting the first coat laid evenly starts with the tool you choose and how you use it. Choose a roller or pad suited to your floor’s grain and finish type, and keep it loaded with a consistent amount of product. Maintain uniform pressure to prevent lap marks and ridges; don’t press hard enough to squeeze product into pores.
Work in long, even passes, overlapping each stroke slightly to build consistent film thickness. Watch for runs at edges and adjust technique before they set. Establish tooling consistency by returning to the same motion, angle, and speed across the entire area.
Time your passes to avoid pooling, and verify edge-work with a light back-roll. This ensures finishing precision without gaps or texture inconsistencies.
Dry Time Considerations
Dry time isn’t a guesswork step—it’s built into the finish you’ve laid down. You’ll gauge drying time by the product label, room conditions, and application thickness. Keep the coat thin and even to avoid runs and tackiness, then monitor for surface dryness before you proceed.
Temperature should stay around 60–77°F (15–25°C) with humidity between 40–60%; drastic swings extend the curing period and can cause dull spots. Don’t rush into second coats or screening until the first coat’s dry to the touch and the surface isn’t recrystallizing.
Ventilate the space to manage fumes, but avoid strong air drafts that dry unevenly. Remember the curing period; even when dry to touch, full hardness develops over days, not hours.
Troubleshoot Common Recoating Issues
If you notice finish defects after recoating, act quickly to identify the cause and rectify it before it worsens. Start with a clear assessment: look for streaks, uneven sheen, dust nibs, cratering, or long cure times.
Common issues often hinge on surface contamination, improper prep, or incompatible products. For contamination, lightly scuff and wipe with a tack cloth before applying a fresh coat; ensure the room is clean and dust-free.
If prep was rushed, re-sand a small area and re-clean thoroughly. Mismatched finishes cause adhesion problems—stick to the same brand and type or consult manufacturer guidelines for compatible coatings.
Troubleshooting solutions include re-sanding problematic spots, applying a compatible sealer, and maintaining steady temperature and humidity during cure. Verify with a test patch before full recoat.
Finish and Maintain: Longevity Tips and Care
To keep hardwood floors looking great for years, establish a simple daily routine and a smarter maintenance schedule. You’ll extend life by protecting the wood finish and limiting wear.
1) Clean regularly with a soft microfiber pad and a damp—not wet—mop. Use a pH-balanced cleaner to preserve the wood finish and prevent dulling.
2) Apply moisture barriers in high-traffic zones and near entrances, reducing water penetration and minimizing cupping.
3) Recoat as needed, typically every 3–5 years, to reinvigorate gloss, seal surface, and extend durability without over-sanding.
Tips: control humidity, use felt pads, and avoid harsh vacuums.
With prudence and consistency, your floors stay even-toned, resilient, and easy to maintain.
Frequently Asked Questions
How Long Does a Screen-And-Recoat Project Typically Take?
A screen-and-recoat typically takes 1 to 3 days, depending on floor size and ventilation. You’ll do floor prep, light sanding, and finishing techniques between coats, then cure times per finish product before walking on it.
Can I Refinish if the Floor Has Water Damage?
Yes, you can refinish if water damage isn’t severe; assess moisture, dry thoroughly, and address warped boards. If damage persists, replace sections. Water damage requires careful Floor repair steps before you proceed with any refinishing.
What Are Signs Recoating Is Necessary Sooner?
Trouble shadows your floor—watch for dull sheen, micro-scratches, and patchy wear. When these emerge, you need proactive flooring maintenance, or you’ll compromise hardwood longevity. Recoat now to preserve beauty and protect each plank. Act decisively.
Is Dust Containment Essential for Multi-Room Floors?
Yes, dust containment is essential for multi-room flooring projects. You should isolate areas, use vacuum-exhaust tools, and seal doors to prevent cross-contamination, ensuring safe, efficient work across the entire space.
Can I Skip Sanding if the Finish Looks Fine?
No, you shouldn’t skip sanding if the finish looks fine. Sanding improves adhesion, ensuring even floor stain and hardwood durability, preventing future peeling. Lightly scuff, clean thoroughly, then apply stain evenly for lasting results and protection.
Conclusion
You’ve learned how to refresh old hardwood floors with a screen-and-recoat, keeping the finish durable and beautiful. An interesting stat: properly maintained wood floors can add up to 2.5% to your home’s resale value. Keep grit uniform, coats thin, and edges protected, and you’ll reduce dust and prep time. Inspect for wear, sand only where needed, and apply even coats. With consistent care, your floors stay tone-on-tone for years and resist daily traffic better.