
To patch drywall holes from tiny nail indentations to large gaps, start by prepping a clean, dust-free area and gather your materials. For nail holes, apply lightweight spackling, press in, smooth, dry, then sand lightly. For bigger holes, choose a patch type—mesh for light, backing for solid support, or paper for embedding—and apply reinforced joint compound with feathered edges. Sand, prime, and paint to blend. If you keep going, you’ll master texture matching and flawless finishes.
What You’ll Need to Patch Drywall Holes
You’ll need a few basic items to patch drywall holes correctly. Gather a putty knife, premixed joint compound, a sanding block, and a Utility knife with a sharp blade. Have a drywall saw or utility knife for enlarging holes if needed, plus drywall tape for larger gaps. Use a sanding sponge to smooth edges and a small container for compound.
For fastening, select drywall anchors suitable for the hole size and weight you expect, ensuring secure mounting if mounting a fixture. A sanding cloth helps feather edges, while a paintable primer and matching textured compound enable texture matching. Keep a damp sponge handy to clean surfaces immediately after application, preventing dust carryover.
Measure, plan, and patch with controlled, crisp motions.
Quick Fixes for Tiny Nail Holes (Up to 1/4)
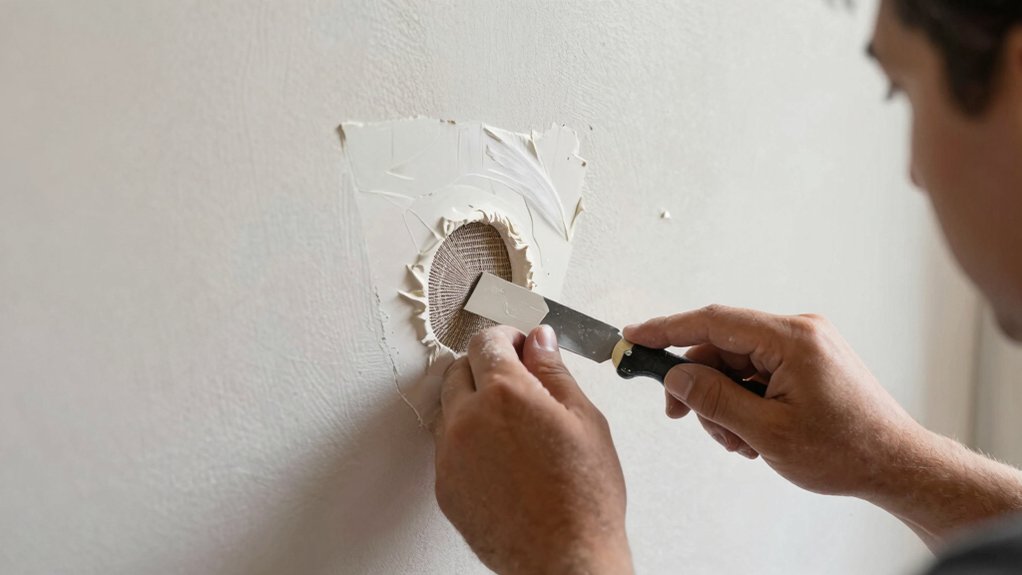
Small nail holes don’t require plastering or sanding a full patch—here’s a fast, reliable fix. You start with wall prep: clean the area, remove dust, and roughen a 1/4-inch circle around the hole.
Apply a thin coat of lightweight spackling with a cold chisel or putty knife, just enough to fill the bore. Press the compound into the hole, then scrape flat so it sits slightly proud.
Let it dry, then lightly sand to smoothness that blends with the surrounding surface. If texture exists, nudge the patch to mimic drywall textures—a gentle stipple or light brush helps.
Wipe away dust, prime, and touch up with matching paint. This quick repair preserves the finish without full patching effort.
Choosing Patch Options for Bigger Holes (Mesh, Backing, or Paper)
When patching bigger holes, you have several backing options to choose from: mesh, backing boards, or paper openings. Mesh offers a light, flexible base for small-to-medium gaps, but it may sag if the hole is oversized.
Backing boards provide solid support behind the patch, ideal for large voids where you can access both sides.
Paper openings, though less common, can work with careful embedding and layering for thin walls or sentimental textures.
Consider alternative patch materials only when standard options fail to hold or to better match wall properties.
Whichever backing you pick, ensure the substrate remains firm and flush with the surrounding drywall.
Plan texture matching early, so you can blend compound and finish for a seamless look.
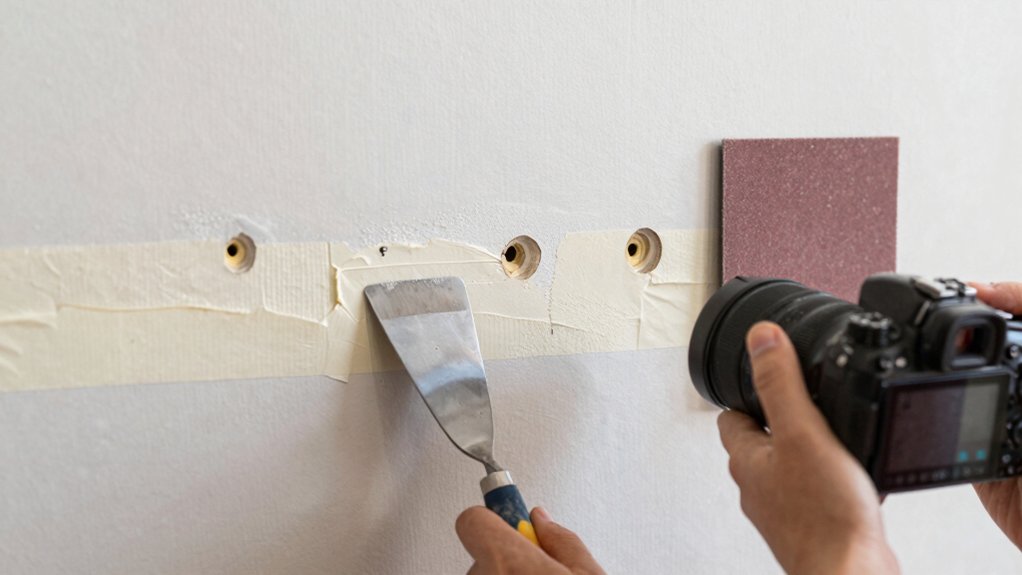
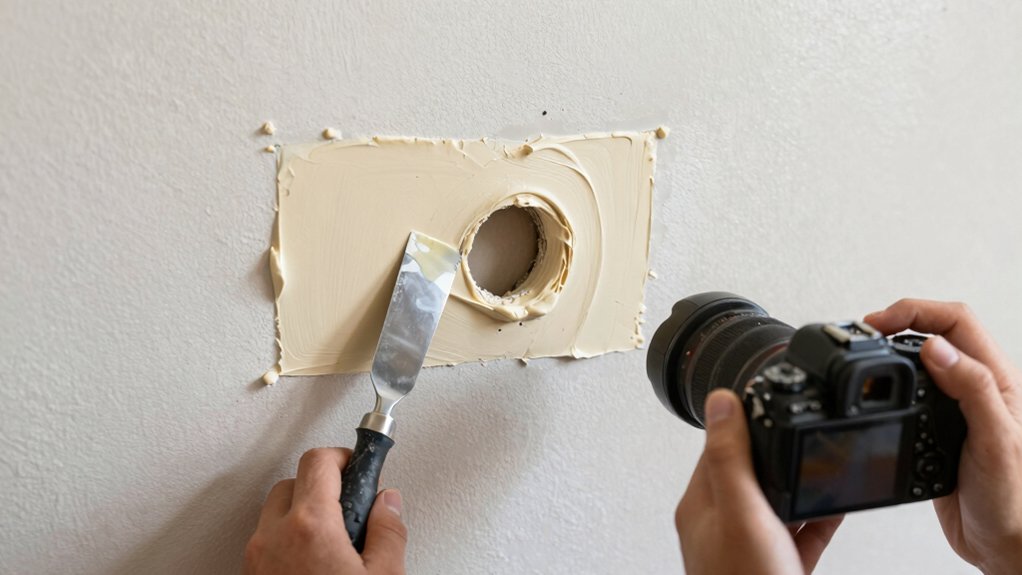
Step-by-Step Patching for Medium to Large Gaps
Assess your Patch Material Selection first, choosing a durable compound and backing that suit medium to large gaps.
Then outline a Stepwise Application Method, from masking and fastening to layered fills and feathered edges, so you finish with a smooth, paint-ready surface.
I’ll walk you through options and steps to guarantee strong adhesion, minimal shrinkage, and lasting results.
Patch Material Selection
Selecting the right patch material is essential for a durable repair. For medium to large gaps, choose a backing that provides strength and compatibility with your drywall core.
For holes up to several inches, standard joint compound alone won’t suffice; use a fiberglass mesh or paper tape embedded in compound to reinforce the seam.
Consider the backing’s rigidity: a patch with a rigid backing reduces sag and maintains flush alignment with the wall.
Match the patch size to the opening, aiming for overlap that fully covers edges.
Texture matching and adhesive selection must align with your finish plan: texture-mable compounds and compatible bonding agents ensure a seamless result.
Avoid lightweight fillers for large voids; prioritize materials designed for structural repair and long-term stability.
Stepwise Application Method
To patch medium to large drywall gaps, start by securing a solid backing and applying a reinforced joint compound layer that bridges the void. You’ll create a stable base for subsequent texture blending and a seamless finish, while drywall reinforcement prevents future cracking.
- Install backing material firmly, ensuring full support behind the gap.
- Spread a thick, reinforced joint compound to bridge the void and level with surrounding walls.
- Feather edges smoothly, allowing for controlled texture blending that matches the room.
- Allow proper drying, then sand lightly and reapply as needed for a flawless blend.
Sand, Prime, and Paint for a Flawless Finish
To achieve a flawless finish, you’ll focus on sanding for a smooth surface, priming for a uniform base, and painting to seamlessly blend edges.
Start with light, even sanding to reveal a true surface. Then apply primer to lock in color and hide patches.
Finish with precise painting to match surrounding walls and eliminate any telltale seams.
Sanding for Smooth Finish
Sanding for a smooth finish starts after you’ve filled holes and allowed the compound to cure. You’ll feather edges evenly, control dust, and guarantee a uniform surface before priming. The goal is texture matching with the surrounding wall while maintaining drywall reinforcement integrity.
- Select the right grit: start with 120–150, progress to 220 for a flawless surface.
- Use controlled passes: smooth long strokes, avoid gouges, and keep it flat.
- Check for high spots: feel with your hand and lightly sand any protrusions.
- Clean thoroughly: wipe dust, masks, and lighting visibility to confirm evenness.
This step emphasizes a precise finish, enabling precise texture matching and maintaining drywall reinforcement for a durable, professional result.
Priming for Uniform Base
After filling and smoothing, you’re ready to prime for a uniform base. Start with a high-quality drywall primer and a compatible roller or brush. Use a light, even coat to prevent lap lines and to seal dust left from sanding.
Check that the primer consistency is suitable for your surface; too thick or too thin causes uneven absorption. Apply in long, steady strokes, overlapping slightly to maintain uniform thickness.
Allow the recommended drying time before evaluating coverage; if edges still look uneven, apply a second thin coat rather than a heavy one. Avoiding thick layers helps prevent cracking and reveals fewer imperfections later.
When finished, the surface should read evenly under light, ready for the finish coat.
Painting for Seamless Blend
With a seamless blend in mind, you’ll sand any remaining high spots, prime to seal the repaired area, and paint with a finish that matches surrounding drywall.
- Sand until the surface is level with the surrounding texture, using a light touch to avoid gouges.
- Apply a compatible primer, ensuring full coverage to prevent flashing and to aid paint adhesion.
- Choose a paint with matching sheen, then blend edges by feathering strokes beyond the repair.
- Inspect for texture matching and paint blending, making touch-ups where needed for a flawless finish.
Common Mistakes and How to Avoid Them
One common mistake is rushing the patching process, which leads to poorly blended edges and visible seams. You can avoid this by planning repairs in stages and letting each layer dry fully before sanding or applying compound.
Misunderstandings about patch sizing, drying times, and compound consistency create weak repairs or cracks. Common misconceptions include expecting instant cures or using too little material to hold a patch securely.
Tool mistakes also derail results: using a dull knife, over-applying compound, or neglecting to clean joints before work wastes time and weakens adhesion.
To improve durability, maintain controlled pressure, feather edges gradually, and test fit patches before setting them. Respect drying intervals, and keep your workspace dust-free to prevent rough patches from forming.
Pro Tips to Blend Patches With Existing Walls
When patches are in place, you must blend them seamlessly with the surrounding wall to avoid noticeable ridges. To achieve a flawless finish, follow these pro tips:
- Match wall texture by recreating the existing texture with a brush, roller nap, or sponge before painting.
- Use paint matching to select the exact color shade and sheen; test on a small area and adjust as needed.
- Feather edges beyond the patch using light, broad strokes to prevent abrupt changeover.
- Apply thin, even coats and allow full drying between layers to guarantee uniform coverage and a smooth final surface.
Frequently Asked Questions
How Long Does Patching Drywall Typically Take From Start to Finish?
Patching drywall typically takes about one to three days start to finish, depending on hole size and drying conditions. You’ll measure, patch, sand, and paint; drywall drying time varies, but plan a patient patching timeline accordingly.
Can You Patch Holes Without Sanding or Priming?
Fact: 85% of homeowners patch more than one hole annually. You can patch holes without sanding or priming, but texture matching and patch size matter; you’ll achieve better results by feathering edges and using a compatible texture tool.
Is Joint Compound Safe for Indoor Air Quality During Drying?
Yes, joint compound can influence indoor air quality during the drying process. Use low-VOC products, guarantee good ventilation, and avoid lingering fumes. Keep windows open, fans circulating air, and monitor drying times to minimize air quality impact.
Which Patches Are Best for Curved or Uneven Wall Surfaces?
Flexible patches best for curved or uneven walls, offering conformability and strength. Use textured repair for a seamless finish, apply with lightweight joint compound, feather edges, and sand. You’ll achieve a durable patch that blends into irregular surfaces.
How Should You Repair Water-Damaged Drywall Before Patching?
Water-damaged drywall first needs drying, then inspection for mold; remove damaged sections, treat studs, and apply primer before patching. You’ll prevent mold with proper drying and sealing, ensuring water damage doesn’t weaken the repair.
Conclusion
You’ve learned the simplest and most reliable way to patch drywall holes, from tiny pinpricks to larger gaps. With the right materials and a careful approach, you’ll restore a smooth, paint-ready surface in no time. Don’t rush the sanding or the priming—skip those steps, and the finish will show it. Stay patient, and you’ll be back to flawless walls before you know it. In short, you’ll nail it—hole-free, every time.


