
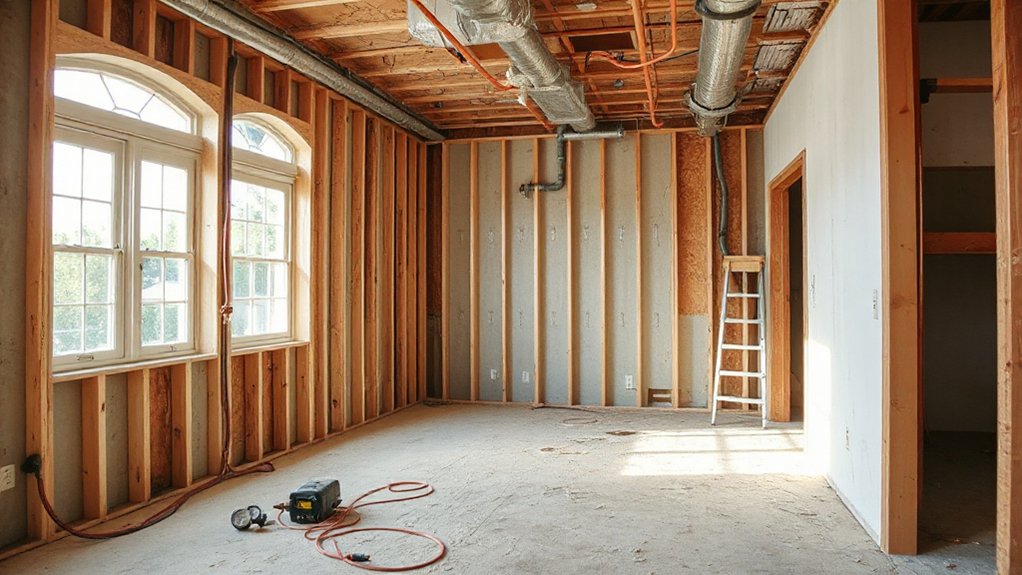
Like a cracked foundation under your feet, aging wiring can quietly threaten every upgrade you bake into your home. You’re weighing safety, code compliance, and modern convenience against the upfront cost, with potential long-term savings in reliability, energy use, and resale value. If your panel hums, outlets spark, or you’re stuck with nuisance trips, a rewire might be more than a mid-life upgrade. Curious how to decide between full rewiring and targeted fixes?
Do I Need a Full Rewiring or Targeted Upgrades?

Deciding between a full rewiring and targeted upgrades hinges on safety, cost, and long-term plans for the home. You’ll assess electrical risk, existing panel capacity, and whether outlets, switches, and fixtures meet modern demands.
If aging fabric shows brittle insulation, frequent tripping, or aluminum wiring concerns, a full rewiring may pay off in reliability and future-proofing.
Targeted upgrades work when your system basics are sound but you need better grounding, GFCI protection, or USB outlets in key rooms.
Consider the layout: are you renovating for color schemes or energy efficiency, or just restoring function?
Address insulation in tandem, since heat loss and moisture affect wiring longevity.
A clear plan keeps costs predictable and aligns upgrades with home insulation and aesthetic goals.
How to Spot Signs That Your Wiring Is Aging
Older wiring can show itself in flickering lights, frequently tripped breakers, or outlets that feel warm to the touch. These safety hazard signals aren’t something you should ignore, and they’re clues that aging wiring may be failing you.
Start here by noting these signs and planning a professional inspection to protect your investment.
Aging Wiring Clues
If you’re noticing flickering lights, frequently tripped breakers, or outlets that feel warm to the touch, your home’s wiring might be aging and in need of a closer look.
Start with a practical check of circuit breakers—feel for warmth, listen for buzzing, and note any frequent trips at peak usage.
Inspect visible wire insulation for cracking, discoloration, or melted sheaths near outlets and switches.
Pay attention to outlets that are hot, discolored, or loose, which signal poor connections or overload.
Look for outdated electrical panels, especially if they lack modern safety features.
Document age milestones (homes built before 1980).
If concerns arise, don’t delay—consult a licensed electrician to assess wiring conditions, estimate replacement scope, and map a reputable upgrade plan.
Safety Hazard Signals
Wiring aged beyond its prime can quietly pose real safety risks, so it helps to recognize concrete hazard signals before they escalate. You should watch for repeated tripped breakers, flickering lights, or outlets that feel warm to the touch.
Buzzing, crackling sounds, or a burning smell signal insulation breakdown and imminent fire risk. If outlets are loose, or you must use adapters or extension cords regularly, that’s a red flag for inadequate wiring or overload.
Visible discoloration, scorch marks, or melted plastic around sockets indicate serious damage and demand immediate attention. Don’t ignore isn’t-a-big-deal symptoms like intermittent power or dimming fixtures.
Prioritize a professional evaluation to prevent a fire hazard and circuit overload, especially in older homes with dated panels and wiring.
When Safety Codes Trigger a Rewiring Project
When safety codes demand a rewiring project, you’ll see it show up as concrete electrical code triggers you can’t ignore.
Aging wiring signals, like frequent trips or scorch marks, push you toward upgrading before they become costly failures.
Permit requirements arrive with clear steps, costs, and timelines, so you can plan, budget, and proceed with confidence.
Electrical Code Triggers
You’ll want to document mismatches between what you have and what the current code requires, especially in kitchens, baths, and outdoor circuits. Don’t overlook overloaded circuits or GFCI/AFCI requirements that now appear in many rooms.
Addressing these triggers early minimizes risk, reduces future repair costs, and streamlines permit approvals. In short, meeting electrical code triggers isn’t optional—it’s a practical step toward safer, more reliable power and lasting value.
Aging Wiring Signals
These indicators point to insulation degradation, inadequate gauge, and outdated grounding that can escalate risk during today’s power-use patterns. You’ll want to map every symptom to a plan: identify circuits overloading frequently, note flickering lights, and record receptacle age.
Prioritize essential upgrades first, then expand to expandability, so your system supports modern loads without frequent interruptions. Consider how vintage fixtures can coexist with new wiring by preserving aesthetics while upgrading safety.
In short, aging signals justify a focused, cost-aware approach to rewiring rather than reactive fixes. wiring aesthetics matters.
Permit Requirements Impacts
Permits aren’t just bureaucratic hurdles; they shape the safety scope and timing of your rewiring project. When safety codes trigger work, you’ll face permit requirements that dictate inspections, panel upgrades, and material standards.
This isn’t red tape for its own sake; it guarantees long‑term reliability and reduces fire risk, insurance headaches, and later retrofits. You’ll encounter permit obstacles like documentation gaps, code interpretations, and jurisdictional quirks that slow progress if you’re unprepared.
Plan for approval delays by mapping review steps, buffer time, and proactive communication with your AHJ and contractor. Align your scope with code expectations to avoid rework, stay within budget, and keep milestones intact.
A disciplined permitting approach turns compliance into a measurable, value‑adding feature of your rewiring project.
Understanding What a Rewire Covers (Vs Repairs)
A rewire isn’t a blanket fix for every electrical problem; it’s a targeted upgrade that replaces outdated wiring, panels, and safety systems to support modern loads and code requirements. You’ll understand what a rewire covers versus repairs as you plan, budget, and compare scope.
- Upgraded wiring and panels that handle higher currents
- New safety features like AFCIs and GFCIs where required
- Modern grounding and fault protection for longevity
- Wireless upgrades and aesthetic improvements that don’t compromise safety
When it comes to repairs, you’ll typically address single faults, nuisance trips, or worn outlets without overhauling the system.
A rewire aligns capacity with today’s devices while preserving reliability and code compliance, making it a future-proof investment.
Full Rewiring Vs Partial Upgrades: A Clear Decision Framework

You’ll compare scope and impact to decide whether a full rewire or targeted upgrades fit your project and timeline.
Use a cost-benefit framework to quantify upfront and long-term savings, safety improvements, and disruption.
This clear framework keeps your investment focused, justified, and ready for leverage with contractors and lenders.
Scope And Impact Analysis
How do you decide between a full rewiring and targeted upgrades? Scope and impact analysis helps you map risks, disruptions, and long‑term gains, so you choose confidently. You’ll weigh current faults, future needs, and how each option aligns with your home’s insulation and interior design goals.
- Assess current wiring age, condition, and code compliance.
- Identify critical circuits that limit safety or usability now.
- Estimate up-sell value through improved insulation compatibility and design flexibility.
- Compare total downtime, dust, and material fatigue against long‑term reliability.
This framework highlights practical implications—less invasive work today can support better interior design and safer, more energy‑efficient home insulation tomorrow.
You gain clarity, avoiding overruns and regret.
Cost-Benefit Decision Framework
Given what you’ve learned about scope and impact, you’ll now apply a practical cost-benefit decision framework to choose between full rewiring and targeted upgrades. You’ll compare upfront costs, disruption, long-term reliability, and code requirements against your goals.
Start with historical context: understand past wiring failures, longevity, and maintenance costs to gauge durability. Then assess aesthetic considerations, ensuring any upgrades respect the home’s character while meeting modern loads.
Quantify benefits in safety, energy efficiency, and appliance compatibility, translating each into dollars saved or risk reduced. Use a decision rule: if incremental upgrades approach the full rewiring cost within a reasonable risk window, favor targeted upgrades.
If risks or future upgrades demands exceed that threshold, pursue full rewiring. Document your assumptions, sensitivities, and decision criteria for clarity and accountability.
What a Full Rewire Typically Includes (Scope and Components)

A full house rewire typically covers more than just replacing old cables; it requires a complete assessment, careful planning, and careful implementation to meet current safety and code standards. You’ll outline scope, materials, and placement to minimize future disruptions and match your home’s needs.
Expect a thorough evaluation of panel capacity, conductor sizing, and grounding, plus updated receptacles and switches. Here’s what typically includes:
- Service entrance upgrade and new panel
- Modern wiring with proper routing, insulation, and labeling
- Grounding, AFCI/GFCI protection, and surge mitigation
- Updates to lighting circuits, outlets, and dedicated lines for high-demand devices
This work supports house decor integration and safe operation of smart appliances, keeping you insulated from surprises and downtime.
Hidden Costs to Expect in a Rewiring Project
Hidden costs often pop up once you’ve committed to a full rewire, so you’ll want to budget for more than just the quoted materials and labor.
Unexpected permit fees, inspection charges, and electrical permit renewals can add up quickly, especially in older homes with hidden framing or hidden joists.
Accessing walls, ceilings, and crawl spaces may require extra debris removal and temporary power, plus dust containment that prolongs the project.
Don’t overlook the cost of upgrading panels or adding surge protection to support a Smart home setup.
You might also encounter temporary relocation of appliances or utilities, which influences scheduling and living arrangements.
Finally, plan for future-proofing with Green energy considerations, like efficient outlets and charger installations to reduce long‑term operating costs.
How Much a Full Rewiring Costs by Home Size
As you size up a full rewiring, you’ll see costs scale with home size, wiring scope, and the number of circuits needed.
Labor and permit rates vary by location, so expect tighter budgets for smaller homes and higher figures for larger ones with upgraded panels or specialty circuits.
This is why a precise assessment of square footage, planned wiring scope, and local permit costs is your first, smartest move.
By Home Size Costs
Here’s how much you can expect to pay for a full house rewiring based on size: smaller homes with 1–2 bedrooms typically run around $4,000 to $7,000, while mid-sized houses with 3–4 bedrooms fall in the $7,000 to $15,000 range.
You’ll see costs shift with fixtures, labor, and accessibility, but size stays the anchor. Use this practical checklist to plan:
1) Assess wiring complexity
2) Get licensed bids
3) Consider future needs (home décor and landscaping design implications)
4) Schedule efficient work windows
Sticking to these points helps you forecast budgets, minimize surprises, and protect investments without delaying essential upgrades.
A precise scope keeps your space safe and ready for modern comforts.
Wiring Scope Variations
Wiring scope varies with more than just size, and that’s where the real cost shifts show up. When you size a full rewiring, you’re counting more than new cables. You’re accounting for older homes with vintage fixtures that complicate routes, heavier panels, and upgraded grounding.
If your aim is safety and reliability, you’ll address circuit overloads, which often require additional feeders, subpanels, and smarter breaker layouts. The presence of historic wiring, multiple vintages, or legacy bypasses can add minutes and materials to the job, not just feet of wire.
Expect differences between a compact condo and a sprawling estate, where lengthy runs, hidden channels, and attic or basement complexities drive variances. In short, scope clarity directly shapes the bottom line.
Labor And Permits Rates
Labor and permit costs scale with home size because bigger houses demand more crews, longer hours, and higher permit scrutiny. You’ll see prices rise with square footage, project complexity, and local permit fees, so expect a proportional bump as your footprint grows. Practical numbers help you plan, not guess.
- Larger homes add crew days, increasing labor charges.
- More wiring runs require extra materials and disposal costs.
- Permits scale with risk, inspection time, and code compliance.
- Home automation and smart technology upgrades can stretch budgets further, if included.
For a full rewiring, factor in optional smart tech, surge protection, and centralized control systems. Staying informed helps you balance safety, efficiency, and cost while protecting your investment.
Typical Price Ranges for Partial Upgrades Vs Full Rewires

Upgrading your home’s electrical system isn’t one-size-fits-all: partial upgrades cost far less upfront than a full rewire, but they can still deliver the safety and reliability you need if you know what to target.
In practical terms, partial upgrades typically run $2,000 to $8,000 for essential fixes like updated panels, new circuits, and modern outlets in a single area, depending on accessibility and material choices.
Full rewires generally start around $6,000 and can exceed $20,000, driven by square footage, labor, and the complexity of hidden wiring.
Historic preservation and aesthetic considerations influence decisions, since visible runs or restored period features may add costs.
Use a phased plan to align risk reduction with budget, emphasizing essential safety first, then scope creep.
How Rewiring Affects Your Insurance Coverage
Upgrading your electrical system can lower premiums by reducing risk, especially if you meet current electrical standards and upgrade outdated wiring.
Insurers look at how the new system adheres to code, the presence of properly sized breakers, and updated grounding to assess claim risk.
As you move forward, you’ll want to document the standards met and how the improvements reduce potential fire hazards to support favorable coverage terms.
Insurance Premium Impacts
Rewiring a house isn’t just a convenience—it can change your insurance, often lowering premiums when done correctly. You’ll appear as a lower risk to underwriters if you upgrade to modern circuits, AFCIs, and grounded outlets. Here’s how it pays off:
- Reduced fire risk from older wiring translates to fewer claims.
- Modern panels handle load surges, supporting safer, affordable coverage.
- Home automation integrations can qualify for discounts when properly installed.
- Wiring aesthetics improve inspection scores and can lower premium classification.
Keep documentation handy: permit records, inspector notes, and product certifications.
Electrical System Standards
Even when it’s not obvious, your electrical system standards directly shape your insurance terms: modern panels, AFCIs, and properly grounded outlets reduce risk for insurers, which can translate into lower premiums or broader coverage. When you rewire, you’re not just upgrading capacity; you’re documenting safety compliance that insurance underwriters trust.
Think about lighting aesthetics paired with proper circuit design, ensuring dimmers and fixtures won’t overload circuits. AFCIs protect bedrooms and living spaces from arc faults, a common source of fires, while modern panels simplify claim processing and code conformity.
Appliance compatibility matters too: dedicated circuits for high-demand devices prevent nuisance trips and overloading. Clear labeling, updated manuals, and code-adherent installations communicate reliability, smoothing endorsements and maintenance requirements you’ll meet over time.
Claim Risk Reduction
Why does rewiring matter for your coverage? Your insurance stance hinges on safety and reliability. Modern wiring lowers fault risk, shaping claims dynamics and premium eligibility. If you delay, you’ll face higher deductibles or denied coverage after a fire or arc fault.
The impact is practical: it signals your proactive stance to underwriters and reduces exposure to costly repairs. Remember, reliability concerns are core to policy decisions, and upgrade necessity often translates to lower risk scores.
- Lower fault likelihood due to updated materials and arc-fault protection
- Clear documentation of compliance improves underwriting confidence
- Fewer nuisance claims from outdated wiring, stabilizing premiums
- Faster claim resolution when your system meets current safety standards
Budgeting Tips: Financing a Rewiring Project
Securing the right funding for a rewiring project starts with a clear, realistic budget and an honest appraisal of your options. You’ll compare cash, loans, and lines of credit, noting interest, fees, and repayment terms.
Prioritize cost certainty by obtaining multiple quotes for both materials and labor, and build a contingency of 10–15% for surprises.
Consider phased financing if you’re upgrading wiring incrementally, and align debt with expected property value gains.
To protect your investment, factor in long-term savings from safer electrical systems, not just upfront costs.
Tie budgeting to home decor goals and neighborhood safety improvements, so improvements reinforce property value.
Keep documentation organized, track expenditures in real time, and revisit your plan quarterly to avoid overextension.
How to Plan a Rewiring Project for Minimal Disruption

To minimize disruption during a rewiring project, map out a clear phased plan that keeps essential functions running and daily life uninterrupted. You’ll reduce stress by prioritizing zones, scheduling work around routines, and protecting living spaces with temporary enclosures. Focus on accepting a realistic timeline and clear milestones so expectations stay aligned.
- Define critical circuits first, then stage tasks by room to contain dust and noise.
- Install decorative lighting in advance where possible to avoid rebundling later.
- Use vintage fixtures where feasible to preserve character without slowing progress.
- Establish daily off-limits zones and clean-up routines to maintain safety and comfort.
This approach minimizes disruption while delivering a reliable, updatable electrical system.
What to Ask Your Electrician Before Work Starts
Before the first tool is touched, you should have a clear list of questions ready for your electrician so you know exactly what to expect.
Start by confirming scope: wiring layout, circuit counts, and a written plan with timelines. Ask about load calculations, panel capacity, and whether the job supports future upgrades like home automation.
Verify code compliance, permits, and inspection steps, plus waste removal and safety measures.
Discuss materials—types of conductors, insulation, and digital tagging for easy maintenance.
Request a breakdown of costs, contingencies, and warranty terms.
Address vintage wiring concerns: compatibility, additional grounding, and modern receptacle standards.
Finally, affirm accessibility of critical areas, potential nuisance factors, and a clear communication channel for updates.
This clarity prevents surprises and protects your investment.
Choosing the Right Contractor: Bids, Credentials, and Processes
Choosing the right contractor starts with clear bids, solid credentials, and a practical process. You’ll compare proposals not just on price, but on scope, timelines, and how risks are managed.
Look for transparent communication, documented electrical safety practices, and proof of contractor credentials. Here’s a focused checklist:
1) Compare bids side by side, noting included materials, permit fees, and cleanup.
2) Verify licenses, insurance, and trade certifications for all lead tradespeople.
3) Confirm project timeline, milestones, and change-order procedures.
4) Review safety protocols, especially around electrical safety, arc fault protection, and emergency contacts.
Energy Efficiency Gains From Modern Wiring and Breakers
Modern wiring and advanced breakers deliver tangible energy savings by reducing wasted power and preventing costly faults. You’ll notice efficiency gains when circuits are properly sized and modern panels limit heat buildup, lowering utility strain and cooling loads.
Smart switches let you schedule and automate lighting, turning off unused rooms without sacrificing convenience, so you cut idle electricity use without compromising comfort.
Circuit breakers provide selectivity and rapid tripping, reducing energy losses from nuisance faults and protecting devices from surges that degrade efficiency over time.
Better wiring practices also minimize phantom loads and voltage drops, delivering steadier performance in high-demand areas like kitchens and home offices.
In short, upgraded wiring and smarter breakers translate to measurable, ongoing energy reductions.
The Long-Term Savings: Reliability, Energy, and Resale Value
Upgrading wiring and panel systems pays off over time by boosting reliability, cutting ongoing energy waste, and enhancing resale appeal. You’ll notice steady savings and fewer outages as circuits handle modern loads with better protection.
The long-term value isn’t just utility; it touches your home’s look and curb appeal through smarter choices in Home décor and landscaping design, creating cohesive upgrades.
1) Reliability spikes with updated breakers and grounded outlets.
2) Energy costs shrink from efficient lighting, HVAC controls, and modern appliances.
3) Resale value climbs as buyers recognize a safer, future-ready foundation.
4) Aesthetics improve with clean wiring layouts that suit design dreams and outdoor spaces.
Focus on practical upgrades that blend function and style, avoiding clutter while supporting thoughtful landscaping design.
Scheduling and Timeline Expectations for Most Homes
Set a practical sequence: permits, material lead times, rough-in, inspection windows, and final connections. Build buffers for delays, especially when coordinating licensed electricians and potential DIY safety constraints.
Communicate clearly with your crew about preferred work hours, access needs, and dust control. Track progress with a simple checklist and weekly updates to stay aligned.
Expect temporary compromises to home aesthetics during the project, but keep the finish line in sight. A disciplined schedule reduces stress, protects safety, and keeps the project on track.
Warranties and Post-Install Support You Should Expect
A solid warranty and clear post-install support are essential safeguards for your investment, so you know exactly what’s covered and for how long. You should expect practical coverage that includes upfront limits, response times, and clear remediation paths.
When you pursue wireless upgrades or other improvements, confirm serviceability, on-site fixes, and material replacements if needed.
For post-install support, look for proactive maintenance reminders and accessible guidance to prevent future issues.
Consider warranties that transfer between owners and specify failure thresholds, not just cosmetic promises. Make sure vendor commitments cover both electrical safety and performance.
- Coverage specifics, exclusions, and duration
- Response times and on-site visit windows
- Transferability and accessibility of support
- Documentation for wireless upgrades and aesthetic improvements
Frequently Asked Questions
How Long Does a Full House Rewiring Typically Take?
A full house rewiring typically takes about 1 to 3 weeks, depending on size and access. You’ll improve electrical safety and support modern technology, with careful planning to minimize disruption and guarantee code-compliant, reliable power throughout your home.
Can You Retrofit Upgrades Without a Full Rewiring?
Yes, you can retrofit upgrades without a full rewiring, but prioritize electrical safety first, using targeted upgrades and inspections. A thoughtful cost comparison shows smaller fixes may save money now, yet hidden risks could undermine long-term reliability.
What Risks Come With Delaying Rewiring?
Delaying rewiring heightens electrical hazards and risk of fire, plus sudden outages. You’ll face higher cost considerations later due to escalating labor and material prices, infrastructure wear, and insurance penalties. Act now to protect safety and long-term value.
How Disruptive Is a Full Rewiring for Daily Life?
You’ll find full rewiring noticeably disruptive, yet you’ll recover quickly: 1 in 3 electrical incidents involve daily life interruptions. You’ll regain safety and comfort, enjoying electrical safety and modern conveniences, with disciplined planning, temporary loss minimized, and steady progress.
Will Insurance Cover Partial Rewires or Only Full Rewires?
Insurance coverage varies, but partial rewires can be eligible, depending on risk and policy terms; full rewires aren’t automatically required. You should review your policy’s exclusions and endorsements, compare rewire types, and negotiate with your insurer for clarity.
Conclusion
You’re standing at the edge of a decision that prices safety and future-proofing against today’s convenience. Rewiring isn’t just adding breakers—it’s safeguarding memories, appliances, and your family. Will you gamble on unreliable wiring or choose a solid, code-compliant system that grows with you? The clock’s ticking: the right upgrade today can prevent tomorrow’s costly repairs. Bet on certainty, trust the plan, and reveal a home that’s ready for whatever comes next.




