Choosing between wired and battery-powered hinges on your home’s wiring and flexibility. For wired, make certain transformer voltage, chime compatibility, and secure wiring before mounting; restore power and test alerts after installation. For battery-powered, pick a level spot, mount the bracket, install the battery, and verify button, chime, and motion settings. Test live view, audio, and night vision, then tune motion zones. If you want a deeper, step-by-step guide, you’ll find more practical details ahead.
Which Doorbell Fits Your Home: Wired or Battery?

Choosing between a wired and a battery-powered doorbell hinges on your home’s wiring, power needs, and installation goals. You evaluate existing circuits, transformer capacity, and the desired reliability.
If you already have a capable doorbell chime circuit and want constant power, a wired model minimizes maintenance and guarantees consistent performance.
If you prefer easy setup and no wiring, a battery-powered unit offers quick installation with minimal disruption.
In either case, consider Wireless security implications and how the device integrates with your smart home ecosystem.
Wired doorbells typically deliver steadier performance, brighter live video, and faster motion alerts when connected to a robust power source.
Battery models prioritize flexibility, simple relocation, and future upgrades as your Smart home integration evolves.
What a Smart Doorbell Delivers (Capabilities and Quick Wins)
Smart doorbells deliver more than a ring at the door. You gain instant sightlines, two‑way talk, and activity logs that timestamp visitors and events.
With a wired or battery model, you’ll see sharper video, adapt motion zones, and receive alerts tailored to your home’s patterns. Quick wins include hands‑free answers, remote snapshot sharing, and integration with smart home platforms for routines and automation.
Video tutorials help you verify setup steps, test Wi‑Fi stability, and confirm cloud or local storage options. User reviews highlight reliability under various weather conditions and app responsiveness on low‑power devices.
In short, you reduce guesswork, improve security, and shorten response times, turning doorbell moments into clear, actionable insights.
Gather Your Tools and Safety Gear
Before you start, gather your safety gear—gloves, eye protection, and a flashlight—and lay out the essential tools you’ll need. Have a screwdriver set, a voltage tester, a drill, and a level ready, plus a smartphone or notebook to reference instructions.
This step sets the foundation for a safe, efficient installation.
Gather Safety Gear
Gather the right tools and safety gear before you start. You’ll work faster and safer if you check basics first: gloves, eye protection, and a non-contact voltage tester. Keep a sturdy ladder, a utility knife, and a small flashlight within reach. Wear slip-resistant footwear and, if you’ll be indoors, protect floors with a drop cloth.
Inspect your doorbell wiring and the mounting surface for damage, debris, or moisture. Have a magnetic screwdriver and a multimeter handy for quick checks without exposing live circuits.
Plan doorbell placement with security considerations in mind, avoiding overly exposed locations. Keep a toolkit organized to prevent misplacing parts, and resist rushing through steps. Following these precautions reduces risk and supports precise installation.
Prep Essential Tools
To prep essential tools, assemble the core items from your toolbox and verify safety gear is ready before you plunge in. You’ll need a drill with bits, screwdriver set, level, wire cutters, and voltage tester. Have a pencil, tape measure, and spare screws on hand.
Put on safety glasses and gloves, and confirm a sturdy ladder is available if you’ll work at height. Prepare a weatherproof, labeled container for fasteners and connectors.
Plan wiring routes near security cameras and outdoor lighting locations to minimize run lengths and exposure. Keep a multimeter for testing circuits.
Double-check that power is off before touching live components. Clear the area of trip hazards, and maintain tidy work space to avoid mistakes.
Install a Wired Smart Doorbell: Step-by-Step
First, you’ll verify wiring compatibility and power needs to confirm your existing doorbell circuit can support a wired smart model.
Next, you’ll review the power requirements and any transformer or chime kit upgrades needed before you begin.
Finally, you’ll outline the installation steps at a high level, so you know what to expect when you start the actual wiring and mounting.
Wiring Compatibility Check
Before you install a wired smart doorbell, verify your existing doorbell wiring and transformer meet the device’s minimum requirements. You must assess wiring standards and voltage compatibility to prevent underperformance or damage.
If your transformer delivers less than the listed voltage, replace it or choose a compatible model. Check wire gauge and insulation for safe operation under load. Confirm there’s a common terminal or suitable chime compatibility, so the doorbell rings reliably.
Ensure no existing alarms or power-sharing circuits conflict with the new unit. If in doubt, pause installation and consult the manufacturer’s specs. Poor compatibility causes false triggers or ghost current, undermining security.
- Verify transformer voltage rating matches the doorbell’s spec
- Inspect wire gauge and insulation for safety margins
- Confirm chime compatibility and wiring terminals
- Identify any shared circuits or power-sensing features
Power Requirements Overview
Power requirements define what your wired smart doorbell needs to operate reliably. You’ll verify two core factors: power source and voltage requirements. Your doorbell must draw steady current from a compatible transformer or power circuit; fluctuations can cause rebooting, camera lag, or intermittent loss of connectivity.
Check the manufacturer’s listed voltage range, typically around 16–24 VAC, and confirm the transformer is rated for the doorbell’s current draw. If your doorbell supports a chime wiring option, ensure the chime unit shares the same power source without overloading the circuit.
Avoid running directly off a house 120 V outlet, which risks damage. Maintain proper wiring gauge and secure connections. Inconsistent supply or improper gauge can reduce performance and shorten the device’s life.
Installation Steps Overview
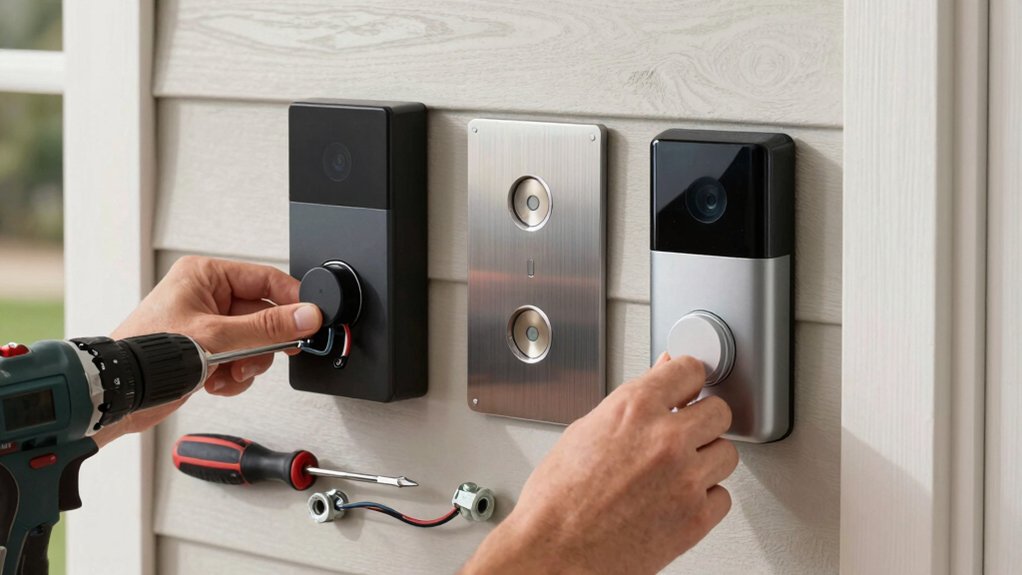
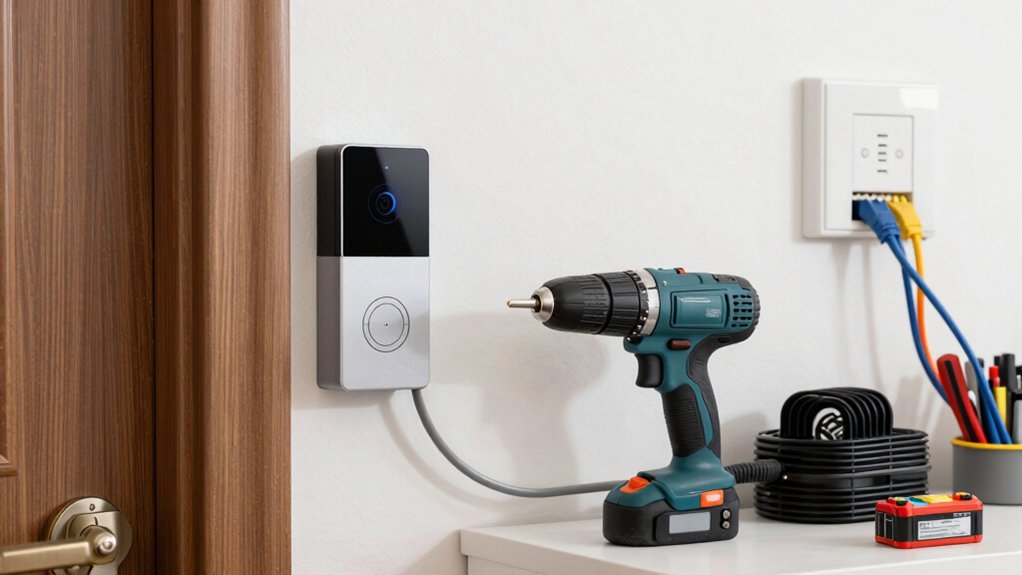
To install a wired smart doorbell, start by turning off power at the transformer and mains, then verify the doorbell’s mounting area and wire routing. You’ll plan doorbell placement to optimize camera view and chime location, ensuring secure mounting.
Next, follow wiring safety practices: confirm voltage compatibility, strip conductors properly, and avoid pinched or exposed wires. Mount the bracket if needed, align the chime, and attach the doorbell unit.
Connect wires to the terminal screws without forcing connections, then secure with screws and tighten firmly. Finally, restore power, test the unit, and verify motion detection, notification alerts, and doorbell chime.
If issues arise, recheck wiring connections and transformer load. Review the wiring safety against local codes before finalizing installation.
- doorbell placement
- wiring safety
- compatibility checks
- testing procedure
Install a Battery-Powered Smart Doorbell: Step-by-Step
If you’re installing a battery-powered smart doorbell, start by choosing a spot at about eye level near the door and within reach of the doorbell’s mounting screws.
Position the device for ideal field of view and unobstructed button access, then mark the screw holes.
Use a level to ensure straight alignment, and drill pilot holes if required.
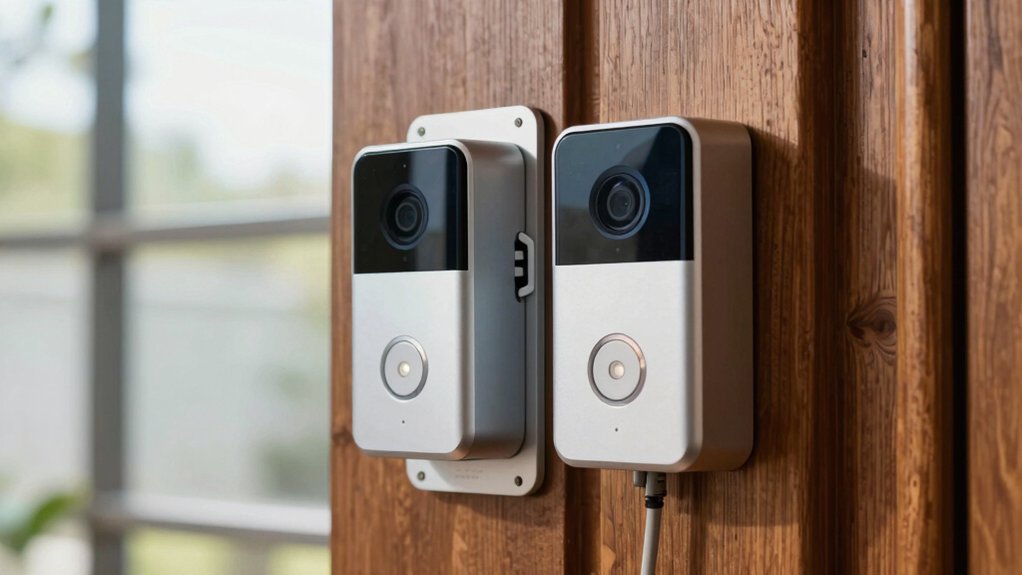
Attach the mounting bracket securely, then slide the doorbell onto the bracket until it clicks.
Install the included battery, ensuring proper orientation and connection.
Verify the unit sits flush against the wall, with no gaps.
Test the doorbell button and chime, and adjust the mounting height if needed.
Consider doorbell design and installation location to maximize sensor range and motion detection while maintaining a clean exterior.
Avoid obscuring the camera or sensor.
Power, Network, and Compatibility Essentials
A smart doorbell’s performance hinges on reliable power, a stable network, and broad compatibility. You’ll optimize by confirming power options, ensuring the battery life meets daily use, and verifying Wi Fi signal strength at the door.
Choose a model with supported voltages and a battery that tolerates your climate and usage patterns. Network compatibility matters: pick one that supports your router’s standard, channels, and security settings, and consider a dedicated chime when needed.
Compatibility with smart home ecosystems expands control and automation opportunities.
- Power options: wired vs. battery, voltage range, and backup capacity
- Battery life expectations and replacement cadence
- Wi Fi signal requirements and boosting tips
- Broad ecosystem compatibility and future-proof features
Setup, Pairing, and Testing Your Features
Once you’ve powered and connected the doorbell, start with a clean setup by following the manufacturer’s app-guided steps to enroll the device, link it to your Wi‑Fi, and assign a name for easy identification.
Next, initiate pairing in the app, confirming your doorbell appears as a connected device and noting the signal strength.
Enable essential features—motion zones, doorbell chime, and notification preferences—then test live view and two-way audio to verify clarity.
Use in-app tutorials or the provided user manuals to validate settings, save a secure password, and enable firmware updates if prompted.
Conduct a quick test at a stable angle, confirming consistent video and audio during daytime and low-light conditions.
Refer to video tutorials for visual confirmation and consult user manuals for advanced configuration.
Troubleshooting Quick Fixes and Common Problems
Start by identifying the most common issues and applying quick, proven fixes. You’ll tackle signal drops, unresponsive buttons, and video lag with targeted steps.
Check battery life first on battery models, replacing or recharging as needed to restore performance. For wired units, verify doorbell power supply stability and correct transformer voltage to prevent resets.
If responses lag, perform a firmware updates check—install current releases to fix known bugs and improve efficiency. Reboot the device after updates to solidify changes.
If you still see glitches, inspect mounting and wiring for loose connections, and confirm the app has needed permissions.
Regular maintenance prevents recurrence and extends reliability.
- Battery life tips and replacement timing
- Firmware updates importance and cadence
- Reboot and reset best practices
- Wiring and mounting verification
Frequently Asked Questions
How Long Does a Smart Doorbell Typically Last on Battery?
A typical smart doorbell lasts several weeks to a few months on battery, depending on usage and features. You’ll maximize battery life with motion-activated recording and reduced notifications, boosting longevity and ensuring you get timely alerts without frequent recharges.
Can I Use Existing Chime With a Smart Doorbell?
Did you know 60% of smart doorbell owners report ideal switchover with existing chime? You can, but you need chime compatibility confirmation and potential wiring modifications. Verify compatibility, power requirements, and transformer compatibility before installing.
Do Wired and Battery Doorbells Require Different Doorbell Wiring?
Yes, they require different doorbell wiring setups. You must match power needs for each model; check compatibility. Your doorbell wiring should support the smart doorbell’s voltage, and confirm smart doorbell compatibility before installation.
Is a Subscription Needed for Video Storage and Features?
Yes, you typically need a subscription plan for video storage and features. You’ll access video storage via a subscription plans, which vary by company and plan, offering longer retention, advanced alerts, and cloud access.
How Do I Improve Wi-Fi Signal for Doorbell Video?
To improve your doorbell video, use Wi Fi extenders or signal boosters to strengthen the connection, place the router closer, reduce interference, and verify your doorbell supports 2.4 GHz. Test speed and stability after adjustments.
Conclusion
Installing a smart doorbell is a smart move, but pick wired or battery based on your home’s needs. You’ll gain instant alerts, clearer video, and remote access, with power and Wi‑Fi reliability driving performance. Follow the step-by-step setup, pair it correctly, and test each feature. If problems pop up, use quick fixes before calling support. Adopting the right model is like installing a reliable guard—always ready, always nearby to answer the door. You’ll wonder how you ever managed without it.