
To silence squeaky wood floors from above or below, start by pinpointing the movement spots—walk and press to feel flex or gaps, marking hot zones. From above, tighten loose boards with shallow nails or screws, or add thinning shims at contact points and a touch of wood glue. From below, tighten joists, re-secure subfloors, or sister nearby joists for stiffness. Use lubricants sparingly on moving joints and reseat gaps; more detail awaits.
Diagnose Squeaks: Quick From-Above or From-Below Evaluation
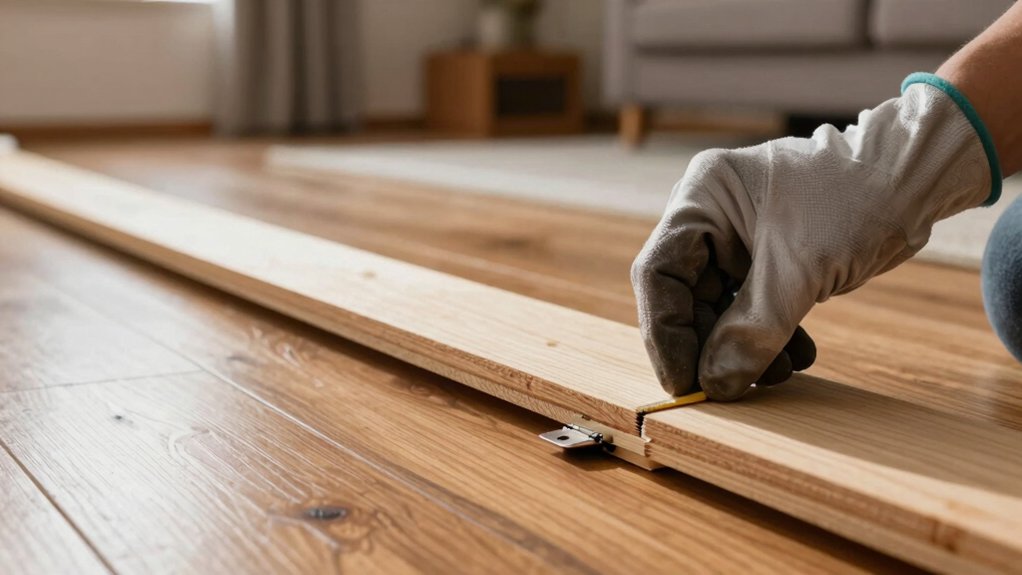
If you hear squeaks, start by quick, practical checks from above or below to pinpoint the culprit. You’ll look for loose boards, gaps, and nails that sit high against the plank.
From above, walk the floor and press down on every suspect area; you’ll feel where a board flexes or lifts.
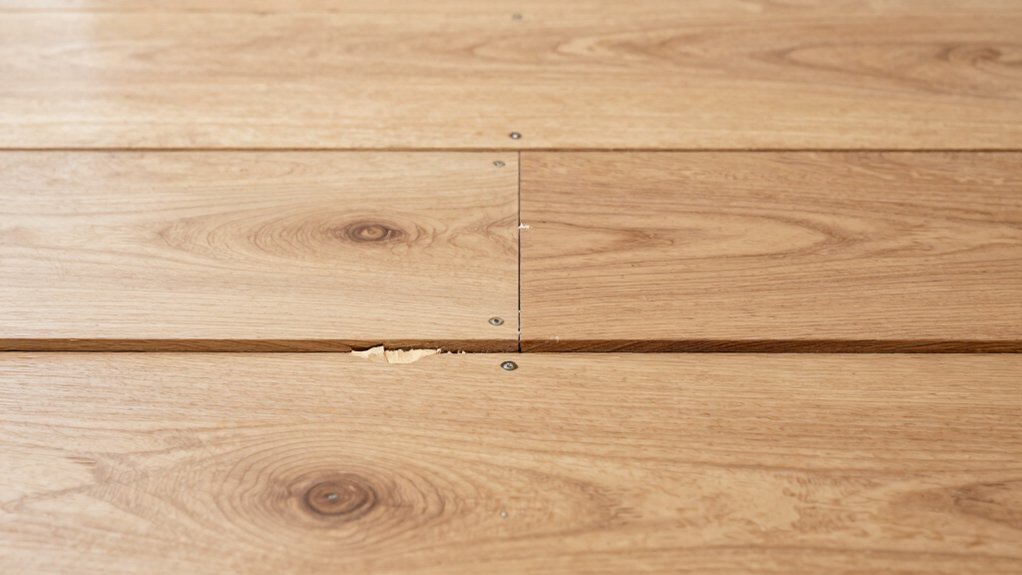
From below, listen at the joist level and scan for visible shifting or daylight between boards.
Note patterns: multiple squeaks in a single run suggest loose fasteners or corner joints, while isolated noises point to individual boards.
Consider wood expansion and moisture control as root causes—seasonal shifts tighten or loosen gaps.
Mark hot spots, then plan precise, minimal interventions to reduce movement without overreacting to normal settling.
Quick Fixes to Try Before Drilling
Before drilling, try quick, non-destructive fixes that can stop most squeaks. You’ll first identify high-traffic boards and hinge points, then work with simple shims or adhesive to restore tight contact between boards and joists.
If gaps exist, drive thin shims or blocks behind the squeaking area using care to avoid fastener damage. For loose boards, add a few drops of wood glue at pinpoint contact and clamp until set.
Loose nails can be reset with a nail set and finishing nail to pull the board down. Consider temporary soundproofing options like rugs or mats during testing, but focus on durable flooring materials for lasting relief.
If noise persists, reassess subfloor integrity and explore long-term soundproofing options.
Secure Loose Boards From Above
Start by tightening the fasteners you can reach from above to secure any loose boards.
If a board still squeaks, re-check the fasteners and add screws or nails where needed, focusing on the surrounding joists.
This approach prioritizes securing loose boards first, then evaluating other fixes.
Secure Loose Boards
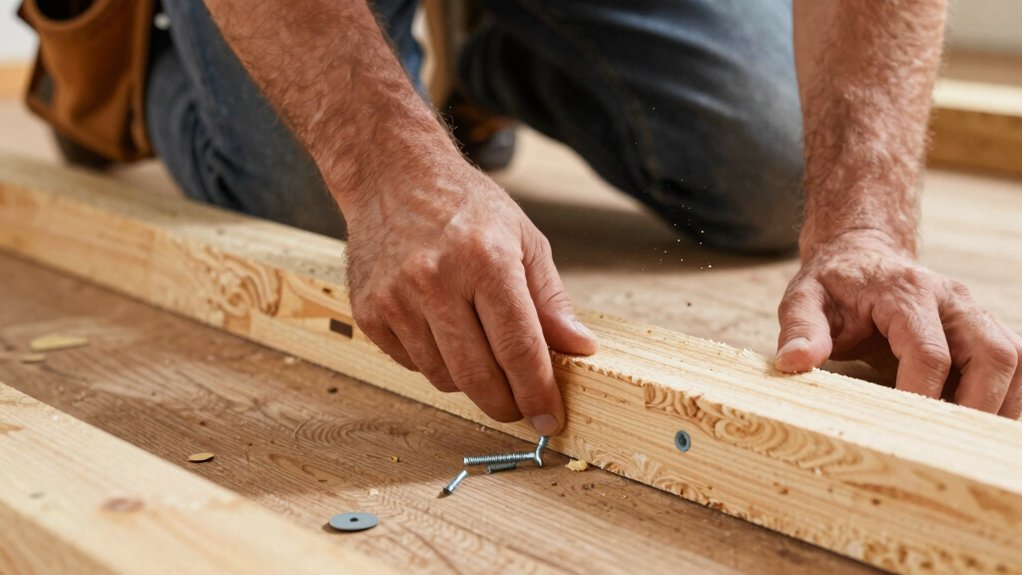
To secure loose boards from above, start by identifying all affected planks and evaluating their movement. If a board shifts under your weight, you’ll want to gauge whether the fasteners or the subfloor beneath are the real cause.
Use a pry bar carefully to reveal hidden nails without bending the wood, then drive shallow, firm nails at slight angles into solid framing or joists. If nails won’t grab, switch to staples or screw fasteners with a countersink to minimize raised edges.
Recheck for movement after each adjustment, applying gentle pressure along the plank’s length. For persistent squeaks, consider adding thin shims or adhesive as a secondary measure.
Focus on stable contact, because better flooring materials translates to noticeable noise reduction.
Tighten Fasteners First
Tighten fasteners first to stop most squeaks right at their source. From above, walk the floor and locate loose strips or boards, then tighten screws or nails just enough to pull them flush without overtension. Use fastener types that suit your subfloor and joists—stainless or coated screws for moisture resistance, ring-shank nails for grip, or finish nails for delicate panels.
Don’t overdrive; boards can bow as wood expansion occurs with humidity changes. If a nail head sits proud, countersink slightly and drive deeper, then dab with wood filler. When tightening, test by walking and pressing on suspect areas.
Repeat process across trouble spots, prioritizing high-traffic boards. This approach minimizes movement, reduces noise, and preserves floor integrity without major repairs.
Tighten Joists and Subfloor From Below
If creaking stems from loose joists or a loose subfloor, securing them from below is a practical, effective fix. You’ll start with access under the floor and locate squeaky zones, then tighten hangers, screws, and nails to restore solid contact.
Focus on joist reinforcement by driving low-profile fasteners or using structural screws that grab the framing without splitting. For the subfloor, identify lifted edges and re-secure with ring-shank or sinew-free screws at regular intervals, then stagger fastener placement to avoid splitting.
Check for full bearing against the joist flange and reseat any gaps. Once fasteners bite firmly, test by walking the area to confirm quiet, even support. This approach minimizes ongoing movement, delivering durable subfloor tightening and lasting silence.
Stop Gaps and Reduce Friction With Shims and Lubricants
Shims can precisely close gaps between floorboards and joists, stabilizing the surface you walk on.
Use lubricants sparingly and safely to reduce friction without attracting dust or residue.
Apply techniques that keep the wood intact and the floor level, then recheck for squeaks after seating.
Use Shim Techniques
To quiet squeaky floors, you can use shim techniques as a practical stop-gap and friction reducer. You’ll place shims where the floor joists or subfloor lack support, stabilizing high spots without removing existing boards.
Start by locating the source of movement with foot taps, then insert thin wood shims between the joist and subfloor at the squeak’s location. Use a small drill or nail set to drive shims in gradually, testing after each adjustment.
For persistent creaks, combine wood shimming with strategic sistering of nearby joists to improve overall stiffness. Keep shim thickness modest to avoid compressing the subfloor.
This approach supports floor integrity and minimizes movement, guiding you toward effective floor joist repair without overhauling the structure.
Apply Lubricants Safely
Lubricants can quiet squeaks when used carefully alongside shims, but they aren’t a substitute for solid support. You apply lubricants only to moving parts or contact points identified during inspection, avoiding exposed floors or unfinished grain. Choose a silicone-based or wax lubricant sparingly, and test in a small area first. Wipe away excess to prevent dust buildup and staining. Keep tools ready, and work methodically to minimize mess and slip hazards.
If you hear new creaks after lubrication, you likely need additional shims or reinforcement. This is about noise reduction with precautions, not a shortcut that compromises structure. Safety precautions matter: wear gloves, ventilate space, and avoid penetrating finishes or glue joints.
- Inspect contact points for lubrication only where recommended
- Apply sparingly and wipe excess immediately
- Test after each adjustment before proceeding
- Use appropriate PPE and ventilated area
- Recheck floor stability if new creaks appear
Fix Warped or Cupped Boards Without Full Replacement
Warped or cupped boards can derail a quiet, stable floor, but you don’t have to replace entire sections to fix them. Start by identifying the high, low, and bowed edges with a straightedge. For cupped boards, the center is higher than the edges; for warped boards, one side lifts.
Stabilize moisture first, since wood expansion and contraction drive warping. Control humidity in the room to slow further movement, and allow the boards to acclimate before fixes.
If edges lift, drive thin shims or plywood patches under the raised sides, then recut excess for a snug fit. For cupped boards, clamp and squeeze glue into the seam, then re-nail at staggered angles to pull the board flat.
Check long-term: maintain consistent moisture control to prevent recurrence.
Quiet Crawl Spaces and Basements: Practical Tips
Quiet crawl spaces and basements can quietly undermine a home’s comfort if you ignore them. You’ll curb squeaks and dampness by prioritizing practical steps that actually work, not grand promises. Focus on accessible improvements first, then expand as needed.
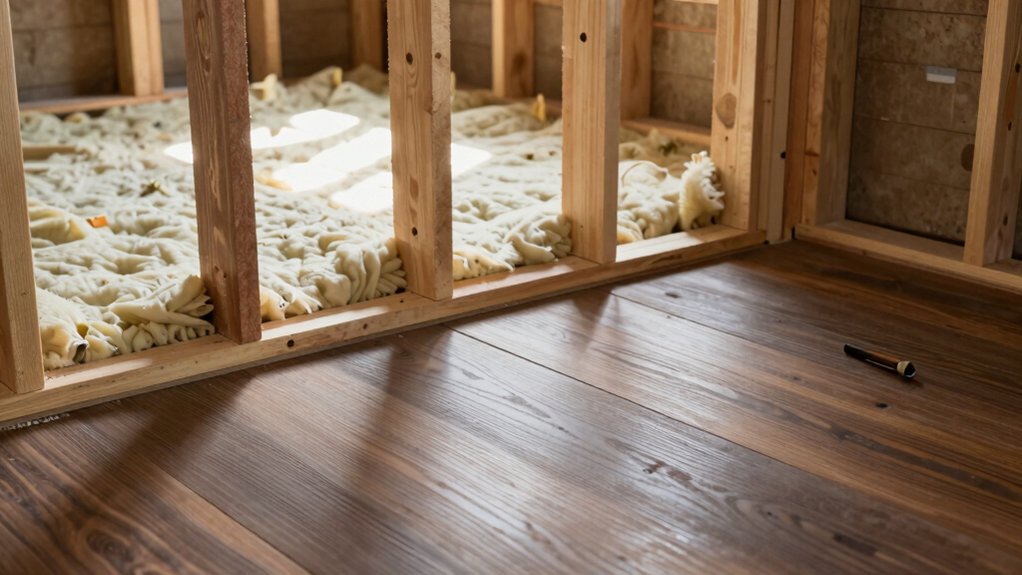
Noise reduction starts with sealing gaps, adding solid barriers, and choosing vibration-friendly materials. Insulation options matter too, because keepin’ the space stable reduces sound transmission and temperature swings that aggravate boards.
- Seal air leaks around rim joists and ducts
- Install rigid foam or mineral wool on walls
- Add a moisture barrier and vapor retarder
- Use resilient channels or decoupled supports
- Keep vents and sump areas clear and dry
Nails vs. Screws: Which Fasteners Keep Floors Quiet Longer
When you tighten floors, screws generally win on long-term quiet and hold up better under movement.
Nails can work, but their grip tends to loosen with seasonal shifts, ironically causing more creaks over time.
We’ll compare durability, ongoing quieting, and how installation choices shape performance, so you can pick the right fasteners for lasting silence.
Nails Versus Screws Durability
Nails and screws each have a role in keeping floors quiet, but their durability differs under load and movement. In a durability comparison, you’ll see screws resist loosening better over time due to higher shear strength and defined bite. Nails distribute stress more broadly, but can loosen as wood moves, especially with seasonal changes.
Fastener types influence creep, withdrawal resistance, and edge separation, so choose accordingly. For quick fixes, nails finish flush but may need re-torqueing; screws stay secure longer with solid clamping. Consider the substrate, joist spacing, and traffic when weighing pros and cons.
- High-load areas favor screws for long-term stability
- Nails suit rapid, less invasive fixes
- Steel hardness and coating affect wear
- Pre-drilling reduces splitting risk
- Proper spacing improves overall quieting performance
Long-Term Quieting Performance
Screws generally maintain floor quietness longer than nails, thanks to higher shear strength and a tighter clamp that resist seasonal movement. Over time, screws keep joints tighter, reducing micro-movements that cause creaks across varied flooring materials.
You’ll notice fewer puckers and settlement gaps when you walk, even after changes in humidity or temperature. This long-term performance matters most in high-traffic areas or multi-story homes, where subtle shifts compound into noticeable noise.
For best results, choose appropriate screw length and pilot size to avoid wood splitting yet maintain clamping force. Don’t overlook installation quality—proper predrilling and spacing preserve the system’s acoustic insulation.
Installation Techniques Matter
Choosing the right fastener changes how quietly your floor stays over time. When you’re deciding between nails and screws, consider how each interacts with flooring materials and subfloor stiffness.
Screws bite more securely, reduce micromovements, and better preserve acoustic insulation across seasonal shifts. Nails compress prone areas and can loosen, creating new squeaks as boards settle.
For solid hardwood, screws minimize squeaks longer, especially with floating or nailed-down assemblies. If you’re working with engineered options, screws still offer superior pull-out resistance and less crown movement.
Pair fasteners with proper spacing and batten support to maximize quietness. Material compatibility matters, so choose fasteners designed for your floor type and subfloor.
- Stronger grip with screws
- Reduced board movement
- Better long-term acoustic insulation
- Compatible with engineered,
- Proper spacing and support
Long-Term Maintenance to Prevent Future Squeaks
To prevent future squeaks, commit to a proactive maintenance routine that addresses both floors and subfloors. Establish a seasonal inspection schedule: check fasteners, joists, and subfloor integrity; tighten or replace as needed.
Vacuum and sweep regularly to prevent grit from lodging between boards, then reseal high-traffic areas to minimize movement. Use appropriate lubricants sparingly on joints that show minor movement, avoiding deposition where it can migrate beneath finishes.
Choose durable, compatible flooring materials and maintain proper humidity to reduce wood expansion and contraction. Address moisture sources promptly, since dampness invites squeaks.
Consider future renovations that respect existing subfloors and enhance stability. When choosing aesthetic considerations, balance look with structural compatibility, ensuring joints and transitions remain secure over time.
Troubleshooting Guide: What to Do If a Fix Doesn’t Hold
If a fix doesn’t hold, start by rechecking the root cause before reapplying. Look for hidden gaps, loose nails, or misaligned boards that bypassed your first attempt. Confirm you chose compatible flooring materials for the subfloor and that fasteners aren’t corroded or overdriven. Reassess adhesive spread and timing to ensure proper bonding, especially with newer noise reduction technologies.
If joints remain stubborn, isolate the issue to a specific plank or seam before scaling up repairs across the floor. Revisit the technique you used, and adjust pressure, tack direction, or fastener spacing as needed. Always test with light foot traffic after each adjustment.
- Inspect subfloor for deflection or uneven surfaces
- Verify nail/screw installation and head seating
- Check adhesive cure and compatibility
- Isolate the problematic area for targeted fixes
- Evaluate overall impact on flooring materials and noise reduction
Frequently Asked Questions
Are Squeaks Worse in Humid or Dry Conditions?
Humidity effects dominate squeaks; they worsen in humid conditions and tighten floor joints. In dry conditions, boards shrink slightly, reducing friction. You’ll notice more creaks when moisture swings, so control humidity and inspect fasteners for stability.
Can Pets Cause Floor Squeaks Over Time?
Pet hair and pawprints can gradually contribute to squeaks as joints loosen; you’ll notice creaks where pets repeatedly tread. Inspect floors, tighten fasteners, and add shims or underlayment where needed to stabilize boards and quiet the floors.
Will Sanding Reduce All Types of Squeaks?
Sanding isn’t universally effective; it won’t address every squeak. You’ll often improve results with precise tightening and lubrication. In many cases, sanding effectiveness is limited, so focus on targeted fixes for squeak elimination before more extensive steps.
Do Structural Issues Cause Recurring Floor Squeaks?
Structural issues can cause recurring floor squeaks. Foundation shifting and nail loosening create movement you’ll hear again. You tighten fasteners, stabilize framing, and monitor for further settlement, ensuring patches don’t crack, and you recheck every joint.
How Long Do Temporary Fixes Last on Floors?
Temporary fixes last differently, but typically weeks to months depending on use and floor type. You’ll notice smoother results when you tighten fasteners or apply inserts; monitor joints, reapply as needed. Longevity of repairs hinges on floor movement and load.
Conclusion
You’ve got a clear path to a quieter floor. Follow the above/below checks, try quick fixes, and pick durable fasteners for lasting results. If a squeak persists, re-torque joists or add shims where needed, then seal gaps to keep dust and friction down. Think of it as tuning a piano: small adjustments render a smooth, harmonious finish. With steady maintenance, your floors stay quiet and confident for years to come.


