To repair a wooden deck, start by inspecting for loose boards, rot, and loose fasteners, then remove damaged boards carefully and replace them with straight, dry exterior-rated lumber that matches sizing. Add corrosion‑resistant fasteners and proper flashing to protect joists, and make certain even spacing for drainage. Reinstall railing posts securely, check for plumb and tight connections, and seal joints to prevent moisture intrusion. Finish with a safety check and maintenance plan for lasting curb appeal and durability. More tips await.
Assess Your Deck: Diagnose Damage Before Repair
Before you repair, inspect the deck thoroughly to diagnose damage. Start with a visual walkaround, noting loose boards, protruding nails, and fascia or railing gaps. Check for soft spots that reveal rot or mildew, and probe with a screwdriver to gauge stiffness. Look for cupping, warping, or cracked boards that compromise structure.
Inspect fasteners for rust and corrosion; replace or tighten as needed. Examine flashing and ledger connections where water intrusion thrives. Assess surface wear, including weathering, fading, and deck stain degradation, which signals moisture problems.
Consider how furniture placement affects wear patterns and drainage, guiding future protection steps. Document findings, prioritize repairs, and plan minimal-impact fixes that restore safety while preserving aesthetics.
Avoid overlooking substructure issues that could impede long-term stability.
Gather Tools, Materials, and Safety Gear for Deck Repairs
You’ll want a focused set of tools and safety gear before you start repairs. Gather essential hand and power tools, plus protective gear like gloves, eye protection, and a sturdy respirator for dust.
This foundation helps you work efficiently and safely as you assess materials and prep the job.
Gather Essential Tools
Gather the right tools, materials, and safety gear before you start. You’ll need a measuring tape, carpenters’ pencil, square, and a pry bar for board removal. Have a hammer, claw or framing, a power drill with bits, and a circular saw ready for cut tasks. Include a speed square, level, and sharp chisels for precise work.
Stock replacement boards, corrosion-resistant fasteners, and deck spacers to maintain gaps. For power tools, pick models with variable speed and comfortable grips, and keep blades sharp for clean cuts.
Check weather considerations before you begin; plan around dry days and avoid work in rain or high humidity. Keep a sturdy ladder, safety glasses, ear protection, and a dust mask on hand for clean, controlled work.
Safety Gear Essentials
To protect yourself while deck repairs, equip a complete safety setup: ANSI-rated safety glasses, hearing protection, and a respirator or dust mask for dust and fumes. You’ll also want protective gloves and reliable eye protection during cutting, drilling, and nail removal. Choose gear that fits well, seals, and stays comfortable for longer tasks.
Inspect all equipment before you start, replace damaged parts, and keep a clean, clutter-free work zone. When handling treated wood or old fasteners, treat skin and eyes as top priorities. Store gear in an accessible location so you don’t skip safety steps.
Regularly replace disposable respirators and filters to maintain effectiveness and reduce exposure risk.
- ANSI-rated safety glasses and eye protection
- Protective gloves that fit snugly
- Hearing protection (earmuffs or plugs)
- Respirator or dust mask with filters
- Tool-cutting guards and face shield (where applicable)
Remove Damaged Deck Boards Without Causing More Damage
Carefully loosen the fasteners around the damaged boards, then pry them up from the ends to avoid tearing the surrounding decking. You’ll want to expose the fasteners cleanly and work slowly to prevent splintering.
Identify nails or screws associated with the bad boards, and use a proper puller or the correct bit to reduce shear stress on adjacent boards. If you encounter rot and decay, stop at the joist and assess the extent before removing more material.
For nailed boards, target the nail removal method that minimizes lifting nearby planks; shear or punch-down methods can help avoid splits. Maintain control, keep your cuts straight, and discard any fragments that could create future trip hazards.
Replace only after you’ve confirmed the underlying deck structure remains solid.
Choose Replacements: Sizing, Lumber, and Fasteners for Your Deck
When you choose replacements, start with sizing that matches your deck’s joist spacing and load.
Pick lumber that’s straight, dry, and rated for exterior use, ensuring it ages similarly to the existing boards.
Select fasteners and materials that resist corrosion and corrosion-compatible hardware to keep the deck secure long-term.
Sizing and Lumber
Choosing the right sizing, lumber, and fasteners is essential for a durable deck. You’ll select boards with consistent thickness and grade, matching span and load needs, to minimize warping. Use southern yellow pine, cedar, or composite options based on climate and budget.
Dimensioned lumber should be straight, dry, and free of defects; verify with moisture readings and grade stamps. For spacings, follow local code to ensure ventilation and drying.
Fasteners must resist corrosion in your climate, so pick stainless steel or coated options. Plan for future maintenance, like deck stain, and account for seasonal movement. Also, consider furniture layout so outdoor furniture won’t stress joints over time.
- Assess board dimensions and grade before purchase
- Match lumber type to climate and maintenance plan
- Check moisture content and straightness
- Choose corrosion-resistant fasteners and connectors
- Anticipate stain compatibility and furniture placement
Fasteners and Materials
Selecting fasteners and materials sets your deck’s durability and cost. You’ll choose fasteners that resist corrosion and ensure secure, long-lasting joints. For optimum fastener quality, match stainless steel or hot-dip galvanized options to your climate and wood type, avoiding staples or low-grade nails that loosen over time.
Consider the load, spacing, and seasonal movement to prevent crown or squeaks. Material durability matters: select pressure-treated, cedar, or composite lumber based on exposure and maintenance you’re willing to perform.
Sizing matters too—fastener length should penetrate through the deck board by at least 1.5 inches and into the joist. Use hidden or edge-fastening methods when possible to preserve aesthetics.
Verify compatibility with your deck’s lumber, then document the replacements for future reference.
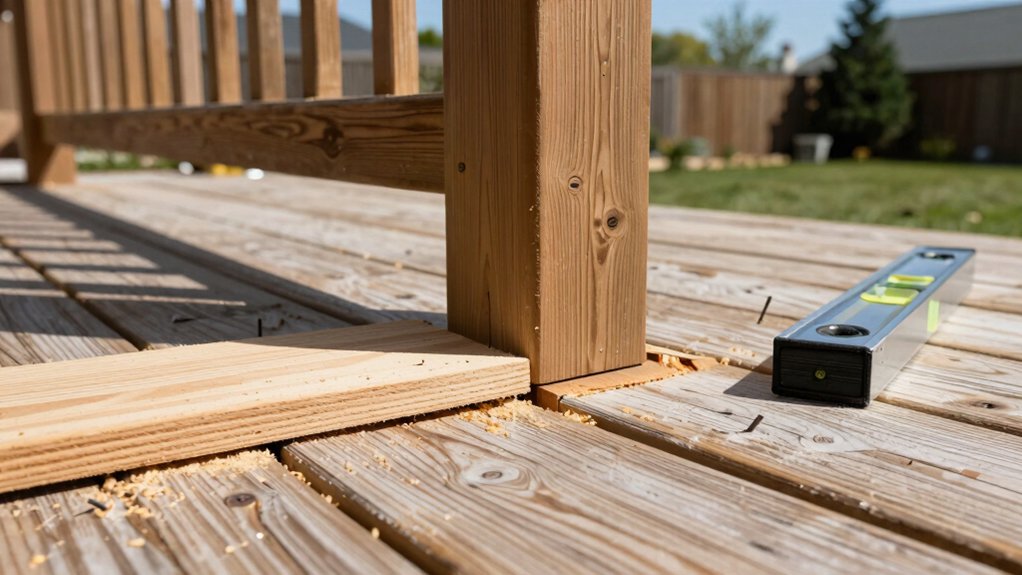
Install Replacements With Proper Flashing and Drainage
To install replacements with proper flashing and drainage, start by removing the old boards and backing each new board with flashing that diverts water away from the joists. Guarantee flashing wraps under the board edge and overlaps where water can pool, then secure with corrosion-resistant fasteners.
Align each board for even spacing to promote drainage and minimize cupping. Seal joints and corners with compatible caulk to prevent moisture intrusion. Verify that drainage paths slope away from the house and toward the deck’s outer edge.
- Choose corrosion-resistant fasteners and matching flashing materials
- Cut boards square and stagger joints for strength
- Install continuous flashing at ledger and rail connections
- Test water flow with a light spray to confirm drainage
- Maintain clean seams to prevent debris buildup and rot
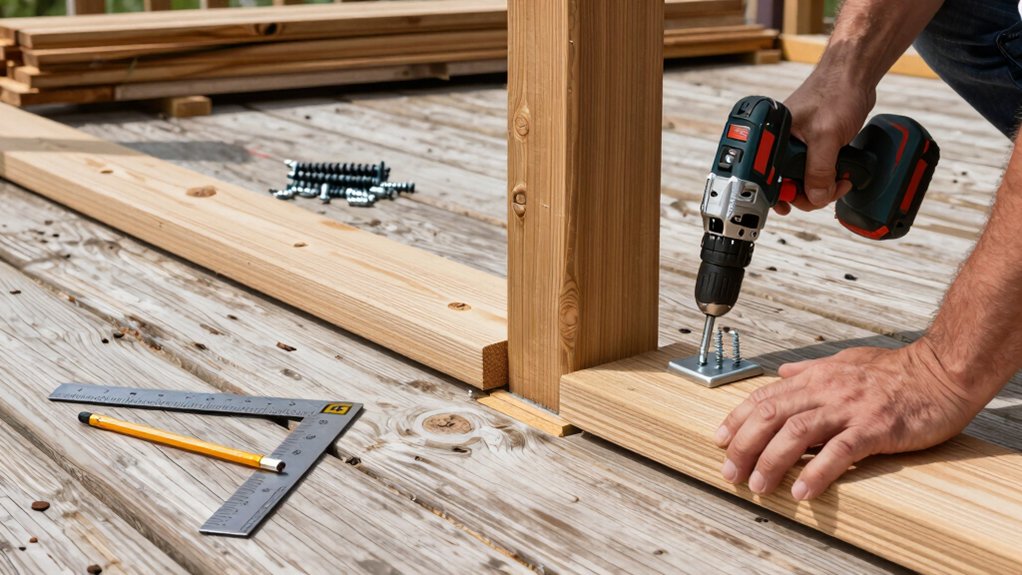
Inspect and Secure Railing Posts for Stability
After replacing boards and flashing, you’ll want to verify that the railing posts are solid and square. Begin with a fixed test: gently push and pull each post to feel for movement. If you detect movement, you’ve identified railing post stability issues that must be addressed before proceeding.
Check the base connections where posts meet the deck framing; loose or split pockets indicate poor anchoring. Use appropriate post anchoring techniques to restore rigidity, such as upgrading to through-bolt fasteners or reinforced concrete footings for ground-supported posts.
Re-secure any lag screws or structural screws, ensuring washers seat properly. Verify plumbness with a level, then recheck post anchors after any adjustments.
Document fixes and maintain consistent post spacing for uniform load transfer and railing integrity.
Final Safety Check, Maintenance Tips, and Curb Appeal Upgrades
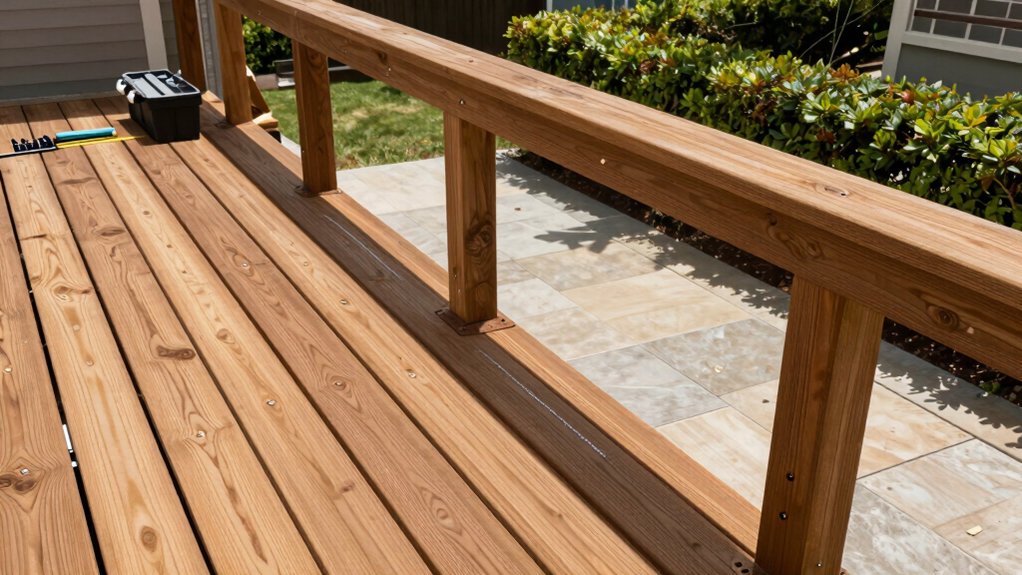
Before putting the project to bed, run a final safety check, then share quick maintenance fixes and easy curb appeal upgrades that keep the deck safe, durable, and inviting.
You’ll want a tight recap: recheck fasteners, rails, and joists for looseness; clean surfaces; apply fresh sealant where needed; and replace any damaged boards promptly. Address trip hazards, ensure proper drainage, and confirm light fixtures are weatherproof.
Maintenance fixes are simple: sweep weekly, power wash as needed, re-stain every couple of years, and tighten hardware after seasonal shifts.
Curb appeal upgrades are practical and affordable: subtle deck lighting, plant integration with rail planters, low-volume irrigation, seasonal containers, and a tidy, consistent color scheme.
- Final safety sweep of all connections
- Weatherproof deck lighting checks
- Plant integration with rail planters
- Regular cleaning and sealing cadence
- Seasonal container styling
Frequently Asked Questions
How Long Does a Deck Replacement Project Typically Take?
A deck replacement project typically takes 3 to 7 days, depending on size and complexity. You’ll consider weather windows and permitting. Plan for labor considerations, materials delivery, and potential delays to avoid schedule creep. Stay proactive, monitor progress, adjust as needed.
Can I Replace Boards With Composite Materials, Not Wood?
Yes, you can replace boards with composite decking instead of wood. You’ll consider alternative materials like composite decking, which resists rot and maintenance. Make certain of proper framing, fasteners, and proper thickness; follow manufacturer guidelines for installation and ventilation.
What Distractions Could Indicate Structural Frame Damage Beyond Boards?
You notice bowing floors and uneven surfaces, signaling structure-frame damage beyond boards. Inspect beams, joists, and posts, looking for cracks, rot, rust, or settlement. Don’t ignore creaks; tighten connections and consult a structural engineer if uncertainty persists.
Should I Apply Sealer Before Reinstalling New Boards?
Yes, you should apply deck sealant before reinstalling new boards. Use a durable wood preservation sealant to protect surfaces, guarantee even coverage, and allow proper curing. This step helps prevent moisture damage and extends deck life.
How Do I Handle Hidden Fasteners or Screws During Replacement?
Anticipation issue: you’ll worry about damage, but handle fastener removal calmly. For hidden fasteners, pry gently, then use screw extraction with a compatible bit. You’ll replace boards, ensuring secure seating and smooth surface after removal.
Conclusion
So you tackled the deck like a pro, huh? Replaced boards, bolstered rails, and dodged DIY disasters with a wink and a drill. Remember: safety first, screws tight, flashing smart, drainage clear. If it squeaks, you fixed it; if it drains, you baffled it. Your curb appeal just filed a restraining order against shabbiness. In short, you’ve earned the bronze badge of backyard sovereignty—now enjoy the view, but keep maintenance on speed dial.