There’s no need to break the bank to feel more space, but you’ll need to rethink what you already have. You’ll start by spotting small gaps in your end-of-terrace footprint and using clever extensions that respect your home’s character while boosting ceiling height and flow. You’ll balance practical storage, flexible zones, and outdoor access, then test layouts that work now and adapt for future needs—a path that invites you to explore further as you plan.
Identify End-Of-Terrace Footprint Gaps and How Extensions Fix Them

End-of-terrace homes often hide footprint gaps that quietly rob usable space and disrupt flow. You’ll pinpoint where these gaps occur, from wasted hallway nooks to narrow rear corners that chew daylight.
Start by tracing your existing layout, measuring structural offsets, doors, and window lines, so you see the true footprint you’re working with. Then assess how extensions can reclaim that space without overhangs or awkward progressions.
A well-placed rear or side extension can align with the house’s rhythm, improving movement and light. Focus on a design that supports garden transformation while preserving interior layout integrity, so your rooms read as cohesive zones rather than disjointed boxes.
The result is smarter circulation, brighter living, and a clear path to future flexibility.
Define Your Space Goals: Brighter Living, Extra Bedroom, or Home Office
If you’re weighing brighter living, extra bedroom, or a dedicated home office, start by naming the top three outcomes you want to achieve this year.
Consider how light, flow, and furniture layouts can support each goal, and how much you’re willing to invest to access them.
Brighter Living Goals
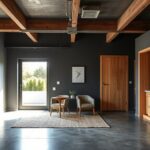
You’ll want to clearly define what “brighter living” means for your end-of-terrace home: more natural light, better function, or both. You’re shaping goals around brighter interiors and light enhancement that support everyday life.
Visualize how you move through rooms with fewer dark corners, where windows, skylights, or light scoops pull daylight deeper inside. Prioritise practical fixes: reflective surfaces, ceiling-height glazing, and thoughtful shading to maintain glare control.
Align extensions with sightlines to maximize perceived space and daylight flow. Consider room function: a brighter living zone for socialising, a lit dining area for clearer meals, and a sunlit corridor guiding you calmly.
Document targets, measure light levels, and confirm that every change adds usable brightness without compromising privacy or energy efficiency.
Extra Bedroom Needs
With brighter living as your backdrop, you’ll now map how an extra bedroom fits into the overall layout and daily routine. You’ll prioritise flexible use, quick access, and future-proofing while preserving flow from common areas to private zones.
Consider mood, light, and storage in tandem with garden privacy and interior decor so sleepers feel calm and guests feel welcome.
- Optimize doorway locations for unobtrusive movement between living and sleeping spaces
- Choose multipurpose furniture to maximize floor area without crowding
- Plan storage that reduces clutter and preserves open sightlines
- Align bedside lighting with switches near entry points for convenience
- Integrate soft textiles and window treatments that respect garden privacy while brightening rooms
Home Office Priorities
A clear goal for your home office should align with your daily routines, noting whether you’re chasing a brighter living backdrop, a dedicated extra bedroom, or a focused work zone.
Define your priorities first: is natural light your daily driver, or do you need quiet zones and storage for files? Choose a layout that supports momentum—compact desk, dual monitors, and an inspiration wall that doubles as a whiteboard.
Consider wiring and power outlets upfront to avoid later clutter. Use smart lighting to shift mood from task-focused to relaxed after-hours, and integrate Home decor cues that reflect your taste while keeping pathways clear.
Balance gardening-friendly greenery with low-maintenance flora to soften glare, reduce fatigue, and boost focus without distraction. Prioritize adaptability for future needs.
Align Extensions With Your Home’s Character and Planning Constraints
You’ll align any extension with your home’s character, keeping rhythm with existing detailing, proportions, and the street’s scale.
Meet planning constraints head‑on by pre‑checking setbacks, materials, and design codes so your vision fits without friction.
Harmonise materials and form from the outset, so the new addition feels like a natural continuation, not an afterthought.
Align With Existing Character
To align extensions with your home’s character and planning constraints, start by evaluating the existing architectural language—materials, roofline, proportions, and detailing—and map how any addition should echo or respectfully contrast these elements.
You want to preserve character consistency while shaping a coherent stylistic tone across the facade and flow interior spaces. Let the extension reflect your home’s personality, not imitate it blindly; subtle departures can highlight modern livability while honoring tradition.
Use restrained materials, scale, and alignment to maintain rhythm with neighboring homes. Prioritize details that read as deliberate, not retrofit.
Plan orientation and fenestration to complement proportions. Guarantee roofline and cornices align where possible, so the addition feels inevitable, not incidental.
- Reflect existing materials and textures
- Match roofline and cornice cues
- Maintain proportion and alignment
- Choose restrained, complementary detailing
- Prioritize seamless transitions between eras
Respect Planning Constraints
How can you guarantee any extension respects planning constraints while still serving your home’s character? You start with a thorough site appraisal, noting setback rules, height limits, and materials guidance from your local authority.
Map the limitation envelope against your design goals, then craft a proposed massing that sits gently beside your existing roofline and street frontage.
Choose sustainable materials that echo the existing palette, so the new work reads as a measured extension rather than a radical addition.
Prioritize glazing and doors that respect boundary lines and daylight rights, avoiding overbearing volumes.
Integrate smart lighting to enhance visibility without drawing attention to alterations.
Finally, document the rationale for council review, including energy and impact assessments, to demonstrate thoughtful integration with minimal disruption.
Harmonise Materials & Form
Bringing materials and form into harmony starts with a disciplined palette: choose finishes that echo your home’s existing textures, color, and scale, then design massing that respects the rhythm of the streetscape.
- Match material textures to the original brick, timber, and stone to preserve tactile continuity.
- Align rooflines and setbacks with adjacent eaves and cornices for form harmony.
- Use a restrained palette, repeating accent colors rather than introducing new clashes.
- Choose window and door profiles that mirror historic proportions and rhythm.
- Plan joints, seams, and detailing to read as a single, coherent volume.
Material textures and form harmony guide your addition, ensuring the extension blends yet reads as intentional growth.
Seamless Kitchen-Diner Layouts That Keep Outdoor Space Open

One way to maximize a tight end-of-terrace sits is by designing a seamless kitchen-diner that nudges outdoor space into the everyday flow: keep the indoors open to the garden with a shared floor, continuous materials, and doorways that disappear when you need them.
You’ll align cabinetry and dining zones for clear sightlines, reducing clutter and supporting quick passages to the outdoors. Use a single material palette—slab quartz, polished concrete, or timber—to blur boundaries between inside and out.
A shallow step or level threshold keeps moisture and weather at bay. Plan garden privacy into the layout with strategic planting and screened dining nooks, and install subtle outdoor lighting that guides movement without glare.
This approach sustains flow, expands usable space, and invites daily outdoor living.
Pocket Doors and Sliding Walls for Flexible Living Zones
Pocket doors and sliding walls offer a practical path to flexible living zones in tight end-of-terrace spaces. You can reconfigure a single area in moments, creating flow for daily living or quiet retreat. Choose track systems that disappear when open, and door panels that pair with existing finishes for a seamless look.
Use sliding walls to carve or open zones without sacrificing floor space. Prioritize acoustic seals and soft-close hardware to maintain comfort in small footprints. Consider pocket doors in high-traffic routes, and mirror panels to visually expand rooms.
Plan for hardware compatibility with cabinetry and built-ins to avoid clutter.
- Slim profile tracks for tight joints
- Soft-close, durable hardware
- Acoustic-rated sliding walls for privacy
- Flush-mounted pocket doors to save space
- Align finishes with existing aesthetics
Light-Rich Conservatories: Glazing, Foundations, and Thermal Performance
Light-rich conservatories open year-round bright living, but they demand careful glazing, solid foundations, and tight thermal control. You optimise energy by selecting conservatory glazing with low U-values, high solar gain where appropriate, and UV protection to prevent fading.
Combined with properly sealed frames, this reduces heat loss and glare, preserving comfort in all seasons. Foundation reinforcement matters: guarantee your base can carry the added weight, incorporate reinforced footings, damp-proof membranes, and appropriate drainage to prevent settlement.
Use a continuous slab or pad with compliant movement joints. Insulation beneath the floor, underfloor heating, and radiant barriers curb heat flux.
Plan ventilation slots and operable panels for cross-flow, avoiding overheating.
Detail-focused checks—ridge heights, beam alignments, and glazing rebates—keep the space efficient, durable, and future-ready.
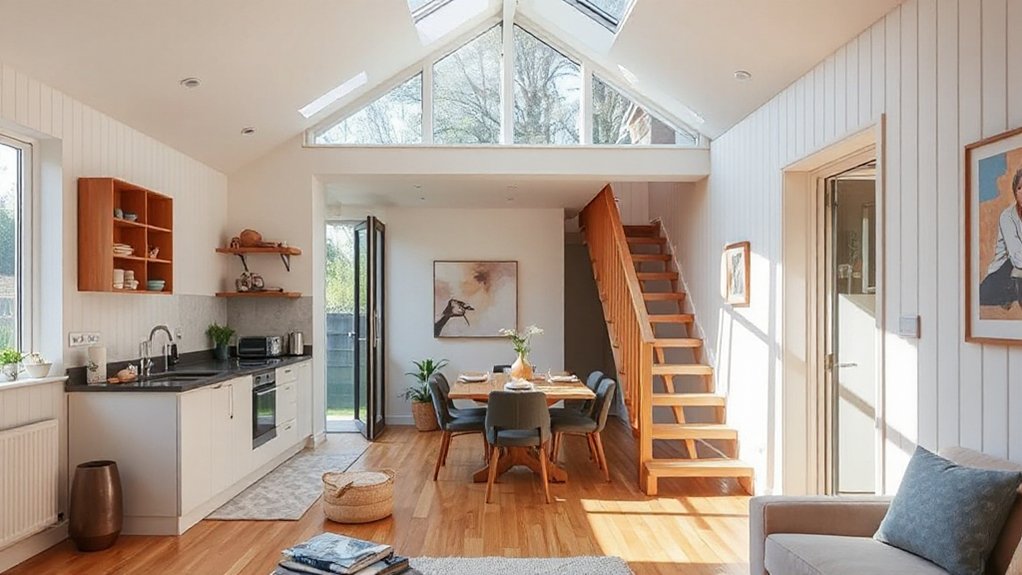
Mezzanines and Levels: Adding Usable Space Without Widening the Footprint

Mezzanines and levels let you gain usable space without widening the footprint, turning vertical height into real, livable square footage. You’ll optimize awkward volumes, create storage nooks, and carve flexible zones for sleeping, work, or play.
Thoughtful Mezzanine design integrates stairs, guardrails, and headroom, so circulation stays safe and smooth. Consider load paths, acoustics, and lighting to keep the space comfortable and efficient.
Level integration guarantees seamless transitions between floor plates, preventing wasted gaps and awkward landings. Use robust structural calculations early, then tailor finishes to match your interior language.
The result is a visually cohesive, highly functional core that feels expansive even in a compact footprint.
- Mezzanine design elements: stairs, guardrails, proportions
- Level integration for smooth transitions and access
- Structural planning and load considerations
- Lighting, acoustics, and finish continuity
- Multifunctional zones that adapt over time
Narrow-Span Extensions: Slim Builds That Maximise Space
Narrow-span extensions punch above their weight by maximizing usable space with slim profiles that don’t overcommit the lot. You’ll design with precision: shallow footprints, uninterrupted sightlines, and a swift shift from living to dining.
Think long, narrow rooms powered by smart storage that hugs walls, not intrudes on floor area. Prioritize load paths and natural light to lift the perception of space without widening the envelope.
Narrow corridors become intentional conduits, with doors tucked to preserve flow. Slim staircases save precious real estate while keeping accessibility intact; place them for direct access between zones and minimal landings.
Materials breathe—light tones, reflective surfaces, and slim, robust finishes. Your goal is clarity, efficiency, and forward‑thinking layout that feels expansive yet purposeful.
Multi-Use Zones That Adapt From Day to Night
You’ll design spaces that shift from day to night with Day-To-Night Flex, so every area earns a second life as lighting, seating, or storage changes.
As Zone Transforms Seamlessly happens, you’ll tune each zone for a natural rhythm—transforming work zones into dining nooks and quiet corners into social hubs.
This Multi-Use Rhythm Spaces approach keeps your end-of-terrace efficient, bright, and ready for whatever the hour brings.
Day-To-Night Flex
- Modular, stacked furniture that redefines boundaries
- Sliding screens or curtains to sculpt zones on demand
- Dual-purpose surfaces with concealed storage
- Adjustable lighting scenes for each phase
- Clear sightlines to maintain openness and safety
Zone Transforms Seamlessly
A Seamless zone emerges when a dining nook becomes a quiet work hub by stowing chairs and folding desks, preserving sightlines and airflow. Functional progressions are anchored by consistent materials and a subdued color palette so each shift feels intentional, not transactional.
Consider radiant beneath-floor heating and adjustable lighting to cue mood—bright for meals, dim for lounging. Operate with versatile furniture: ottomans that double as stools, wall-mounted desks that fold away, and modular shelving that reconfigures as needs change.
Your plan balances ergonomics, aesthetic clarity, and forward-thinking adaptability.
Multi-Use Rhythm Spaces
- Open plan layouts enable seamless shifts
- Hidden storage preserves minimalist decor
- Flexible partitions redefine zones on demand
- Smart lighting shifts mood and purpose
- Multi-functional furniture supports rapid reconfiguration
Structural Basics: Load-Bearing, Beams, and Practical Limits

In end-of-terrace homes, understanding load-bearing walls, beams, and the practical limits of what existing structures can support is essential before any retrofit or extension. You’ll assess what the primary supports do, where loads transfer, and how long spans interact with floor and roof systems.
Focus on load bearing essentials: identifying columns, walls, and stiffeners that carry weight to foundations. Beams must be sized for anticipated loads, clear of services, and placed to minimize disruption while maximizing usable space.
Consider practical limits like wall removals, floor joist orientation, and potential rafters or roof trades. Plan for future access and drainage routes without compromising structure.
Your goal is reliable support, efficient spans, and a path to creative, safe expansion.
Planning Permission and Building Regs: What You Must Know
Planning permission and building regs aren’t optional hurdles—they’re the framework that guarantees your end-of-terrace retrofit is safe, legal, and future-ready. You’ll navigate planning permissions, understand what needs a full application, and know when you can rely on permitted development rights.
Building codes and standards guide structural, electrical, and drainage choices, so your design stays compliant while optimizing space.
Zoning laws influence use, density, and extensions’ impact on neighbors, helping you anticipate objections or tweaks early.
By aligning with these rules, you reduce risk, delays, and costly rework, while preserving value and safety.
- Understand when you need full planning permission versus permitted development
- Check building codes for structural and services compliance
- Map zoning laws to extension type, footprint, and setbacks
- Pre-empt objections with clear, compliant designs
- Plan for future inspections and approvals throughout the build
Budget-Smart End-Of-Terrace Extensions: Cost-Saving Without Cutting Quality
You can start with budget-friendly design tactics that maximize space without overreaching costs, like modular layouts and multipurpose zones that adapt as your needs change.
Choose cost-efficient materials that still perform well, prioritizing durability and finish quality to avoid early replacement or maintenance.
Budget-Friendly Design Tactics
Could you get more value from your end-of-terrace extension by smart budgeting? Yes—every inch and penny counts when you design with intention. Focus on flow, sightlines, and future adaptability, so your space feels larger without costly adds.
Budget planning guides every choice, from layout tweaks to finishes, ensuring you don’t backslide on quality. Prioritize practical materials and multipurpose zones that earn their keep, then dial in details that elevate perception without overreaching.
Material selection should lean on durable, low-maintenance options that resist wear in high-use areas. Pair clever storage with everyday efficiency, and you’ll keep costs controlled while you grow usable area over time.
- Align layout with daily routines for seamless movement
- Choose durable, low-maintenance finishes
- Maximise natural light to reduce lighting needs
- Integrate flexible, multipurpose furniture
- Plan phased updates to spread costs
Note: Budget planning, Material selection are central under this topic.
Cost-Efficient Material Choices
Smart budgeting starts with choosing materials that deliver durability and long-term value, so your end-of-terrace extension stays functional and attractive without frequent replacements.
To maximize space without overspending, mix cost-efficient essentials with durable basics: engineered timber or high-quality laminates for floors, recycled-content bricks, and moisture-resistant boards for walls.
Prioritize low-maintenance options that resist wear and weather, reducing upkeep costs over time.
For surfaces, choose solid cores or tile alternatives that mimic premium finishes at a fraction of the price.
Use light, reflective colors to enhance perceived space and reduce lighting needs.
Creative decor adds personality without bulk, while smart furniture stays modular and durable, maximizing flexibility for evolving layouts.
Plan with future needs in mind, ensuring every material choice supports long-term functionality and space efficiency.
Lighting Your Extension: Daylight, Layered Ambient, and Task Lighting
When you extend a home, daylight should guide the layout: place windows and skylights to harvest natural light through the day while keeping glare and heat in check. You’ll layer ambient and task lighting to sustain mood and function after sun goes down, using dimmers, controls, and suitable fixtures.
Focus on daylight optimization by aligning glass with living zones and workspaces, so natural light travels deep without creating hotspots. Select lighting techniques that boost perceived space, texture, and warmth, then tailor task lighting to activities like cooking, reading, and sewing.
Keep energy use predictable with smart plugs and timers. Finish with design honesty: fixtures that disappear in daylight, yet perform at night.
- Position clerestory and skylights for even daylight spread
- Use wall-washers and ambient LEDs for depth
- Layer task lighting at every workspace
- Incorporate dimmers for mood control
- Choose finishes that reflect light without glare
Insulation and Energy Efficiency for Year-Round Comfort

You’ll start with solid insulation strategies that keep you comfortable year-round, from airtight joints to thermal breaks.
Choose energy-efficient design moves like continuous insulation, high-performance windows, and reduced thermal bridging to cut heat loss and gain.
Insulation Strategies For Comfort
To keep spaces comfortable year‑round, focus on insulating the key pathways of your end-of-terrace home: the attic, walls, and floors where heat leaks most often. You’ll prioritize insulation materials that seal gaps, dampen drafts, and maintain steady temperatures, while creating robust thermal barriers against exterior swings.
Choose breathable, moisture‑tolerant options for walls and attics, paired with continuous floor insulation to reduce cold bridging. Install radiant barriers in roofs where sun exposure spikes heat.
Seal penetrations, then test with a blower door to verify performance. Plan for future renewals by selecting durable, recyclable products. Your aim is a tight envelope that supports year‑round comfort without overworking systems.
- Insulation materials selection and placement
- Continuous air sealing for all junctions
- Thermal barrier integrity across exterior walls
- Floor insulation to curb cold bridging
- Moisture management and ventilation balance
Energy Efficient Design Choices
Could you make your end-of-terrace home run more efficiently by combining smart insulation with focused energy tweaks? You’ll start with airtight drafts: seal gaps, insulate walls, roof, and floors properly, then minimize thermal bridges with continuous insulation.
Use reflective barriers in attic spaces and install high-performance seals on doors and windows. Design the layout to maximize passive heat: align spaces to sun paths, pair heavy curtains with thermal blinds, and optimize floor plans for radiant warmth.
Integrate solar panels to offset daytime use and charge storage for evening comfort. Pair controls with smart thermostats for precise zoning, responsive scheduling, and occupancy-based adjustments.
Target efficiency gains with heat-recovery ventilation and high-efficiency boilers or heat pumps, ensuring year-round comfort without waste.
Storage-First Design: Built-Ins, Alcoves, and Clever Alcove Solutions
Storage-first design begins by prioritizing built-ins, alcoves, and clever alcove solutions as integral elements of the layout, not afterthoughts. You design spaces that hide clutter and boost function, using vertical storage, recessed shelves, and pull-out organizers to maximize every inch.
Built-ins frame rooms, create zones, and reduce freestanding furniture; alcoves become display, pantry, or desk nooks, seamlessly integrated with trim and lighting. Think modular, scalable, and maintenance-friendly so progressions between spaces feel intentional.
Consider interior decor choices that unify tones, textures, and hardware, while outdoor landscaping influences to-the-edge storage like shed walls or garden niches. Your goal is a calm, efficient footprint with flexible use, where every surface serves a purpose and enhances flow.
- Integrated shelving and benching for seating with storage
- Recessed niches for display, books, or electronics
- Pull-out organizers inside cabinets and cupboards
- Hidden USB/charging stations in alcove surfaces
- Multi-purpose furniture with concealed storage
Exterior Aesthetics: Materials and Roofs That Match and Endure
Choosing exterior materials and roofing that harmonize with your End-of-Terrace home’s silhouette and climate is essential for durability and curb appeal. You want exterior finishes that resist weathering while preserving texture and colour over time.
Consider a palette that ties into neighbouring façades to create cohesion, yet allows your personality to shine through subtle contrasts.
For roof choice, prioritize durability and drainage; metal or slate options offer longevity and low maintenance, while modern composites provide resilience in harsh conditions.
Installation details matter: proper underlay, flashing, and ventilation prevent leaks and mould.
Keep materials low maintenance with easy cleaning and minimal repainting cycles.
Prioritize energy efficiency via reflective finishes or darker accents that still reflect climate needs.
Exterior finishes and roof durability anchor your home’s longevity and visual resonance.
Timeline and Project Management: From Brief to Handover
A clear timeline and solid project plan turn a brief into real progress, guiding you from concept to handover with visibility at every stage. You’ll translate requirements into milestones, allocate resources, and set decision points that keep the build on track.
Early coordination with designers, engineers, and contractors reduces risk and speeds approvals. Regular reviews prevent scope creep, while a detailed schedule aligns trades and deliveries.
Consider interior acoustics early to avoid retrofits, and plan furniture placement layouts during space programming so walls, plugs, and lighting align with usable room shapes.
- Define milestones and decision gates
- Align team responsibilities and communication cadence
- Schedule deliveries, permits, and inspections
- Integrate interior acoustics considerations
- Verify furniture placement and space usability during design reviews
Case Studies: Real End-Of-Terrace Extensions That Maximised Space
From real-world projects, these end-of-terrace extensions demonstrate how small footprints can yield big returns when every square meter counts, light is maximized, and flow guides furniture and brands of storage.
You’ll see compact rear and side extensions that push ceiling heights, foldaway dining, and pocket doors between kitchen, lounge, and garden.
Case study highlights include clever garden landscaping that stitches outdoor and indoors for year-round use, plus interior decor cues that unify material finishes, optimize storage, and reduce clutter.
Practical takeaways: step-free access, consistent sightlines, and modular furniture that adapts to family needs.
Each project prioritizes daylight, thermal comfort, and scalable storage, turning tight plans into spacious living with enduring design intent.
Frequently Asked Questions
What Are Hidden Costs Not Covered in Typical End-Of-Terrace Extensions?
Hidden expenses surface in planning pitfalls like unexpected fees, permits, and utility upgrades. You’ll face costs for drainage, foundations, insulation, and overruns, plus timing gaps. Budget for contingencies, schedule buffers, and thorough surveys to avoid surprises.
How Long Does Approval and Build Typically Take for These Projects?
Approval and build typically take about 8–12 weeks for planning permissions, with 6–14 weeks for building regulations approvals, depending on complexity. You’ll align timelines, secure permits early, and coordinate inspections to keep momentum steady.
Can Extensions Impact Insurance Premiums or Home Resale Value?
Extensions can affect your premiums and resale value. You’ll face extension regulations and insurance implications, so plan proactively: verify permissions, consult insurers early, document costs, and guarantee quality craftsmanship to preserve market appeal and financial resilience.
Which Materials Offer the Best Long-Term Durability for End-Of-Terrace Sites?
Durability factors favor steel, concrete, and sealed timber, you’ll value material longevity when planning. You’ll balance cost and resilience, as enduring joints outlast trendy finishes. You’re crafting futureproof walls—long-term reliability through thoughtful, strategic material choices.
How Can I Future-Proof an Extension for Changing Needs?
You can future-proof an extension by choosing flexible layouts, modular furniture, and smart technology integration, plus Eco friendly materials that adapt. You’ll plan for upgrades now and maintain performance, sustainability, and comfort as needs evolve over time.
Conclusion
You’ll finish with a home that feels bigger, brighter, and more you. Picture a graceful, almost unnoticeable extension coaxing light through generous, glassy moments, while built-ins tuck away the clutter you forgot you had. It’s not a renovation so much as a quiet improvement, a soft nudge that lets flow and function breathe. You’ve created spaces that adapt, so daily life feels effortless, a touch more expansive, yet perfectly in keeping with the home’s voice.