To install a dimmer safely, first confirm your fixture is dimmable and note its wattage, then choose a dimmer compatible with your bulb type (incandescent, LED, or CFL) and load. Gather tools, power off at the main breaker, and verify wires with a tester. Remove the old switch, connect the dimmer’s hot lead to the supply hot and its other lead to the fixture, secure, mount, and test for smooth, flicker-free dimming. You’ll learn more steps ahead.
Decide If Your Fixture Is Compatible With a Dimmer
Before you install a dimmer, confirm that your fixture supports dimming. Start by checking the fixture material and construction for any dimmer compatibility notes from the manufacturer. Some fixtures, especially certain LED tubes or integrated LEDs, aren’t dimmable or require specific dimmer types.
Verify the mounting location compatibility with dimming controls; wall boxes and ceiling mounts must accommodate compatible dimmers without obstructing airflow or wiring. Inspect the fixture’s rating label for wattage limits and minimum load requirements.
If you find a dimmable label, ensure the dimmer’s range matches the fixture’s operating range to avoid flicker or buzzing. When in doubt, consult product documentation or a qualified electrician to confirm safe, proper use.
Choose the Right Dimmer Type for Your Fixture
To pick the right dimmer, start with wiring compatibility to make certain the switch fits your circuit.
Then verify light-source compatibility so the dimmer can handle the bulb type and load without flicker or overheating.
This combo—wiring checks plus compatible light sources—guides you to a safe, effective choice.
Wiring Compatibility Checks
Choosing the right dimmer starts with confirming your fixture’s compatibility: check the bulb type, wattage rating, and whether the fixture requires a trailing-edge (electronic) or leading-edge (magnetic) dimmer.
You then verify wiring compatibility by matching the dimmer’s wiring standards to your home’s supply conductors and terminals.
Identify the fixture types you’re wiring: recessed cans, track, lamps, or ceiling fans, and note any special connectors or pigtails.
Confirm that the dimmer’s load rating supports total wattage and that the switch box can accommodate the device’s depth and terminal layout.
Verify ground continuity and respect local electrical codes.
If you see any uncertainty, consult a licensed electrician to prevent improper connections or overheating.
Light Source Compatibility
Understanding the light source is essential when selecting a dimmer type: different bulb technologies require specific dimming methods to prevent flicker, noise, or premature failure. You must match the dimmer to the light bulb technology used in your fixture.
Incandescent or halogen lamps accept standard leading-edge dimmers, delivering broad compatibility with minimal risk of instability.
LEDs and CFLs, however, often demand compatibility-rated dimmers that provide smooth, flicker-free operation at low loads. Check the fixture material and bulb compatibility labels, and avoid dimmers that exceed wattage ratings for your setup.
If you plan to retrofit an existing fixture, verify that the dimmer supports low-current startups and any smart-control features you intend to use.
Ultimately, proper matching reduces noise, prolongs life, and guarantees consistent light quality.
Gather Tools and Safety Precautions Before You Begin
Before you start, gather the essential tools and review safety steps to prevent accidents. You’ll need a voltage tester, insulated screwdriver, wire strippers, needle-nose pliers, electrical tape, and a non-contact tester for added assurance. Have a level of readiness with a flashlight or headlamp and a sturdy work surface. Create a clean, dry area free of clutter, and keep a fire extinguisher nearby. Wear safety glasses and insulated gloves to guard against shocks or sparks.
Electrical safety begins with planning: confirm fixture compatibility and ensure damaged cords are replaced. Compile a brief Tool checklist and place it within reach for quick reference. Avoid distractions, follow standard grounding practices, and never bypass safety devices or manufacturer instructions.
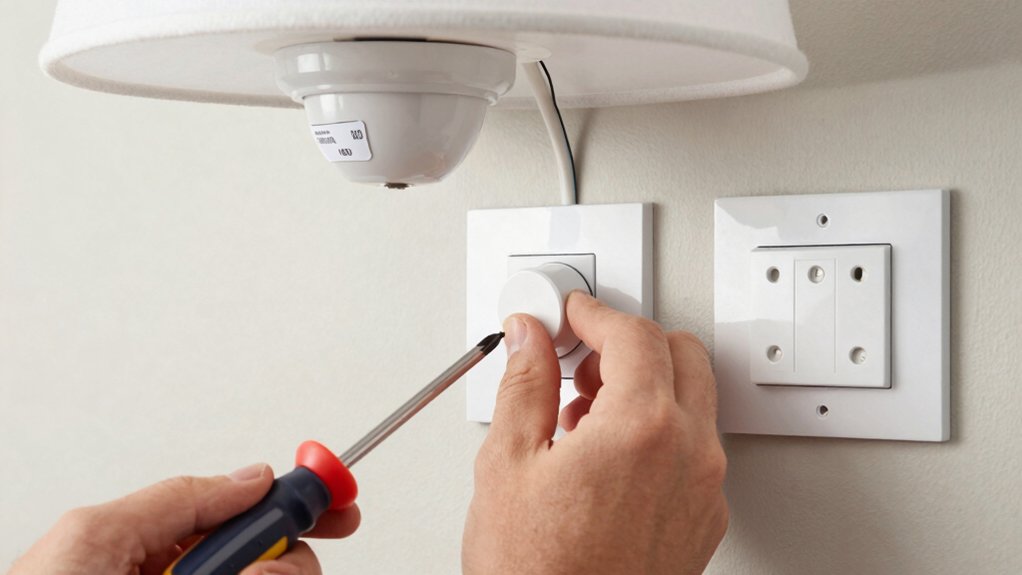
Turn Off Power and Access the Wiring Safely

Turn off power at the main breaker, then test the circuit with a non-contact tester to confirm there’s no live voltage before you touch any wires. You’ll access the wiring by removing the wall plate and opening the electrical box, keeping hands dry and tools insulated.
Use one hand when probing, and keep the other away from conductors to reduce shock risk. Identify the hot, neutral, and ground conductors, noting their positions for reference. Maintain clean, dry hands and store removed screws in a parts tray.
Observe wiring safety by avoiding movement on bare conductors and never working in damp conditions. Check Fixture compatibility by confirming the existing box supports the dimmer’s amperage and mounting style.
Plan your steps to minimize disruption and preserve circuit integrity.
Remove the Old Switch and Inspect the Wiring
Start by removing the old switch from the box. With the power confirmed off, pull the switch gently and note how it’s wired. Use one hand to support the device as you disconnect. Document or mentally log which wires go to the common and to the traveler terminals, then set the switch aside.
Perform a wiring inspection before touching anything else: look for damaged insulation, loose conductors, or signs of heat. If you see scorched insulation or melted plastics, halt the process and reassess with a qualified electrician.
Verify the ground is intact and connected to the box or switch ground screw. Confirm that wire colors match standard conventions, and avoid reusing damaged connectors.
This step ensures safe switch removal and a reliable baseline for wiring the new dimmer.
Wire the Dimmer for Standard Incandescent or Non-Dimmable Fixtures
To wire a dimmer for standard incandescent or non-dimmable fixtures, connect the dimmer’s hot lead to the supply hot and the dimmed lead to the fixture’s hot conductor, ensuring the ground remains attached to the switch body.
- Verify power is off at the breaker and test leads before touching.
- Attach the dimmer’s hot input to the line feed, securing with a proper connector.
- Connect the dimmed output to the fixture’s hot conductor, keeping neutrals uncontaminated.
- Reattach ground to the switch frame and confirm all terminations are snug and safe.
Resulting wiring supports Lighting aesthetics and informed Fixture placement, without introducing dimming variables beyond the fixture’s rating.
Special Cases: LEDs, CFLs, and Dimmable Drivers
You’ll want to understand how LEDs and dimmable drivers behave with your dimmer, including compatibility notes and how CFLs fit in.
We’ll cover which fixtures are truly dimmable, how dimmer types interact with LEDs, and what to check before changing settings.
This sets the stage for practical guidance on choosing compatible components and avoiding common issues.
LEDs And Dimmable Drivers
LEDs and dimmable drivers require careful matching; not all LED fixtures work with every dimmer, and some combinations can cause flicker, shimmering, or reduced life. To guarantee reliable performance, evaluate compatibility before wiring.
1) Check dimmer type against your LED fixture’s driver.
2) Refer to manufacturer compatibility lists for smart lighting modes.
3) Test dimming range to verify smooth low-end operation and full brightness without buzzing.
4) Consider using dimmers labeled for low-load LED applications to preserve aesthetic design.
CFLs And Compatibility Notes
CFLs introduce unique compatibility considerations with dimmable drivers, so you should verify how the ballast and dimmer interact before wiring.
In practice, many CFLs require specific dimming profiles or may flicker, hum, or fail to adjust smoothly if the driver isn’t compatible.
Check the ballast type, wattage range, and labeled dimmability to ensure you don’t exceed the fixture’s ratings.
For reliable performance, match the dimmer’s minimum load and the bulb’s wattage window to avoid unexpected shutdowns.
Always confirm fixture compatibility before purchase.
Note that some CFLs aren’t intended for dimming at all, even when labeled.
When selecting light bulb types, prioritize documented compatibility with the dimmer and ballast.
This prevents installation errors and preserves complete lighting control.
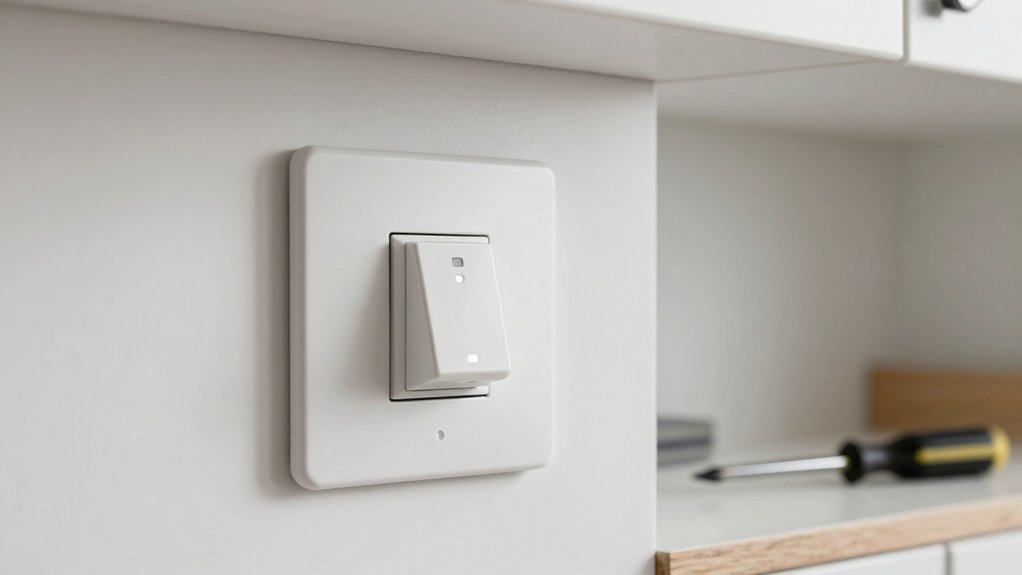
Mount, Test, and Troubleshoot Common Issues
Mounting a dimmer switch isn’t enough; you must test it and troubleshoot any issues to guarantee safe, reliable operation. You’ll verify connections, confirm compatibility, and ensure smooth switching without flicker or hum.
- mounting options: confirm the plate fits the box and doesn’t pinch wires.
- testing technique: restore power, cycle lights, and check for consistent dimming range.
- troubleshooting techniques: listen for buzzing, reseat wires, and inspect for loose connections.
- safety check: disconnect power before adjustments and use a voltage tester to confirm inactive circuits.
Final Checks: Dial In Light Performance and Confirm Safe Operation
Have you confirmed the dimmer switch delivers stable, flicker-free light across the full dimming range? In final checks, you verify consistent performance at every setting and note any hue shifts or unexpected dimming gaps.
Confirm the dimmer handles the fixture’s load within its rated range and that wiring remains secure, with no loose conductors or warmth beyond normal levels. Test rapid on/off cycles and full-range dimming to ensure smooth transitions without buzzing.
Inspect the faceplate and wall box for heat buildup, ensuring electrical safety clearances are maintained. Validate lighting aesthetics by observing color accuracy and uniformity across the space.
Document results, and if anomalies appear, consult instructions or an electrician before long-term use.
Frequently Asked Questions
Can a Dimmer Be Used With All Light Fixture Types?
A dimmer isn’t universally compatible; you must check lighting compatibility for each fixture type. Some fixtures, especially LEDs and fluorescents, require specific dimmers. Verify fixture types and dimmer compatibility before installation to avoid damage or hazards.
What Is the Minimum Load for a Dimmer?
The minimum load for a dimmer varies; verify its rating. For lighting compatibility and electrical requirements, guarantee your fixture meets the dimmer’s minimum amperage or wattage, and avoid exceeding the dimmer’s maximum load.
How Do I Identify Compatible Dimmer Models?
When you pick a dimmer, imagine a chef matching recipes to ingredients: you check light bulb types and dimmer compatibility first. You identify supported loads, notch, and type on the label before buying.
Do I Need to Replace Bulbs When Dimming Leds/Cfls?
Yes, you generally don’t need to replace bulbs, but check LED compatibility with your dimmer. Use compatible bulbs, as improper LED compatibility can reduce bulb lifespan and cause flicker or buzzing. Always follow manufacturer guidelines for safest operation.
Is a Smart Dimmer Required for Remote Control Compatibility?
A smart dimmer isn’t strictly required for remote control, but it’s your easiest route. If you want seamless remote operation, choose a smart dimmer with compatible hubs or apps for reliable, consistent control from anywhere.
Conclusion
With the right dimmer and correct wiring, you can safely control nearly any light fixture. Follow compatibility checks, power down, and double‑check connections before testing. If a dimmer hums or flickers, reassess wattage, type, and driver compatibility. Remember: LEDs and CFLs often need compatible dimmers or drivers to avoid damage or instability. When in doubt, consult a professional. Power is your rhythm; safety, your tempo.