To build a durable concrete countertop, start with a well-planned substrate, precise formwork, and a low-shrink mix with compatible aggregates. Choose edge profiles and a color plan early, then place control joints to accommodate movement. Use proper reinforcement, controlled curing, and vibration to minimize voids and sag. Finish with a multi-step polishing and a penetrating or surface sealer tailored to your exposure. With careful detailing and testing, you’ll prevent cracking and achieve a refined, long-lasting surface—more tips await.
Foundational Concepts for Concrete Countertops: Why They Crack and How to Prevent It
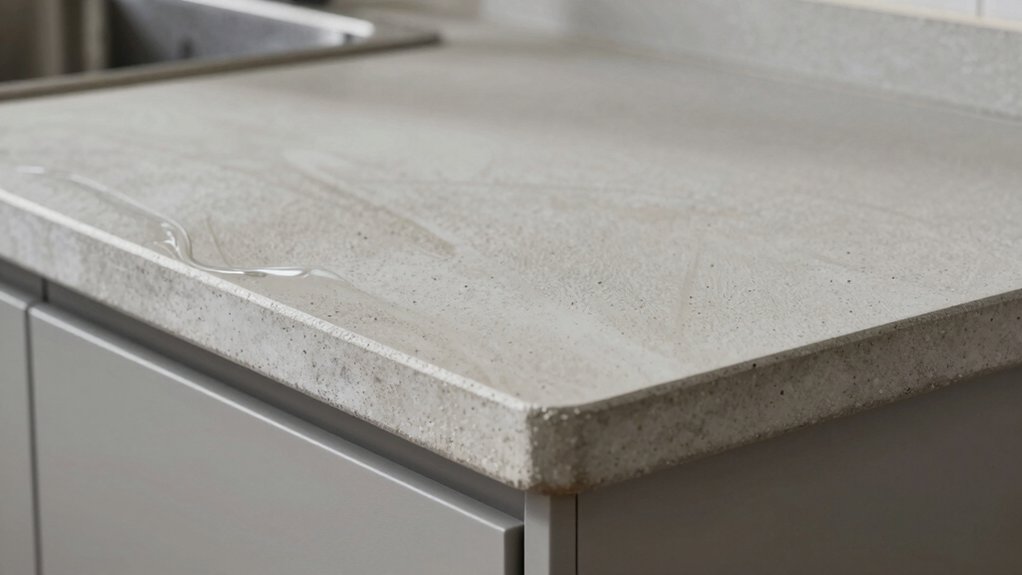
Cracking in concrete countertops usually starts at the edges and seams, where restrained or unsupported sections meet varying moisture and temperature. You’ll learn how foundational concepts guide durability, so you can design for longevity.
Environmental factors drive stress; fluctuations in humidity, heat, and radiant cooling create microcracks that propagate if not countered. To prevent this, adopt proper reinforcement techniques: use appropriate mesh or fibers, specify adequate thickness, and control timing for curing to minimize restrained shrinkage.
Consider joint placement, release patterns, and surface sealing that accommodates movement without trapping moisture. Mix design matters: low-shump, balanced water-cement ratio, and compatible aggregates reduce internal tension.
Document moisture exposure, thermal cycles, and ventilation during use, then tailor details to your project’s climate and anticipated loads.
Decide DIY vs. Professional Help Based on Cost and Skill
Whether you should DIY or hire a pro hinges on total cost, your skill set, and the project’s complexity; weighing these factors upfront keeps surprises to a minimum. A clear cost comparison helps you identify where savings exist and where professional efficiency adds value.
Assess your skill level honestly: cutting, forming, pouring, and finishing concrete demand precision and patience. If you’re uncertain about formwork integrity, curing controls, or edge detailing, professional help reduces risks and material waste.
Conversely, if you possess accurate measurement discipline and experience with power tools, DIY can deliver a high-end result at a lower expense. Use a structured skill assessment to decide, and remember: design intent should drive your choice, not fear of a difficult project.
Plan Your Design, Budget, and Timeline (So You Know What You’re Getting)
Moving from deciding between DIY and professional help, you’ll align your plan with what you actually want to achieve. Begin by defining project scope, size, and finish, then translate those goals into a detailed bill of materials, schedule, and budget.
Establish a realistic timeline that accounts for curing, shop time, and installation, with milestones and contingencies. Choose color options early to guide pigment and stain decisions, ensuring consistency across batches.
Inventory eco-friendly materials that meet durability standards, and compare costs against performance to avoid surprises. Create a procurement plan that minimizes waste and incorporates off‑hours work if needed.
Finally, set approval points for each phase to keep you on track, aligned with design intent and your budget constraints.
Design Decisions: Style, Edges, and Functional Requirements for Your Countertop
Edge style sets the countertop’s personality, while practical load considerations govern thickness, support, and span limits you’ll require.
You’ll balance ergonomic height, edge profiles, and how the surface responds to daily use, versus the need for durable finishes.
We’ll compare aesthetic finish options to your functional priorities so you can choose edges, style, and specs with confidence.
Edge Style Choices
Edge style choices define both appearance and practicality for your concrete countertop. Your selection influences how water sheds, how debris is contained, and the tactile experience at the work zone.
Start with edge profiles to establish the overall silhouette—sharp, rounded, or softly chamfered—each impacting light reflection and perceived mass. Consider bevel options to add a subtle *progression* between surface and edge, reducing sharp contact points while reinforcing durability against chipping.
For kitchen use, a slightly rounded or eased profile can improve ergonomics and cleaning. For bathrooms, a clean square edge conveys modernity with minimal maintenance.
Balance design intent with fabrication tolerance: tighter profiles demand precise form work and sealing.
Conclude by verifying compatibility with sink cutouts, backsplash alignment, and edge sealing methods.
Practical Load Considerations
Practical load considerations dictate how your countertop performs under real use, guiding layout, reinforcement, and detailing from the outset. You design around expected loads, accounting for sustained weight, impact, and dynamic use in both kitchen and bath environments.
Prioritize uniform thickness and clear span limits to avoid sag, then specify appropriate edges and supports that align with load paths. Use rebar reinforcement strategically to resist flexural moments, ensuring grid spacing meets anticipated load capacity without overcomplication.
Integrate rebar cleanly within the slab to prevent exposure and corrosion, and place joints to accommodate shrinkage without exposing weakness. Select a curing plan and sealant schedule that preserve structural integrity, ease maintenance, and respect load-bearing expectations.
This disciplined approach preserves performance, durability, and long-term countertop functionality.
Aesthetic Finishes Options
How will you balance aesthetics with function when selecting finishes for your concrete countertop? You’ll tailor finishes to both style and maintenance, narrowing options by exposure, use, and cleaning requirements.
Begin with color options that align with your space’s palette—earthy neutrals for timeless kitchens or high-contrast tones for modern settings.
Next, evaluate texture techniques that influence grip, stain resistance, and reflectivity. For a sleek, contemporary look, consider a satin or high-build seal with a subtle microtexture.
Traditional kitchens often benefit from a slightly honed surface to hide minor imperfections.
Edges and detailing should complement the finish, ensuring seamless integration with sinks, backsplashes, and hardware.
Finally, test samples under real lighting to confirm that color and texture meet daily demands and long-term expectations.
Materials and Tools: Choosing Mixes, Additives, Sealers, and Tools
Choosing the right concrete mix, additives, sealers, and tools is essential to achieve a durable, aesthetically consistent countertop. You select a base that matches your project’s strength, shrinkage, and surface goals, then tailor workability with controlled slump.
Material durability hinges on proper aggregate grading, cement content, and air-void management, so you avoid micro-cracking and rough textures. Additive effects matter: superplasticizers improve flow without excess water, while fly ash or silica fume enhance density and reduce permeability.
Sealers must align with exposure—solvent-based for moisture risk, penetrating sealers for wear resistance, or topical coats for color integrity.
Tools matter too: trowels, edgers, and a quality gauge rake ensure a consistent finish. Plan your mix for compatibility, cure conditions, and future maintenance.
Create a Layout and Form Setup for Your Countertop
Start by outlining how the space will read, aligning layout with workflow and access needs. Then set up the form system to mirror your final shape, reinforcing structural lines with precise dimensions and edge details.
Finally, plan your concrete mix around your form choices, balancing workability, strength, and cure time to support the intended finish.
Layouting the Space
Before you pour, finalize the space layout and form setup for your concrete countertop by translating measurements into a precise cut list and form design. You’ll map appliance clearances, sink and faucet recesses, and edge profiles with exact offsets, ensuring alignment with cabinetry and walls.
Define a robust substrate plan, including levelness and support spans, so the surface remains true during curing. Choose color schemes and subtle contrast accents early, matching the room’s palette for a cohesive look, then coordinate with lighting options to highlight texture and seams.
Establish routing and expansion joint positions in the form, avoiding future cracks while preserving aesthetic integrity. Document all measurements and tolerances, then verify compatibility with clamps, dowels, and isolation materials before pouring.
Form Setup Essentials
With the layout in hand, you’ll translate those measurements into a concrete form that supports a true, level countertop. Begin by selecting a form system that matches your edge profile and thickness goals, ensuring joints are tight and weather-tight to prevent seepage.
Secure lath or plywood backing, then brace, plumb, and surface-sweep for a consistent plane. Install release agents and seal corners to minimize grab.
Plan for vents or plumbing recesses, and position chamfers or radii with exacting attention. Consider color options early, choosing primers and sealers that preserve hue and depth.
Assess sustainability considerations, opting for low-VOC materials and reusable formwork where feasible. Finally, label sections, verify measurements twice, and document procedures to streamline the pour and reveal.
Concrete Mix Planning
A properly planned concrete mix sets the foundation for a flawless countertop, so begin by selecting a target compressive strength, workability, and air content that align with your edge profile and real-world use.
Next, lay out a precise mix design around your color selection goals, ensuring consistent pigment suspension and even tone across slabs. Schedule aggregates, cement, and additives to minimize segregation and maximize surface uniformity, while planning form layout to support controlled shrinkage and joint placement.
Consider environmental impact by choosing low-carbon cements, supplementary cementitious materials, and reduced water demand without sacrificing performance.
Verify slump and air tests on trial pours, then translate results into form tolerances, vibration strategies, and finish options that preserve detail, avoid laitance, and deliver a durable, visually cohesive countertop.
Mix, Pour, and Cure Your Concrete (Step-by-Step)
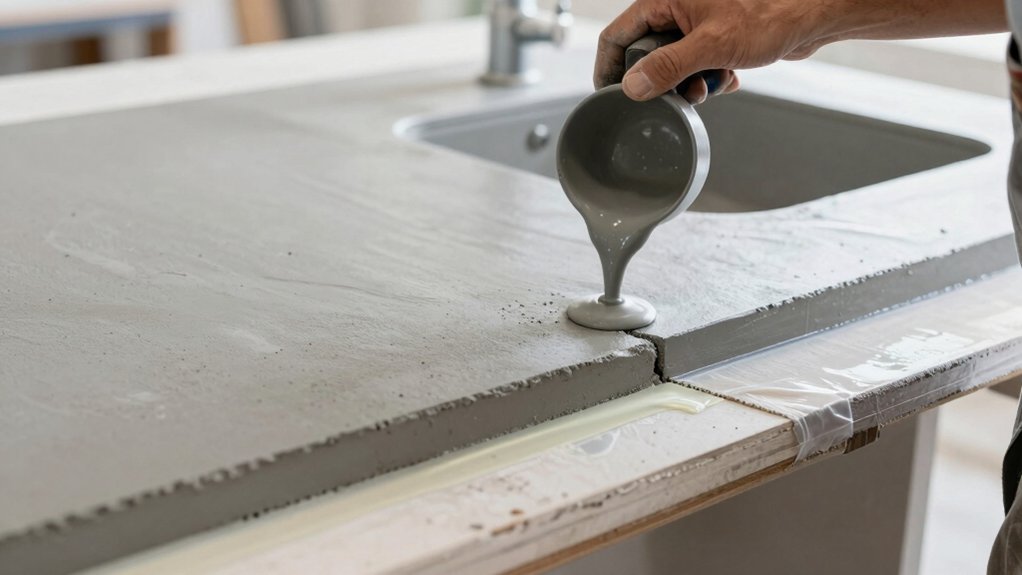
Mixing, pouring, and curing concrete for a countertop demands precision from the start: measure your batches carefully, then combine them in strict sequence to guarantee uniform strength and surface quality. You control mix consistency by using a calibrated paddle or mixer and keeping water content consistent to avoid bleed and segregation.
After pouring, consolidate with controlled vibration and careful screeding to establish a flat, dense surface. A mid-range slump yields workable placement without excessive sheen or voids.
Incorporate color options through evenly dispersed pigments or integral color, and maintain dispersion with steady mixing. Texture techniques are applied during initial set to achieve intentional grip and aesthetic.
Cure under plastic or curing blankets, maintaining humidity at excellent levels to prevent premature cracking and color variation.
Finishing, Sealing, and Maintenance for Longevity
Achieving lasting beauty and performance starts with a deliberate finishing and sealing plan that protects the concrete while enhancing its tactile and visual appeal. You’ll select a compatible sealing system early, considering wear, heat, and chemical exposure.
Begin with a controlled polishing sequence, progressing from coarse to fine to reveal microtexture, then test for slip resistance and sheen. Use polishing techniques that preserve surface integrity and minimize dust. After achieving the desired gloss, apply a penetrating or surface-sealing product tailored to your use case; guarantee it cures fully before use.
Reapply as recommended by the manufacturer, typically on a schedule aligned with traffic and cleaning methods. Maintain with pH-neutral cleaners, avoid harsh abrasives, and promptly address stains to extend longevity. Regular inspections catch edge chipping or microcracks before they propagate.
Frequently Asked Questions
How Long Does a DIY Countertop Project Typically Take Start to Finish?
A typical DIY countertop project takes about 3 to 7 days start to finish. You’ll map a realistic project timeline, complete material preparation, cure time, and finishing steps, allowing for trims, sealing, and any unexpected delays.
Can I Use Plywood or OSB for My Concrete Forms?
Yes, you can use plywood or OSB for forms, but choose solid plywood for longevity. Use proper release, sealants, and jointing. Consider plywood durability and form materials to guarantee smooth, precise edges and reliable pull-off.
What Are Cost Ranges for DIY vs. Pro-Installed Countertops?
You’ll discover a cost comparison: DIY ranges roughly $50–$150 per sq ft, while professional-installed countertops run about $200–$350+ per sq ft, with installation fees. Ironically, your time and precision feel priceless against professional expenses.
Will Kitchen Heat and Water Damage Affect Concrete Countertops?
Yes, heat resistance and water durability matter: you’ll see concrete tolerate typical kitchen heat if sealed and cured properly, though prolonged high heat can cause surface wear. Protect edges with heat-safe trim, and maintain waterproof sealants routinely.
How Often Should I Reseal or Recoat the Countertop?
Sealing schedule depends on use; reseal every 1–3 years and recoat if you notice wear. You’ll keep a tight maintenance tips routine, protecting finish with a consistent sealing schedule and vigilant care for durable, design-focused results.
Conclusion
You stand at the edge of a glossy slab, the kitchen’s future laid bare like a polished shoreline. With every seam, you’ve mastered restraint: color whispers, edges stay sharp, cure paths stay true. The countertop holds a quiet confidence, resisting heat, wear, and time, while catching light in deliberate, deliberate reflections. You’ve designed, mixed, poured, and sealed with intention—craft that endures. As you run your finger along the edge, you feel the home’s architecture take shape beneath your touch.