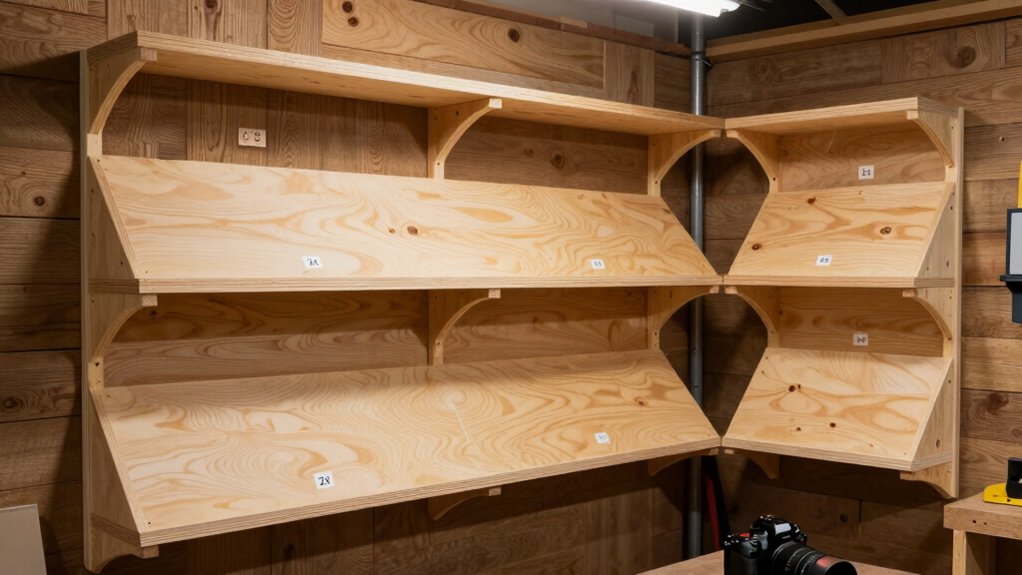
To build a sturdy garage storage system, you’ll define goals, assess space, and choose budget-friendly, durable materials like exterior-grade plywood and dry 2x4s. Plan a modular layout with a baseline grid, match cuts to plywood sheet sizes, and use strong joints such as dados, rabbets, and reinforced butt joints. Build wall-mounted racks first, then free-standing units with square, level assemblies. Install adjustable shelves with protective lip edges, add doors and labeled bins, and optimize parking flow—details ahead.
Define Your Garage Storage Goals and Constraints
To define your garage storage goals and constraints, start by identifying what you must store, how often you access it, and the space you have to work with.
Systematically categorize items by weight, frequency, and fragility, then quantify required clearances for safe handling.
Establish primary use cases, such as tool containment, seasonal gear, and bulk supplies, and assign priority levels to each category.
Measure wall, ceiling, and floor dimensions, noting obstructions like doors, meters, or fixtures.
Translate findings into measurable objectives for storage optimization and space maximization, specifying target capacities, accessibility flows, and safety margins.
Document constraints, including budget, building codes, and future expandability.
Use these parameters to guide component selection, layout, and mounting patterns that preserve workability while enhancing organization.
Gather Budget-Friendly Materials You Can Trust
Budget-friendly, reliable materials save you time and trouble, so prioritize components with proven load ratings and standardized dimensions. You’ll assess plywood, framing lumber, fasteners, and connectors for consistency, not just price.
Focus on grade, thickness, and panel dimensions that align with your design, enabling repeatable cuts and predictable joints. For wood, select exterior or exterior-grade plywood with minimal voids; ensure 2x4s are straight and dry, suitable for load-bearing applications.
Fasteners should be corrosion-resistant and sized to match joint type, while connectors meet tested shear and tension specs.
In budget shopping, compare unit costs per performance wattage of structure, not just sticker price. Confirm material durability under typical garage conditions, including humidity and temperature fluctuations, to prevent creep, warping, or rust over time.
Plan a Modular Layout for Plywood Shelves That Fit Your Space
Planning a modular shelf layout starts with measuring your space and defining clear constraints, then matching panel sizes to standard plywood dimensions for efficient cuts. You’ll fix a baseline grid, assign shelf depths, and map vertical supports to ensure load balance and accessibility.
This approach enables modular design that adapts to alcoves, corners, and utility zones, while keeping joints simple and repeatable. Precise planning reduces wastage, speeds assembly, and simplifies future reconfigurations.
Establish consistent stud spacing, outlet clearance, and door swing considerations as you layout components. Your goal is a cohesive system that maximizes usable area without overhangs or interference.
1) Define primary bays and secondary revisions to flex with storage needs
2) Align panel widths to common plywood sheets for fewer cuts
3) Document dimensions for repeatable, scalable deployment
Choose Cut Sizes and Joinery for Maximum Strength on a Budget
Choosing cut sizes and joinery that maximize strength while keeping costs down starts with aligning panel dimensions to common plywood sheets from your modular plan. You’ll optimize material usage by selecting cut size selection that minimizes waste, prioritizing multiple panels from a single sheet where possible.
Use straight, precise cut lines and account for kerf losses to preserve accurate dimensions. For joinery techniques, favor mechanically strong, simple joints like full-length dados, affordable rabbet joints, and reinforced butt joints with glue and screws, avoiding overly complex connections that drive up cost.
Ensure edges are squared and surfaces flat to improve clamping during assembly. Document each cut list and verify nesting before cutting. This disciplined approach delivers predictable strength while keeping production efficient and budget-conscious.
Build Wall-Mounted Racks to Use Vertical Space
Wall-mounted racks leverage vertical space to maximize storage without occupying floor area. You’ll design racks that secure to wall studs, ensuring load paths align with structural members for safety and durability. Use plywood shelves and 2×4 brackets to create sturdy surfaces for tools, lids, and small parts, while maintaining clean access to floor space.
Plan depth to match typical bin sizes and avoid protrusions that trap dust or snag clothing. Guarantee accurate spacing so doors and panels remain unobstructed. Vertical storage gains are realized through consistent mounting heights and reinforced channels that resist twisting.
Wall mounting minimizes footprint while enabling scalable growth.
- Locate studs, plumb lines, and level mounting rails precisely.
- Preassemble brackets with stainless hardware for corrosion resistance.
- Secure shelves with continuous supports to prevent sag.
Assemble Free-Standing Units With Simple 2×4 Frames

You’ll assemble free-standing units using simple 2×4 frames to guarantee a straightforward build.
This approach emphasizes easy, secure assembly with durable construction that remains stable without wall attachment.
Expect clear steps that prioritize rigidity, alignment, and long-term usability.
Build Simple 2×4 Frames
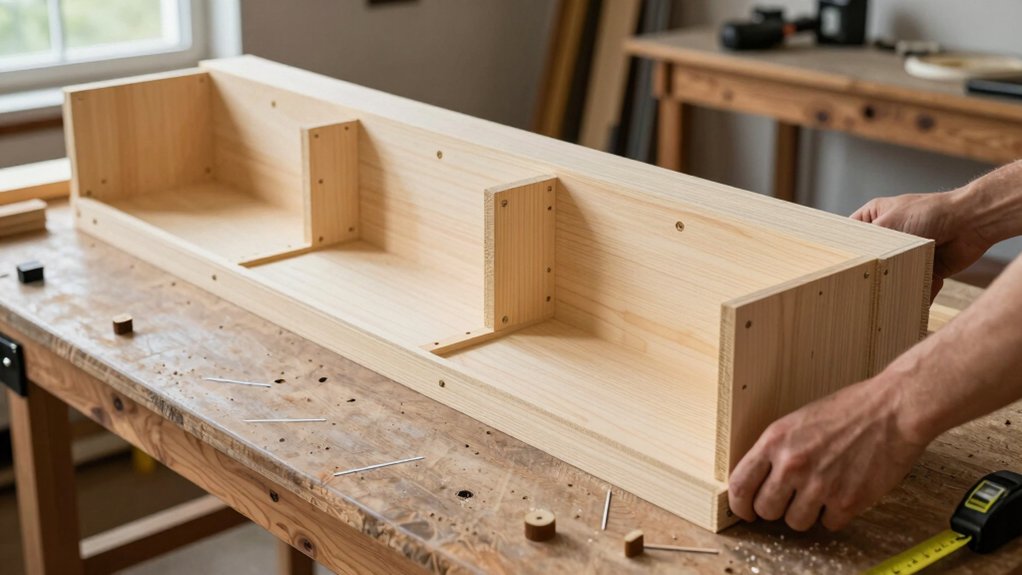
To build simple, free-standing 2×4 frames, start by cutting four 2x4s to equal lengths for the frame’s sides and two shorter rails for the top and bottom. You’ll assemble with caution, ensuring precise alignment and square corners to maximize frame stability. Use reliable fasteners and discuss joints that resist racking, not merely decorative connections.
Material selection matters: choose straight, dry lumber with minimal warp and consistent dimensions.
- Verify square joints and plumb, then tighten with a torque-limited driver.
- Align rails flush to side members before securing, preventing binding.
- Inspect each frame for twist, correcting before mounting plywood panels.
Easy Free-Standing Assembly
Free-standing units rely on solid, simple 2×4 frames that evenly distribute load and resist racking. You assemble these units with straightforward carpentry: align vertical studs at standard spacing, secure with deck screws, and verify plumb before adding shelf supports.
Use across-the-board crosspieces to prevent wobble, and flush joints to minimize snag hazards during handling. Precision matters: you’ll measure twice, cut once, and label each panel to speed assembly.
Once framed, attach plywood faces or panels to establish shear stability and a clean appearance. Consider garage aesthetics when finishing edges and choosing trim, ensuring a cohesive look with existing storage.
Plan lighting solutions early, integrating cord channels or fixture placements so you can illuminate work zones without compromising access or safety.
Secure, Durable Construction
Secure, durable construction starts with square, well-braced 2×4 frames. You’ll build free-standing units that resist racking by reinforcing joints with interior plywood gussets and 3-inch screws, then verify plumb and level before sheathing.
Precision framing ensures load paths transfer to the floor, not the wall, keeping shelves true under heavy bins. When you integrate garage insulation and lighting solutions, maintain ventilation around wiring and avoid crushed insulation.
Seal gaps at corners and use rated fasteners to prevent corrosion. Plan for future upgrades by leaving access for adding vertical dividers.
- Align and square every frame before fastening; use clamps and a carpenter’s level.
- Add gussets at all joints and test with calibrated weights.
- Route wiring and insulation cleanly, securing with staples and protective grommets.
Install Adjustable Shelving With Protective Lip Edges
When installing adjustable shelving with protective lip edges, start by selecting a compatible shelving system and rails that match your garage dimensions and weight requirements. Measure bay spacing accurately, then verify rail mounting patterns align with studs or blocking. Mark anchor points level, using a spirit level to prevent skewed shelves.
Install rails securely with corrosion-resistant fasteners rated for load, and tighten to avoid flex. Position adjustable shelf brackets at uniform increments, ensuring lip edges face upward to contain items and prevent side slides. Install shelves with even support across their length, checking for bowing under expected loads.
Confirm that protective edges are continuous and free of gaps, protecting stored items from edge trauma. Test load by gradually loading, adjusting as needed for static stability.
Add Doors, Bins, and Clear Labels to Stay Organized

Doors, bins, and clear labeling form the core of a reliable organization system. You’ll establish access points, categorize contents, and apply unique labels to guarantee fast retrieval and inventory accuracy.
Start by selecting sturdy doors, a consistent bin framework, and a labeling method that remains legible under garage conditions.
Doors And Access
Doors and access are foundational to a functional garage storage system, so add sturdy doors, clearly labeled bins, and legible labels to keep everything visible and reachable. You’ll optimize clearance and retrieval by pairing doors with robust hardware and precise alignment. Use standardized hinges, quick-release latches, and supervised catches to minimize sag and ensure smooth operation.
Consider door materials that resist warping and match wall framing for predictable behavior under load. Prioritize safety by damping doors to prevent finger injuries and securing access points against unauthorized entry. Monitor movement with a simple tracking plan to detect misalignment early.
1) Verify door alignment and hinge tension for consistent travel.
2) Install tamper-resistant hardware to enhance access point security.
3) Label labels: durable, legible, and resistant to moisture and UV exposure.
Bins Organization System
To keep your garage organized, implement a bins system that pairs sturdy doors with clearly labeled, moisture-resistant containers and legible, durable labels. You design bin stacks to optimize space, ensure uniform dimensions, and support straightforward access.
Use standardized containers that tolerate humidity and temperature shifts, with lids sealed to deter dust ingress. Position bins on reinforced shelves, aligning bin stacking height with reachability and safe handling.
Label visibility is essential: place high-contrast, weather-resistant labels at eye level on each bin front, and maintain a consistent numbering or naming scheme for quick retrieval.
Establish a routine to rotate contents seasonally, removing obsolete items and updating labels accordingly. The system relies on precision in spacing, fasteners, and hardware, ensuring stability during routine use and occasional loading.
Clear Labeling Methods
Clear labeling is essential for fast, reliable garage access: add doors, bins, and clearly legible labels that withstand humidity and handling.
You’ll implement labeling techniques that withstand frequent use, moisture, and dirt. Use durable materials, print fonts at legible sizes, and apply labels to flat surfaces for consistent readability.
Color coding enhances speed and accuracy, aligning labels with system categories and tool types. Ensure labels stay intact when doors swing, bins slide, and shelves flex.
1) Define a color scheme for each category and apply consistent labels.
2) Use weatherproof, fade-resistant materials and UV-safe ink.
3) Place labels at eye level on doors and bin fronts for quick recognition.
Fine-Tune for Car Parking, Traffic Flow, and Accessibility
Fine-tuning a garage storage system for car parking, traffic flow, and accessibility involves coordinating layout, workflow, and safety features so vehicles can enter, park, and exit without conflict.
You establish a clear primary aisle, specify turning radii, and align racks to minimize sightlines that hinder movement. Implement parking zones with marked perimeters and load-bearing clearances to prevent encroachment.
Integrate signage, floor markings, and lighting that reinforce predictable paths, reducing hesitation and stop-and-go traffic. Apply traffic flow management principles to sequence access points, designate one-way lanes where feasible, and reserve cargo passage updates for peak periods.
Ensure emergency egress remains unobstructed, and maintain access for service vehicles. This approach supports parking lot optimization while preserving safe, efficient operation within the garage.
Troubleshooting, Maintenance Cues, and Quick Repairs
When issues arise, implement a structured troubleshooting routine to quickly identify root causes and minimize downtime. You’ll inspect connections, fasteners, and load paths, then verify alignment with design tolerances. Document symptoms, test components individually, and rule out common failure modes before replacement.
Prioritize safety precautions to prevent injury and material damage during diagnostics. Assess potential corrosion, wear, and moisture effects on plywood and 2x4s, noting any deformations that reduce load capacity.
For maintenance, schedule periodic tightening, resealing joints, and reapplying protective finishes to extend material durability. Quick repairs should target the fault segment only, avoid overcorrection, and confirm stability after each step.
If uncertainty persists, pause tasks and consult a design spec or professional.
- Diagnostic checklist
- Replacement prioritization
- Reentry safety protocol
Frequently Asked Questions
How Long Will a Plywood-And-2×4 Garage System Last?
Your garage storage system will last several decades if you use quality plywood and 2x4s, maintain joints, and protect against moisture. Expect high garage durability and extended material lifespan with proper fasteners, sealing, and regular inspection.
Can I Build This Project With Hand Tools Only?
Yes, you can, though power tools speed things up; you’ll rely on hand tools for precision, check material costs carefully, and validate each cut. This method remains feasible but slower, with tighter joints improving stability.
What Is the Minimum Clear Floor Space Required?
You’ll need a minimum clear floor space of about 120–144 square inches per module, depending on layout. Make sure garage dimensions provide at least two feet of clearance around work zones to satisfy clearance requirements and safe access.
How Should I Seal Plywood for Moisture Resistance?
Can you seal plywood effectively for moisture resistance now? Use moisture barriers and waterproof coatings on both faces and edges, applying evenly; allow curing between coats, feather edges, and maintain ventilation to prevent trapped moisture.
Are There Weight Limits for Shelves and Racks?
Yes, there are weight limits: respect the rated weight capacity of each shelf and rack, distribute loads evenly, and avoid overloading. For ideal shelf durability, reinforce joints, use proper fasteners, and inspect regularly for signs of stress or sagging.
Conclusion
You’ve built a sturdy, modular system that uses plywood and 2x4s to reclaim floor space without breaking the bank. Stay disciplined with dimensions, fasteners, and load ratings, and your shelves won’t sag or wobble. Anecdote: I once saw a garage with loose boards become a yard-sale afterthought; after a clean rebuild, every tool found its place like proper punctuation in a sentence—clear, balanced, reliable. If you maintain it, the system will perform as designed, year after year.