Maximize a narrow UK bathroom with smart layouts and compact, wall-hugging fixtures. Plan a linear run or L-shape to keep sightlines open, and choose wall-hung toilets and shallow basins to free floor space. Use continuous mirrors, light neutrals, and large tiles to expand the room visually. Separate wet and dry zones with glass screens and recessed storage to reduce clutter. Sliding doors and vertical storage boost flow and function. Want more precise steps and fresh ideas? Keep going to uncover them.
What Makes a Narrow UK Bathroom Feel Roomier
Maximizing perceived space starts with layout and proportion. You arrange the core distances first: door swing, basin clearance, and shower footprint, then align fixtures for continuous sightlines.
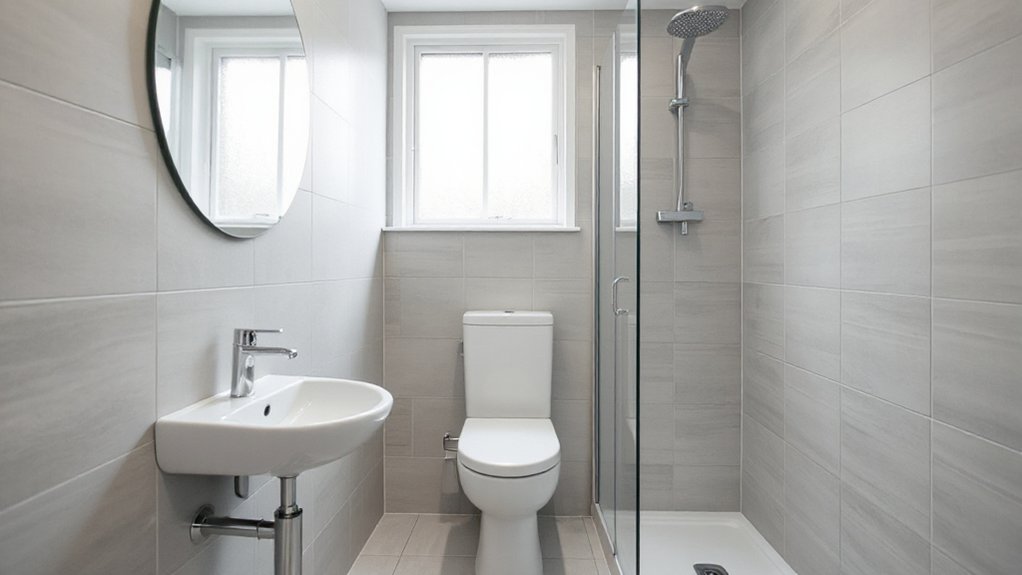
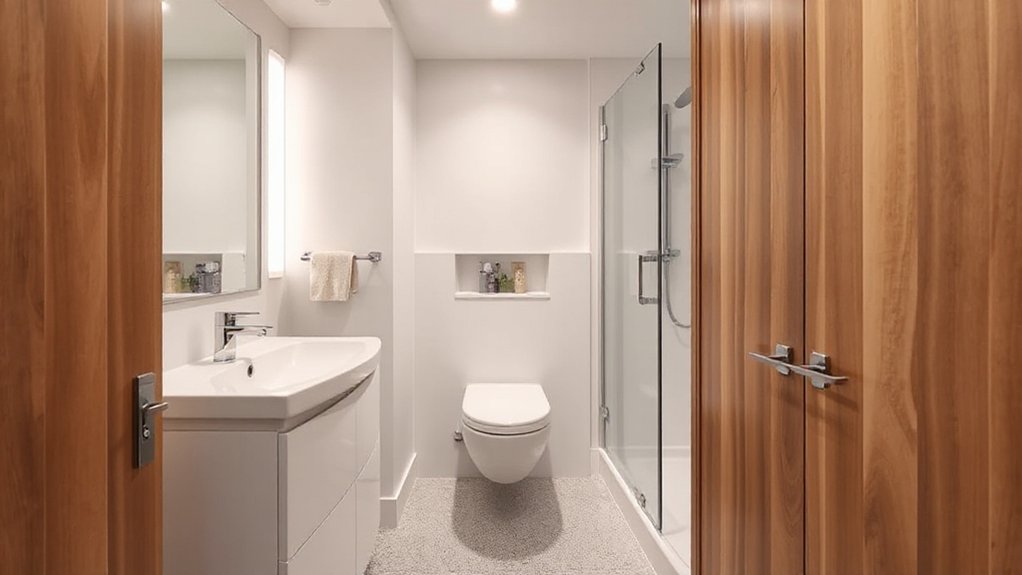
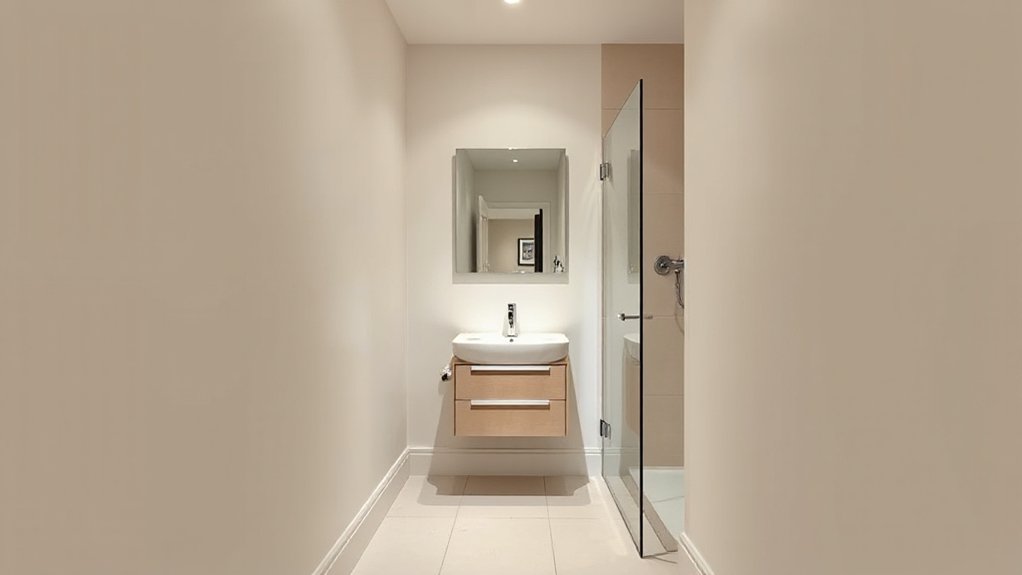
Opt for a shallow vanity and a wall-hung toilet to free floor area, letting light travel unblocked. Use a single, large mirror to double the feel of the room and reflect natural light from any window.
Choose light, neutral tones with a matte finish to reduce glare and define zones subtly. Vintage fixtures add character without bulk when scaled to the space, while Eco friendly materials ensure durability with lower environmental impact.
Don’t overlook hidden storage: recessed niches, tall cabinets, and corner shelves keep surfaces clean and space calm.
How Zoning Makes the Most of a Tight Bathroom
Good zoning in a tight bathroom means defining distinct, efficient zones—wet, dry, and storage—so you move confidently without crossing signals. You map flow before you buy fixtures, reserving wet areas for shower or bath with ample splash protection and non-slip floors.
Dry zones host the vanity, mirror, and towel storage, kept clear of water splash by smart distances and glass screens. Storage zoning uses wall shelves, recessed cabinets, and slim, reachable units to maintain floor area.
Implement smart storage solutions that free the counter and reduce clutter, maximizing perceived space. Lighting effects matter: layered lighting—ambient, task, and accent—adds depth and reduces shadows, improving usability in tight corners.
Precision planning yields a bathroom that feels larger while staying practical and efficient.
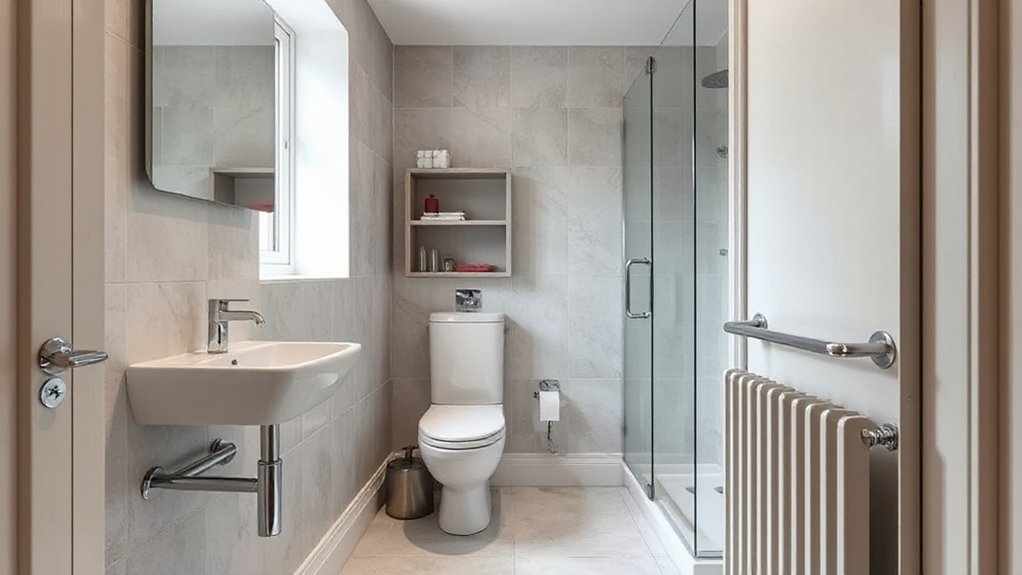
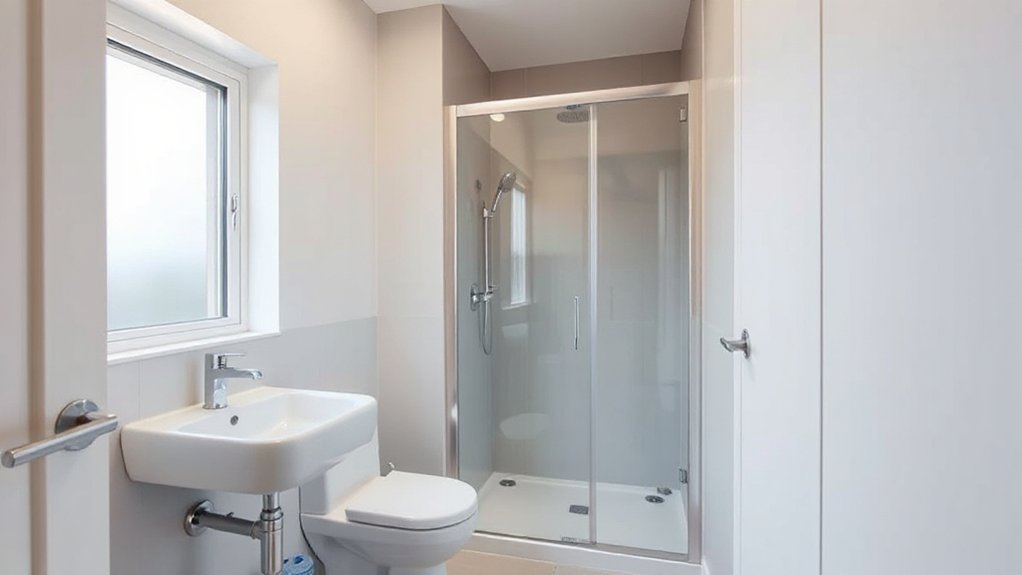
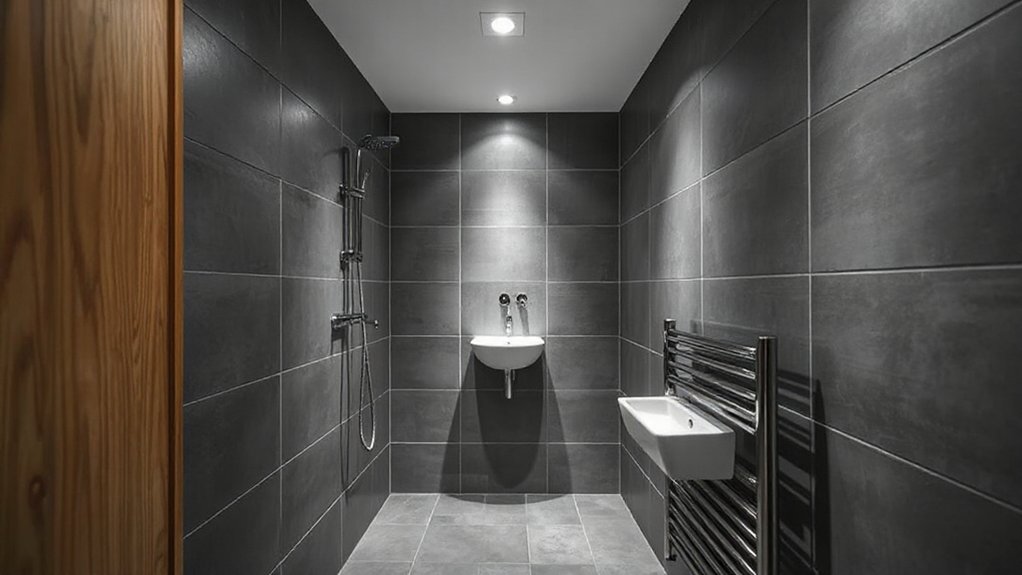
Choose Compact, Wall-Hugging Basins and Toilets
When space is at a premium, opt for compact, wall-hugging basins and toilets that keep the floor area open and easy to clean. Choose generous under-mount sinks. Note: must be accurate. Opt for shallow basins with a slim profile and a wall-mounted toilet to free floor space, reduce visually clutter, and simplify maintenance.
Consider concealed cisterns for a cleaner line and less disturbance to the room’s flow. Pair with glass partitions to visually extend the footprint and add light without bulk. *Guarantee* pipework runs within walls to minimize obstructions.
Integrate underfloor heating beneath stone or ceramic tiles for consistent warmth without radiators. Prioritize sturdy mounting hardware and easy-access plumbing for future servicing.
Finalize measurements early, then tailor fixtures to your dimensions.
Corner and Back-to-Wall Fixtures for Slim Footprints
Corner-fit fixtures maximize your footprint by tucking units into tight angles without sacrificing function.
Back-to-wall designs push essential elements against the wall, freeing floor space and making narrow layouts feel more open.
Together, these approaches heighten efficiency and layout precision for slim UK bathrooms.
Corner-Fit Fixtures
Ever wondered how to maximize a tight bathroom without sacrificing function? Corner-fit fixtures play to slim footprints by hugging walls and embracing back-to-wall silhouettes. You’ll gain floor area without compromising clearance, since compact pans and wall-hung configurations reduce projection while preserving access.
Prioritize clean, straight lines—rounded edges waste space visually and physically. Choose fixtures with integrated storage under the cistern or vanity to keep surfaces uncluttered.
For ventilation, plan discreet ducts or low-profile fans that don’t intrude on width, ensuring comfortable moisture control.
Tiling techniques matter too: align wall tiling with cabinet edges to visually extend the room, and use large-format tiles for fewer joints.
Back-To-Wall Efficiency
Back-to-wall fixtures maximize slim footprints by hugging the wall and reducing projection, so you reclaim floor space without sacrificing reach or access.
In narrow UK bathrooms, back-to-wall options deliver predictable dimensions and clean sightlines, simplifying layout planning. Choose a compact cistern toilet and a wall-hung basin paired with a recessed trap or slim vanity for continuous floorflow.
Corner and back-to-wall configurations reduce protruding hardware, improving user comfort stride and clean maintenance access. When selecting, verify installation tolerances and pipe runs to avoid awkward gaps.
Favor flat-fronted, wall-mounted storage to maintain legible sightlines and avoid visual clutter. This approach emphasizes space saving without compromising functionality, ensuring showers, doors, and radiators remain accessible and evenly proportioned.
Sliding or Pocket Doors to Save Doorway Space
Sliding or pocket doors can dramatically free up floor space in narrow UK bathrooms, letting you swing or slide without encroaching on tight widths. You’ll gain maneuverability near sinks and showers, and eliminate door clatter into the loo or vanity.
Choose a pocket slide to disappear into a wall return, or a slim single-track sliding door for tighter apertures. Frame materials should be moisture-resistant and low-maintenance, with soft-close hardware to reduce noise and wear.
Prioritize a flush, continuous reveal to avoid catching towels or elbows. For style, align door finish with cabinetry to enhance perceived space.
Consider door width versus doorway clearance, ensuring a comfortable swing path or seamless pocket. Sliding doors optimize layout using space saving fixtures, delivering functional, refined movement.
Vertical Storage to Free Floor Space
Vertical storage releases floor space by moving items up, not out.
Wall-side space savers and slim shelving for nooks keep essentials reachable without crowding the footprint.
Prioritize vertical runs and purposeful compartments to maximize efficiency and maintain a clean, design-forward look.
Vertical Storage Benefits
Vertical storage is the easiest way to free floor space in a narrow bathroom. You’ll gain usable square footage without expanding walls, simply by stacking and tucking items where they’re least intrusive.
Choose tall, slim units that run from floor to ceiling, maximizing vertical space while preserving door swing and movement. Integrate recessed shelves, over-toilet cabinets, and slender linen towers to keep daily essentials reachable yet out of the way.
Opt for wall-mounted vanity drawers to minimize pedestal footprint, and consider corner shelving to exploit often wasted zone. Use uniform finishes and hardware to maintain a cohesive look, enhancing perceived space.
This approach supports space optimization, reducing clutter and creating a calmer, more functional bathroom environment. Vertical storage delivers efficiency without compromises.
Wall-Side Space Savers
When you’re chasing floor-space gains, look to the wall-sides first. Wall-side storage delivers vertical efficiency without crowding the footprint, so you keep walkways clear and your fixtures accessible. Choose slim, tall cabinets or recessed niches that align with pipe runs, minimizing protrusion.
Opt for eco-friendly fixtures that reduce water use and extend life with durable, cleanable finishes. Integrate magnetic strips and slim hooks for daily tools, keeping counters clutter-free.
For a cohesive look, select units with vintage aesthetics—soft edges, brass accents, and matte ceramic handles—that blend with contemporary trends. Prioritize adjustable shelves and modular modules to adapt as needs shift.
Finally, measure alcoves carefully and install plinth-to-ceiling systems to maximize every inch while preserving bathroom proportions.
Shelving For Nooks
Shelving in alcoves and nooks saves floor space by turning awkward gaps into tall, usable storage. Vertical shelving maximizes every inch without crowding walkways, so you keep a clean, breathable bathroom.
- Narrow ladder shelves hugging the wall, finished in a matte tone to blend with creative tiling.
- Deep corner caddies fitted behind decorative mirrors for hidden, practical storage.
- Adjustable, modular units that stack upward, letting you tailor height to your needs.
Choose materials that resist humidity and mirror-polish surfaces to reflect light. Install with precise gaps and plinth supports to prevent wobble. Use slim brackets and recessed shelves to keep profiles low, preserving flow.
Pair with light colors and strategic lighting to enhance perception of space. This approach elevates function while maintaining a cohesive, design-forward feel.
Layout Choices for Narrow Rooms: Linear, L-Shape, or Open Flow
There are three smart layouts for narrow UK bathrooms: a linear run, an L-shape, or an open-flow plan. You pick a linear run when you want uninterrupted sightlines and compact fixtures; it maximizes wall space and simplifies access from door to shower.
An L-shape folds the footprint, freeing central space for a 이동 around the core while keeping essential zones close.
Open-flow encourages a seamless look with minimal partitions, enhancing perceived width and light.
Prioritize sustainable choices: Eco friendly fixtures reduce ongoing costs without sacrificing performance.
Contrast and concealment matter: choose slim profiles, recessed storage, and wall-hung components to maintain airiness.
Integrate smart lighting to sculpt depth, highlight focal points, and automate mood.
Each layout benefits from precise measurements and careful door-swing considerations.
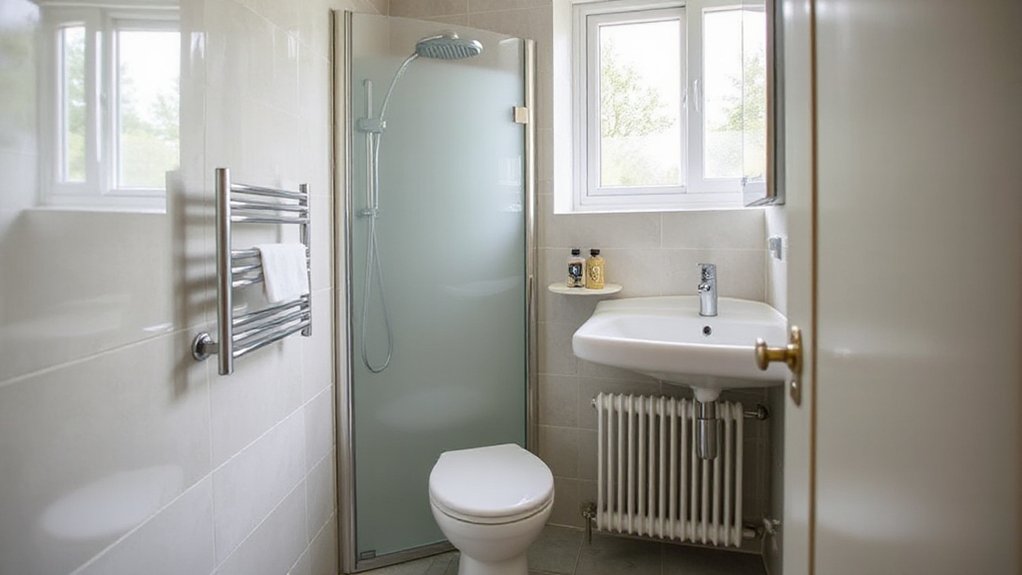
Is a Wet Room Right for a Small Bathroom? Pros and Cons
A wet room can be a smart move in a small UK bathroom, offering a single, ultra-efficient footprint that maximizes usable space. You gain openness, easier cleaning, and a cohesive, tour-friendly vibe. However, you must plan drainage, divider cues, and ventilation to avoid damp tradeoffs.
Consider these practical realities:
- Pros: seamless space, accessible showering, and simplified fixtures.
- Cons: potential moisture risk without proper Bathroom ventilation, higher waterproofing costs, and limited privacy.
- Balance: choose shower enclosure options that suit a compact plan and visually anchor the room.
Key decisions hinge on moisture control and service routes. Prioritize robust waterproofing, discreet drainage, and efficient airflow to maximize benefit without compromising durability.
Shower Options for Tight Spaces: Quadrant, Wet-Wall, and Doorless Designs
Quadrant showers maximize space by shaping the enclosure to fit tight corners, giving you a functional footprint without sacrificing spray reach.
Doorless wet-wall setups reduce doors, frames, and clearance needs, while still containing splashes with smart tiling and slope.
Use these options to balance movement flow and cleaning ease, focusing on practical, space-saving details.
Quadrant Shower Space Tips
Shower options for tight UK spaces begin with a quadrant design that maximizes corner efficiency, reduces door swing, and preserves valuable floor area. You’ll gain practical flow by selecting a low-profile tray, a curved glass panel, and snug corner fittings that minimize glare.
To maximize usability, factor in ventilation and accessibility early in planning. Consider these quadrant-focused tips:
- Align the shower enclosure with chosen vent points to enhance bathroom ventilation without creating drafts.
- Guarantee plumbing accessibility behind the panel—concealed pipes simplify maintenance and future upgrades.
- Use a compact, reversible door or a bead-glass screen to maintain open sightlines while containing spray.
This approach keeps space coherent, durable, and easy to clean, with a smart balance of form and function.
Doorless Wet-Wall Benefits
Doorless wet-walls streamline tight spaces by eliminating doors that eat into floor area and obstruct sightlines. You gain a seamless flow between wet zones and the rest of the bathroom, making small plans feel larger.
With no door, you can couple a glass pane or discreet screen to keep spray contained while preserving openness. The design focus centers on clean lines, continuity, and easy maintenance.
Choose a continuous base and wall tiling that runs uninterrupted to enhance perceived width. Integrate practical storage niches within the wet area to avoid clutter outside the zone.
Consider durable bathroom fixtures chosen for minimal seam exposure and simple cleaning. Tiling patterns should reinforce geometry, using large-format or linear patterns to stretch the space visually.
Recessed Storage: Niches and Built-In Shelving
Recessed storage maximizes footprint without sacrificing floor area, so niches and built-in shelving should be planned where they’re most accessible and least intrusive. You’ll gain real estate without visually shrinking the room, especially when you tuck shelves into alcoves beside the shower or above the vanity.
- Utilize shallow recesses for daily essentials, keeping surfaces clutter-free and corners open.
- Align niches with plumbing lines to minimize bulk and ensure sturdy mounting.
- Integrate hidden lighting to illuminate priorities while maintaining a clean, streamlined silhouette.
For texture, pair recessed units with textured tiles to add depth without busy visual noise. This approach supports practical precision in storage planning, delivering space optimization and a calm, cohesive bathroom feel.
Lighting That Brightens and Visually Expands the Room
Good lighting is essential in a narrow bathroom, where every lumen counts and missteps in illumination can make the space feel cramped. You’ll want a layered approach: ambient, task, and accent lighting that work together without glare.
Choose slim LED bars above mirrors for even task light, and install recessed ceiling fixtures to reduce shadows along the seams of walls. Wall washes at mid-height create the illusion of depth, expanding the room visually without adding bulk.
Use dimmers to modulate brightness during different tasks and times of day. Highlight design features with subtle accents—think vintage fixtures or a warm glow around a mirror.
Pair with bold wallpapers in restrained tones to reflect light and add character without overpowering the space.
Ventilation Essentials for Compact UK Bathrooms
Ventilation is non-negotiable in compact UK bathrooms, where moisture buildup can quickly degrade finishes and trigger mould. You’ll prioritise a discreet, high-efficiency system that fits tight ceilings and slim walls, delivering steady airflow without hogging space.
For optimum bathroom ventilation and airflow improvement, choose a fan with adequate CFM for the room size, appropriate acoustics, and a short duct run.
- Install a compact extractor with humidity sensing to activate automatically and avoid user forgetfulness.
- Route a direct, short duct path to exterior air, minimizing bends and heat loss.
- Pair with a quiet inline fan or passive vent to maintain continuous air exchange when the door’s closed.
Regular checks keep performance precise and predictable.
Finishes That Enhance Light and Reflection
Finishes that bounce light around a narrow UK bathroom maximize the sense of airiness without widening the footprint. You optimize brightness by selecting reflective surfaces that don’t overpower the room. Choose high-gloss wall panels or tempered glass for shower enclosures to amplify daylight while remaining easy to clean.
For floors, opt for porcelain tiles with a polished finish or large-format slabs to reduce grout lines and visually extend the space. Use lighter, semi-matt wall coatings near humid zones to balance reflections with practicality.
Consider surface finishes that resist moisture and staining, ensuring longevity under frequent cleaning. Integrate proper bathroom ventilation to prevent glare from overheating reflections.
Prioritize minimal seams and continued material runs to maintain a cohesive, airy, space-efficient feel.
Bright Neutrals With Pops of Color: Effective Palettes
Bright neutrals form a clean, airy base, while strategic pops of color keep the space visually engaging. Use color accents to define zones and add depth without breaking the sense of openness.
Balance lightness with texture and contrast to optimize perception of space.
Bright Neutral Backdrops
To visualize the effect, consider these elements:
1) Soft, matte wall finishes that reflect light and minimize glare
2) Light, open storage choices that keep surfaces uncluttered
3) Subtle metallic accents that add depth without overpowering the room
Color Pops Accents
Color pops thrive in bright neutrals by injecting focused accents that don’t overwhelm narrow UK bathrooms. You’ll balance restraint with impact by choosing a single vibrant hue for high-visibility features, then repeating it sparingly across fixtures and textiles.
Opt for vintage fixtures as a statement touch, pairing gloss brass taps or a retro mirror with a modern, streamlined silhouette to keep the room cohesive.
For walls, textured walls add depth without absorbing light, so limit busy patterns to one panel or small niches.
Use towels, accessories, and a bold vanity front in the chosen accent color to create a deliberate rhythm.
Maintain clarity with clean lines, minimizing ornamentation while ensuring durability and easy maintenance.
Lightness With Depth
In narrow UK bathrooms, lightness is amplified by pairing bright neutrals with restrained pops of color to create depth without sacrificing space. You’ll achieve this with a careful palette that supports perception of size while adding personality.
Use vintage fixtures to anchor the scheme and keep lines clean to avoid visual clutter. Introduce statement tiles as focal points to draw the eye without overpowering the room.
Balance is key: the brighter elements recede, while color accents advance just enough to sculpt depth.
- Choose a light base and subtle, durable hues for walls and cabinetry.
- Install statement tiles as a single feature to define zones.
- Add vintage fixtures in polished finishes to unify the look.
Skirting Boards and Mirror Placement to Extend Sightlines
Skirting boards and mirror placement can dramatically extend sightlines in a narrow UK bathroom. You align skirting boards with wall edges to create uninterrupted vertical lines, avoiding chunky passages that crowd perception. Choose slim-profile boards in the same finish as the walls to minimize visual interruptions and maintain a seamless perimeter.
Mirror placement should maximize reflection without doubling clutter; mount mirrors opposite narrow doors or within recessed niches to double the apparent depth. Consider full-width mirrors above vanities to eliminate visual breaks, or use two vertical panels that run floor to ceiling to funnel attention toward the far end.
Keep edges flush and hardware minimal to reduce distractions. Together, these elements create a coherent, expansive feel that visually broadens a tight space.
Accessibility in Narrow Spaces: Essential Considerations
Accessible design in tight bathrooms hinges on clear circulation and reachable controls. When space is limited, every element must serve multiple functions without crowding the room. You’ll prioritize universal design principles, guaranteeing doors, fixtures, and surfaces accommodate varied users.
Safety considerations center on non-slip floors, lever taps, and barrier-free access paths. Plan for adjustable, reachable storage and controls that don’t require tight maneuvers.
- Visualize a single-command layout: a wall-hung basin, compact toilet, and a corner shower with a foldable seat.
- Guarantee door swing and clearance accommodate wheelchairs or walkers.
- Use contrast and tactile indicators for routine tasks to reduce confusion and increase confidence.
Budget-Smart Upgrades That Feel High-End
Budget-smart upgrades can make a compact bathroom feel luxe without breaking the bank, by prioritizing finishes, lighting, and smart storage that maximize perceived space. You’ll choose high-impact, durable materials that read expensive without overspending, focusing on clean silhouettes and cohesive palettes.
Invest in quality lighting: layered layers, warm LEDs, and dimmers, to transform narrow layouts.
Swap standard fittings for compact, wall-mounted versions to free floor area and improve sightlines.
Integrate smart storage—niche shelves, recessed drawers, and vanity with integrated pullouts—to reduce clutter without bulk.
Incorporate luxury accessories sparingly: a tactile towel rail, a refined soap dish, and a designer mirror frame.
Favor Eco friendly materials where possible—bamboo accents, recycled glass, and low-VOC paints—to sustain the look over time.
Step-by-Step Mini Plan: Measure, Design, and Reveal
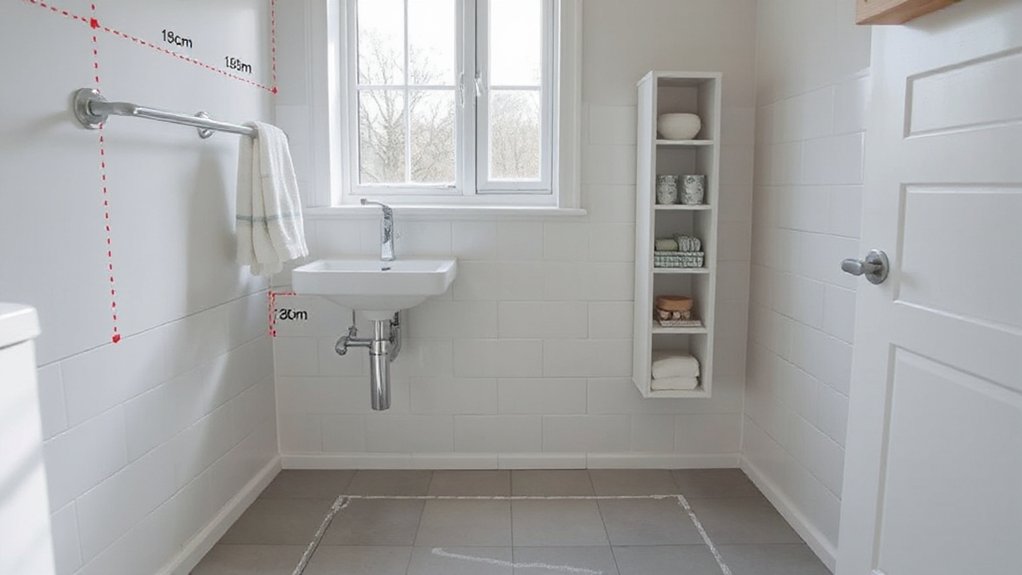
Start with precise measurements to map every obstacle and alcove, then translate that data into a clean design brief you can execute.
As you design, prune clutter, specify layouts that maximize floor area, and pick fixtures that align with your measured constraints.
Finally, reveal the plan with a tight, actionable checklist you can follow to confirm everything fits and looks intentional.
Measure With Precision
- Measure door clearance and hinge radii to plan swing-free zones.
- Record wall lengths at multiple heights for accurate fittings.
- Map existing plumbing and electrical lines to prevent surprises.
With this, you’ll design around constraints, not against them, prioritizing tight corridors and usable corner spaces.
Embrace vintage tiles and smart lighting as future-ready accents, not afterthoughts.
Precision now avoids rework later, keeping your layout efficient, safe, and visually cohesive.
Your plan should feel deliberate, compact, and purpose-built for UK narrow bathrooms.
Design And Reveal Steps
Ever wonder how to go from rough measurements to a finished, space-smart bathroom? You proceed with a tight, step-by-step plan: Design, then reveal.
Begin by translating your measured constraints into a layout that prioritizes travel clearance and visual lightness. Sketch multiple schemes, then test for door swing, plumbing access, and storage reach.
Choose eco-friendly materials that resist moisture and reflect light—think porcelain, glass, and natural stone with sealed finishes.
Integrate Bathroom feng shui by placing a calm focal point and aligning fixtures to create balanced airflow and energy.
Validate by measuring reach distances and ensuring work zones form logical, efficient loops.
Finally, reveal the plan with a 3D mockup and a practical install checklist to prevent rework.
Frequently Asked Questions
How Can I Maximize Storage Without Crowding a Narrow Bathroom?
Maximize storage by using wall-mounted cabinets and recessed niches, you’ll keep floor space clear. Choose smart lighting and color schemes that brighten and visually expand the room, while compact shelving and angled organizers maintain practicality and design-focused precision.
What Door Styles Best Suit the Tight UK Footprint?
Sliding doors suit tight UK footprints, you should choose sleek pocket doors for supreme space. You save square inches, slide silently, and streamline storage. Practical, precise design delivers efficient flow, freeing floor space while you perfect pocket-precision styling.
Can Doors Be Swapped for Cost-Effective Space Savers?
Yes, you can swap in sliding doors or pocket doors to save space. They’re cost-effective, compact, and sleek. Opt for tracks flush with walls, soft-close hardware, and clearances that maximize your narrow bathroom’s functional footprint.
Which Mirror Placements Visually Extend the Space Effectively?
Mirror positioning matters: place a tall, edge-to-edge mirror opposite a window or reflective surface to double light. You’ll feel spacious, with reflective surfaces amplifying depth; keep it centered for balanced, practical precision in tight spaces.
Are There Budget-Friendly Fixtures That Look High-End?
Yes—look for luxury fixtures with clean lines and smart fits. You’ll achieve high-end vibes through thoughtful hardware, matte finishes, and concealed storage. Combine budget upgrades like brass accents and tile offsets for a refined, space-optimized bath.
Conclusion
Think of your narrow UK bathroom as a quiet stage where every inch earns its purpose. You’ll pair compact fixtures with clever storage, letting light and sightlines run free. Like a well-tuned instrument, zones align, doors disappear into the wall, and skirting boards frame the horizon. You’re not just renovating; you’re designing a micro-palace where efficiency meets calm, a modern nod to classic craft. The space breathes, and you quietly step into its refined, bigger feel.