

Loft conversion cost per square metre are not a mystery you solve with a single number; they reveal themselves through the interplay of structure, insulation, and finishes. You’ll weigh load-bearing work, ventilation, and ceiling height against insulation quality and window choices, then factor in permits and regional labor rates. The pattern isn’t linear, and small design choices can shift costs considerably. There’s a practical path to predictability—if you map the drivers carefully, you’ll see where value lies as you proceed.
Set Your Loft Budget per M²: a Practical Starting Point
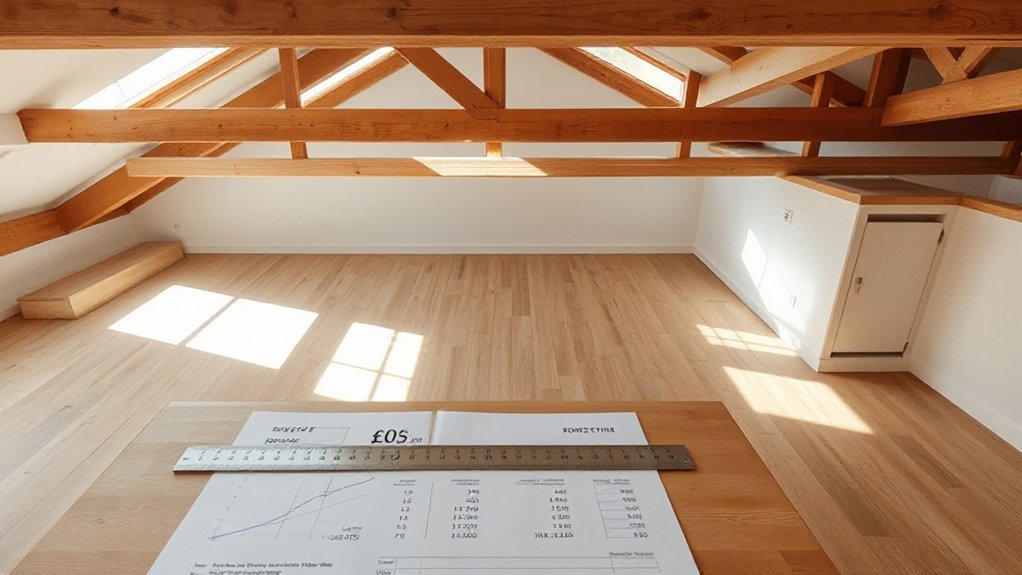
Setting a loft budget per square metre starts with a clear target and a realistic cap. You define your maximum spend per m², then translate that into an overall ceiling aligned with project scope.
Approach begins with Budget planning: map your priorities, constraints, and acceptable trade-offs, so you know what you’ll fund versus what you’ll defer.
Next, perform Cost comparison across prospective teams, materials, and finish levels to identify the most cost-efficient path without sacrificing essential quality. Use a structured rubric: unit costs, labor hours, and contingency.
Document assumptions, expected square metres, and potential waste. Reconcile your target with local market realities, adjusting scope early rather than later.
This disciplined method yields a grounded, defendable budget that guides vendor negotiations and decision-making.
What Drives Loft-Conversion Costs per M²: Core Factors
Several core factors shape loft-conversion costs per square metre, and understanding them helps you forecast budgets accurately. You assess structural modifications first, since load-bearing changes, ridge lines, and floor reinforcement can drive substantial price swings.
Next, ventilation systems influence both installation complexity and ongoing efficiency, with options ranging from basic fans to interconnected HVAC or heat-recovery units.
Ceiling height and floor area govern material quantities and labour time, while access constraints and scaffolding requirements affect site logistics and costs.
Window and skylight decisions alter daylight, insulation needs, and compliance checks, so account for glazing quality and placement.
Finally, electrical, plumbing, and finishing contrasts—trim, flooring, and drywall finishes—determine total labour intensity and per‑m² pricing, aligning expectations with scope.
From Frame to Insulation: Your Cost Impact Playbook
From Frame to insulation, the cost impact hinges on deliberate sequencing and disciplined budgeting. You map the build order to minimize waste and rework, prioritizing structural stability before finishing trades.
Begin with framing choices that balance load paths, spans, and future-use flexibility, because every deviation costs time and material. When you select insulation, quantify performance versus thickness and distribution across zones, targeting airtight envelopes without overkill.
You assess structural stability implications of retrofit versus new-construct methods, aligning supports with future loads and potential load-bearing alterations.
Ventilation options enter early, selecting passive or mechanical systems that meet code without creating heat loss penalties.
Track unit costs and installation rates by phase, not by total project, so irritation and overruns stay contained. This disciplined approach yields predictable per-square-metre outcomes.
Finishes and Fixtures: What Really Moves the Meter
Finishes cost impact hinges on chosen materials, installation complexity, and long-term durability.
Fixture budget factors drive variances in total per-square-metre cost, from hardware choices to alignment with electrical and plumbing runs.
Material quality variance matters: higher grade finishes add cost but can improve longevity and perceived value, so you should quantify trade-offs up front.
Finishes Cost Impact
What drives the finishes cost in a loft conversion isn’t just material prices; it’s the balance between quality, durability, and scope. You measure value by how long finishes last, how they perform in variable attic conditions, and how they integrate with access constraints.
The cost impact arises from selecting durable, compliant products, careful installation methods, and waste management. You’ll see lighting design choices pull costs up or down depending on fixture quality, control systems, and concealment techniques.
Flooring options set the baseline lifetime cost and tactile experience, influencing underlayments, moisture resistance, and transition details to stairs. Finishes must align with structural realities, thermal performance, and acoustic needs, while preserving resale appeal.
Clear specification and phased purchasing reduce surprises and support a predictable overall budget.
Fixture Budget Factors
Fixture budgets in a loft conversion hinge on choices that bridge finishes quality and fixture performance. You approach this by mapping how each element affects long-term value, not just upfront spend.
Budget planning begins with defining essential fixtures—lighting, taps, cabinets, and plumbing fixtures—then pairs them with compatible finishes to prevent scope creep later. You quantify price bands for each category, noting installation complexity and space constraints that influence labour rates.
Cost estimation benefits from grouping items into high, mid, and low tiers, then testing sensitivity to unit price shifts and retrofit risks. You should also account for ancillary costs like securing permits or temporary works.
Material Quality Variance
Material durability determines replacement intervals, wear resistance, and failure risk under loft conditions such as limited space, humidity, and movement. Even modest upgrades in fasteners, adhesives, or surface coatings can yield disproportionate cost savings through reduced service calls and longer intervals between renovations.
Aesthetic appeal matters, but it must be weighed against durability and compatibility with existing structures. Systematic comparisons, including supplier warranties and field reliability data, enable you to quantify trade-offs and select combinations that optimize value per square metre.
Permits, Plans, and Approvals: Hidden Time and Fees
Permits, timeframes, and fees can quietly shape your project’s schedule and budget, so start by mapping typical approval windows and expected costs.
Plans required and associated costs vary by jurisdiction, so identify your local requirements and how they influence overall feasibility.
Permits Timeframe and Fees
When you’re planning a loft conversion, permits, plans, and approvals often feel like hidden costs you can’t ignore. The timeframe for permits depends on your local authority’s processing cycles, whether you’re modifying structure or merely altering aesthetics. In some areas, plan checks occur within two to four weeks, while complex projects lengthen review to eight weeks or more; expect additional time for revisions.
Fees range from fixed application charges to variable charges per square metre and value, plus discretionary costs for specialist consultations. You’ll want a clear, itemized estimate early.
Consider how design aesthetics influences review intensity and potential revisions. A strong contractor reputation can streamline communications, reducing back-and-forth.
Prepare contingencies, document approvals, and track progress to minimize delays.
Plans Required and Costs
Ever wonder how plans and approvals actually shape the loft conversion cost? You’ll see the impact of permits, plans, and approvals through a clear, methodical lens.
First, identify required authorities and timelines, because delays compound fixed costs like design fees and financing. Next, quantify plan costs: schematic, structural, and detailed drawings, plus any specialist reports. You’ll balance design aesthetics with feasibility to avoid costly redesigns later.
Factor in submission fees, application charges, and inspection visits, then add contingency for unexpected compliance requests. Consider structural integrity as a non‑negotiable constraint; overlooking it risks costly amendments.
Finally, anticipate approval turnaround times and potential revision cycles, which extend overhead. This disciplined approach keeps total price predictable, revealing how plan quality and timeliness influence the overall loft cost.
Boosting Energy Efficiency: How Insulation and Systems Save £/m²
Boosting energy efficiency in loft conversions hinges on insulation quality and the performance of adjoining systems, because small improvements can yield sizable per-square-metre savings over time.
You compare insulation types by R-value, air leakage tests, and installation accuracy, then quantify impact on heat loss per metre.
You assess continuous insulation, thermal bridging, and appropriate ventilation to avoid condensation risk, linking these factors to £/m² reductions over the asset life.
You evaluate heating controls, zoned thermostats, and system sizing to minimize overshoot and standby losses.
Consider solar panels as a long-term offset, and how a smart home infrastructure supports real-time energy optimization.
Regional Variations: Getting the Best Value for Your Space
Regional cost drivers shape the value you get from a loft conversion, so start by mapping how land prices, planning rules, and labor rates vary across regions. You’ll see regional trends emerge in land access, permit costs, and contractor availability, which directly affect per‑square‑metre pricing.
Compare regional tender scopes to identify consistent benchmarks, then adjust for local talent pools and material sourcing. A precise approach tracks market fluctuations over time, noting seasonal demand and policy shifts that shift报价 and lead times.
Apply a region‑specific risk assessment to anticipate cost overruns and schedule gaps. Use these insights to negotiate effectively, choosing partners who align with your space goals while maintaining product quality, durability, and compliance, ensuring your project remains financially predictable.
Frequently Asked Questions
How Long Does a Typical Loft Conversion Project Take From Start to Finish?
A typical loft conversion takes about 8–12 weeks from start to finish. You’ll manage interior design decisions, secure building permits, coordinate trades, and track milestones, ensuring deadlines stay on target while adjustments minimize disruption to your home.
What Are Hidden Costs Not Covered in per M² Pricing?
Hidden fees can surprise you; roughly 15% of loft projects creep beyond per m² estimates. Permit costs vary, and you’ll face survey, utility, and ventilation fees. You’ll want to track hidden fees and permit costs meticulously.
Do Listed Buildings Require Different Cost Considerations per M²?
Yes, listed buildings require different costs per m² due to historic regulations and preservation requirements, so you’ll need to factor in approvals, specialist materials, and conservation constraints when planning, budgeting, and selecting finishes for your loft conversion.
How Do Roof Structure Differences Affect per M² Pricing?
Roof design changes your per m² pricing by boosting structural complexity, increasing required supports, and complicating insulation. You’ll notice heftier costs when frames and joints demand precision; this methodical, analytical approach highlights how structural complexity drives value.
Can Supplier Delays Impact per M² Cost Estimates?
Yes, supplier delays can cause cost fluctuations in per m² estimates, because you’ll face paused materials and reselection, forcing schedule changes, expedited shipping, and revised quotes that reflect updated labor and delivery costs you must manage.
Conclusion
You’ll think the math is simple: m² times a price, end of story. But no—your loft isn’t a spreadsheet, it’s a performance project. Structural tweaks, insulation depth, and those “minor” permits all sneak in, like surprise guests. If you ignore finish quality or energy systems, you’ll save today only to pay tomorrow. So budget methodically, anticipate fees, and value efficiency. Irony: the cheapest route often isn’t the cheapest in the end, because the least prepared equals the most expensive regret.


