To convert an office space into a residential studio, start with a precise space assessment: measure area, ceiling height, daylight, and structural feasibility, then verify egress and service routes. Define sleeping, working, and living zones with flexible layouts and multi-use furniture. Prioritize built-in storage, adaptable finishes, and daylight optimization while controlling glare. Map electrical, lighting, HVAC, and safety systems to support comfortable living. A phased plan and budget guarantee smooth permits and approvals as you progress. You’ll uncover essential steps that empower smarter decisions.
Assess Your Space: Measurements, Daylight, and Structural Feasibility
Before you start converting, take a precise inventory of the space. You’ll measure floor area, ceiling height, and column locations, then map constraints on egress, service runs, and load paths.
Document daylight factors: window size, orientation, shading, and glare risk, since natural light boosts habitability and perceived space.
Assess structural feasibility by reviewing framing, wall types, and vibration tolerance for equipment.
Verify ceiling clearance for mechanicals, electrical, and data drops, and confirm potential retrofit paths without compromising integrity.
Evaluate partition options that preserve fire ratings and moisture control while enabling flexible layouts.
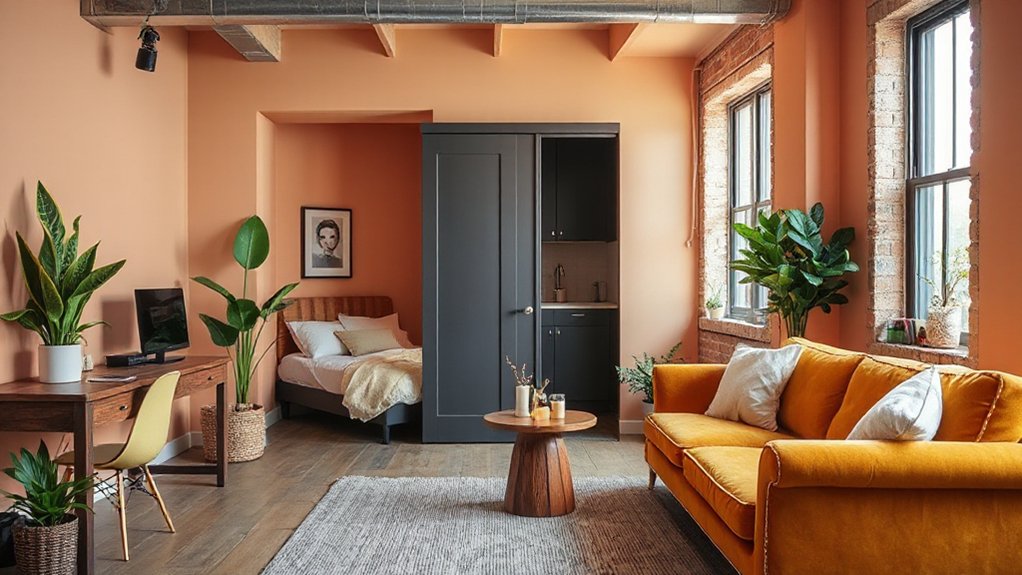
Consider urban aesthetics and color schemes early to guide zoning and finish decisions.
Record assumptions, uncertainties, and required trades, so design decisions remain data-driven and aligned with code-safe, efficient execution.
Know the Rules You Must Follow: Local Codes and Landlord Requirements
You’ll need to verify local code compliance and secured landlord approval before any conversion work begins.
We’ll outline the specific permits, occupancy classifications, and safety standards that apply, as well as the approval process your landlord typically requires.
Understanding these requirements upfront helps prevent delays and ensures your project stays within legal and contractual boundaries.
Local Code Compliance
Managing local code compliance is essential when converting office space into a residential studio. You’ll verify applicable building codes, fire safety standards, and egress requirements before design decisions.
Key concerns include ensuring habitable square footage, sound attenuation, and utility hookups meet current code, not just past practice. Historical regulations and zoning variances often influence permitted layouts, so document existing approvals and any exemptions, then align plans with the authoritative code.
Prepare a codes matrix mapping requirements to proposed specs, and consult the local authority having jurisdiction early to avoid rework.
- Confirm means of egress and occupancy limits
- Verify fire ratings, ventilation, and electrical capacity
- Identify historical regulations and zoning variances relevant to your site
Landlord Approval Rules
Landlord approval is a gatekeeper step in converting office space to a residential studio, and it sets the scope, timeline, and conditions for all subsequent work. You must interpret lease clauses precisely, identifying permitted alterations, load-bearing changes, and utility modifications.
Review tenant rights related to habitability, privacy, and access, guaranteeing compliance with any consent requirements and notice periods.
Confirm intermediary approvals for subcontractors, architectural plans, and environmental assessments, and document all approvals in writing to avoid disputes.
Assess remediation duties, insurance obligations, and occupancy limits tied to the landlord’s risk management policies.
Align design decisions with building code exceptions and fire-safety standards, obtaining any necessary permits before work commences.
Maintain clear communication channels to prevent scope creep and ensure timely completion within the agreed schedule.
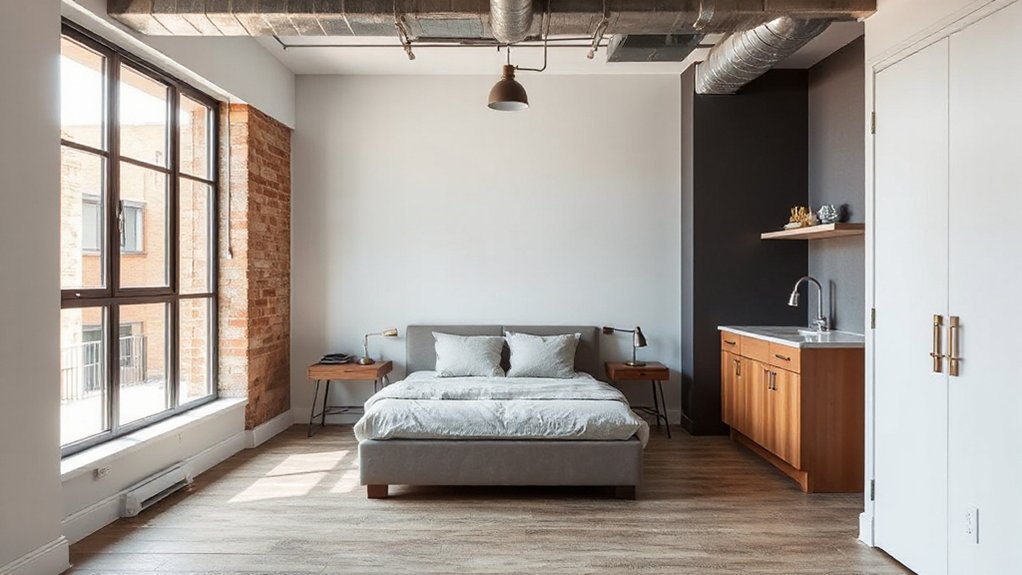
Define Sleep, Work, and Living Zones in Your Studio
You should define sleep zones with clear boundaries and low-traffic access, so rest isn’t disrupted by daytime activity.
Establish distinctly separate work areas using visual cues, desk placement, and acoustical zoning to minimize cross-traffic and distractions.
Clarify living zones with intentional flow, storage, and seating that balance comfort, efficiency, and safety in a compact studio.
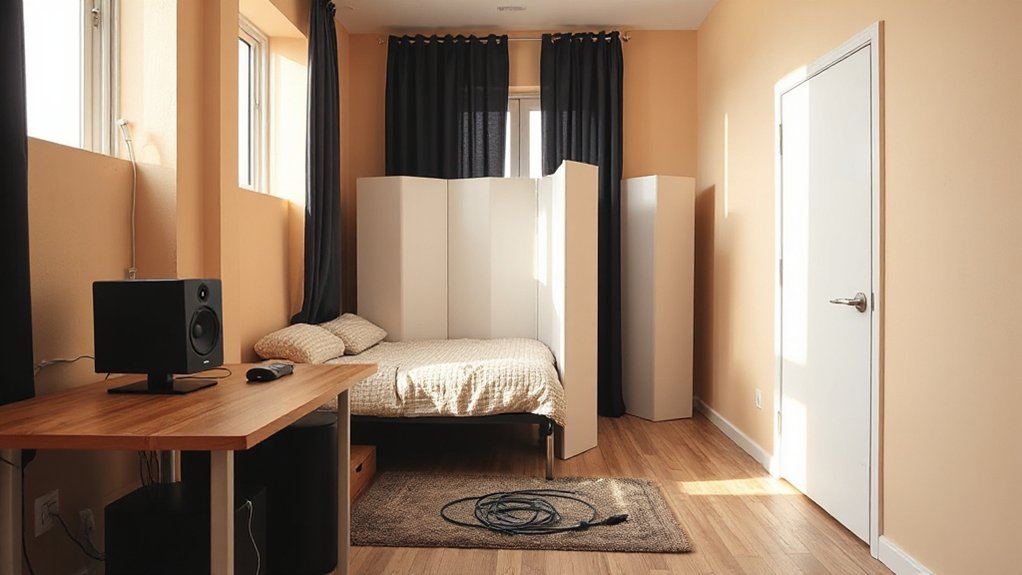
Define Sleep Zones Precisely
To define sleep zones precisely, start by separating the bedroom from work and living areas with clear boundaries—physical partitions, sound dampening, and lighting controls all contribute to a distinct sleep environment.
- Use a privacy partitioning screen or bookshelf to create a visual barrier without closing off the space.
- Implement blackout curtains and dimmable lighting to establish a nighttime atmosphere.
- Position the bed away from monitors and work surfaces, and employ acoustic zoning with rugs or panels to minimize noise bleed.
Sleep zoning relies on predictable cues and privacy partitioning to sharpen circadian signals.
Maintain consistent bed placement, minimize screen exposure before bed, and reinforce boundaries with signage or micro-architecture choices to sustain an undisturbed rest environment.
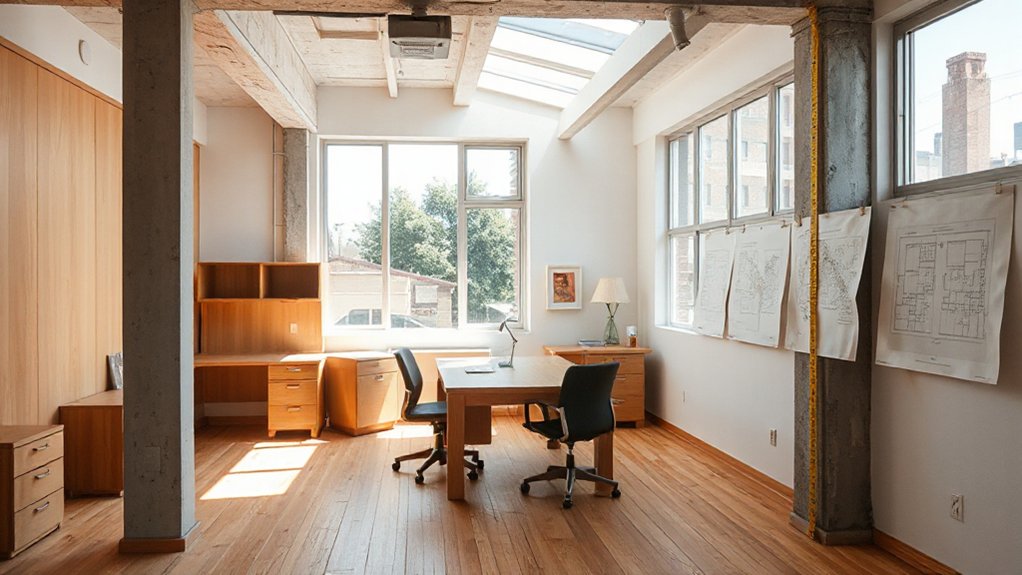
Separate Work Areas Effectively
Separating work areas within a studio begins with explicit zoning that preserves rest and living functions. You define distinct zones for sleep, work, and living, ensuring each area supports its primary function without encroaching on another.
Establish a dedicated work zone that’s visually distinct and accessible, yet isolated enough to minimize distractions. Implement workspace ergonomics by selecting an appropriate desk height, monitor position, and chair support to maintain posture during extended sessions.
Use privacy barriers such as screens, curtains, or shelving to create psychological separation without reducing light. Integrate soft boundaries for sleeping and relaxation—low-key lighting, sound dampening, and organized storage.
Regularly reassess flow patterns to prevent overlap, preserve privacy, and maintain a balanced, productive living environment.
Draft a Flexible Layout: Zones, Flow, and Multi-Use Areas
When converting an office shell to a residential studio, start with a flexible layout that defines clear zones, guides flow, and supports multiple uses within the same footprint. You’ll assign distinct areas for work, living, and circulation, while preserving openness where needed. Use perforated partitions, floor cues, and ceiling lines to map functions without visual clutter.
Emphasize adaptability with removable screens and furniture that doubles as storage. Plan sightlines that prioritize daylight and visual connection to key features like an art gallery vignette and urban gardening niches. Integrate service cores to minimize disruption and maintain clean circulation paths.
- Define zones with purpose-built furniture that slides or folds
- Align pathways to natural movement and daylight
- Reserve flexible surfaces for changing needs and displays
Pick Multi-Use Furniture That Maximizes Small Spaces
You should prioritize multi-use furniture that expands both storage and function without crowding the space.
Choose pieces that transform, stack, or hide items to preserve clear circulation while maintaining daily usability.
This approach enhances small-space flexibility by combining essential functions in a single, intentionally selected set.
Multi-Use Furniture Basics
To maximize small-space efficiency, choose multi-use furniture that combines storage, seating, and work surfaces without sacrificing comfort or durability. You’ll prioritize pieces with built-in compartments, fold-away surfaces, and modular joints to adapt as needs shift.
Carefully assess load limits, hardware quality, and ease of operation to avoid reductions in usability over time.
- Select a pouf with hidden storage that doubles as a seat or occasional side table
- Opt for a wall-mounted desk that folds flat, paired with a slim, sturdy bookshelf
- Integrate an extendable dining/working table that conceals seating when not in use
Focus on finishes that resist wear; incorporate Vintage furniture and Artistic accents to elevate the space while maintaining practicality.
Maximizing Small-Space Flexibility
Look for modular systems that reconfigure easily, enabling instant shift between work, dining, and sleep zones. Choose finishes and hardware that read as cohesive to reduce visual noise, and favor built-in storage to keep surfaces clear.
Incorporate vintage furniture strategically to add character without sacrificing adaptability; opt for pieces with clean lines and neutral tones that blend with evolving layouts. Pair with artistic decor to personalize without overpowering functions, ensuring the space remains flexible, legible, and efficient under daily use.
Maximize Natural Light While Preserving Privacy
Natural light is essential for a comfortable studio, yet privacy must remain uncompromised. You can balance openness with controlled exposure by selecting glazing and treatments that maximize daylight while limiting visibility from outside. Implement strategies focused on Privacy enhancement and daylight optimization to protect intimate spaces without sacrificing brightness.
- Choose high-transparency filters or frosted panes for shared walls and street-facing windows.
- Use interior screens, movable blinds, or zoned shading to adjust glare and sightlines.
- Employ reflective surfaces and light shelves to distribute natural light deeper into the space.
Carefully pair window placement with automated shading to maintain consistent illumination. Document daylight performance targets and test seasonal variations to ensure ongoing privacy protection without dimming your studio.
Sound Control Basics for a Quiet Studio
You’ll start by outlining sound absorption basics to reduce reflections across walls and ceilings.
Next, define your room acoustic goals to balance privacy with usability.
Then, map how materials and layouts meet those targets.
Finally, address noise transfer prevention by detailing barriers, decoupling methods, and selective zoning to keep the studio quiet.
Sound Absorption Basics
Sound absorption is the primary way to control reverberation in a residential studio, reducing reflections and improving intelligibility without altering the overall room balance. You’ll optimize sound energy by selecting materials that dampen mid and high frequencies, while avoiding over-damping the space. Balance density, thickness, and coverage to achieve a natural, liveable tonal character.
- Implement soundproof curtains to trap reflected energy at boundaries and quicken decay times.
- Install acoustic panels on primary reflection points for targeted control.
- Pair porous absorbers with occasional strategic diffusion to preserve intelligibility.
Focus on implementation practicality: precise placement, compatible finishes, and minimal visual impact. This approach yields clearer recordings, easier conversation, and a calmer environment without major structural changes.
Room Acoustic Goals
Achieve this through calibrated placement of primary listening and recording positions, coupled with targeted treatment that maintains tonal neutrality across amplitudes.
Emphasize a uniform bass response by combining high-density bass traps with strategic wall loading to reduce flutter and standing waves, while preserving intelligibility at mid and high frequencies.
Acoustic insulation protects the studio’s quiet interior from adjacent spaces, stabilizing background noise levels.
Implement soundproofing strategies that complement absorption, ensuring that isolation doesn’t degrade on-axis clarity or percussion transient accuracy.
The result is a controlled, repeatable sonic environment suitable for critical listening and accurate capture.
Noise Transfer Prevention
- Isolation and decoupling strategies
- Sealing and airtight assemblies
- Sound masking integration and monitoring
Electrical and Lighting Essentials for Living Spaces
Electrical and lighting infrastructure is foundational to a livable studio, so plan currents, outlets, and control schemes with intent for flexible furniture and multimedia needs. You’ll map circuits to separate living, sleeping, and workstation zones, minimizing interference and overloading risk.
Select outlets with USB-Power and tamper-resistant features, plus dedicated circuits for high-draw devices like HVAC, space heaters, and media racks.
Implement lighting automation to adjust scenes for work, relaxation, and movie nights, pairing dimmable LEDs with occupancy sensors and time-based schedules.
Prioritize electrical safety by using proper GFCI protection in wet areas, accessible panel labeling, and cord management that avoids tripping hazards.
Document wiring diagrams, load calculations, and commissioning tests, ensuring the system remains scalable as your studio evolves.
Heating, Cooling, and Ventilation for Comfort
Effective heating, cooling, and ventilation are critical for comfort in a converted living space, and you should design these systems to respond to changing occupancy, activity, and external weather.
You’ll optimize HVAC systems to maintain steady temperatures, manage humidity, and guarantee efficient energy use, while prioritizing air quality throughout the studio.
Integrate sensors and zoning so you can adjust conditions by area and time, avoiding drafts and cold spots.
Choose compact, ceiling-silent equipment and balanced ventilation to minimize noise and maximize comfort.
- Optimize HVAC systems with zoning, sensors, and smart controls
- Prioritize air quality through filtration, fresh-air intake, and humidity control
- Plan for seamless integration with lighting and insulation to reduce load
Kitchenette Placement and Small-Batch Cooking Tips
You’ll optimize kitchenette placement by prioritizing workflow, storage accessibility, and proximity to utilities, while aligning with your studio’s layout constraints.
Consider small-batch cooking essentials, compact appliances, and space-saving candidates that deliver efficiency without clutter.
We’ll explore layout tips, essential gear, and concise appliance ideas to support practical, high-functioning daily meals.
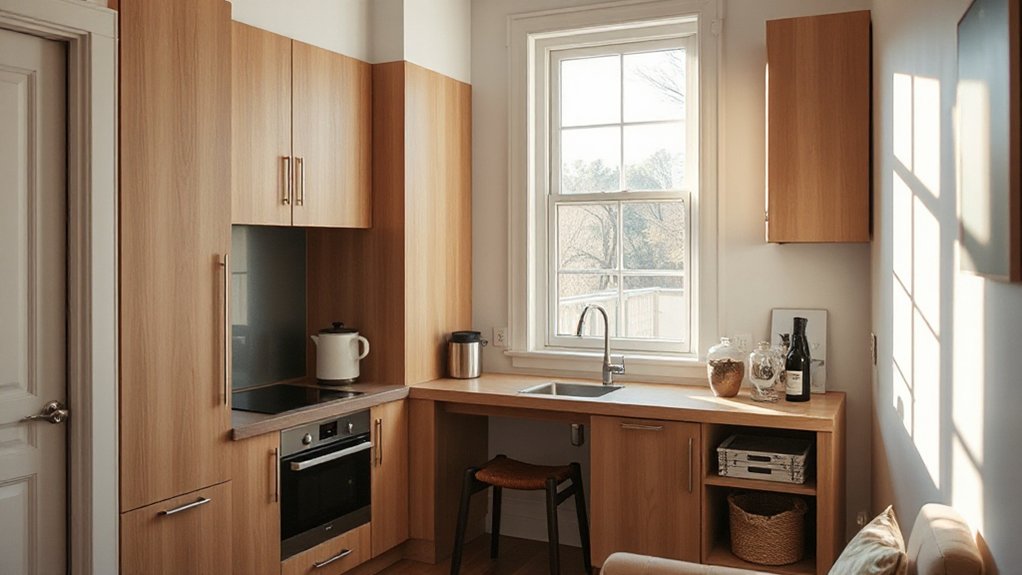
Kitchenette Layout Tips
Designing a compact kitchenette requires deliberate placement of appliances and work zones to maximize efficiency in a small footprint. You optimize layout by zoning for prep, cooking, and cleanup, ensuring clear walking paths and minimizing cross-traffic.
Perimeter storage should be used for bulky items, while a compact island or peg rail adds flexible work surface without crowding. Align the sink, stove, and refrigerator in a work triangle to reduce motion and time.
Integrate vertical storage to free counter space, and choose multi-functional components to maintain a streamlined aesthetic. Outdoor greenery and decorative accents can soften the space without compromising function.
- Prioritize efficient triangles and clear zones
- Use vertical storage and multi-functional units
- Integrate subtle decor with practical gains
Small-Batch Cooking Essentials
When space is tight, prioritize compact, multi-functional appliances and a focused workflow tailored to small-batch cooking. You optimize counter depth with a single-duct exhaust range or induction module, paired with a compact convection oven for versatility.
For storage, implement labeled, modular bins and pull-out organizers to support kitchen organization without clutter.
Structure your prep zone into a logical sequence: wash, chop, cook, plate, with clearly defined surfaces and minimal transit.
Choose cookware sized for two servings and stackable, easy-clean pieces to maximize cabinet efficiency.
Use batch-minded tools—measuring cups, reusable containers, and a small food processor—to support consistent portions.
Maintain a strict rotation, rotate ingredients by date, and document routines to sustain reliable small batch cooking outcomes.
Space-Saving Appliance Ideas
Small, space-conscious layouts benefit from compact, purpose-built appliances that maximize function without sacrificing workflow. In this section, you’ll optimize kitchenette placement and leverage small-batch cooking tactics to enhance space efficiency and user experience.
Prioritize integrated units that share venting and electrical circuits to reduce clutter, while choosing energy-efficient models to boost appliance efficiency and overall space optimization. By selecting modular, shallow-depth appliances, you maintain clear sightlines and accessible counters, enabling safer, faster prep.
Target multi-function devices to minimize gear count and streamline maintenance.
- Optimize placement along a single wall with vertical storage
- Choose multi-function, energy-efficient units for space optimization
- Use compact cookware and batch techniques to reduce waste and clutter
Safe Wall Modifications: What You Can Actually Do
If you’re converting office space into a residential studio, the walls you choose to alter must meet safety, code, and sound-performance requirements. First, verify load-bearing status with a structural assessment before any modification. Non-load-bearing partitions can often be altered, but you must preserve fire separation and electrical compliance.
Use approved materials and methods, such as fire-rated drywall, mineral wool wall insulation, and properly sealed joints to maintain continuous barrier performance. When adding or removing studs, keep securely fastened framing and avoid compromising flanking paths that undermine sound reduction.
Install acoustic seals around doors and penetrations, and use fire caulk for gaps. Always consult local codes for fire safety, ventilation, and electrical setbacks to guarantee a compliant transformation.
Storage Solutions That Free Up Floor Space
Maximizing storage without sacrificing floor space starts with intelligent layout and multi-functional fixtures. You’ll optimize every inch by selecting compact, high-capacity storage compartments and defining zones that minimize clutter.
Prioritize built-ins, wall-mounted precedents, and dual-purpose furniture to keep pathways clear while preserving accessibility. Implement closet organization strategies that maximize vertical inventory, paired with doors that conceal deep shelving and labeled bins for quick retrieval.
- Use wall-mounted shelving and over-door organizers to reclaim surface area
- Integrate hidden storage within seating and headboard units for seamless privacy
- Outfit closets with adjustable rods, stackable bins, and labeled dividers for efficient access
Cozy Colors and Decor That Warm a Loft-Style Studio
Cozy colors and decor can transform a loft-style studio into a warm, inviting living space without sacrificing the openness that defines the genre. You’ll optimize lighting, choose restrained palettes, and balance texture to avoid visual heaviness while preserving airiness.
Implement color palettes that anchor zones—warm neutrals for living areas, cooler accents for work zones—without creating abrupt changes. Select decorative accents that reflect architectural honesty: sculptural lamps, minimal artwork, and tactile finishes that add depth without clutter.
Prioritize cohesion by tying tones across furniture, textiles, and surfaces, ensuring contrast supports function rather than distraction. Integrate natural materials—wood, stone, leather—sparingly to enhance warmth.
Consider durable, easy-care textiles to maintain a polished appearance. This approach sustains the loft’s openness while delivering comfort and character.
Timeline and Milestones for a Smooth Convert
A clear timeline and well-defined milestones are essential for a smooth office-to-residential conversion, aligning design decisions with permitting, budgeting, and construction workflows.
- Establish baseline schedule: site prep, utility upgrades, and core-mandate changes, with critical-path tasks identified.
- Phase design and approvals: concept, permit submittals, and material selections synchronized with contractor availability and inspections.
- Milestones for occupancy readiness: framing, finishes, and systems commissioning aligned with move-in dates and potential art gallery or display areas within an office conversion concept.
You should build in risk buffers for permit delays and supply shortages, while documenting changes for traceability.
Maintain a shared calendar, update stakeholders weekly, and track budget impact against timeline.
Adhering to these milestones keeps the project on track and supports a cohesive, professional finish.
Budget Breakdown: Where to Spend and Where to Save
When converting office space to a residential studio, the budget should target core costs first—structural integrity, systems upgrades, and code-compliant finishes—then allocate remaining funds to design details that affect livability.
You prioritize essential investments: load-bearing assessments, HVAC and electrical modernization, moisture control, and fire safety upgrades, ensuring long-term reliability.
Next, allocate funds to finishes and fixtures that improve comfort and efficiency without excessive cost escalation. Design trends should guide aesthetic choices without compromising performance or timelines, while furniture styles influence space planning, storage, and adaptability.
Use a phased approach to avoid budget overruns, aligning each purchase with measurable outcomes like energy savings, acoustics, and air quality. Document decisions, quantify benefits, and maintain contingency reserves for unforeseen scope adjustments.
Permits, Inspections, and Approvals: A Practical Guide

After laying the foundation with structural reliability and code-compliant finishes, you’ll move into the permit, inspection, and approval phase to align construction work with regulatory requirements. The permit process guides every major change, ensuring zoning regulations are respected and safety standards are met.
You’ll submit drawings, manifests, and compliance documents to the local authority, then await review and potential revisions. Inspections verify that work matches approved plans at key milestones, confirming fire, electrical, and plumbing systems operate safely within occupancy limits.
Track timelines, fees, and required amendments to avoid delays. Proactive communication with inspectors reduces rework and speeds approval.
- Prepare complete documentation for a smooth permit process
- Schedule inspections strategically around milestones and holidays
- Maintain an auditable record of approvals, amendments, and codes
Realistic Before-and-After Checklist
Translating an office shell into a residential studio requires a disciplined, step-by-step checklist that maps visible results to underlying requirements. Your before-and-after rubric should quantify spatial changes, utility reconfigurations, and finish quality.
Begin with enclosure and zoning: verify ceiling height, acquire partition schemas, and confirm HVAC zoning aligns with living-use loads. Next, document finish transitions, lighting upgrades, and electrical rewiring milestones, attaching acceptance criteria to each stage.
For layout, plan furniture arrangement to optimize flow, storage, and daylight access, then validate movement analytics with a mock setup before finalizing installation.
Outdoor landscaping remains a post-occupancy impact, so schedule phased exterior work separately.
Finally, compile a sign-off matrix linking interim checks to final approvals, ensuring all revisions satisfy safety, code, and usability targets.
Maintenance and Longevity of a Residential Studio
Protecting a residential studio’s longevity starts with disciplined preventive maintenance that aligns with its mixed-use design. You should implement a proactive schedule that covers HVAC filtration, moisture control, and electrical safety, while respecting compact zoning.
Regular inspections detect wear before it escalates, preserving interior aesthetics and reducing disruption to daily living.
Prioritize durable finishes and modular components that adapt to furniture arrangements as needs change, extending service life and minimizing waste.
Maintain efficient ventilation to control humidity, especially in multi-use zones, and document repairs for traceability.
- Monitor air quality and seal integrity to protect finishes
- Schedule seasonal checks for systems, joints, and seals
- Plan updates to furniture arrangements and storage to sustain longevity
Frequently Asked Questions
How to Handle HOA Restrictions on Renovations?
You should verify HOA enforcement and obtain renovation permissions before starting any work. Review covenants, note penalties, and document approvals. Communicate proactively with the HOA, keep records, and guarantee compliance to avoid delays or conflicts during renovations.
Can I Short-Term Rent While Converting the Space?
Yes, you can short-term rent during conversion. Imagine a tight clock: precise steps and timing. You’ll review lease agreements, set clear terms, and align Rental pricing with your project timeline and compliance requirements for the space.
What Insurance Coverage Is Needed During Renovations?
You should obtain extensive insurance coverage during renovations, including builder’s risk and liability, and guarantee renovation permits are obtained before work begins. Verify coverage extensions for temporary occupancy, equipment, and subcontractors to protect against site-related claims.
Are Rental-Grade Appliances Suitable for Studios?
“Practice makes perfect.” Yes, rental-grade appliances can work in studios, but assess appliance durability and appliance energy efficiency, prioritizing units rated for high-frequency use; guarantee warranties and service access justify potential wear from compact, daily living demands.
How to Assess Mold or Asbestos Risks Safely?
You assess mold or asbestos risks safely by hiring licensed professionals for mold testing and asbestos removal, follow their containment protocols, wear PPE, isolate affected areas, document findings, and guarantee compliant remediation before resuming occupancy.
Conclusion
You’ve scoped your space, secured standards, and shaped smart zones. Stay vigilant about ventilation, safety, and service routes as you assemble everything. For long-term success, synchronize storage with sized spaces, swap surfaces for durability, and schedule routine checks. Maintain meticulous documentation, margins, and milestones to monitor mudroom-to-master suite progress. Finally, foresee frequent fixes, fine-tune fittings, and foster flawless functionality through focused, fearless, fine-grained fine-tuning.