
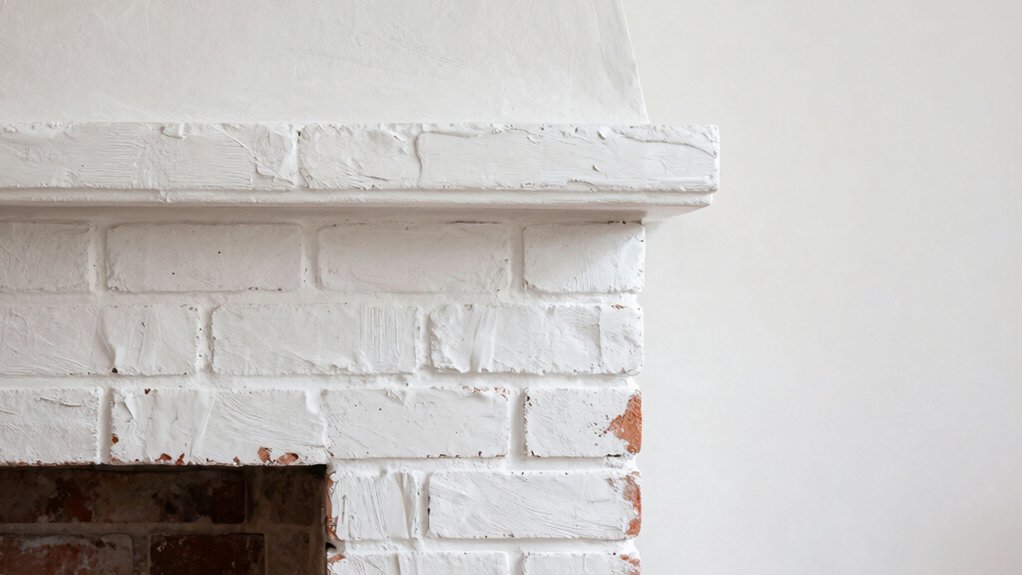
To whitewash or limewash a brick fireplace or wall, start by choosing your finish: whitewash for a clean, modern look, limewash for a breathable, textured patina. Prep the surface by cleaning, repairing joints, and removing coatings, then dampen bricks lightly. Mix in small batches, test first, and adjust water and pigment to your desired tone. Apply in thin, even coats with overlapping strokes, then seal with a breathable matte sealer after curing. More tips await as you continue.
Whitewash vs Limewash: Which Brick Finish to Choose
Whitewash and limewash are two traditional brick finishes that look similar at a glance but behave very differently in aspects of appearance, durability, and upkeep. You’ll decide between them by weighing historical accuracy against your aesthetic preferences.
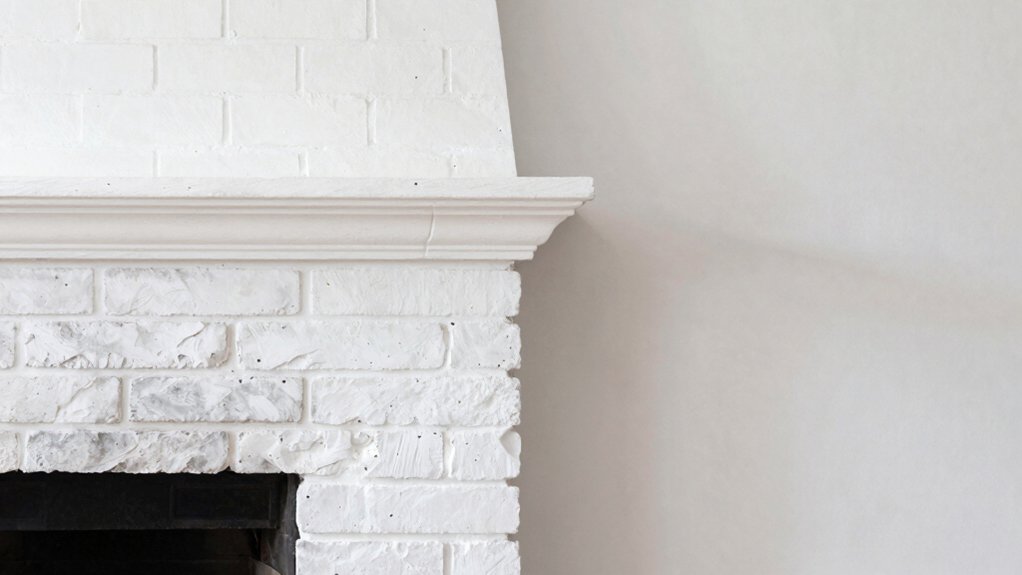
Whitewash yields a uniform, matte white that can brighten interiors and conceal surface flaws, yet it diffuses sound and offers minimal breathability.
Limewash, in contrast, penetrates brick, preserves porosity, and develops a soft patina with time, aligning well with period styles and authentic textures.
For durability, limewash resists peeling but requires periodic reapplication as it erodes slowly. Consider environmental conditions and maintenance capacity.
If your goal is a precise, period-correct look, prioritize historical accuracy; if you favor a flexible, evolving appearance, lean toward limewash to satisfy aesthetic preferences.
When to Pick Whitewash or Limewash on a Fireplace
Choosing between whitewash and limewash for a fireplace hinges on how you want the surface to behave and read in a room.
You pick limewash when you want a breathable, matte finish that ages gracefully, showing brush marks and surface texture for character.
You opt for whitewash when you prefer a softer, more uniform tint with less variation and easier touch-ups.
Consider room lighting, furniture, and overall style to gauge how the finish reads from a distance.
Historical authenticity matters if you’re recreating a period look; modern aesthetics suit contemporary spaces with a cleaner, brighter feel.
Also weigh maintenance: limewash shifts over time, whitewash stays relatively stable.
Choose the method that best aligns with your desired timeline and ambiance.
Brick Prep: Clean, Repair, and Protect Before Finishing
Start with a clean brick surface, removing dust, soot, and efflorescence so the finish adheres evenly.
Make targeted repairs to cracks and damaged mortar to prevent future problems and guarantee longevity.
Protect the work area and choose compatible cleaners and sealers, so preparation supports lasting color and coverage.
Clean Before Application
Before you apply limewash or whitewash, clean the brick thoroughly to remove dirt, dust, and efflorescence. You’ll want a solid, debris-free substrate to guarantee even color and adhesion. Focus on paint removal and dust cleaning to prevent future flaking.
- Inspect for loose mortar and voids.
- Vacuum surface with a HEPA collector.
- Damp-wipe stubborn grime, never saturate.
- Scrape off peeling paint and masonry coatings.
- Rinse and allow to dry fully before finishing.
Repair for Longevity
Repairing for longevity begins with a thorough brick and mortar assessment, then addressing any defects that could compromise the finish. You’ll inspect for cracks, loose joints, efflorescence, and water intrusion, prioritizing structural integrity before cosmetic work.
Teeth-cut loose mortar joints should be raked and repointed with a compatible mortar mix, ensuring proper compaction and color match. Patching areas require matching texture and porosity to prevent differential absorption under limewash.
Clean the surface to remove dust, oils, and efflorescence, then seal with an appropriate breathable primer if needed. Choose historical authenticity in texture and color to preserve character, while using eco-friendly materials where possible.
Document repairs for future maintenance, and recheck after curing to confirm uniform absorption and a durable base for limewash.
Mix Ratios and Color Control for Whitewash and Limewash
To control coverage, start with a practical dilution plan that suits your brick and target finish. You’ll adjust color intensity by testing small samples, ruling in or out wash thickness and lime content as you go.
Apply in even, workable coats with consistent mixing to make certain of predictable results.
Dilution For Coverage
When you mix whitewash or limewash, the dilution determines both coverage and final shade, so start with a small test batch and scale up.
- Test on a hidden area to gauge absorption and tone.
- Record water-to-limewash ratios for repeatable results.
- Track surface porosity; adjust dilution for consistent coverage.
- Build layers gradually to control depth and texture.
- Choose Eco friendly options to balance performance and sustainability.
This approach supports historical accuracy by respecting traditional dilution practices while allowing modern control. Don’t rush the first pass; even coverage matters for a uniform look.
If you need more opacity, widen the mix slightly, then re-test before expanding to the full area. Focus on predictable results, avoiding over-thinning that causes streaking or washout.
Color Intensity Control
Color intensity in whitewash and limewash is governed by precise mix ratios and colorants, and you should start with a small test batch to dial in the exact shade.
You determine color saturation by adjusting pigment concentration and water ratio, not by guessing. Use a consistent base: 1 part pigment to 3–4 parts lime or lime-putty, then dilute with water to achieve the desired intensity.
Record each mix, noting weather and drying time, since they affect shade variation.
For deeper tones, increase pigment incrementally in small increments; for lighter tones, reduce pigment or extend dilution.
Apply swatches on scrap brick to compare side by side.
Maintain uniform application, as inconsistent coats exaggerate color variation and undermine even coverage.
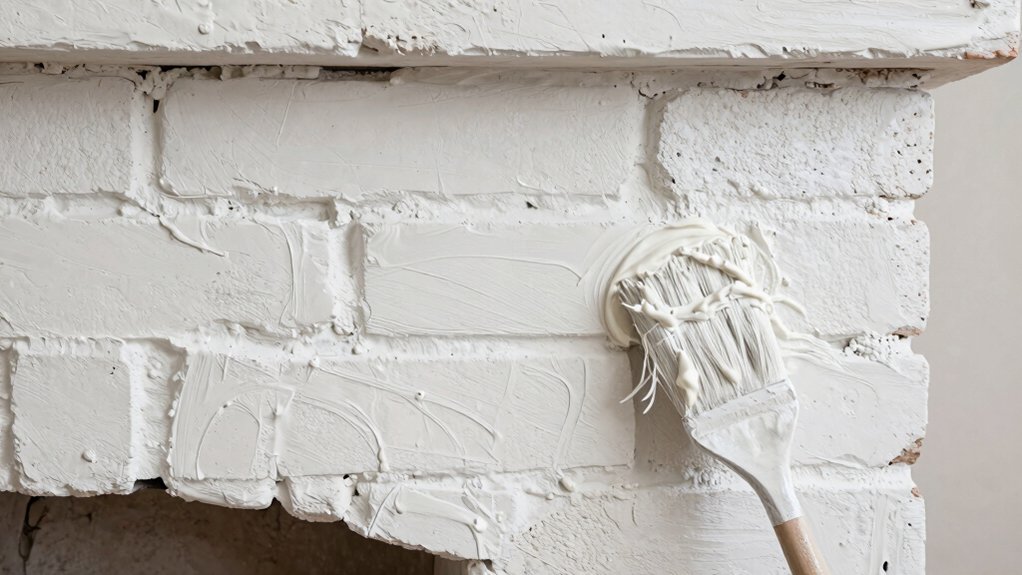
Application Techniques
Achieving consistent whitewash or limewash results starts with disciplined mix ratios and color control, then translates those choices into a repeatable application technique. You balance pigments and lime with measured water, testing on scrap masonry to confirm opacity.
Apply with deliberate, uniform passes, maintaining a wet edge to avoid lap marks. Keep mixing containers covered to prevent drying.
- Brush techniques: load evenly, flick excess, and maintain a consistent stroke direction for a cohesive finish
- Roller methods: use a short nap roller for smoother surfaces or a stippling roller for texture
- Dilution checks: tint gradually and log ratios for repeatability
- Layer timing: wait for tack between coats to prevent lifting
- Clean edges: protect trim and surrounding masonry with painter’s tape before starting
Application Techniques for Even Brick Coverage
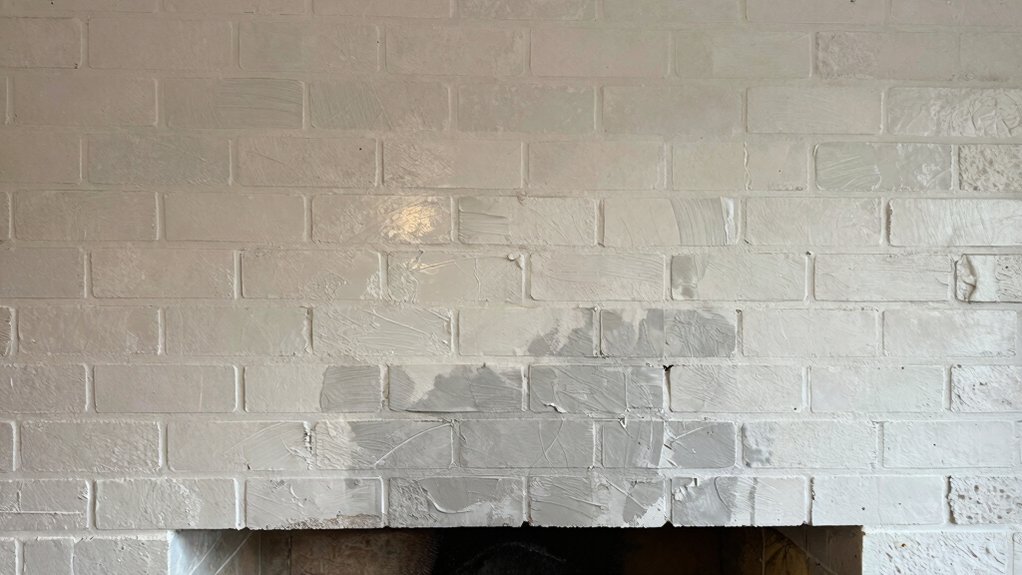
To apply an even brick coverage, start with a thorough surface prep and a measured plan for distribution. Begin by cleaning the brick surface, removing dust, loose mortar, and grease until the pores are open. Dampen the brick lightly to prevent suction that would suck in the whitewash.
Mix the mix to a uniform consistency, avoiding runny or stiff textures. Apply with a brick brush or wide, flat trowel, working in small sections to control color and prevent lap marks. Maintain a steady, overlapping motion to keep edges clean.
Use color blending as you layer, rotating brush directions to minimize streaks. Aim for subtle texture variation rather than uniform flatness, ensuring each brick reads consistently while preserving the natural character of the masonry.
Clean tools promptly to prevent skinning.
Curing and Sealing for Lasting Durability
Once the brick surface has been prepared and the whitewash applied, proper curing and sealing practices lock in color and protect the finish. You guarantee lasting durability by choosing appropriate protective coatings and observing correct drying time.
Favor breathable sealers to prevent moisture locking, and apply in thin, even coats.
- Use a breathable, matte finish sealer
- Allow ample drying time between coats
- Apply seals after initial cure per product label
- Test a small area first for color shift
- Maintain manual ventilation during curing
Avoid damp environments and rapid heat that can cause cracking. Inspect for uniform saturation and recoat only where needed.
Store leftovers sealed and labeled for future touchups.
Troubleshooting: Common Issues and Fixes
Common issues with whitewashed or limewashed brick surfaces usually stem from moisture, improper mixing, or over-application, so start by diagnosing symptoms like peeling, cracking, blistering, or uneven color.
If you notice paint peeling or color fading, reassess prep and application steps. Begin by inspecting moisture sources—condensation, leaks, or high humidity—and seal or repair as needed before recoating.
Ensure your mix is correct: too thick or too thin yields poor adhesion; adjust with the recommended water-to-lime mix and mix thoroughly to a smooth consistency.
Apply in thin, even coats, allowing sufficient drying time between layers.
If blistering occurs, remove the affected area, dry completely, and reapply.
For persistent issues, test a small area with alternative limewash ratios and modify accordingly.
Frequently Asked Questions
Can I Limewash Over Existing Paint or Sealer?
Yes, you can, but paint compatibility matters; limewash isn’t ideal over sealed surfaces. You’ll need thorough surface preparation: remove or abrade sealers, clean, and prime. Test a small area first to confirm adhesion and finish suitability.
How Long Before Cleaning After Applying Whitewash?
How long before cleaning after applying whitewash? Typically wait 24 hours to cure, then start with a gentle cleaning schedule using a soft brush and mild detergent. Plan routine stain removal sessions to prevent buildup. Are you ready to start?
Which Brick Types Absorb Limewash Best?
You’ll find soft, high-porosity bricks absorb limewash best. Focus on brick porosity and surface preparation; clean, dry, and dampen slightly before applying thin coats for even coverage and minimal flaking. Avoid dense, non-porous brick.
Do You Need a Sealant After Limewashing?
Yes, you should apply a sealant after limewashing. Sealant application enhances limewash durability, guards against moisture, and reduces dust. Make certain to select a compatible product, apply evenly in thin coats, and allow proper curing before use.
How to DIY Color-Match Limewash to Decor?
Start by noting that 87% of DIYers overestimate color cohesion; you can avoid that with a color matching technique using a swatch, test batch, and gradual application. Decorating tips: blend limewash with limited pigment, seal, then adjust.
Conclusion
Whitewash and limewash offer reliable brick finish options, each with unique looks and durability. If you want a softer, chalky appearance, limewash breathes and ages beautifully; whitewash gives crisper, more opaque coverage. About 75% of DIYers see faster results with whitewash, while limewash often requires longer cure times but longer-lasting color. Start clean, patch flaws, mix precisely, and apply evenly. With proper sealing, you’ll reduce repeat maintenance and preserve brick texture for years.


