
To reinforce a sagging gate or fence post, start with a material check—wood, metal, vinyl, or concrete—and fix what’s loose with quick shims and tension before you over-tighten. Add braces or straps to pull the post upright, then cap and anchor it with lag bolts, wedge anchors, or U-bolts after stabilization. If the post still sags, consider upgrading the footing or replacing the post. You’ll uncover steps for lasting support beyond this point.
Diagnose Sagging by Material (Wood, Metal, Vinyl): Signs and Thresholds
Sagging signs vary by material, so start by inspecting wood, metal, and vinyl separately. You’ll note material expansion limits, fastener integrity, and frame alignment as you assess each type.
For wood, look for cracks, warp, and loose joints when joints split or nails back out. Thresholds are noticeable bowing or door-face gaps.
Metal posts reveal bending, rust, or detached brackets where corrosion weakens support. Thresholds show post movement more than a quarter inch.
Vinyl sheds rigidity with fading, but still sags from loosened anchors or bent rails. Expect flexible seams and loose caps.
Weather impact matters: temperature swings, humidity, and precipitation accelerate all deltas.
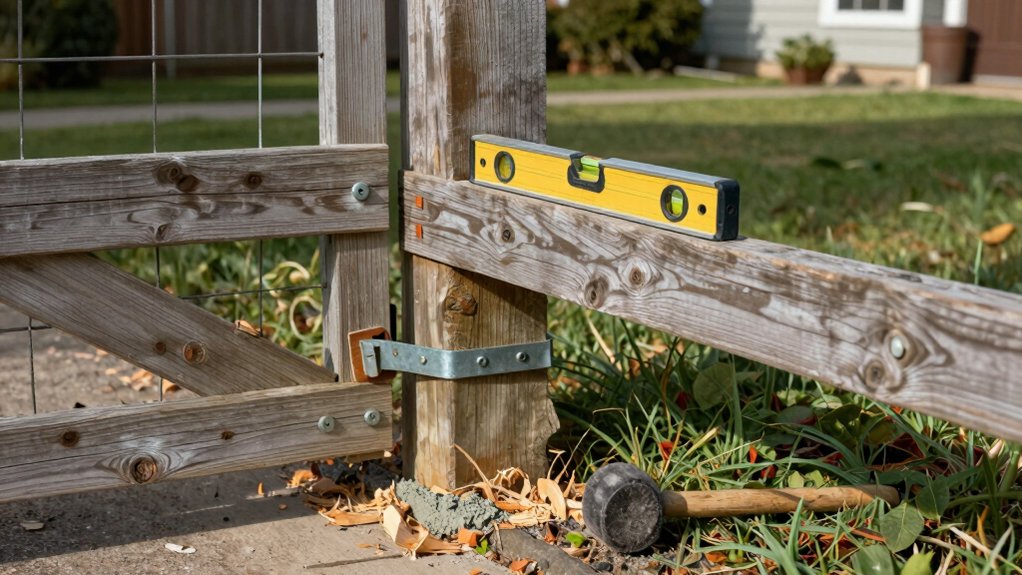
Record concrete-settle signs separately, then compare against original square plumb to determine overall severity and urgency.
Quick Fixes for Minor Sag: Shims, Braces, and Tension Methods
If the sag is minor, quick fixes can restore alignment without major work. You can start with shims behind the hinge and latch to nudge the post upright, then test for plumb by opening and closing the gate.
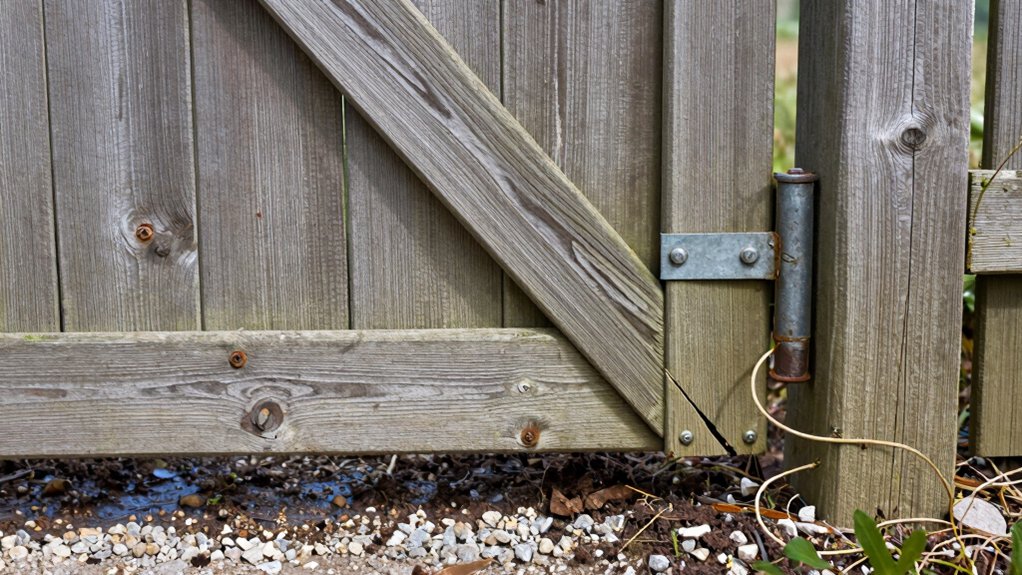
Add temporary braces from the post to a solid nearby support for stability while you adjust. Tension methods—adjusting the hinge screws, tightening a strap brace, or using a turnbuckle—can pull the post back toward true.
When you’re done, seal any exposed wood and touch up with fence paint to blend repairs. For a cleaner look, finish surrounding areas with decorative trim where gaps were visible.
These steps keep effort low and results solid, without overhauling the post.
When to Reinforce a Post With Caps and Anchors
Caps and anchors should come into play when you’ve already tackled looseness with shims or braces but still notice persistent sag.
You’ll know it’s time to reinforce if the post shifts under typical loads, or if the ground around the base has loosened and the post can’t hold its position.
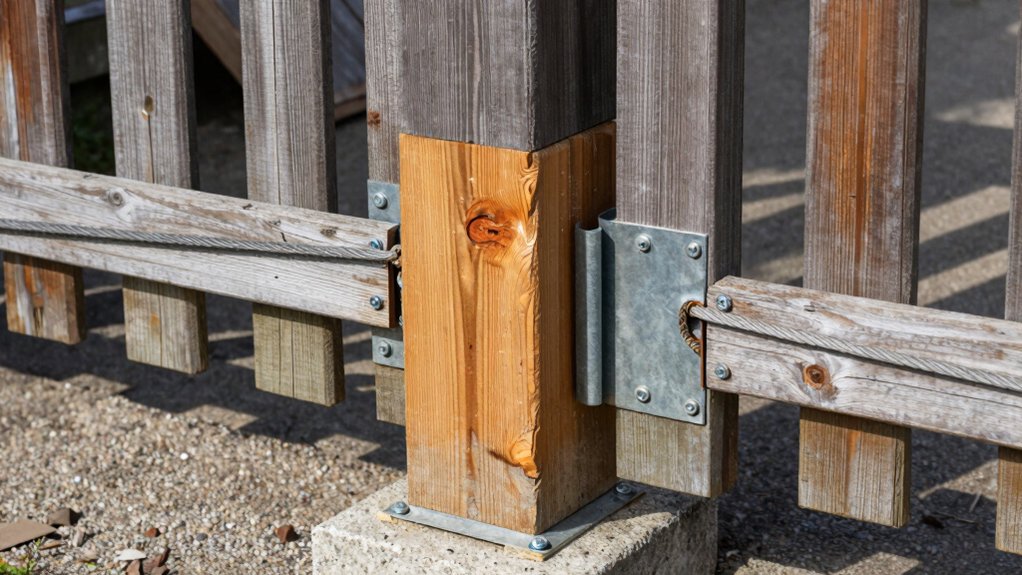
Use caps and anchors to transfer the load to sound material and restore rigidity, then recheck alignment and hinge operation.
Caps And Anchors: When
Caps and anchors should be added when a post shows signs of persistent movement or weakness, not just surface wobble. You guard against future failure by evaluating both condition and environment before you act.
If the post has cracks at the base, excessive leaning, or ongoing movement after rains or compost shifts, consider reinforcement. Choose decorative caps to cap the top and protect from moisture ingress, while preserving aesthetics.
Anchor types vary: lag- or bolt-in brackets for solid soil, wedge anchors for concrete, and U-bolts for round posts. Pair caps with anchors only after you’ve stabilized the base.
Don’t rely on superficial tightening alone; address root looseness and soil settling. Plan your approach to minimize disturbance to fencing and gate operation while you reinforce.
Post Reinforcement Timing
You reinforce a post only after it’s stabilized, not at the first sign of wobble. Post reinforcement timing hinges on proper assessment of load and movement. Wait until the post stops shifting under typical forces from wind, traffic, or gates.
Then, choose caps and anchors based on post material and post height to ensure compatible grip and load transfer. For wood, set caps to seal and brace, and drive anchors to each corner for even support; for metal, use rust-proof caps and heavy-duty anchors that match the gauge.
If concrete or masonry surrounds the base, verify cure strength and cracking before anchoring. Avoid overbracing or premature reinforcement, which can transfer stress upward.
Plan reinforcement when you can reliably stabilize the structure and achieve solid contact across the post material.
Replacing a Sagging Post: Stakes, Sizes, and Materials
Choosing the right stakes and depth sets the foundation for a lasting replacement. Start by selecting sturdy stakes and digging to the correct depth for your soil conditions.
Consider post size options that match the load and span you’re replacing. Ensuring the sleeve or footing can support the gate without shifting is essential for stability.
Finally, weigh material choices—treated wood for longevity, metal for strength, and composites for low maintenance. Plan for anchoring and reLeveling as you install.
Stakes and Depth
Stakes and depth are critical when replacing a sagging post; choosing the right size and setting depth guarantees lasting support. You want a stake that resists leaning, with material suited to your climate. Drive anchors below the frost line when possible, and use multiple stakes for symmetry and transfer of load.
For most fences, a 4×4 or 6×6 post with treated wood provides solid performance; keep spacing tight to prevent side sway. Dig holes wide enough to accommodate the stake and backfill with compacted soil. Consider soil stability and water drainage; poorly drained soil undermines stability.
Track weather impact in your plan—frozen ground shifts demand deeper, sturdier settings. Ensure post-to-stake connections remain rigid, using corrosion-resistant fasteners for longevity. Recheck alignment after installation.
Post Size Options
For post-size options, select dimensions that match your fence load, climate, and soil conditions. You want a size that resists bending, splash, and frost heave without overkill. Choose sturdier stock if you’re replacing a sagging gate post, and align with existing framing for continuity. Consider treatment and installation depth to prevent rot and movement. Post paint can seal surfaces and extend life, while decorative caps add finishing appeal.
- Determine load and spacing to pick a compatible diameter.
- Match post height to gate weight and wind exposure.
- Use pressure-treated lumber or rot-resistant species for durability.
- Plan for cap and paint options to finish the look and protection.
Material Considerations
If you’re replacing a sagging post, start by weighing stakes, sizes, and materials to guarantee a durable, stable fix. Material choices drive long-term performance, so pick lumber or composites suited to your climate and gate weight.
Pressure-treated lumber resists rot, while cedar offers natural decay resistance with lower maintenance; steel or aluminum posts provide excellent rigidity but higher cost. Match post dimensions to hinge and latch loads, ensuring your replacement can handle daily stress without flex.
For fence sections, consider decorative accents that won’t compromise strength, and plan a paint color that protects surfaces without hiding structural quality. Use corrosion-resistant fasteners and durable brackets to secure posts.
Finally, verify the ground sleeve or concrete footing aligns with your gate’s movement, preventing future sag.
Install External Braces: Aluminum, Steel, or Wood
To install external braces, you’ll choose between aluminum, steel, or wood based on budget, durability, and exposure. Each material has tradeoffs, so pick what fits your setup and maintenance tolerance. Consider decorative alternatives and aesthetic considerations to keep the look cohesive with existing hardware.
- Aluminum: light, corrosion-resistant, easy to trim; ideal for high-humidity areas.
- Steel: strongest, but heavier; use galvanized or powder-coated finishes to reduce rust.
- Wood: rustic charm, blends with historic fences; seal and treat to extend life.
- Installation: align braces flush, predrill, and fasten with corrosion-resistant hardware.
Tip: match fasteners to the brace material and finish for consistent appearance and durability.
Concrete Footing Upgrades for Lasting Support
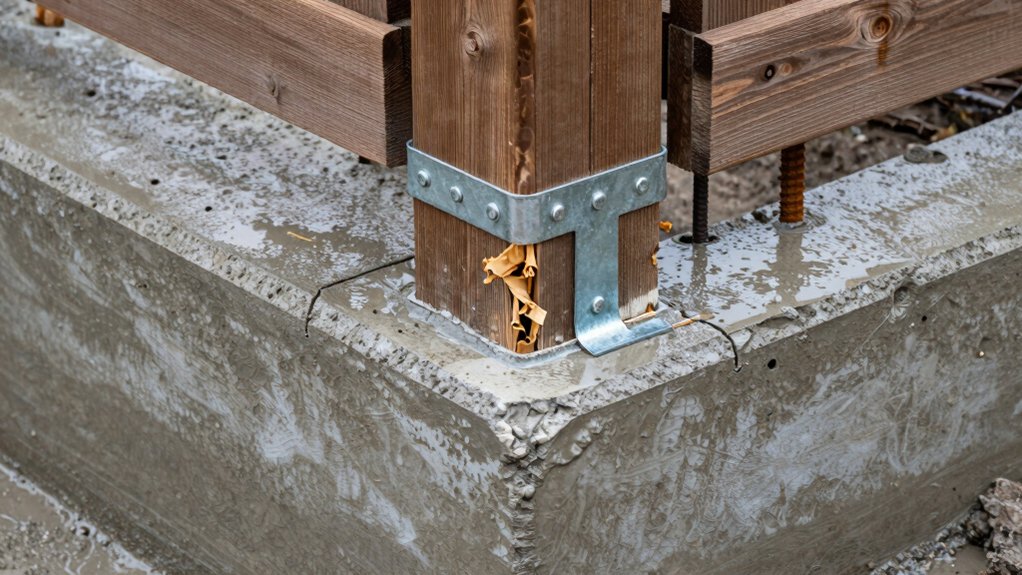
Concrete footing upgrades are essential for lasting support, especially when gates or fences bear added weight or unsettled soil. You’ll improve stability by digging to a deeper, solid base and using formwork to keep the pour uniform.
Use a concrete mix with adequate strength, and add reinforcement like rebar or sturdy wire mesh to resist cracking and shifting. Guarantee trenches are below frost line and align with the post centers for even load transfer.
Compaction around the footing minimizes voids, and a proper footer collar helps lock the post in place. After curing, apply soil stabilization techniques around the base to reduce future settlement.
Also plan for paint maintenance around the footing to prevent water intrusion and surface deterioration.
Gate Hinge Adjustments to Reduce Sag-Related Stress
Sagging gates strain their hinges and frames, so start by tuning the hardware before chasing other fixes. You can reduce sag-related stress by adjusting hinge tension and alignment, then test resistance and swing smoothness. Use these steps:
- Tighten hinge screws and check for wood movement; replace if stripped.
- Adjust hinge tension to restore level, preventing off-kilter rubbing.
- Test the gate latch alignment; refine strike plate position for secure latching.
- Verify post plumb and hinge alignment after any adjustments.
Remember: subtle tweaks beat big fixes. If the gate still drags, recheck mounting screws and ensure hinge pins aren’t bent. Maintain consistent hinge tension to preserve years of service and keep the latch functioning reliably.
Maintenance Tips to Prevent Future Sag
Regular maintenance is key to keeping gates and posts from sagging again. To prevent future sag, inspect hinges, anchors, and braces at least twice a year, tightening screws and replacing worn components promptly.
Keep the area dry and clear of debris to deter moisture buildup that weakens foundations. Treat exposed wood to slow deterioration, using a water-repellent finish or paint preservation to extend life between refinishes.
Install proper drainage so water won’t pool at the base, and consider a weatherproof cap or flashing to protect tops and joints.
Monitor for signs of pest activity and apply targeted pest prevention where needed to stop galleries that compromise structural integrity.
Regular adjustments and timely upkeep reduce wear and preserve alignment long term.
When to Rebuild: Signs a Post Needs Full Replacement and Reconstruction
When you notice persistent misalignment or movement despite prior repairs, it’s time to contemplate full replacement and reconstruction. A post showing persistent wobble, cracks at the base, or rotted or ground-embedded portions signals you’ve exhausted stabilization options. Rebuild now to restore fence alignment and overall strength, not just quick fixes.
Consider the following steps:
1) Inspect surrounding soil and footing for erosion or voids.
2) Remove the old post and replace with treated lumber or steel, set in concrete.
3) Re-align the entire run for consistent gates and panels.
4) Verify post stabilization with proper bracing and secure fasteners.
If these criteria apply, stop patching; pursue complete replacement to ensure lasting performance and reliable fence alignment.
Frequently Asked Questions
How Long Do Reinforced Gates Typically Last After Fixes?
A reinforced gate typically lasts 5–15 years, depending on soil, weather, and maintenance. With proper gate reinforcement you maintain fence stability longer, and you’ll reduce sagging risk, saving you headaches and costly replacements over time.
Can Sagging Gates Cause Property Damage or Injuries?
Sagging gates can cause injuries and property damage if misaligned. You should check gate alignment and inspect for weak posts; plan post replacement or hinge adjustments promptly to prevent accidents and further structural failures.
Are DIY Fixes Safe on Metal Gates and Fences?
It’s not safe to rely on DIY fixes alone for metal gates and fences. You can proceed, but prioritize DIY safety and use proper metal reinforcement methods, consulting pros when in doubt to avoid failures.
What Wood Species Resist Sag Best Long-Term?
You’ll want naturally durable woods like cedar, redwood, and treated pine, which offer strong wood durability and season-long stability. Favor species resistance to rot and insects, and choose heartwood over sapwood for lasting performance and minimized sag.
How Weather Affects Reinforcement Longevity and Maintenance?
Weather impact varies with season; corrosion and swelling shorten reinforcement longevity if untreated. You’ll minimize issues by sealing joints, applying protective coatings, and inspecting quarterly. Follow maintenance tips: reapply sealant, tighten hardware, and replace weakened posts promptly.
Conclusion
You’ve got this: guard the gate, guard the grain, guard the grasp of ground. Quick fixes fix grafts; steadfast steps seal sag. Study sag patterns, select sturdy sleeves, set solid supports, and seal the site. Shut out strain with proper hinges, sound screws, and steady staples. Maintain the mainstay by monitoring moisture, mowing margins, and monthly checks. If it’s beyond patchwork, promptly pursue permanent posts and precise, proven procedures. Prevent, protect, perform—perseverance proves.


