
To stop drafts, start by locating gaps around doors, windows, and attic or utility penetrations using smoke tests, candles, or tissue. Choose the right weatherstripping (foam, vinyl, or bulb for gaps; door sweeps for bottoms) and apply it on clean, dry surfaces. Seal with a steady bead of caulk for frame seams, then fill larger voids with low-expansion foam and trim flush. Recheck tightness with a candle or smoke test—you’ll uncover more fixes ahead.
Why Drafts Happen and How Sealing Windows Saves Energy
Drafts happen whenever there are gaps, cracks, or misalignments around doors and windows. You’ll experience stray air when the seal isn’t continuous, letting warm or cool air cross the threshold. The root causes include frame settlement, aging weatherstrips, improper installation, and hardware gaps that create pressure differentials.
By identifying where drafts enter—top, sides, or bottom—you target sealing efforts precisely, not guesswork. Sealing improves thermal insulation, reducing heat transfer and interrupting convection paths that steal comfort. When you close gaps, you preserve steady interior temperatures, enabling your heating and cooling systems to work more efficiently.
The outcome is tangible: better energy efficiency, lower utility bills, and a more consistent indoors. Focus on durable materials, proper compression, and clean, commanded overlaps for lasting energy savings.
Quick Air-Testing Methods to Prioritize Your Fixes
You’ll start with quick wind tests to pinpoint drafts and prioritize fixes that yield the biggest gains. Use a tight checklist to assess gaps around doors, windows, and frames.
Then, map findings to a clear Priority Fixes Guide. This approach keeps you focused on effective, data-driven actions that improve comfort fast.
Quick Wind Tests
To quickly identify where wind leaks originate, use simple, practical tests that don’t require special equipment. You’ll measure impact by feel and sight, not guesswork. Start at the easiest edges: around sash gaps, weatherstripping, and thresholds.
Hold a candle or coffee filter near suspected joints; steady flame or flutter reveals drafts and airflow paths. Use light indicators: a tissue strip along frames to flag continuous movement.
Check attic and basement access points, utility penetrations, and door bottoms when rooms feel markedly cooler or musty. Quantify results by noting orientation, height, and material—then compare to typical sealable areas.
Prioritize fixes that reduce indoor airflow through the largest, most persistent paths, especially around window insulation and door seams.
Priority Fixes Guide
Which leaks matter most, and how can you pinpoint them quickly? You’ll start with quick air tests to rank priorities. Use a two-step approach: first, feel for drafts around habitual trouble spots—windows, doors, electrical outlets, and attic hatch—while the system fans run.
Then, seal the tiniest gaps you identify to verify impact. Emphasize energy efficient windows and door edges, focusing on caulk lines, weatherstrips, and thresholds. Apply a smoke test or infrared scan if available, noting where wind pulls vapor or heat.
Record findings with location, gap size, and potential fixes. Prioritize fixes that deliver the largest reduction in draft per dollar, and document your results as you go. This builds a focused, repeatable workflow for effective draft proofing techniques.
Weatherstripping Basics: Which Types Fit Your Windows and Doors
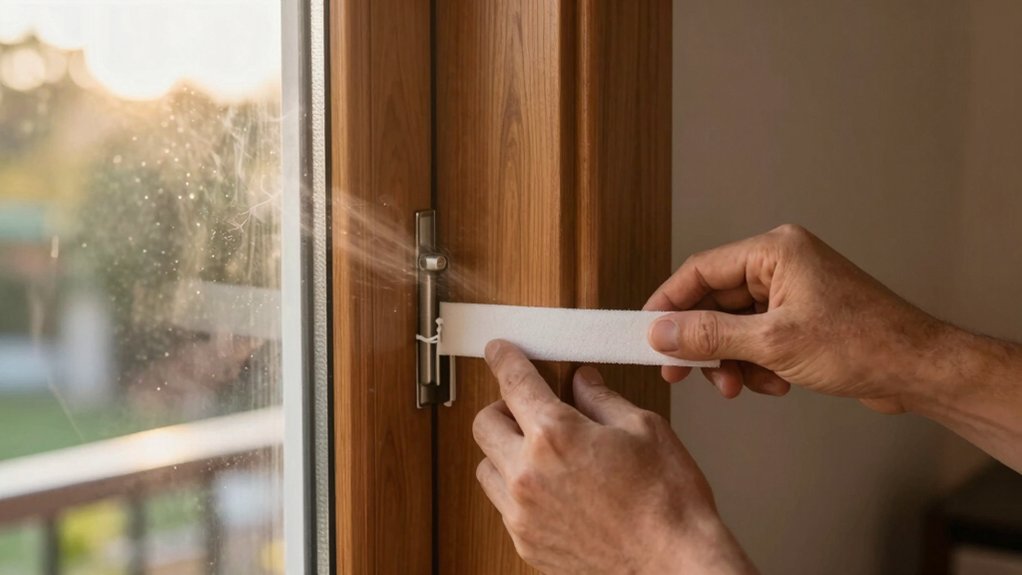
There are several weatherstripping options to match your windows, from vinyl or foam tapes for gaps to bulb and door-sweep seals for perimeters.
You’ll want to assess both the gap size and the surface material, then select a type—tape for irregular edges, automatic door bottoms for floors, or bulb seals for sash-to-frame gaps—that fits with minimal fuss.
Start by testing current clearances at both the window and door perimeters to determine which sealing approach delivers the best air-tight, low-friction result.
Types Fit For Windows
Weatherstripping for windows comes in several distinct types, each suited to different gaps, profiles, and frame materials. You’ll choose based on sash movement, material compatibility, and exposure.
For narrow gaps, use V-strip or foam tape that compresses evenly without springing away. In wider frames, consider rigid foam or metal-backed weatherstripping to maintain a seal even with settling.
For double-hung or sliding sashes, door-style sweep or bulb seal can reduce drafts at the bottom without hindering operation.
Install with clean, dry surfaces, and test closure to ensure no binding. Consider window styles and glass options when selecting color and finish to minimize glare and maintain aesthetics.
Precision fitting matters: measure, cut, and press firmly, then recheck gaps at multiple points.
Door Perimeter Sealing Options
To seal door perimeters effectively, start by matching the weatherstripping to your door type, frame material, and gap size. You’ll choose from door sweeps, tubular, V-channel, and compression profiles based on swing direction and reveal.
A door sweep provides a low-friction threshold seal at the bottom; guarantee it contacts the sill without binding. For irregular gaps, use a flexible weatherproofing tape along jambs to fill light crevices and create a continuous barrier when paired with sweeps.
Consider solid compression seals for heavy doors and hollow cores for tighter tolerances. Install with the door closed and the frame plumb, trimming any excess length. Verify without distortion by opening and closing smoothly, then recheck gaps at all edges for persistent drafts.
Door Seals That Stop the Chill: Thresholds and Bottom-Sill Fixes
Door seals at the threshold and bottom sill are your first line of defense against drafts, moisture, and cold air sneaking under doors. You evaluate thresholds for gaps, then choose solid fixes that stay put. Measure the worst leakage points with a light and feel, noting height, slope, and compression.
Install or replace threshold seals with a tight, continuous gasket, ensuring the door clears evenly without binding. For bottom sill fixes, add a rigid sweep or combined vinyl brush if you have a low-lying sill; ensure contact across the entire width. Verify clearance so the door closes fully without dragging.
Seal fasteners should sit flush, and any weather-stripping must resist wear. Recheck after a week, adjusting compression or pivot points as needed for durable performance.
Seal Window Gaps: Sash, Frame, and Crank Areas
Seal gaps around the sash, frame, and crank areas with targeted mobility in mind: identify where daylight shows or drafts feel strongest, then apply purpose-built fixes that stay put. You focus on precise gaps at the sash pockets, meeting rails, and crank mechanisms, locating trouble spots with a flashlight and feel.
For window insulation, use rigid or foam backer supports to cushion movements and prevent gaps from widening with temperature shifts. Inspect the sash for light-lingering cracks and address with compatible fast-setting materials that resist shrinkage.
Consider sash repair options that preserve smooth operation, then test opening and closing to confirm a snug seal. Finish by rechecking weather-strips and hardware alignment, ensuring long-term draft resistance without adding bulk.
DIY Seal Coat: Caulk, Foam, and Sealant Techniques That Last
You’ll master Caulk Application Tips for clean lines, proper bead size, and feathered edges that resist cracking.
Next, apply Foam Sealant Techniques with correct tool selection, temperature control, and curing times to avoid gaps.
Finish with Lasting Sealant Maintenance habits that schedule inspection, cleaning, and timely resealing to keep drafts at bay.
Caulk Application Tips
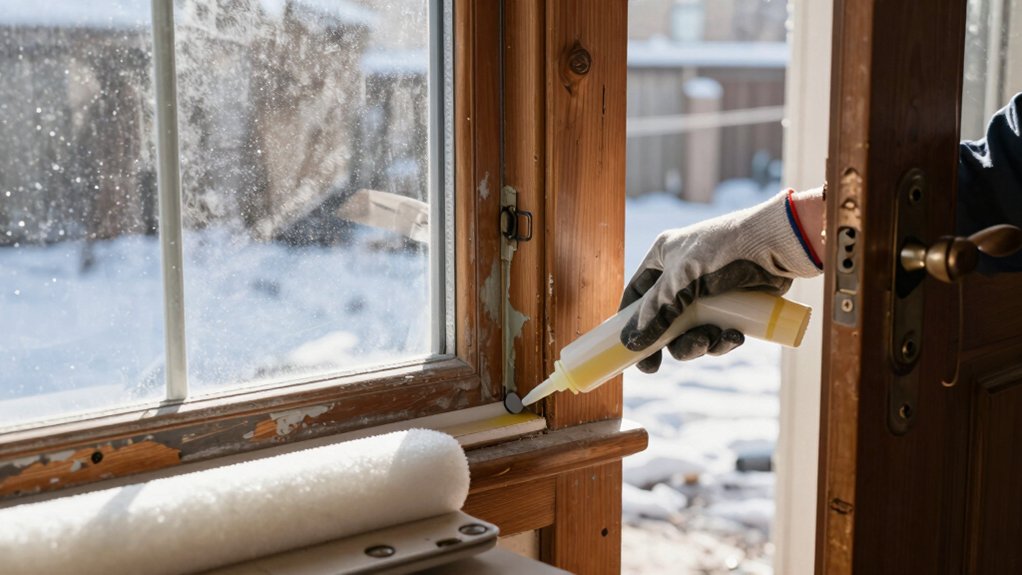
Caulk is your first line of defense against drafts and moisture, and applying it correctly saves energy and prevents damage. To start, choose the right caulk for your joints—silicone for exterior gaps, acrylic latex for interior seams. Then prep the surface: clean, dry, and remove old material.
Cut the nozzle at a 45-degree angle to match gap width, and use a steady bead, avoiding gaps caused by overfilling. Smooth the bead with a damp finger or tool for a uniform finish, while masking tape edges to protect adjacent surfaces.
Apply in a continuous sweep, seal all window insulation joints, and check door draft blockers for any shifting after curing. Finish by inspecting for gaps, then wipe excess caulk before it cures.
Foam Sealant Techniques
Foam sealant is a fast, high-volume option for filling larger gaps and joints around windows and doors, offering a sturdier base for long-term insulation than caulk alone. You apply minimal, controlled beads along framing seams, then tool smooth with a damp fingertip or dedicated tool before curing.
Choose low-expansion foam for tight cavities to prevent bowing or overfill; use a nozzle adapter to target vertical and horizontal joints precisely. After curing, trim excess foam flush with surfaces and seal exposed edges with paintable caulk to maintain adhesion.
For best results, pair foam with compatible insulation materials and ensure clean, dry surfaces. This method supports energy efficient upgrades by reducing drafts and enhancing overall airtightness.
Lasting Sealant Maintenance
Maintaining seal integrity around windows and doors starts with proactive inspection and timely reapplication of caulk, foam, and sealants before deterioration compounds drafts or moisture intrusion. You’ll schedule seasonal checks, focusing on cracks, gaps, and bead continuity.
Use high-quality polyurethane or acrylic caulk for exterior joints and silicone where moisture contact is frequent; remove old material fully, clean surfaces, and let dry. Apply even, continuous beads with a steady hand, tool smoothness, and precise butt joint alignment to prevent pinholes.
For cavity gaps, inject low-expansion foam, trim flush, and reseal. After cure, test with gentle air pressure and tactile feel to confirm coverage.
Prioritize thermal insulation and indoor humidity control by maintaining consistent, gap-free seals, reducing heat loss and moisture migration. Regular maintenance yields enduring performance and comfort.
Draft Stoppers and Accessories: Snakes, V-Strips, and Tapes
Draft stoppers and accessories offer quick, cost-effective ways to seal gaps around doors and windows without major remodeling. You’ll evaluate door thresholds for up-down drafts, then select a compatible draft stopper or accessory set. Draft stoppers provide an immediate barrier at the sill, while snake accessories fill irregular gaps along the frame.
Use precise measurements to choose length-adjusting options, and verify that attachments press firmly without warping the door. Apply V-strips along plain jamb edges to redirect airflow, ensuring a tight perimeter without creating binding. Tapes, including foam-backed variants, seal small seams and cracks that resist standard weatherstripping.
For best results, install during dry conditions and test with a simple candle or lighter to confirm airflow reduction. Maintain components with periodic cleaning and re-seating as the door settles.
Targeting Common Trouble Spots: Corners, Jambs, and Edge Gaps
Corners, jambs, and edge gaps are the spots where drafts most often sneak in, so start by mapping each area and prioritizing the ones with visible daylight or air movement.
You identify corner gaps precisely by inspecting tight joints between wall and frame, then verify along J-shaped contact points at jambs. Measure gaps with a ruler, note their width, and compare to your weather stripping options.
For corner gaps, apply high-performance foam or backer rod where appropriate, followed by weather sealant to create a continuous fill.
At jambs, install continuous weatherstripping with adhesive backing, ensuring a snug compression. Test with a draft wand or incense to confirm airflow cessation, and re-seal any persistent leaks.
Be mindful of edge gaps near hardware and adjust hardware alignment if needed to stop jamb leaks.
Maintenance Habits for Lasting Window Weatherization

Regular upkeep keeps weatherization effective long after the initial sealant and strips are in place, so establish a simple routine: inspect, test, and address areas with visible gaps or shifting hardware at least twice a year.
You’ll prioritize tight seals at frames, sashes, and thresholds, checking for paint or wood movement that can loosen weatherstripping. During seasonal inspections, verify that doors latch fully and that weatherstripping remains intact without compression marks.
When you detect wear, replace the appropriate components rather than patching temporarily. Pair this with objective energy audits to confirm performance gains and identify weak spots.
Maintain a documented log, noting dates, findings, and actions. This disciplined approach sustains insulation, reduces drafts, and supports long-term energy efficiency.
When to Consider Professional Weatherization Upgrades
When signs of aging or wear appear, it’s time to contemplate professional weatherization upgrades. You should consider them when persistent drafts recur despite sealing efforts, when seasons shift your energy bills, or when your home’s comfort feels uneven.
A professional assessment identifies gaps you might miss, target areas with the highest heat loss, and prioritize cost-effective improvements. Expect recommendations that include exterior insulation where exterior walls are uninsulated or poorly insulated, and air-sealing strategies that address junctions around windows and doors.
Also evaluate attic ventilation; improper intake or exhaust can trap moisture and raise cooling or heating loads. Implement solutions in logical phases, verifying performance with measured air changes per hour and updated comfort metrics.
Your goal: durable comfort, lower costs, lasting drafts prevention.
Frequently Asked Questions
Can Drafts Come From Electrical Outlets or Fixtures?
Yes, drafts can come from electrical outlets or fixture drafts. You’ll feel them near outlets or ceiling fixtures. Inspect with a candle, seal gaps with foam or gaskets, and install outlet-resistant covers to block Electrical outlets and fixture drafts effectively.
Do Blinds and Curtains Affect Draft Performance?
Yes, blinds and curtains help with draft performance. You improve window insulation, you deploy draft blockers, you tighten seals, you measure gaps, you test airflow, you seal leaks, you monitor comfort, you adjust layers, you stay proactive.
How Do Extreme Temps Impact Seal Longevity?
Extreme temps degrade seal longevity by accelerating material wear and cracking; insulation effectiveness drops, increasing air infiltration. You’ll notice faster gasket aging, brittle caulking, and more drafts, so inspect seals seasonally and replace compromised components promptly.
Are Draft Risks Different Between Metal and Vinyl Windows?
Draft risks differ: metal window drafts feel harsher, while vinyl window leaks are subtler. You’ll notice sharper metal gaps and slower seal deterioration with vinyl. Pinpoint joints, insulate edges, seal leaks, and monitor performance for lasting comfort.
Can Weatherstripping Affect Window Operation or Warranty?
Weatherstripping can affect window operation if it’s too thick or misapplied, but it won’t void warranty when installed correctly. It improves window insulation and enhances seal durability, though you should verify compatibility with your specific model.
Conclusion
You can cut drafts quickly by tackling doors, windows, and gaps with the right seals. Start with easy wins—weatherstripping, door sweeps, and clear caulk—then test results with a simple smoke or breeze check. If you doubt DIY fixes, know that professional weatherization pays back through comfort and lower bills. Picture your home sealed tight: steady temps, quieter rooms, and energy savings that keep your thermostat from fighting every season. You’ve got this—seal, test, enjoy.


