Popcorn ceilings were popular for hiding flaws and reducing noise, but they can harbor asbestos. First, test to confirm asbestos presence; if positive, hire licensed professionals. If clear, isolate the work area with plastic, seal doors, and wear a respirator, goggles, and coveralls. Score edges, then gently scrape to avoid drywall damage. Patch and sand, prime to seal dust, and repaint with quality ceiling paint. Keep workspace clean and safe, and you’ll gain a smoother ceiling—and learn more as you proceed.
Why Popcorn Ceilings Were Popular: and When to Remove Them
Popcorn ceilings gained popularity in the mid-20th century because they helped disguise imperfections, reduced sound transmission, and were quick and affordable to install. You’ll see why this ceiling texture became a default for many homes: it hides irregularities from rough plaster, speeds up construction, and offers decent acoustics in busy living spaces.
As you plan home renovation projects, you’ll assess whether the style still serves your needs or if modernization outweighs its benefits. Consider maintenance, potential moisture issues, and the overall aesthetic impact on room brightness.
If you choose to keep popcorn ceilings, document condition and avoid aggressive repairs. If you decide to remove, expect a controlled, well-planned process. Your decision should balance practicality with desired look and future home value.
Is Asbestos in Your Ceiling? Testing, Risk, and When to Hire Help
If your popcorn ceiling contains asbestos, testing is essential before any removal or repair work begins. You should know that asbestos testing determines fiber presence and concentration, guiding safe decisions.
Before you hire help, confirm credentials, licenses, and lab accreditation, and request a written plan outlining containment, disposal, and decontamination steps.
Hazard awareness matters: even small disturbances can release fibers into the air, risking exposure for occupants. Don’t assume all popcorn textures are asbestos-free—simply removing them isn’t risk-free.
If tests are positive, you’ll need professional abatement rather than DIY methods.
When choosing a contractor, compare written estimates, safety records, and cleanup guarantees, and obtain clearance documentation after completion.
Prioritize safety, follow local regulations, and proceed only with qualified, experienced teams.
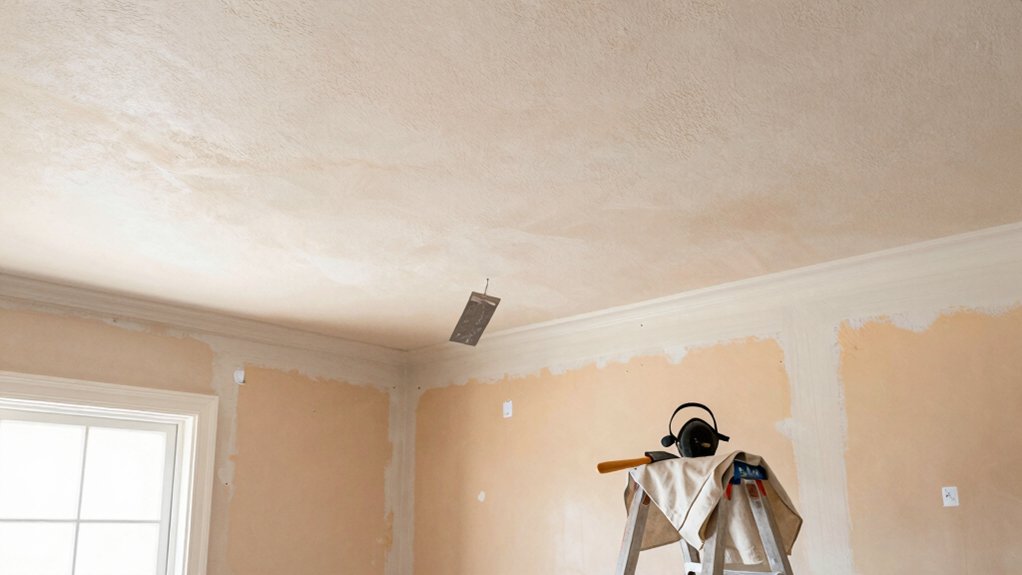
Prep the Worksite: Containment, PPE, and Safety Guardrails
Preparation begins with a controlled worksite: isolate the area, protect occupants, and establish clear safety boundaries before any removal work starts. You’ll set up containment, remove loose items, and seal doorways with plastic sheeting to minimize dust spread. Establish a dedicated entry and exit path to reduce cross-contamination.
PPE matters: dust containment requires proper gear, and personal protective equipment protects you from irritants and debris. Use a respirator rated for dust, safety goggles, and disposable coveralls with gloves.
Secure scaffolding or a sturdy ladder, with guardrails, to prevent falls. Keep a clean-through workflow to avoid recontamination.
- Isolate the room and seal barriers
- Deploy dust containment strategies
- Equip with appropriate PPE
- Inspect safety guardrails and access points
Scrape, Patch, and Finish: Step-by-Step Removal and Repair
Now you’ll begin the actual removal and repair process: scrape the textured coating, patch any damaged areas, and finish to a smooth, paint-ready surface.
Begin by scoring the edges where the popcorn layer meets the bare ceiling to keep pieces cohesive. Use steady, parallel strokes to lift the texture without gouging the drywall. Collect debris promptly to maintain a clean work area.
For patches, apply a thin layer of joint compound, then feather the edges to blend with surrounding texture. Allow compound to dry fully, then sand with light, even strokes until flush.
Address any minor cracks with quick-drying patch, then re-sand. Finish with a sealing coat to prevent texture shedding.
This is texture removal and drywall repair, performed methodically for a uniform final result.
After Removal: Prime, Patch, and Repaint for a Flawless Ceiling
After removal, start by applying a premium primer to seal the bare drywall and lock down dust. You’ll establish a uniform base for texture removal and guarantee consistent adhesion for patches and paint.
Next, assess repairs, fill gaps, and feather edges so the ceiling reads smooth and flat. Then you’ll prime again if needed to maximize stain resistance and long-term finish quality, especially over repaired areas.
Finally, choose a high-quality ceiling paint and apply in even coats for flawless coverage.
- Evaluate texture removal results and address any remaining uneven spots
- Patch patched areas with joint compound, feather edges, and sand smooth
- Re-prime the repaired surface to protect and enhance adhesion
- Apply two coats of ceiling paint for a uniform, durable finish (ceiling priming, texture removal)
Frequently Asked Questions
How Long Does Whole-House Popcorn Ceiling Removal Take?
You’ll typically see a full-house ceiling texture removal take days to a week, depending on square footage and prep. Plan for a layered removal timeline, protective work, and post-work cleanup to guarantee efficient completion.
What Tools Minimize Dust During Removal?
You minimize dust during removal by using dust containment and low dust tools. Rigid air barriers and plastic sheeting keep mess contained, while handheld scrapers with dust collection reduce debris. Maintain negative pressure, vacuum frequently, and seal work areas.
Can Popcorn Ceilings Be Left As-Is in Some Rooms?
Yes, you can leave popcorn ceilings in some rooms. Exaggerate: it’s practically a bold, vintage statement. Consider ceiling texture options and aesthetic considerations, then decide if your space benefits from keeping the texture or choosing a cleaner, modern look.
Will Removal Affect Insulation or HVAC Efficiency?
Yes, removal can affect insulation and hvac efficiency. You’ll want professional guidance to assess insulation impact, guarantee proper sealing, and maintain airflow; otherwise, you might create gaps or moisture risks that reduce system efficiency.
How to Handle Ceiling Debris Disposal Legally and Safely?
You should separate and bag debris as hazardous materials, then follow disposal regulations for your area, transporting it to an approved facility. Wear PPE, avoid dust spread, and verify local guidelines to guarantee legal, safe handling throughout cleanup.
Conclusion
Conclusion:
You’ll appreciate the clean, modern look after you finish removing the popcorn texture, patching any imperfections, and sealing with fresh paint. By staying cautious, testing for asbestos, and using proper containment and PPE, you minimize risks while you work efficiently. If you’re uncertain, don’t push it—hire help. In the end, you’ll enjoy a smooth ceiling that feels bright and new, like you’ve traded yesterday’s bumpy surface for a sleek, timeless glaze—just don’t time-travel to the 1950s.