

A kitchen bump-out expands counter space and light, improving flow by creating dedicated prep, cooking, and cleanup zones. Position the fridge, stove, and sink in a logical work triangle, add pull-out boards or compact islands, and use vertical storage to cut clutter. Maximize daylight with wide windows, skylights, and minimal framing for outdoor sightlines. Choose layered lighting, durable surfaces, and cohesive finishes to weave indoors and out. Keep exploring for more ideas you can apply today.
Expanding Counter Space and Work Zones

Expanding counter space and work zones is about making the kitchen flow more efficiently. You’ll gain room to prep, plate, and clean without crowding.
Start with a clear work triangle and dedicated zones for prep, cooking, and cleanup. Appliance placement matters: position the fridge, stove, and sink to minimize steps and backtracking.
Align counters with drawers and cabinets to keep tools within arm’s reach, reducing motion and clutter. Use vertical space for storage optimization, installing open shelves or hanging rails for frequently used items.
Consider pull-out boards, drop-down countertops, or a compact island to extend prep area without blocking pathways. Keep the layout simple and logical so every movement feels natural, focused, and streamlined.
Let There Be Light: Brightening With Windows and Skylights
Natural light should feel like a built-in feature, not an afterthought. You’ll brighten your bump-out by prioritizing window placement and skylights that draw the eye upward and outward. Choose wide, operable windows to flood the kitchen with morning sun and cool afternoon light, while minimizing glare with thoughtful placement.
Skylights add height and airiness without sacrificing wall space for cabinets or seating. Pair generous glazing with appropriate lighting fixtures for evenings, ensuring a balanced glow that doesn’t rely on one source. Use window treatments that control glare and privacy without dulling color or depth.
Slim frames, clear glass, and reflective backsplashes amplify daylight. Keep wiring simple and accessible, so fixtures can shift with your evolving layout and moods.
Smart Appliance Layouts for a Seamless Kitchen Flow
Smart Layout Strategies help you place appliances where you actually work, creating clear routes between prep, cooking, and cleanup. Think in zones that keep the fridge, sink, and range in a logical triangle while tuck-away spaces minimize clutter.
With seamless appliance zones, you’ll move through tasks without backtracking, making every bump-out count.
Smart Layout Strategies
Efficient kitchen layouts hinge on smart appliance placement that supports flow from prep to cooking to cleanup. You optimize the worktriangle by aligning fridge, sink, and range within easy reach. Then tuck small appliances into designated zones to reduce clutter.
Consider counter-depth models to maintain sightlines and prevent crowding. Position microwaves and coffee makers at convenient heights for quick access.
Lighting optimization matters: layer ambient, task, and accent lighting to keep work areas bright without glare. Use under-cabinet LEDs to illuminate countertops and ensure switches are reachable from prep zones.
When you plan, anchor aisles with clear walkways and avoid asymmetrical clutter that forces detours. Finally, build in flexible spacing for future upgrades, so your kitchen adapts as needs evolve.
Seamless Appliance Zones
Seamless Appliance Zones harness coordinated placements to keep your kitchen flowing smoothly. You’ll group utilities so prep, cooking, and cleaning happen in a single, logical loop.
Think about sightlines and reach, placing the fridge near prep zones yet away from heat sources. Align ovens, microwaves, and coffee makers with tall cabinets to conceal clutter while keeping everything reachable.
This layout supports appliance placement that minimizes steps, reduces traffic, and streamlines cleanup. Integrate hidden panels and integrated panels to blend devices into cabinetry, avoiding visual interruptions.
Favor shallow depths for wall units to maintain clear counter space. Plan electrical and plumbing runs with future upgrades in mind, enabling appliance integration that’s adaptable as technology evolves.
The result is a cohesive, user-friendly kitchen where routines feel effortless.
Cozy Breakfast Nook and Dinette Options
A cozy breakfast nook makes mornings feel calmer, inviting you to linger with a warm cup and bright views. You design a compact dinette that fits your bump-out, adding a cozy corner for casual meals.
Choose a built-in bench with storage to maximize space and keep counters clear. Pair it with a small, square table and armless chairs that slide under when not in use.
Opt for light, neutral upholstery with a pop of color through cushions or a throw. Let natural light shape the mood; add a pendant or two for focused illumination.
Keep the palette airy, materials durable, and textures inviting. This breakfast nook becomes daily comfort, a bright, efficient hub for quick breakfasts and lingering chats.
Pantry and Storage Tricks in a Bump-Out
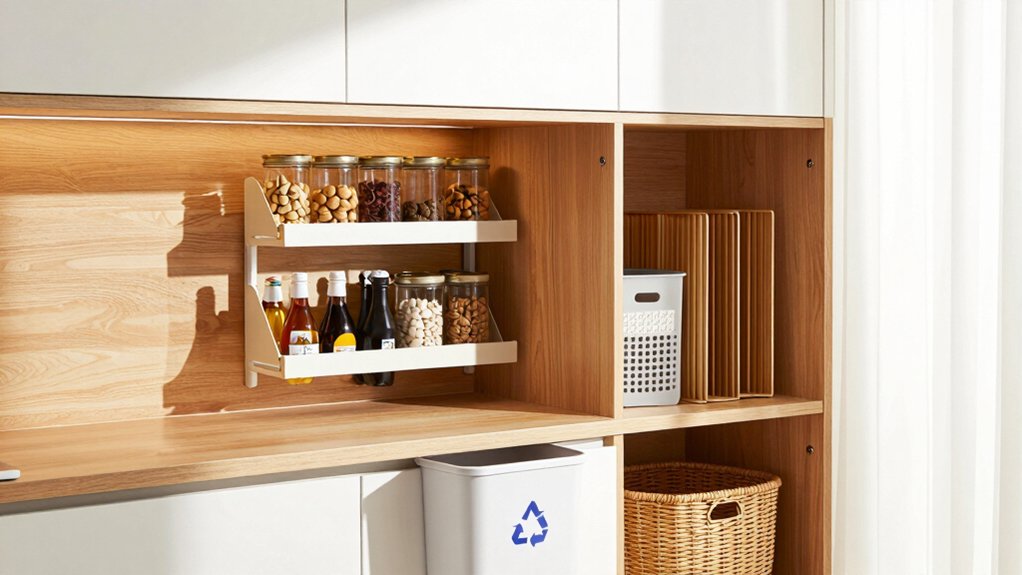
If you’ve got a bump-out, smart pantry design turns wasted depth into real function. You’ll plan vertical shelves and pull-out bins to maximize every inch, reducing clutter as you cook.
Use adjustable racks to adapt to canned goods, spices, and snacks, so you avoid dead space behind doors. Open shelving keeps essentials visible, speeding meal prep and encouraging organized habits.
For deep corners, install lazy Susans or corner pullouts to access items without rummaging. Label bins and use uniform containers to create a cohesive look that’s easy to maintain.
Integrate a small, shallow drawer for mail, bags, or wraps to keep countertops clear. Focus on pantry organization and choose storage solutions that streamline daily tasks.
Your bump-out becomes a compact, efficient culinary hub.
Breakfast Bar and Seating Ideas
A breakfast bar instantly elevates a bump-out, giving you a casual dining nook that doubles as extra prep space. You’ll choose a height and seating that suit your routine, whether counter stools for quick bites or upholstered benches for lingering chats.
Pair streamlined cabinetry design with open shelving to keep the area feeling airy while showcasing everyday pieces. For dining room cohesion, sync the bar’s finish with adjacent cabinetry and hardware, so progression feels deliberate, not piecemeal.
Extend the countertop into a small peninsula to create a natural flow between cooking zones and seating. Add integrated under-counter lighting to spotlight meals and tasks, and consider a hidden notch for trash or recycling bins to keep surfaces uncluttered.
Outdoor-Indoor Connection: Indoor-Outdoor Access
You can create seamless doorways that blur the line between kitchen and patio, swapping barriers for open sightlines. Focus on an effortless outdoor-indoor flow that encourages movement and makes dining al fresco feel natural year-round.
Consider year-round access solutions that keep the space comfortable and connected, no matter the season.
Seamless Doorways Design
Seamless doorways blur the line between indoors and outdoors, creating a fluid, inviting passage that expands usable space. You design with wide openings and minimalframes to reduce visual clutter, letting light travel freely.
Choose doors that fold, slide, or pocket neatly, so passages feel effortless rather than forced. Materials matter: match floor heights, align thresholds, and pick finishes that echo your kitchen and exterior palette.
When you scope the retrofit, plan for weather seals, unobtrusive hardware, and secure locking without sacrificing aesthetics. Consider threshold details that ease movement while preserving a cohesive look.
This approach supports doorway connections that read as one space, rather than disconnected rooms. Prioritize entryway aesthetics with clean lines, ample glazing, and a consistent design language throughout.
Outdoor-Indoor Flow
Bringing the outdoors in should feel effortless, with clear sightlines and open access that makes every meal or gather feel connected to fresh air and sunlight. You’ll design for a seamless passage between kitchen and exterior, prioritizing wide openings, minimal thresholds, and durable surfaces that resist weather.
Consider how architectural styles influence your choices—slab-to-deck connections, sliding or bi-fold doors, and matched materials unify spaces. Plan sightlines from prep to porch, so traffic stays intuitive and clutter-free.
Check building permits early to confirm setbacks, framing, and glazing requirements, preventing snags later.
Light control matters too: adjustable shading, interior color palettes, and exterior lighting extend usability.
Finally, designate outdoor zones that mirror indoor zones, maintaining flow without sacrificing function or comfort.
Year-Round Access Solutions
Year-round access hinges on systems that bridge indoor comfort with exterior practicality. You’ll design passages that feel seamless, not forced, so you can use the bump-out space in any season. Prioritize durable, energy-efficient connections, like insulated doors that seal tightly and operable vents for climate control.
Consider a retractable or multi-panel door that opens wide without curb interruption, inviting outdoor flow when the weather cooperates. Storage solutions keep seasonal gear tucked away yet accessible, avoiding clutter that disrupts use.
Lighting enhancements extend usable hours, with layered options for task, ambient, and accent needs, plus weatherproof fixtures near thresholds. Draft-proof thresholds plus radiant floor or zone heating zones can maintain comfort.
Pair smart controls with shaded sun exposure to balance glare and heat.
Material, Finish, and Color Schemes for a Cohesive Look

To create a cohesive look for a kitchen bump-out, choose materials, finishes, and colors that mirror or complement your existing space while balancing contrast and texture. You’ll pair durable surfaces with subtle warmth, avoiding overly matchy tones.
Select cabinet finishes that echo your main cabinetry, then introduce contrast through color or grain in the bump-out panels. For texture, mix matte and semi-gloss sheens in a controlled way, so reflections stay balanced.
Carry that logic into the backsplash materials and wall color: a simple tile with a hint of pattern can unify zones without overpowering them.
When you install cabinet hardware, pick a finish that ties together hinges, fixtures, and faucet. Keep the palette cohesive, with a few deliberate accents for personality.
Real-World Before-and-After Case Studies
Real-world before-and-after case studies put the theory to the test, showing how bump-outs can transform flow, storage, and light in actual kitchens. You’ll see layouts optimized for appliance placement, with traffic lanes clarified and work zones clearly defined.
In one project, a modest bump-out rebalanced the trio of sink, stove, and fridge, shortening steps and freeing counter space for prep. In another, daylight from revised window lines plus strategic lighting design brightened a previously dim corner, making the space feel larger.
Storage gains come from deeper countertops and tailored cabinetry, reducing clutter and improving accessibility. Across cases, decisions hinge on how you move through tasks, not just how the room looks. Real results prove bump-outs work.
Conclusion
You’ll see how a kitchen bump-out can transform everyday cooking into an experience you actually enjoy. By expanding counters, inviting light, and smartly arranging appliances, you gain flow, function, and a cozy nook to savor. Think of it as extending your home’s heartbeat—bright, practical, and welcoming. In this gentle flourish, a small change becomes a big improvement, whispering, yes, you deserve more space, more light, more joy. The future of your kitchen starts with a single, thoughtful bump.


