Skylight costs hinge on size, type, and roof specifics, with materials, labor, permits, and flashing adding up quickly. Fixed, venting, or tubular units vary widely, and larger or multiple skylights amplify both material and labor expenses, plus potential structural work. Hidden costs—inspections, revisions, and weather-related delays—can add 5–15%. You’ll want a careful budget, smart material choices, and a solid installer plan to avoid surprises as you evaluate options.
What Drives Skylight Installation Prices

Several factors determine skylight installation costs. You assess labor hours, permitting, and removal of old units, then translate these into dollar estimates. Labor efficiency and regional wage differences drive variability; the same job may cost hundreds more in high-cost markets.
The framing condition and roof complexity alter required time and materials, with dimensional changes increasing flashing and flashing-related materials. Material durability matters: higher-quality panes, insulated glass, and reinforced housings reduce replacement cycles, impacting long-term value.
Historical trends show that early skylight prices dominated by glass panes have given way to lighter plastics and advanced coatings, shifting costs toward installation and integration rather than raw material.
You balance energy performance targets, warranty terms, and contractor reputation to refine the final price.
Skylight Types: Cost Ranges at a Glance
There are distinct skylight types to contemplate, each with a different cost bracket and performance profile. You’ll see clear ranges for fixed, venting, and tubular variants, plus differences by material and glazing.
This section starts with a concise map of typical price bands to anchor your budgeting decisions.
Skylight Type Varieties
Skylight types vary in cost and function, so choosing the right option requires comparing light transmission, insulation, and installation complexity. You’ll map options by glazing (glass vs. polymer) and frame materials, then weigh heat gain versus loss.
Quantify performance: U-values, SHGC, and visible transmittance guide material choices, while durability metrics constrain long-term cost.
Consider skylight shapes—flat, curb-mounted, or tubular—and assess curb height, flashing, and vapor barrier requirements.
Installation techniques matter: factory-sealed units simplify field work, whereas custom-built units force in-situ sealing and potential mitigation for wind uplift.
For cost ranges at a glance, prioritize materials with high infrared resistance and low maintenance.
Track trade-offs between aesthetics and energy savings, ensuring compatibility with existing roofing substrate and ventilation needs.
Cost Bracket Overview
Cost brackets for skylight types vary by glazing, frame, and installation approach, so you can quickly gauge total costs by filtering on unit price, labor difficulty, and long-term energy performance.
You’ll see distinct ranges by type: fixed, venting, tubular, and dome, with glazing options from tempered or laminated glass to polycarbonate inserts influencing price per square foot.
Frame materials—vinyl, aluminum, wood, or hybrid—shift installation complexity and resale value, reflecting historical trends toward energy efficiency and durability.
Labor difficulty, including roof pitch and flashing requirements, drives upfront costs and scheduling.
Aesthetic considerations, such as daylight distribution and exterior curb appeal, affect buyer willingness to pay premiums.
Labor Costs by Skylight Type and Roof
Labor costs vary by skylight type due to unit price and installation complexity, with more elaborate models elevating both material handling and labor time.
Roof labor may shift based on roof pitch, mounting method, and flashing requirements, creating measurable differentials across projects.
You’ll want to quantify these factors—comparing per-unit costs, time estimates, and contractor overhead—to forecast total labor impact accurately.
Labor by Skylight Type
The cost to install skylights varies by type, and more complex designs add measurable labor time. You’ll see distinct labor allocations by unit type, from fixed to venting to skylight tubes, with vented units needing additional sealant, flashing, and mechanical testing.
Material access and roof pitch drive time per opening, while integration with existing framing and electrical rough-in adds clear, incremental minutes or hours. Skylight aesthetics influence crew setup and sequencing, affecting on-site coordination and final finish quality.
Historical skylight trends inform standard practices, but each installation demands precise assessments of cut, reframe, and flashing requirements. Expect higher labor for larger or multiple skylights and for top-hung or motorized models, versus simpler fixed units.
Documentation should reflect measured hours per unit and total project hours.
Roof Labor Variations
Roof labor costs vary by skylight type and roof characteristics, with larger or more complex openings driving proportionally higher time and price. You’ll see variation based on skylight shape, frame, and glazing, as well as roof pitch, decking, and underlayment.
Labor hours rise when cutouts exceed standard dimensions or require custom flashing, impacting crew setup and roof protection. Expect incremental costs for higher roof material compatibility challenges, such as integration with metal, tile, or membrane systems, plus potential adjustments for insulation and vapor barriers.
Skylight aesthetics influence trim and finishing time, though not always linearly with size. Quantify labor by hours per opening and multiply by local crew rates, noting that more intricate skylights and steeper slopes escalate both duration and total cost.
How Roof Type Affects Installation Time and Price
Understanding how roof type affects installation time and price requires precise, data-driven assessment: steeper or more complex structures add handling time and specialized equipment, while larger spans increase crew hours and material costs.
You’ll see time and price rise with angle, pitch, and structural complexity, since access, fall protection, and material cutting demand additional coordination. Roof insulation must be integrated for thermal performance, and weatherproofing techniques require proper flashing and sealing to prevent leaks, influencing both scheduling and expenditure.
Variations in ridge, valley, and overhang details alter substrate prep and fastener counts, shaping labor hours and waste. Material choices for underlayment and flashing affect unit costs and delivery timing.
- Steep pitches add risk controls and equipment rental, boosting costs
- Complex penetrations require precision cuts and isolation
- Longer spans raise crew hours
- Increased waste drives disposal fees
- Insulation and weatherproofing sequencing affects timing
Size, Placement, and Complexity: Price Factors
Size, placement, and complexity directly drive price because each factor changes labor hours, material needs, and risk management. You’ll see costs scale with opening size: larger skylights require longer drafting, more custom flashing, and extended framing work, typically increasing labor 15–40% per added square foot.
Placement matters: roof slope, attic access, and obstructions affect installation time and safety gear, adding 5–25% in labor and overhead.
Complexity, including multiple units, skylight type, and flashing systems, drives material variance and specialty labor fees, often 10–35%.
Skylight aesthetics influence trim, glazing, and edge detailing, subtly shifting costs yet improving perceived value.
Historical installations may constrain methods and require archival flashing or guards, elevating activity duration and permitting considerations.
Do You Gain Value From Glass vs. Polycarbonate?

Choosing between glass and polycarbonate for skylights hinges on value delivered over time rather than upfront cost alone.
Polycarbonate often wins on impact resistance and weight, while glass typically offers better long-term clarity and thermal performance.
- Glass durability: longer service life with gradual glazing losses, fewer replacements
- Polycarbonate transparency: high light transmission initially, with potential yellowing over decades
- Maintenance costs: glass cleans easily; polycarbonate requires scratch-resistant coatings
- Insulation impact: glass generally yields higher R-values per inch in standard skylight assemblies
- Total cost of ownership: balance upfront price, replacement intervals, and energy savings
In practice, you quantify expected life, maintenance needs, and energy impact to decide which option yields lower 15–25 year cost of ownership.
New vs Replacement Skylights: When to Choose
You’ll weigh New Skylights advantages against Replacement Skylights timing to decide which path minimizes cost per roof area over a 20-year horizon.
If you’re starting from a blank roof, new units offer higher efficiency and design flexibility.
However, replacement may cut installation labor by 25–40% and reduce waste.
For a rapid ROI, quantify energy savings, payback period, and the impact of available warranties to guide your choice.
New Skylights Advantages
New skylights offer several advantages over replacement options, mainly because they maximize energy performance and daylight capture from the outset and simplify installation. With a fresh frame, you avoid retrofit gaps and achieve a tighter envelope, measured by a 5–15% improvement in U-factor and visible light transmission that remains stable over time.
You’ll also gain predictable performance, since skylight materials are engineered for minimal thermal bridging, and you can select glazing with low-e coatings to suit climate. Installation tools and framing alignments are standardized, reducing labor variance.
Overall lifecycle costs tend to be lower, given fewer seals to maintain and longer warranty coverage.
- Improves insulation integrity using compatible skylight materials
- Standardizes fit and reduces on-site modifications
- Predictable performance with quantified energy gains
- Streamlined installation with common installation tools
- Lower long-term maintenance and warranty advantages
Replacement Skylights Timing
Replacement typically saves on roof deck labor but may incur higher unit costs if framing changes are required. In quantitative terms, expect energy savings of 5–15% annually when upgrading to high-performance skylight materials versus older units, with payback periods commonly 6–12 years, depending on climate and orientation.
Consider skylight aesthetics to guarantee alignment with interior lighting levels and exterior rhythm; inappropriate styling can necessitate retrofits. If current units show condensation, seal failure, or glazing delamination, replacement becomes more favorable.
Prioritize reliable warranties and material compatibility for long-term performance.
Packaging Costs: Frames, Flashing, and Curbing
Packaging costs for frames, flashing, and curbing can represent a significant portion of skylight installation budgets. You’ll quantify each component to control total cost, focusing on material choices, thickness, and compatibility with your roof type.
Packaging costs are driven by framing materials, flashing configurations, and curb dimensions, not just unit price. By comparing supplier quotes, you’ll identify cost per lineal foot, curb volume, and fastener requirements, enabling precise budgeting.
Expect framing materials to account for the largest share, with flashing and curbs adding measurable, variable overhead. Accurate takeoffs reduce waste and emphasize installation efficiency, which lowers overall expenses.
- Material grade and thickness influence both cost and durability
- Framing materials determine load capacity and tolerance
- Flashing type (metal, PVC, or hybrid) affects seal longevity
- Curb size governs material waste and labor time
- Supplier discounts hinge on volume and lead times
Hidden Costs to Watch: Permits, Roof Decks, and Flashing Surprises
Permits and regulations add time and cost, typically 1–3% of total project spend, plus potential inspection fees.
Hidden decking and flashing costs can surface as overruns of 5–15% if retrofits are needed or if structural work is required.
You should quantify permit timelines, confirm code requirements, and reserve a contingency of 10–20% for flashing surprises.
Permits and Regulations
- Permit fees and review timelines vary by jurisdiction.
- Code compliance drives framing and flashing decisions.
- Inspection sequencing impacts project cash flow.
- Third-party plans review can add costs.
- Documentation protects safety and material durability.
Hidden Decking and Flashing Costs
Hidden costs often lurk beneath skylight projects, especially around decking and flashing details that aren’t obvious at first glance. You’ll want to quantify potential surprises before breaking ground.
Hidden costs include additional roofing materials, underlayment, and fasteners for nonstandard openings, plus labor for precise cutouts and framing adjustments.
Decking flashing adds another layer of expense: transitions, drip edges, and sealants must be integrated with existing roof lines to prevent leaks, which often requires temporary shoring or upgraded decking substrate.
Expect permit-driven inspections to add time and fees, and prepare for extra waterproofing steps if your roof deck isn’t designed to tolerate penetrations.
Track costs per square foot, compare flashing options, and document all assumptions to avoid overruns from concealed costs.
Financing Skylight Projects: Loans, Leases, and Incentives
Financing skylight projects involves a clear choice among loans, leases, and available incentives, each with distinct cost, term, and eligibility profiles. You should quantify total cost, including interest, fees, and depreciation, to compare options over the project lifetime.
Loans typically offer fixed APRs and terms from 5 to 15 years, with monthly payments that scale by loan-to-value.
Leases provide lower upfront costs but higher total payments if you keep the unit, and may limit ownership of skylight aesthetics or integration with historical design.
Incentives—rebates or tax credits—vary by program and square footage, affecting net cost.
Choose financing that preserves value, especially where skylight aesthetics or historical design impact resale.
- Compare total cost and payment schedules, not just monthly payments
- Assess ownership vs. lease implications for long‑term value
- Include potential incentives in net cost calculations
- Align financing with project scope and timing
- Evaluate how design goals influence eligibility and depreciation
Energy Efficiency Credits: What You Should Claim
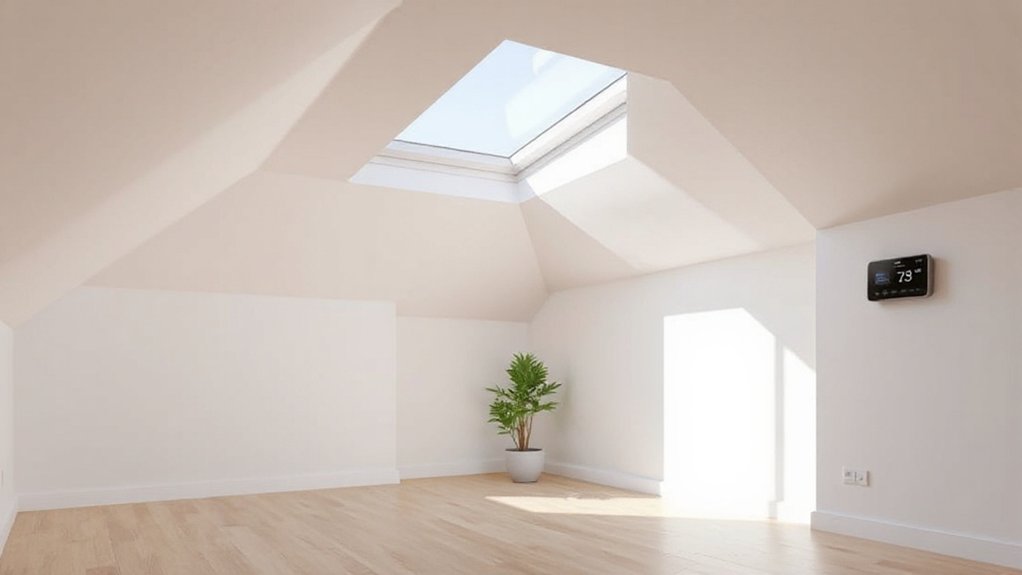
Energy efficiency credits can meaningfully reduce your skylight project’s net cost, but you must identify and claim the programs you’re eligible for. You should inventory local, state, and federal options, noting eligibility thresholds, credit amounts, and application windows.
Compare standardized metrics; quantify sky quality improvements and daylight benefits to justify claims with specific performance data. Typical credits cover lighting, insulation, and window efficiency, but tiers vary by model U-factor, SHGC, and glazing type.
Calculate post-credit cost per square foot and ROI using energy savings estimates over 10–20 years. Track required documentation: product specs, contractor attestations, and installation dates.
Confirm any cap limits or phaseouts that affect your skylight mix, ensuring your claims align with program rules and reporting formats.
Smart Skylights: Upfront Costs and Long-Term Savings
Smart skylights come with higher upfront costs than fixed units, but their long-term value hinges on automation features, climate control, and daylight-driven energy savings. You’ll weigh initial price against ongoing benefits like reduced cooling loads, automated shading, and improved interior lighting quality, which can lower monthly bills by a measurable margin.
In aggregate, expect payback in 4–7 years depending on climate, insulation, and usage. Skylight aesthetics matter for perceived value and comfort, while sensors and integration influence maintenance costs and reliability.
When sizing, consider glazing type, U-factor, and glare control to optimize comfort without overpaying. Long term, automation drives comfort, while daylight-driven savings compound with seasonality and occupancy patterns, enhancing overall home performance.
- Upfront vs long-term cost balance and payback window
- Climate impacts on energy savings and system load
- Automation features versus manual operation value
- Skylight aesthetics and interior lighting quality
- Maintenance, reliability, and long-term life-cycle costs
DIY vs Pro: Budget Tradeoffs and Risk
DIY projects can save upfront costs, but choosing between DIY and professional installation carries clear budget tradeoffs and risk. You’ll compare labor, material quality, and tool investments, estimating total cost variance within ±15% for typical residential skylites.
Pro installation adds guaranteed flashing, weatherproofing, and warranty coverage, reducing liability exposure by a defined 0.5–2.0% of project value over 10 years.
DIY savings hinge on your ability to match structural integrity, vapor barriers, and insulation R-values; errors escalate rework and energy loss, quantified as 5–12% annual heat gain or loss.
Skylight aesthetics influence resale value, though historical regulations may constrain mounting style and glazing options, limiting design freedom.
Weigh permit costs, inspection schedules, and potential code corrections, then decide based on measurable risk-adjusted cost.
Your choice should balance budget clarity with reliability.
Realistic Budget Framework: A Step-by-Step Plan
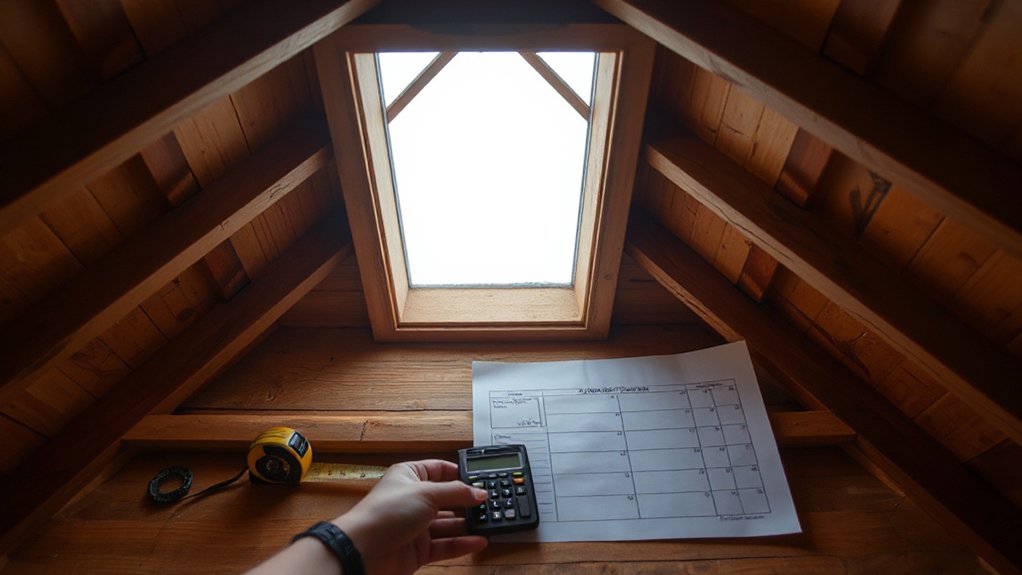
To build a realistic budget for skylight installation, start with a precise cost framework: itemize all components (materials, labor, permits, flashing, weatherproofing, warranty protections) and assign unit prices plus contingencies. You’ll quantify each line, then sum to a base subtotal and apply a 10–20% contingency for uncertainty.
Track correlations between skyline design choices and total cost, so you can optimize performance without sacrificing weather resistance. Compare material classes (glass vs. polycarbonate) and labor rates by region to refine accuracy. Validate with a sensitivity analysis that shows how small changes affect the bottom line.
Document assumptions, risk factors, and milestone reviews to prevent scope creep. Finalize an itemized budget sheet you can reuse for future skylight projects.
- Clear line items with unit costs
- Contingency as a separate line
- Skyline design implications
- Weather resistance priorities
- Periodic budget reviews
Quick-Start Budget Calculator and Checklists
You’ll start with a compact, practical toolkit: a quick-start budget calculator and a set of checklists that translate the previous cost framework into actionable numbers. This kit converts estimates into line-item totals for materials, labor, permitting, and contingencies, and then benchmarks them against historical context to reveal variance over time.
Use the calculator to input room area, skylight type, glazing, installer rates, and location modifiers; you’ll obtain a subtotal, tax, and a risk-adjusted contingency. The checklists guide sequencing: permit readiness, roof compatibility, weather window, and supplier lead times.
Record aesthetic considerations—glazing tint, frame finish, and daylight access—to quantify qualitative impact. Finally, review results with a sensitivity lens, noting which variables most affect total cost and schedule.
Frequently Asked Questions
How Long Does Skylight Installation Typically Take From Start to Finish?
Skylight installation typically takes 1–2 days from start to finish. You’ll assess site readiness, install flashing, seal, and trim. Energy efficiency improvements occur as you add the unit, boosting natural lighting while reducing heating or cooling loads.
What Maintenance Is Required After Skylight Installation?
Maintenance after installation requires regular skylight cleaning and proactive leak prevention; you’ll balance brightness with seal checks, measure rainfall impacts, and track cleaning intervals, ensuring dry interiors while minimizing repair costs over time through disciplined upkeep.
How Do Installed Skylights Affect Home Insurance Premiums?
Skylights can raise insurance premiums depending on risk assessment; your policy may adjust after evaluating glazing type, installation quality, and weather exposure. You might see modest increases if risk is heightened, with discounts for reinforced glazing outperforming baseline.
Can Skylights Be Installed in Winter or During Rain?
Yes—Winter installation and Rain installation can be done, but weather windows matter. You’ll need dry conditions, temps above freezing, and sealing checks; anticipate slower progress and higher costs, because winter rain complicates framing, flashing, and insulation performance.
Are There Health Concerns With Certain Skylight Materials?
Material toxicity can affect skylight choices; some plastics release low-level toxins, while others are inert. You should evaluate UV protection ratings, formaldehyde emissions, and VOC levels to minimize health risks and guarantee compliant, low-toxicity installations.
Conclusion
Skylights aren’t magic windows; they’re math problems with glare. You’ll pay for size, type, roof, and labor, plus hidden inspections and potential reinforcements. Expect 5–15% contingency for surprises. Tubular vents are cheaper; fixed panes, larger skylights, and complex roofs push prices up. DIY saves labor but risks leaks and warranty voids. Plan a realistic budget, compare bids, and match features to value. If you crave sunshine, budget discipline first, improvisation last.