
Start by defining safety, ambience, and budget goals for your yard, then set a realistic overall budget. Design a safe, even path with simple zoning—walkways, stairs, focal points—using cost-effective, low-voltage options. Choose durable LED fixtures with tight beam angles, test samples, and stagger installations to spread costs. Prioritize weatherproof, easy-to-install gear and solar where feasible. Regularly test, adjust, and maintain coverage to keep costs down while boosting curb appeal; you’ll uncover more tips as you continue.
Define Safety, Ambience, and Budget Goals for Your Yard
Before you install any outdoor lighting, define three clear goals: safety, ambience, and budget. You’ll shape placement, choices, and sequencing by prioritizing protection, mood, and cost control.
Start with safety: identify high-traffic paths, stairways, and entryways, and plan for GFCI protection and visibility without glare.
Ambience guides fixture style, color temperature, and spacing to create welcoming zones without overlighting.
Budget grounds decisions on how many zones, how bright, and how long lights run.
Consider timing considerations as you map when lights should activate—dusk-to-dawn, motion-triggered, or manual.
Assess fixture durability against weather, debris, and potential impacts to minimize replacements.
A clear framework keeps selections focused, durable, and economical while delivering reliable, inviting outdoor illumination.
Set a Realistic Budget for Budget-Friendly Lighting
Set realistic limits on your lighting spend and map costs by area to avoid surprises. Plan per area to allocate budgets for fixtures, wiring, and installation, so you can prioritize must-haves first.
Keep contingencies small but sufficient, and track every purchase against your initial plan to stay on target.
Set Realistic Limits
To set a practical budget for outdoor lighting, start by defining the total amount you’re comfortable spending and how it’ll be allocated across fixtures, wiring, and installation.
You then cap expectations by identifying nonnegotiables (safety, essential visibility) and nice-to-haves (accent lighting, focal points).
Prioritize efficiency to reduce long-term costs, choosing solar options where it makes sense for distance and sun exposure.
Consider future upgrades and maintenance, reserving a contingency fund for rewiring or replacements.
Match fixtures to area needs, avoiding overlighting and underlighting alike.
Use smart controls to maximize energy savings without inflating upfront costs, selecting scalable systems that grow with your budget.
Set clear milestones, track spending, and adjust as necessary to stay on target while preserving quality and safety.
Plan per Area
Plan per area means budgeting by zone so you don’t overspend. Break your landscape into lighting zones: foyer approach, paths, focal trees, and seating areas. Assign a realistic cap to each zone based on impact and safety, then total them for the overall budget.
Prioritize essential lighting first—safety and navigation—then allocate funds for ambiance. Use solar options where feasible to shave upfront costs, especially in low-visibility zones, but don’t force solar where it underperforms; mix with low-voltage options if needed.
Choose decorative accents that boost curb appeal without draining funds, such as lanterns, uplights for specimen trees, or step lights. Track spend against plan weekly, trimming fixtures or repetitions if you approach your limit. Reassess after installation for any adjustments.
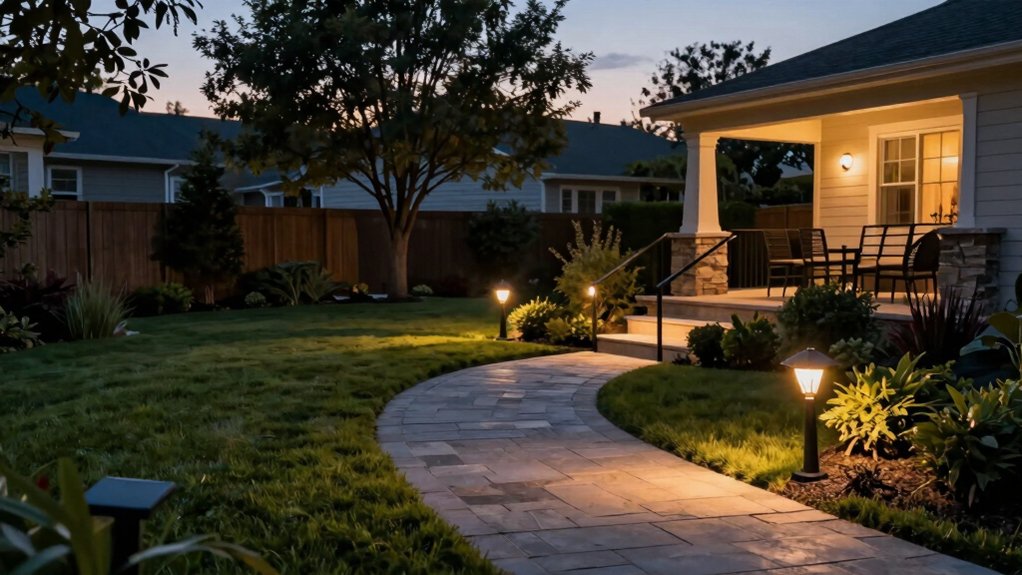
Design a Safe, Even Path and Zoning Plan on a Budget
Design a safe, even path by outlining a clear route that minimizes tripping hazards and maximizes visibility.
Plan zoning to separate lighting zones by function—walkways, steps, and progression—so you can light only what’s needed and stay within budget.
Use even spacing and low, glare-free fixtures to create a consistent look that guides visitors safely at night.
Safe Path Layout
A safe, even path is the backbone of a budget-friendly landscape lighting plan. You design with consistent spacing, low-maintenance fixtures, and clear sightlines to prevent trips after dark.
Map your route before buying: mark curves, stair edges, and connections, then choose fixtures that emphasize scale and visibility without crowding the space.
Use solar options where feasible to save on wiring and labor, placing them where sun exposure is ideal and maintenance is minimal.
Prioritize even illumination along the full length, not just entry points; aim for uniform brightness to reduce glare and shadows.
For style and function, add decorative accents at key junctions—perimeter markers, step lights, or silhouette-ready silhouettes—so you gain character without complicating the circuit.
Keep paths straight, grid-like, and adaptable for future updates.
Zoning On A Budget
Smoothly connecting your safe path to a practical zoning scheme keeps costs down while you expand lighting coverage. Start with a simple grid: designate zones along the path where lighting is essential, then add secondary areas for ambiance. Prioritize density near entry points, stairs, and transitions, while keeping longer stretches low-profile.
Use a single control strategy—timers or motion sensors—to simplify wiring and reduce costs. Solar options can fill remote areas without trenching, but mix with wired fixtures where reliability matters in low-sun months. Choose fixtures with a cohesive finish and scale to your landscape to avoid clutter.
Incorporate decorative touches—accent rocks, low-voltage uplights, or path markers—to create rhythm and safety. Plan future additions around existing zones to preserve budget flexibility.
Choose Low-Cost, High-Value Fixtures That Deliver
When you’re choosing fixtures, prioritize low-cost options that still deliver. Look for durable build quality, simple installation, and reliable performance at a budget-friendly price.
Solar options can reduce upfront wiring costs and maintenance, but check panel efficiency and battery life to avoid frequent replacements.
LED advantages matter here: lower power draw, longer life, and consistent output with less heat. Favor fixtures with integrated LEDs and universal mounting brackets to maximize flexibility across plantings and paths.
Choose warm to neutral color temperatures (2700–3000K) for inviting evenings without harsh glare.
Prioritize tight beam angles for pathways and uplights that minimize fixture count while maximizing impact.
Read reviews focusing on brightness consistency, weather seals, and warranty length to guarantee you aren’t paying twice.
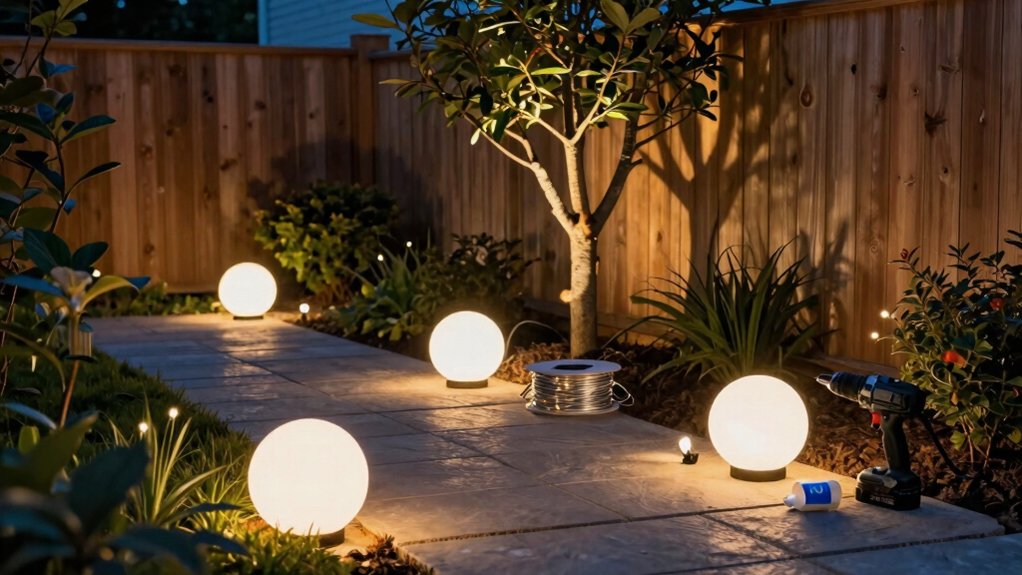
Install Safe, Low-Voltage Lighting With Simple Steps
Set up your low-voltage system safely by choosing a transformer and cable rated for outdoor use, then layout paths to minimize tripping hazards and weather exposure.
Begin with a simple, looped layout from the power source to each lighting point, avoiding long runs that waste voltage.
Use a weatherproof transformer mounted off the ground and protected from rain.
Run 12-14 gauge cable in trenches or along edging, securing it with stakes so it won’t shift.
Keep connections above ground where possible and seal any junctions.
Add a weatherproof timer or switch for easy control, and test each fixture before burying cables.
Consider solar options for areas with reliable sun but still wire for DIY wiring where shade exists, ensuring consistent illumination across zones.
Prioritize safe, repeatable steps over gimmicks.
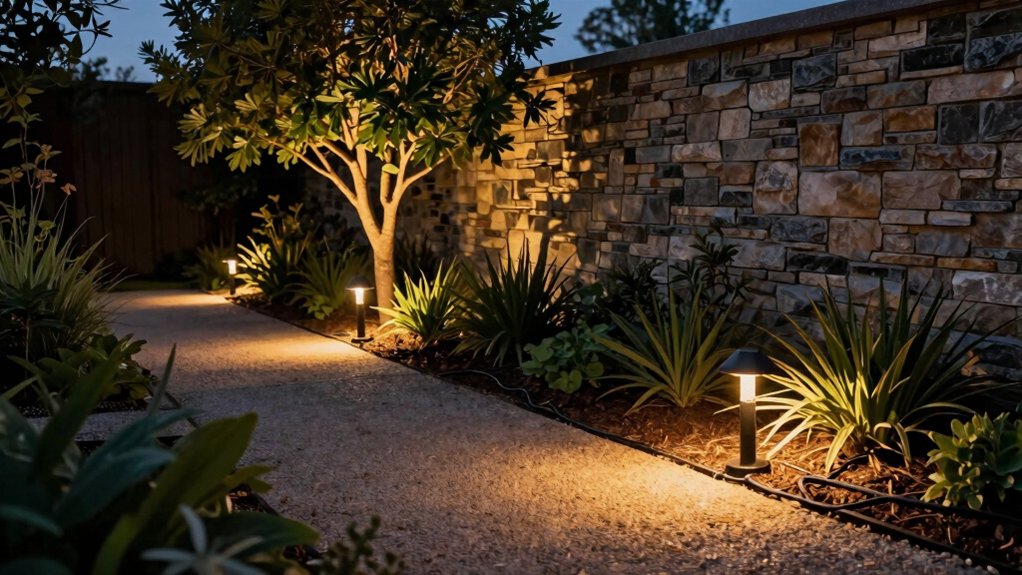
Test, Adjust, and Maintain Even Coverage
Test each fixture after installation to verify even coverage, then adjust aim and spacing until shadows and bright spots are balanced. You’ll want a simple walkthrough: walk the yard with a flashlight at dusk, note gaps, and mark them mentally or with tape.
Use lighting techniques that emphasize pathways, entryways, and focal features without creating glare. Re-aim high or low as needed, and reposition fixtures to fill dark pockets without overlighting any one area.
Check timing and brightness on a full cycle, ensuring consistency across zones. Document your fixture placement and angles for future tweaks.
Routine maintenance matters: clean lenses, tighten screws, and replace bulbs promptly. With deliberate fixture placement and mindful aiming, you sustain balanced illumination that enhances safety and curb appeal while conserving energy.
Avoid Common Budget-Busting Lighting Mistakes
Avoid budget-busting errors by planning before you buy. You’ll waste money if you buy features you don’t need or overpay for glow you’ll barely notice. Define needs first: pathway lighting, accent highlights, and security zones. Map your space and choose fixtures with correct beam spread to avoid oversaturation and hot spots.
Prioritize efficiency and longevity over flashy specs. Consider solar options for low maintenance, but recognize their limits in shaded areas or long nights. Do your own planning with simple DIY tools like a tape measure, marker, and battery tester to prevent miscalculations.
Buy samples or test units when possible, then stagger installs to spread costs. Budget for timers, transformers, and weatherproof components, but avoid upgrading systems prematurely until you verify real performance.
Frequently Asked Questions
How Do I Choose LED vs. Halogen for Budgets?
You should typically choose LEDs over halogen for budget reasons due to far lower energy use and longer life. Compare solar options for daytime charging, then pick fixture styles that maximize efficiency and illumination while staying within your budget.
What’s the Best Low-Voltage Transformer for Savings?
Lightning flash quick, your best low-voltage transformer for savings is an energy-efficient model with adjustable output. You’ll see a cleaner energy efficiency profile and clear cost comparison over time, helping you pick the right unit for savings.
Which Cables Are Most Durable for Outdoor Use?
You should choose cables with rugged cable insulation and durable outdoor connectors, since they resist moisture and UV exposure. Look for jackets rated for outdoor use and connectors that snap tight, seal well, and stay corrosion-free under continuous underground exposure.
How Often Should I Replace Bulbs on a Budget?
Most bulbs last 10–20 years with proper care, so replace sparingly on a budget. You benefit from energy efficient bulbs, and DIY installation tips keep costs down; plan for annual checks, and select durable, weatherproof fixtures.
Can I Install Lighting Myself Without Permits?
You can’t skip permits: lighting regulations require electrical permits for outdoor installs. You should check local codes, plan inspections, and hire licensed help if needed. Following rules protects safety and avoids fines, so don’t proceed without approvals.
Conclusion
You’ve got this: with a clear safety plan, a tight budget, and simple, low‑voltage fixtures, your yard will glow without breaking the bank. Picture a welcoming path, evenly lit, guiding guests like a moonlit ribbon. By testing as you go and avoiding pricey temptations, you’ll keep installation practical and durable. Stay steady, adjust as needed, and maintain regularly. A well-lit landscape isn’t magic—it’s smart, steady craft turning evenings into usable, safe spaces.


