Insulate your attic by first outlining climate needs, then pick materials that fit your space and budget. Use batts or rolls for standard framing, blown-in or spray-in options to fill gaps and around obstacles, and consider continuous insulation to cut thermal bridges. Match R-values to your climate, seal air leaks around penetrations, and install vapor barriers where appropriate. Finish with balanced ventilation or unvented designs based on attic type. If you want more detail, you’ll find practical steps and optimization tips ahead.
Why Attic Insulation Matters for Comfort and Bills
Attic insulation directly affects indoor temperature stability and energy use. When you add proper insulation, you reduce heat flux through the roof plane, improving comfort across seasons. You’ll notice fewer drafts and less reliance on active heating and cooling, which translates to lower utility bills and steadier indoor temperatures.
Thermal bridging remains a critical factor: framing, joists, and other structural elements can bypass insulation, creating heat paths that erode efficiency. Addressing these gaps with continuous insulation or carefully placed barrier materials minimizes losses and supports consistent performance.
Insulation durability matters because long-term deterioration—compression, moisture ingress, or settling—reduces effectiveness and raises operating costs over time. Selecting materials with stable performance, proper installation, and robust edge detailing guarantees durable comfort and cost savings.
How Climate Guides Your Insulation Choice
Climate conditions determine your insulation strategy, as climate effects on choice guide the material, thickness, and installation method you select.
Temperature tied insulation appears as target R-values and air-sealing priorities that match local weather patterns, not generic defaults.
Consider your local climate, seasonal highs and lows, and wind exposure to choose combinations that optimize performance and cost.
Climate Effects On Choice
Understanding climate is essential because it directly shapes insulation needs and performance targets. You assess exterior conditions, humidity patterns, and seasonal temperature ranges to select materials with appropriate thermal resistance, moisture handling, and long-term stability.
In humid regions, prioritize assemblies with robust moisture control to prevent mold and reduce condensation risk, while avoiding materials prone to rot or degradation.
Dry, cold climates demand high R-values and wind resistance, emphasizing air barriers and drift protection to limit heat loss.
In mixed climates, you balance vapor management with breathability to avoid traps that compromise insulation durability.
Consider roof pitch, attic ventilation, and drainage to minimize moisture ingress.
Always align choice with projected moisture loads, expected seasonal swings, and the need for durable performance over decades.
Temperature Tied Insulation
Temperature guides insulation choices by tying material performance to anticipated heat flux, seasonal swings, and moisture dynamics. You evaluate how attic geometry, framing, and expected load shape heat transfer, and then select materials that minimize peak flux while sustaining nominated R-values across temperature ranges.
Thermal bridging informs your layout: you place continuous insulation to suppress studs’ conductive paths, reducing localized heat loss in winter and heat gain in summer. Moisture control becomes integral; you assess vapor movement, air leakage, and condensation risk, choosing assemblies that resist moisture accumulation without trapping it.
You balance cost, installability, and long-term durability, ensuring detailing around penetrations, joists, and ductwork maintains continuity. Your decision ties climate-driven expectations to practical installation, delivering a resilient, efficient, and code-compliant attic enclosure.
Local Weather Considerations
Local weather patterns determine the moisture, heat, and ventilation loads your attic must manage, so you tailor insulation choices to seasonal extremes and humidity trends. In temperate climates, prioritize vapor retarders and barrier integrity to prevent condensation, while ensuring adequate venting to avoid moisture buildup.
Hot, humid regions benefit from high-density insulation with effective air sealing to reduce latent heat transfer and mildew risk.
Cold zones require substantial R-values and continuous insulation to minimize interstitial frost and heat loss, paired with reliable ventilation paths.
Consider wind uplift and roof slope, as exterior conditions influence installation method and fastener choice.
Align material performance with climate adaptation goals, verify long-term durability, and plan for seasonal service checks. This approach optimizes attic insulation for local weather realities.
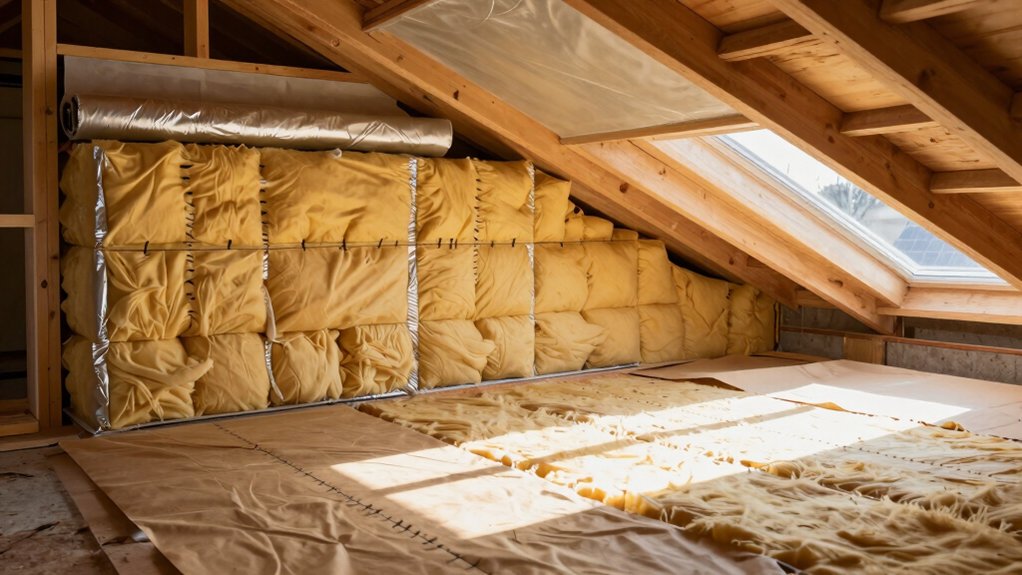
Insulation 101: Batts, Rolls, Sprays, and Blown-In
You’ll compare Batts, Rolls, Sprays, and Blown-In to match your attic’s framing, R-values, and moisture controls. Each method trades ease of installation for performance, cost, and air-sealing potential, so consider fit, gaps, and ventilation.
We’ll outline practical distinctions to guide your selection and sequencing in this topic.
Batts vs. Rolls
Batts and rolls are the two most common forms of residential insulation, and each delivers nearly identical R-values per inch when installed correctly. When you choose between them, consider fit, installation ease, and air-sealing potential.
Batts come pre-cut for standard joist spacing and simplify uniform coverage, while rolls can cover irregular gaps more fluidly, reducing joints. Proper installation requires snug fitting around wires, outlets, and openings to maintain thermal resistance.
Both options perform similarly in a nominal system, so attention to gaps, compression, and edging determines overall effectiveness. Use caution near recessed lights and vents to avoid compression and hotspots.
For many attics, batts speed installation; rolls minimize waste in uneven spaces.
- Comparable R-values per inch when properly installed
- Batts offer quick, uniform coverage for standard spacing
- Rolls adapt to irregular gaps with fewer cuts
- Focus on gaps, compression, and edge detailing for thermal resistance
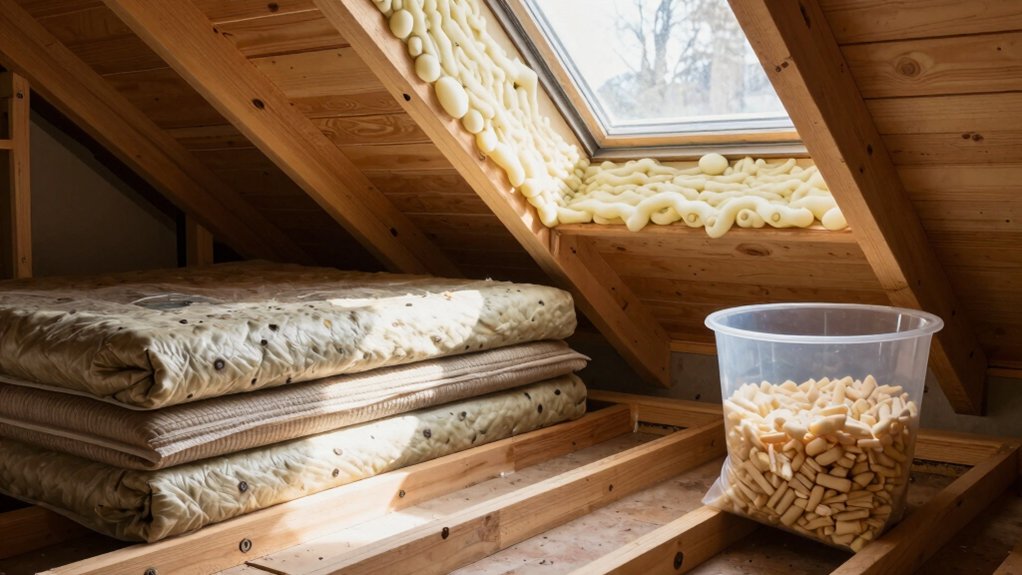
Sprays and Blown-In Options
Sprays and blown-in insulation options fill spaces that batts and rolls miss, delivering dense coverage and high air sealing potential when applied correctly. You’ll choose fiber options based on friability, density, and mineral or cellulose content, aligning with attic geometry and ventilation needs.
Sprays deploy elastomeric or foam formulations that create continuous envelopes, reducing convective gaps, but require professional technique to avoid over-application and shrinkage.
Blown-in systems, using coarse or fine fibers, fill irregular pockets and reach framed cavities more completely, with measured air-permeance results. Fiber options influence settling rates and long-term R-value retention, while spray techniques govern nozzle distance, pattern, and cure time.
For best performance, match application method to attic access, moisture exposure, and existing framing, ensuring adequate ventilation and code compliance.
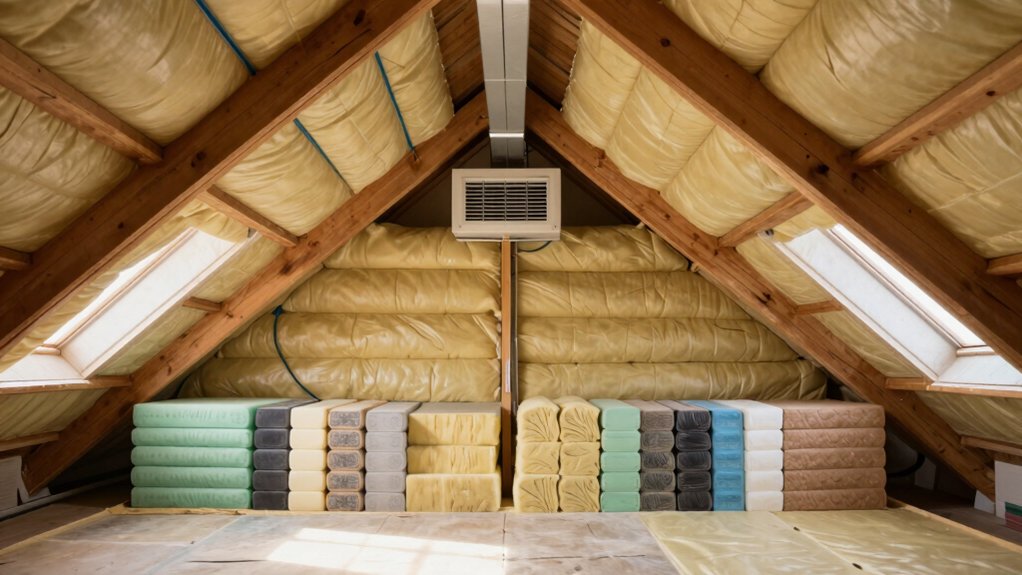
What Is the Right R-Value for Your Climate?
Determining the right R-value for your climate hinges on local building codes and climate zone guidance, which specify minimum insulation levels to minimize heat loss and gain. You’ll compare climate zone recommendations, then select R-values that meet or exceed those standards while considering attic framing, air leakage, and moisture risk.
Match the R value standards to your energy goals and budget, ensuring compatibility with adjacent assemblies and ventilation needs. Assess seasonal performance, long-term payback, and installation practicality to quantify climate impact.
Precision matters: higher R-values yield diminishing returns beyond certain thresholds in some zones, while underinsulation undermines comfort and efficiency. Plan for future weather variability, not just current temperatures, to optimize long-term savings.
- Key R-value targets per climate zone
- Compliance with code minimums vs. practical upgrades
- Interaction with existing insulation and attic layout
- Long-term energy and comfort benefits
Vapor Barriers and Air Sealing: When and How
Vapor barriers and air sealing are foundational to attic performance, working with insulation to control moisture movement and air exchange. You apply barriers where framing and joints meet, prioritizing continuous coverage over gaps. Use materials rated for specific climate conditions, and seal around penetrations with compatible tapes or caulks to maintain continuity.
In practice, you space vapor retarders by climate and avoid creating condensation paths between layers. Focus on moisture control by preventing warm indoor moisture from reaching cold surfaces, where it could condense.
Sealing techniques should address attic access hatches, wiring penetrations, and HVAC lines, ensuring no air leaks dominate the assembly. Verify insulation fitment after sealing to maintain performance and reduce heat loss or gain. Regular inspection catches shifting seals and compromised barriers.
Attic Ventilation: Keeping Roof and Insulation Dry
Attic ventilation is essential for keeping the roof deck dry and protecting insulation from moisture-laden heat, condensation, and mold risk. You’ll manage airflow to remove moisture and heat before it condenses on sheathing or fibers, preserving R-value and reducing decay risk.
Proper design balances intake and exhaust to maintain steady pressure and minimize wind-driven infiltration. Roof ventilation enables attic moisture to vent safely outdoors while preventing warm, humid air from migrating into insulation.
Use continuous or semi-continuous soffit and ridge or hip vents aligned with the roof plane, climate, and attic layout. Avoid blockages and ensure baffles, filters, and clearance remain intact for reliable performance.
- Vent placement strategy aligns intake and exhaust for effective circulation
- Ensure unobstructed paths with baffles and spacer nets
- Monitor moisture indicators and adjust with seasonal changes
- Match venting to roof structure and climate zone
Finished vs. Ventilated vs. Unventilated Attics: Material Guidance
You’ll compare finished, ventilated, and unvented attic configurations to identify material constraints and installation priorities. Consider how each approach affects insulation choice, airflow, and moisture control.
Then, align these considerations with your space, climate, and energy goals. We’ll outline key considerations for Finished Attic, Ventilated Attic Principles, and Unvented Attic Guidance to set a clear starting framework.
Finished Attic Considerations
Finished Attic Considerations: When deciding between finished, ventilated, and unventilated attic configurations, start by clarifying the intended use and insulation strategy, since each approach dictates different air-sealing, ventilation, and thermal-control requirements.
- Assess achievable ceiling height and access for attic finishing versus storage, balancing space with structural limits.
- Align interior design goals with insulation depth, vapor control, and finish materials to minimize thermal bridges.
- Prioritize airtight detailing at eaves, hatch, and partition interfaces to support efficient heating and cooling.
- Plan for discreet mechanical routing and service access that preserve aesthetics, while maintaining code-compliant ventilation as appropriate.
Attic finishing choices influence durability, comfort, and energy performance, so document decisions and test for consistent enclosure integrity.
Ventilated Attic Principles
How should you approach ventilated attic design when comparing finished, ventilated, and unventilated configurations?
In ventilated attics, establish the objective: maximize controlled attic airflow while minimizing heat and moisture buildup. Use a balanced airflow strategy: soffit intake, ridge or turbine exhaust, and strategically placed baffles to maintain clear paths for air movement.
Prioritize continuous venting across the assembly to prevent convective hot spots and condensation risk. Materials guidance should emphasize low-permeance vapor retarders on the interior side only where appropriate, with effective insulation thickness surrounding ducts and joists.
Monitor moisture control by ensuring HVAC and appliance exhausts vent outdoors, not into the attic. Avoid compression of insulation near vents, and maintain unobstructed clearance for air movement.
Consistency in detailing preserves performance and reduces long-term degradation of attic components.
Unvented Attic Guidance
Unvented attics require careful material choices to prevent moisture accumulation and thermal bridging without relying on attic ventilation. You’ll rely on continuous insulation and robust moisture management to maintain performance, durability, and indoor air quality.
Use air sealing as a foundational step to minimize heat loss paths and reduce condensation risk. Specify materials with low moisture sorption and high vapor resistance, ensuring compatibility with interior or exterior vapor retarders.
Implement moisture barriers at all junctions, penetrations, and roof-to-assembly interfaces, prioritizing airtight seals around electrical boxes, chimneys, and vents. Choose rigid insulation and properly rated membranes to resist uplift and moisture ingress.
Confirm code-compliant assemblies meet climate-specific requirements for unvented configurations.
- Air sealing technique
- Continuous insulation approach
- Moisture barrier detailing
- Penetration and junction sealing
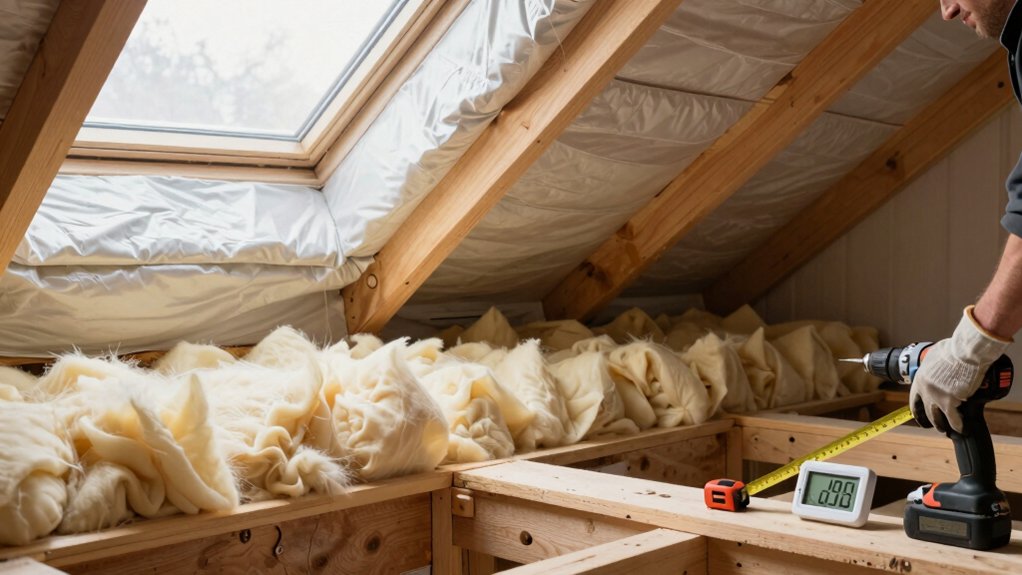
Safety, Prep, and Tools You’ll Need
To start, gather essential safety gear and verify the area is ready: wear a dust mask, eye protection, gloves, and sturdy footwear, and make sure the attic space is dry, well-lit, and free of obstructions before you climb up.
You’ll adopt a focused mindset, because accurate prep reduces risk and improves efficiency. Personal protective equipment shields you from dust, fibers, and debris, while proper clothing minimizes snag hazards.
Before handling materials, inspect the workspace for protrusions, loose boards, and electrical hazards, and ensure ventilation is adequate.
Maintain tool safety by organizing a dedicated station for blades, cutters, and fasteners, and always keep a clear path to exits.
Use a clearly labeled, non-slip ladder, and stagger tool retrieval to avoid overreaching.
Step-by-Step: Installations for Common Attic Insulation Types
With the attic prepared and safety gear in place, you’ll proceed to install insulation using the type that matches your design and climate. Follow precise steps for each common material to ensure uniform density, proper coverage, and minimized gaps. Maintain attention to ventilation needs and framing clearance to prevent compressing fibers.
As you work, monitor for signs of attic moisture and address any leaks before final enrollment of layers. If you encounter restricted access or damp conditions, pause and perform insulation removal to restore effectiveness. Accurate installation reduces thermal bridging and improves performance ratings across seasons.
Use protective sleeves, proper framing gaps, and consistent overlaps to avoid cold spots and material sagging.
- Prepare and inspect framing and ventilation before starting
- Apply material in even, continuous layers with target R-value
- Seal edges and penetrations to prevent drafts
- Inspect for attic moisture indicators and rectify issues
Inspect, Test, and Maintain Your Attic Insulation Quality
Regular inspection and testing are essential to maintain attic insulation performance and energy efficiency. You should conduct visual surveys monthly and after severe weather to identify gaps, compression, or moisture staining.
Use a flashlight to look for damp patches, mold, or air leaks around junctions, vents, and penetrations. Perform a blower-door or infrared scan if you have access to equipment; these methods reveal hidden leaks and thermal bridges.
Schedule annual density and thickness checks against your installed specification, and verify vapor barrier integrity. If you detect compromised performance, plan insulation removal or targeted top-ups only where needed, never full replacement without assessment.
Address attic pests promptly and seal entry points. Maintain records, track improvements, and re-test after repairs to guarantee sustained efficiency.
Frequently Asked Questions
Can I DIY Attic Insulation Without Permits or a Pro?
You can DIY attic insulation, but permit requirements may apply in your area; check local codes first. Failing to obtain permits could jeopardize safety, insurance, and compliance. Follow precise methods, materials, and venting guidelines to ensure proper performance.
How Often Should Attic Insulation Be Inspected or Replaced?
Around 30% of home energy loss occurs through attics, so you should schedule yearly inspections and plan replacement every 15–20 years, depending on material type and condition. Your inspection schedule and replacement frequency must be precise and documented.
Do I Need a Vapor Barrier in All Climates?
Yes, you don’t need a vapor barrier in all climates. Vapor barrier necessity depends on climate considerations; in dry, cold, or mixed climates it’s often recommended, while in hot-humid zones you may adjust to avoid trapping moisture.
Can Insulation Affect Attic Mold or Condensation Issues?
50% of home energy loss happens through poorly insulated attics. You should know that insulation can affect attic mold or condensation issues. You’ll improve moisture barriers and mold prevention by proper installation and air sealing, using precise, technical methods.
What’s the Best Attire and Safety Gear for Installation?
You should wear protective clothing and respiratory protection; prioritize full-coverage garments and a respirator or P100 mask, plus gloves and eye protection. Guarantee proper fit, seal, and eye/skin exposure minimization to safely access attic spaces during installation.
Conclusion
You’ve reviewed how climate, attic type, and materials dictate insulation choices, and you’ve seen the logic behind R-values, vapor barriers, and air sealing. To visualize this theory, imagine a thermal map: high‑performing insulation forms a tight, layered shield that blocks heat transfer in winter and heat gain in summer, while gaps create pathways for losses. Precision matters: select the right materials, install with care, and test your attic to maintain comfort, efficiency, and durability.