

To install a board and batten accent wall, start with solid planning: choose battens, spacing, and rail layout, then prep the wall by repairing drywall and priming for paint or stain. Measure carefully, mark centerlines, and dry-fit sections before fastening. Attach rails squarely, cut battens to length, and stagger joints for a clean look. Caulk seams, finish with paint or stain, and inspect for gaps or high spots. You’ll master layout details that elevate any room, step by step.
What Is Board and Batten Wall Paneling and Why Use It?
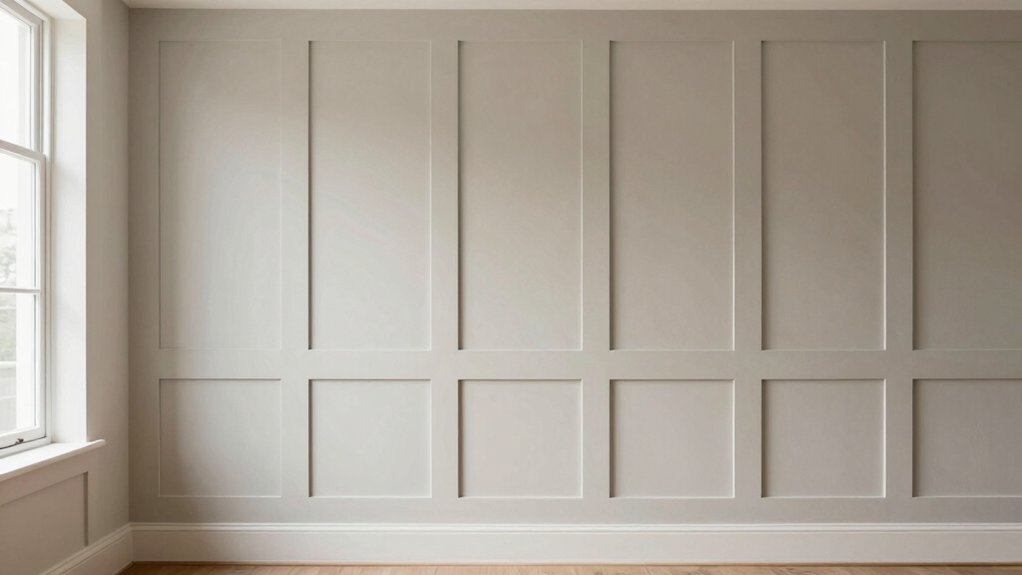
Board and batten wall paneling is a classic design that combines vertical battens with wide wall panels to create clean, dimensional interest. You’ll grasp its appeal once you see how the vertical lines guide the eye upward, while the wider panels add contrast and texture.
This treatment suits a range of spaces, pairing well with decorative styles from rustic to contemporary, and offering a tailored, architectural feel without excess ornament.
Historically, board and batten emerged from practical farm and coastal interiors, evolving into a refined construction detail used in formal and informal settings alike.
You benefit from its versatility: it adds depth to walls, improves acoustics subtly, and remains adaptable to paint, stain, or wallpaper.
Its enduring appeal lies in timeless proportional harmony and restraint.
Tools, Materials, and Cost Basics
To install board and batten wall paneling smoothly, assemble a clear plan for tools, materials, and budget before you start. Begin with a precise cut list, measurement grid, and a durable saw, drill, level, miter gauge, and nailer suitable for your chosen battens.
Choose materials wisely: solid wood or plywood with a moisture-resistant finish, plus backing fasteners and adhesive compatible with your wall type.
Budget for underlayment, trim, corner blocks, and fasteners, plus protective coatings. For finishes, consider decorative finishes or paint, and plan color selection that complements the space.
Account for waste, fastener length, and surface prep. Keep a compact toolkit on hand and document supplier costs to avoid overrun.
Finalize the order before cutting to ensure efficiency and a clean installation.
Wall Prep for Board and Batten: Drywall, Moisture, and Priming
You’ll start with solid drywall prep, ensuring a clean, flat surface for board and batten.
Controlling moisture is essential, so seal gaps and manage humidity before you install primer and paint.
We’ll cover the essentials of drywall readiness and moisture-smart priming to set a durable foundation.
Drywall Preparation Essentials
Drywall prep is the foundation of a clean, durable board-and-batten installation, so you’ll want to get it right. Begin with a spotless surface: repair gouges, cracks, and nail pops, then sand until joints are smooth to the touch. Next, wipe away dust to ensure adhesion remains uncompromised.
Assess the drywall finishing level; if seams show, apply a thin skim coat to even the texture, then re-sand for a uniform plane. Prime only after the surface is flawless, using primer application that blocks stains and seals the gypsum for paint performance.
Mask adjacent areas to protect trim and create crisp lines once you install the battens. Finally, verify the wall is dry and free of moisture before proceeding with fasteners and paneling.
Moisture Control Basics
Moisture control is essential before mounting battens, since lingering humidity can cause warping, mold, and paint failure down the line. Before you install, assess the space with a hygrometer and target a relative humidity around 40–60% for interior walls.
Manage moisture by addressing leaks, sealing gaps, and improving ventilation, especially in kitchens, baths, or basements. Control surface moisture by allowing drywall to dry completely after any cleaning or patching, and avoid applying finishes on damp substrates.
Use a dehumidifier or air conditioner as needed, and monitor conditions during acclimation. Humidity control supports dimensional stability, ensuring battens sit flat and fasteners grip properly. This approach also aids mold prevention, preserving long-term wall integrity and performance.
Measure and Plan Your Battens
To measure and plan your battens, start by determining the layout that will give you clean, consistent lines across the wall. You’ll map batten spacing, run heights, and orientation before cutting a single piece.
Consider how lighting options will interact with shadows and reflectivity, and choose a layout that flatters the room’s natural or artificial illumination. Pair your plan with color schemes that enhance contrast or harmony, ensuring the battens become a design feature rather than a distraction.
Confirm tolerances for wall irregularities and account for baseboard details early.
- Create a quick sketch with measured spacings and centerlines.
- Decide batten width, thickness, and orientation to balance proportion.
- Test a sample area for lighting, color, and edge clarity.
Cut Battens and Install Baseboard Edge
Next, you’ll cut batten lengths precisely to fit the wall profile and guarantee clean joints.
Then install the baseboard edge, securing it firmly to a solid nailing line for a seamless finish.
Precision here sets the stage for clean alignment and long-lasting board-and-batten results.
Cut Batten Lengths Precisely
Cut batten lengths precisely by measuring from the wall to mark each piece, then cut with a sharp saw to guarantee tight fits along the baseboard edge. Precision matters for a clean, professional look, so prioritize measuring accuracy and straight cuts over guesses.
Plan your cuts based on stud spacing and wall irregularities, and verify each piece before final trimming. Careful material selection ensures battens respond well to moisture and nails, avoiding warping over time.
- Double-check each measurement against the layout before cutting.
- Label pieces by position to keep alignment consistent during installation.
- Inspect edges for burrs and trim them cleanly to prevent binding.
Install Baseboard Edge Securing
Once the batten lengths are cut and labeled, you’ll secure the baseboard edge to lock the frame in place. Align the baseboard against the bottom edge, ensuring a tight fit with the wall. Use a level to verify plumb and plumbness across the length.
Then, drive finishing nails or preferred fasteners through the baseboard into the wall studs. Optional shims can correct minor gaps, but keep them minimal to preserve clean profiles.
Trim any excess with a sharp saw for a clean joint. Seal joints and nail holes to minimize gaps that trap dust and affect wall textures.
Install decorative accents along the edge sparingly to avoid crowding. Focus on precise alignment to maintain a refined, durable presentation of decorative wall textures.
Install Vertical Battens
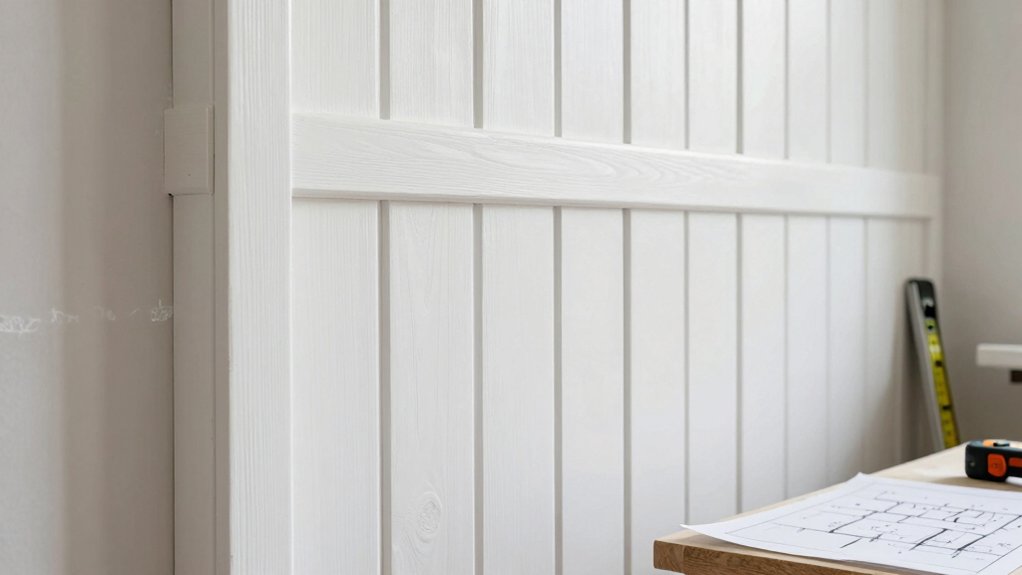
To install vertical battens, start by locating and marking the grid lines that align with your wall studs, ensuring every batten will sit plumb and evenly spaced. You’ll secure battens to the wall with corrosion-resistant fasteners, checking level often as you go to avoid bowing. Precision here guarantees clean edges and consistent shadow lines.
- Dry-fit each batten against the wall before fastening to confirm alignment and spacing.
- Apply adhesive sparingly at stud lines, then drive fasteners with a cordless drill for solid, gap-free contact.
- Verify plumb, recheck spacing, and measure diagonals to prevent skew.
Consider furniture placement and lighting considerations when planning the panel layout to optimize depth and ambience.
Install Horizontal Rails or Wainscoting
Now you’ll explore how to align horizontal rails for a clean, consistent look and determine the right panel heights that support solid wainscoting.
We’ll cover horizontal rails details and outline the key steps for installing wainscoting, so you know what to measure, cut, and fasten.
As you proceed, focus on precise alignment, secure fasteners, and clean joints to make certain a professional finish.
Horizontal Rails Details
When installing horizontal rails or wainscoting, start by establishing a true, level baseline across the wall to guarantee consistent rail placement. You’ll want precise measurements, square corners, and a firm reference line for accurate panel alignment. Focusing on these details keeps the rails true and visually balanced from edge to edge.
- Verify plumb and level at each mark, adjusting as needed to maintain straight, parallel rails.
- Choose rail thickness and spacing that complement your board dimensions for cohesive panel alignment.
- Dry-fit sections before final fasteners, then secure with appropriate fasteners for clean joins and minimal gap visibility.
Wainscoting Installation Steps
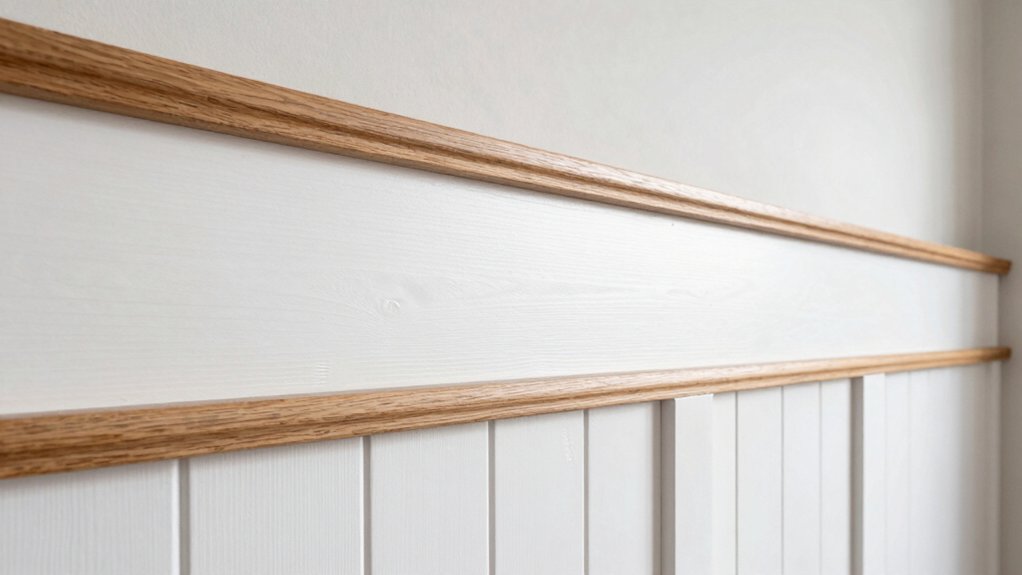
After establishing a true, level baseline, install the horizontal rails or wainscoting by tracing your layout lines and securing each rail squarely to the wall. Begin with adhesive and fasteners suited to your wall type, then level each piece before nailing.
Cut rails to length with precision, mitering corners as needed for clean joints. Confirm gaps at joints are minimized to maintain a seamless decorative molding appearance.
Check for plumb across every rail, adjusting as required to preserve a consistent run. Attach decorative molding where rails meet battens, creating a crisp transition that enhances the wall texture.
Maintain uniform spacing between rails to avoid crowding or gaps. Finish with the same fastener pattern on all rails, and inspect for high spots before proceeding to paneling.
Finish With Caulk, Paint, or Stain
To finish your board-and-batten wall, you’ll choose between caulk, paint, or stain based on the look you want and the surface you’re sealing. Precision here sets the baseline for durability and a clean profile.
1) Caulking techniques: apply a tight, continuous bead at joints, smooth with a damp fingertip or caulk tool, and wipe excess promptly to prevent splotches.
2) Paint color selection: choose a durable, exterior-grade or cabinet-grade finish; test samples on a hidden area, and favor semi-gloss for trim for easy cleanup.
3) Stain option: opt for penetrating finishes if you crave a natural wood grain, and apply evenly with a clean cloth or brush.
Choose wisely to ensure cohesion and long-lasting appeal.
Troubleshooting Common Issues and Fixes
Despite thorough planning, issues can surface with board-and-batten walls, so address them promptly and methodically—common culprits include gaps, warping, and finish failures.
When you detect gaps, reseal seams with low-viscosity caulk, then repaint to blend.
Warping often stems from improper moisture control; remove affected panels, dry the wall cavity, and reattach with appropriate fasteners and spacers.
Finish failures occur from incompatible coatings or inadequate curing; sand smooth, apply a compatible primer, then finish with even coats.
For hanging artwork, ensure studs align with battens or use reinforced anchors.
Lighting tips: verify fixtures don’t transfer heat to the panels and that dimmers aren’t overdriving finishes.
Regularly check seams after seasonal changes and re-seal as needed to maintain a seamless, durable accent wall.
Maintenance, Cleaning, and Long-Term Care
Maintenance for board-and-batten walls isn’t a set-and-forget task; it hinges on regular inspection, proactive cleaning, and timely repairs to preserve appearance and structural integrity.
- Inspect quarterly for loose battens, nail pops, or caulk gaps, and address issues before they worsen.
- Dust with a microfiber cloth, then wipe spots using a mild, non-abrasive cleaner; avoid excess moisture to protect finishes.
- Recaulk joints and touch up paint as needed to maintain seamless decor maintenance and long-term durability.
For decor maintenance, establish a simple routine: quick daily dusting, a deeper monthly wipe, and annual refreshes of finish or paint.
Cleaning tips emphasize minimal moisture, prompt spill cleanup, and protecting edges from scuffs to extend panel longevity.
Frequently Asked Questions
How Long Does a Typical Board and Batten Project Take?
A typical board and batten project takes about 2–4 days, depending on room size and detail. You’ll complete framing, sanding prep, priming, and install, then finish with paint finishing and trim touch-ups for a polished result.
Can Board and Batten Be Installed Over Wallpaper?
“Where there’s a will, there’s a way.” You can install board and batten over wallpaper, but you’ll need thorough wallpaper removal and surface prep for a solid, lasting finish. Prep meticulously, then secure battens and polishes confidently.
What Patterns Best Suit Small Rooms?
In small rooms, choose vertical or diagonal patterns to visually stretch the space. You’ll favor space saving designs and light reflecting options, using lighter tones and glossy finishes to maximize brightness without overwhelming the area.
Is There a Climate Impact on Material Choice?
Climate sensitive materials matter; yes, your choices influence environmental impact. You should evaluate options, consider finishes, and prefer low-VOC, sustainably sourced options to minimize footprint while achieving the look you want.
How Do I Repair Warped Battens or Rails?
To repair warped rails, you multiple-step fix: evaluate cause, replace severely bowed sections, and secure battens repair with shims or counter-screws. Guarantee straightness, re-nail or adhesive, and recheck alignment for flawless battens repair and stable wall.
Conclusion
You now know how to install board and batten with confidence, from prep to finish. As you seal the look with caulk, paint, or stain, your space gains depth and character that lasts. Stay precise, measure twice, and trust your plan—your effort will pay off. When completed, the wall will feel timeless, like a quiet, well-tuned instrument in a room that’s finally balanced. It’s a project that shines, much like a sunrise after a steady craft.


