
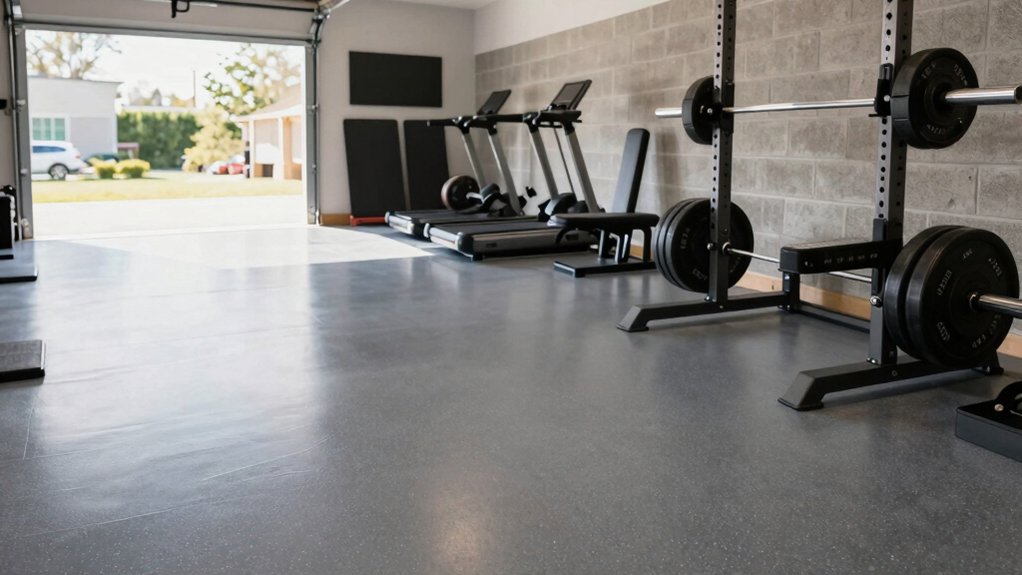
A garage floor for a home gym is the foundation you’ll rely on when you push limits. You weigh durability, safety, and maintenance against cost, and must consider moisture, subfloor prep, and the long-term behavior of epoxy, tiles, or rubber. Each option offers distinct trade-offs in impact resistance, slip resistance, and ease of installation. The right choice hinges on your equipment mix and use pattern, so you’ll want a clear framework before you commit. Here’s where to start.
Assessing Your Space: Key Factors for Garage Gym Flooring
When evaluating your garage space for gym flooring, start by examining floor condition, layout, and potential load-bearing limits to determine appropriate materials. Inspect slab flatness, cracks, moisture signs, and coating integrity to establish baseline compatibility.
Measure usable area, door swings, and equipment clearance to prevent interference with movement and ventilation. Identify fixed structures, ventilation ducts, and trench drains that constrain mat placement and transitions.
Consider ceiling height for overhead clearance and rack or lifting setups. Evaluate weight distribution, impact forces, and environmental exposure to determine acceptable impact-absorption requirements and moisture barriers.
Align flooring choice with anticipated use, cycling between cardio, free weights, and strength stations. Document findings with sketches and measurements to guide material selection, installation sequencing, and long-term maintenance planning.
Epoxy Coatings: Pros, Cons, and Best Use Cases
Epoxy coatings offer a durable, chemical-resistant surface option for home gym garages, delivering a hard-wearing layer that can resist impact, stains, and routine wear from weights and equipment.
You select epoxy for its strong adhesion to concrete and seamless, easy-to-clean finish. Pros include high abrasion resistance, chemical resistance, and customizable gloss levels; cures are relatively fast under proper conditions, enabling early use.
Cons involve surface preparation requirements, potential yellowing in sunlight, and limited elongation, which may crack under substrate movement or heavy point loads.
Best use cases center on cleared, dry spaces with controlled temperature, proper venting, and professional or well-followed DIY application.
For best outcomes, pair with low-odor, moisture-tolerant formulations and maintain the coating with regular cleaning to preserve gloss and integrity.
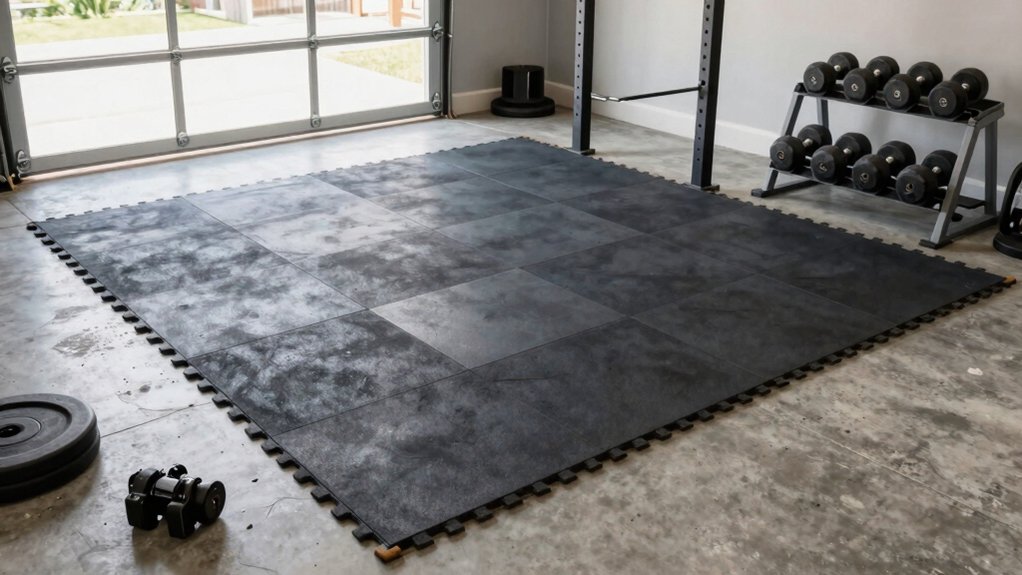
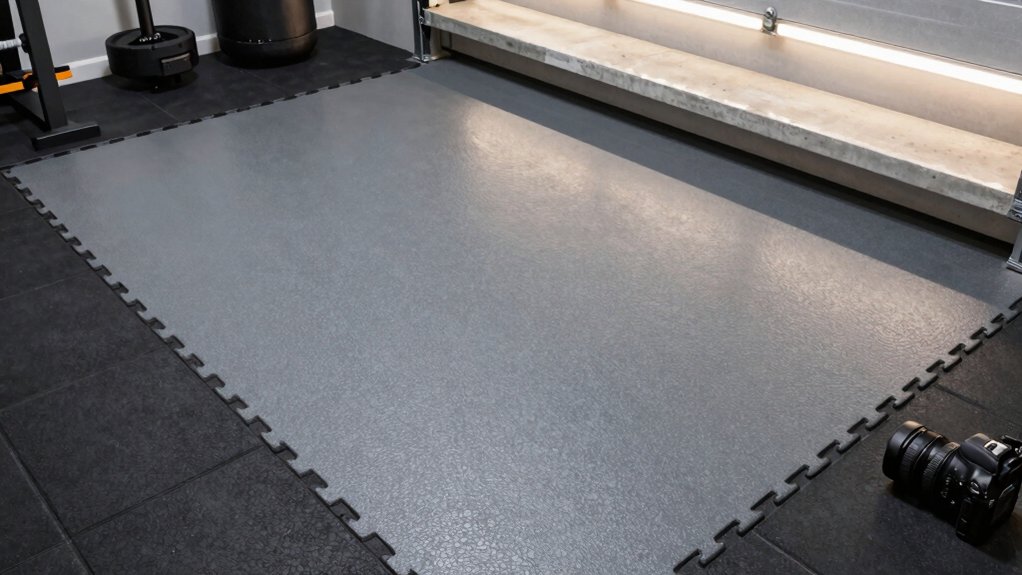
Interlocking Mats: Comfort, Fit, and Installation Tips
Interlocking mats offer noticeable comfort under prolonged workouts by providing cushioning and joint support.
To guarantee a precise fit, measure your space and plan edge cuts to minimize gaps and trip hazards.
Follow manufacturer installation guidance to achieve consistent interlock alignment and reliable performance.
Comfort Benefits
Interlocking mats provide immediate comfort underfoot by creating a cushioned, impact-absorbing layer that reduces fatigue during workouts. You’ll notice load distribution improves when performing compound lifts and dynamic movements, as mats compress uniformly under repetitive force.
The interlocking joints minimize edge deltas, maintain surface integrity, and prevent micro-movements that can distract technique. Comfort benefits are most evident during high-volume sets, interval work, and barefoot or minimalist-shoe training, where surface responsiveness supports stable stance without excessive rigidity.
Material balance matters: foam or EVA blends offer resilience without excessive softness, while closed-cell constructions resist moisture and odor, sustaining long-term comfort. Thickness and density choices influence perceived softness, fatigue onset, and shin or knee joint comfort during kneeling or floor movements.
Avoid overconfidence; select a pad that aligns with your biomechanical needs.
Mat Fit Tips
Comfortable mats are only as good as their fit. To maximize comfort and performance, evaluate mat dimensions against your floor plan, noting wall-to-wall coverage and protrusions around equipment.
Interlocking tiles should align with seams that run parallel to workout flow, minimizing trip hazards and edge lifting. Choose mats with consistent thickness and a tight interlock that resists separation under dynamic loads.
For precision, measure room width and length, then calculate an integer tile count per row and column, accounting for border pieces or half tiles if needed.
Verify color and texture uniformity to prevent slip risk and ensure uniform footing. Store replacement tiles for future adjustments, and test fit by performing a light circuit to confirm stability.
Documentation of serial numbers aids future replacements.
Installation Guidance
Installing interlocking mats requires accurate planning and careful execution to guarantee a stable, uniform surface. Begin by evaluating room dimensions, noting wall straightness, and identifying drainage concerns.
Choose mats with compatible thickness, edge profiles, and a non-slip top surface suitable for loads from gym equipment.
Prepare the subfloor: clean, dry, and free of debris; repair cracks if needed.
Lay mats along the primary traffic direction to minimize misalignment, leaving minimal gaps at the walls.
Use straight cuts for perimeter fit, and lock sections firmly to ensure interlock integrity.
Avoid overlaps or gaps that may trap moisture or create tripping hazards.
Verify seam flatness after installation, then perform a light, consistent load test.
Document material warranties and maintenance requirements for ongoing performance.
Rubber Flooring: Durability, Sound, and Safety Considerations
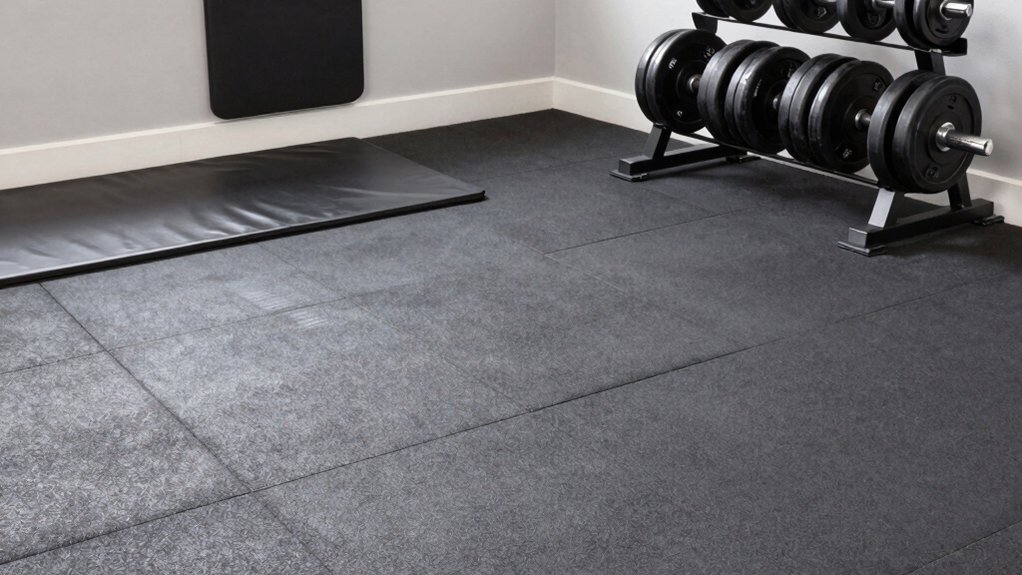
Rubber flooring for home gyms offers a durable surface that absorbs impact and reduces noise, making workouts safer and more comfortable. You choose products with appropriate durometer ratings to balance cushioning and stability for lifts.
Density, thickness, and grateability determine load distribution, moisture resistance, and long-term performance. You should assess recycled versus virgin rubber, wear layers, and edge treatments to minimize cutting and delamination risks.
Interlocking or taped tiles affect seam integrity and maintenance needs, while closed-cell compositions resist water absorption and mold growth. Floor mats must meet static and dynamic load specs, especially under heavy equipment.
You verify ASTM or ISO conformity where available and confirm environmental controls that prevent odor release. Regular inspection of seams, edges, and surface texture maintains safety and function.
Loose-Fill Surfaces: When They Make Sense and How to Apply
Loose-fill surfaces offer specific advantages when you need rapid, cost-effective coverage or temporary flooring for a home gym. They excel for short-term setups, shift between projects, or variable workout zones where permanence isn’t required.
Choose loose-fill products with defined weight and impact criteria, and verify compatibility with equipment loads to avoid displacement. Installation requires a level, clean subfloor; spread material evenly, using a gauge or straightedge to maintain a uniform thickness.
Compaction is minimal but necessary to prevent shifting; follow product-specific compaction guidelines and avoid over-tamping, which can cause gaps. Mechanical action from drops or vibrations may degrade surface integrity over time, so pair with edge restraints or boundary strips to maintain planarity.
For cleanup, use non-abrasive tools and re-apply material as wear emerges.
Moisture and Subfloor Prep: Preventing Issues Before You Install
Moisture and subfloor preparation are essential before putting down any garage-floor finish. Untreated moisture can cause delamination, warping, or adhesive failure, undermining the gym’s durability. You should assess substrate condition, moisture levels, and vapor transmission before selection.
Measure relative humidity under slabs or subfloor panels, and verify that vapor barriers meet manufacturer specs. Clean and dry surfaces thoroughly; remove oil, solvents, and loose coatings that can trap moisture. Ensure concrete or plywood substrates are structurally sound, free of cracks, and properly leveled to prevent telegraphing or uneven wear.
Use compatible primers and sealers designed for high-traffic gyms; follow curing times precisely. Minimize moisture sources during installation, and plan for ongoing monitoring to sustain adhesive cohesion and floor longevity.
Budgeting Your Flooring Project: Costs and Long-Term Value
You’ll want a clear upfront cost guide that covers materials, installation, and any subfloor prep.
We’ll also compare long-term value, including durability, maintenance, and potential resale impact.
This sets the framework to balance initial spending with lifetime performance and total cost of ownership.
Upfront Cost Guide
When budgeting a garage gym floor, start by identifying total installed costs, including material, subfloor preparation, underlayment, underlayment thickness, and professional installation if applicable.
This upfront estimate should separate itemized line items: surface material price per square foot, labor rate, and ancillary fees (disposal, permits, moisture testing).
Consider subfloor prep requirements—epoxy, grinding, or leveling compounds—because they influence labor hours and material mix.
Underlayment selection affects load distribution, impact resistance, and long-term maintenance, with thickness spanning from minimal to premium ratings.
Factor additives like moisture barriers or anti-slip layers into cost projections.
Include contingency for hidden subfloor defects and unanticipated site conditions.
Compare options by cost per square foot and projected lifespan, ensuring alignment with your gym’s usage profile and safety standards.
Reconcile upfront outlay with anticipated replacement or refurbishment timelines.
Long-Term Value Analysis
Long-Term Value Analysis examines how initial flooring choices translate into ongoing costs and performance over the life of your garage gym. You assess total cost of ownership by comparing material durability, maintenance frequency, replacement intervals, and energy impact.
Initial installation costs matter, but long-term expenses, including cleaning, drainage, and potential remediation, drive value. Consider resistance to moisture, impact, and wear from heavy equipment, as these factors reduce downtime and replacement cycles.
Quantify data: expected lifespan, maintenance windows, and disposal or recycling requirements. Track performance metrics such as shock absorption, noise reduction, and thermal comfort, then translate them into productivity gains or energy savings.
Align selections with your budget, use case, and anticipated durability to optimize lifecycle value.
Installation Steps: Quick-start Guide for Each Option
Installation steps vary by option, but the process for each starts with surface prep, material measurement, and kit assembly to guarantee a level, secure base. You begin by cleaning the concrete, removing debris, and correcting any cracks to meet substrate tolerances.
Next, you verify flatness and moisture levels, then perform substrate priming if required by the kit. For interlocking tiles, align edges, roll or tap to ensure full engagement, and confirm trim fit around borders.
For epoxy or urethane coatings, mix components per specification, apply at specified thickness, and maintain a dust-free environment until cure begins. For poured overlays, pour within temperature and viscosity guidelines, spread evenly, and feather edges.
Finally, inspect seams, joints, and edge gaps, and perform a light interim check for levelness after initial cure.
Maintenance and Longevity: Keeping Your Gym Floor in Top Shape
Maintaining your home gym floor starts the moment installation finishes and continues through everyday use. Regular inspection identifies wear, seams, and fasteners that may loosen under dynamic loads. Schedule biweekly surface checks for dents, gouges, or coating degradation; address issues before moisture penetration occurs.
For rubber and vinyl options, clean with manufacturer-recommended neutral pH cleaners to prevent residue buildup that can alter grip or void warranties. Avoid abrasive tools and high-alkaline solutions that can degrade substrates.
Record maintenance steps and observations to track longevity and plan replacements. In weight zones, place mats to distribute loads and minimize deformation.
Control humidity and temperature within specifications to reduce substrate creep. Use proper ventilation during curing or cleaning to prevent chemical off-gassing and material aging.
Frequently Asked Questions
How Long Does Each Flooring Option Last in a Garage Gym?
Typically, epoxy lasts 5–10 years, rubber tiles 15–20, vinyl mats 5–10, and interlocking foam tiles 5–7; like a steady heartbeat, durability depends on traffic, chemical exposure, maintenance, and installation quality, so schedule inspections accordingly.
Which Flooring Is Best for Heavy Lifts and Drops?
Rubber interlocking tiles or seamless epoxy with closed-cell foam mats handle heavy lifts and drops best, offering impact absorption, durability, and easy repair. Pair with dense underlayment, proper leveling, and floor protection for equipment longevity and safety.
Can I Mix Different Flooring Types in One Space?
Yes, you can blend flooring types, but plan zones for impact, moisture, and grip; guarantee transitions are level, use appropriate underlayment or ramps, and maintain compatibility with equipment feet; test weights and lifts on edge cases before full use.
How Does Moisture Affect Epoxy and Rubber Choices?
Moisture lowers adhesive strength and can cause epoxy to blush or peel; it also undermines rubber durability. You should measure humidity, seal concrete, and choose moisture-tolerant epoxy or cushioned, moisture-resistant rubber options accordingly.
What Are the Installation Timeframes for DIY Projects?
Installation timeframes vary by product: epoxy kits typically cure 24–72 hours before use, with full strength at 7 days; polyurea coatings cure faster, often within 4–8 hours to light foot traffic, full cure in 24–48 hours.


