
Is your home solar-ready? Start with a solid roof and a capable electrical panel that can handle added backfeed. Check roof durability, tilt, and shading to maximize sun exposure, and map seasonal shading patterns. Confirm breaker spaces or plan for a subpanel, and choose an inverter and storage setup that suits your loads. Expect clear costs, incentives, and warranties, plus a plan for permits and HOA approvals. If you keep going, you’ll uncover precisely how to optimize every step.
Are You Ready to Go Solar? A 5-Step Readiness Checklist
Are you ready to go solar? This 5-step readiness checklist helps you decide with confidence.
Step one, evaluate roof durability: you want a solid, long‑lasting surface that can support panels for decades. Look for a sturdy structure, minimal repairs needed, and a history of protection against weather.
Step two, confirm material compatibility: some roof types pair better with solar systems than others, so check your shingles, underlayment, and fasteners for compatibility and warranty terms.
Step three, inspect roof age and condition.
Step four, consider shading factors and orientation.
Step five, confirm local permits and HOA rules.
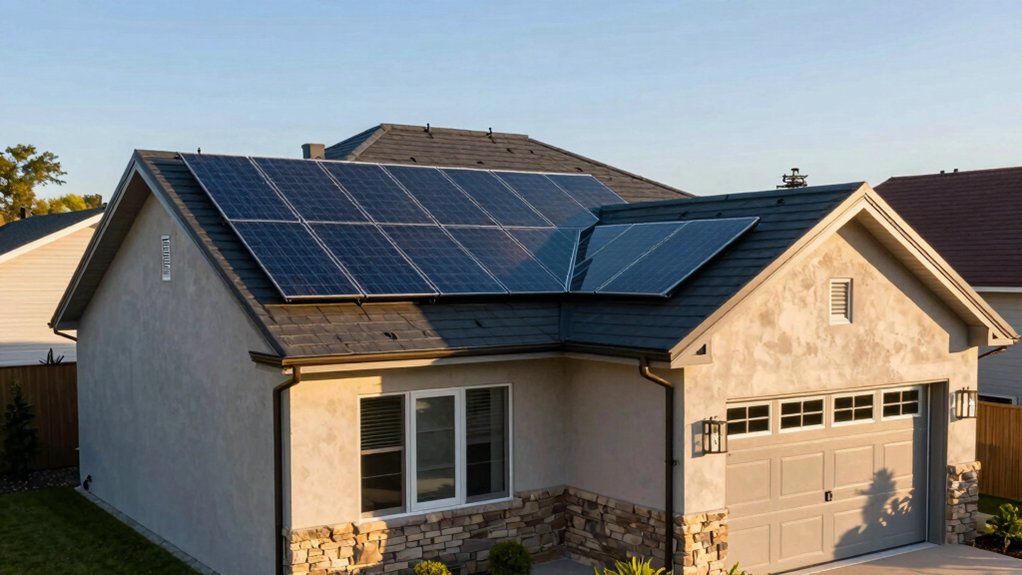
Assess Your Roof: Condition, Tilt, and Shading
Your roof’s condition sets the stage for a successful solar install, so start with a candid inspection: look for loose or damaged shingles, signs of leaks, and chimney or vent penetrations that may require repair before panels go up.
- Inspect for cracked tiles, curling shingles, and worn flashing to prevent leaks.
- Check attic or ceiling for new stains or moisture indicating hidden damage.
- Assess roof angle and tilt to ensure ideal panel exposure.
- Conduct a shading analysis to identify nearby obstructions that reduce output.
A thorough roof inspection guides decisions on repairs, replacements, and mounting options, while a shading analysis reveals how visibility to the sun impacts performance and long-term savings. Planning now prevents surprises later.
How Much Sun Does Your Roof Actually Get?
How much sun your roof actually gets is a key driver of solar viability. You’ll want to map how sun exposure changes across seasons and times of day for your specific roof.
Consider orientation: south-facing roofs typically receive the most sun, while east or west faces may offer strong but shorter exposure.
Roof material matters because some surfaces handle heat, reflection, and mounting differently, potentially affecting efficiency and maintenance.
Shading from trees, chimneys, or nearby structures can dramatically reduce daytime output, even on sunny days.
You should assess how long uninterrupted sun lasts in peak hours and whether any seasonal pruning or reorientation is feasible.
Accurate sun exposure estimates help you size panels, estimate savings, and avoid overpromising solar performance.
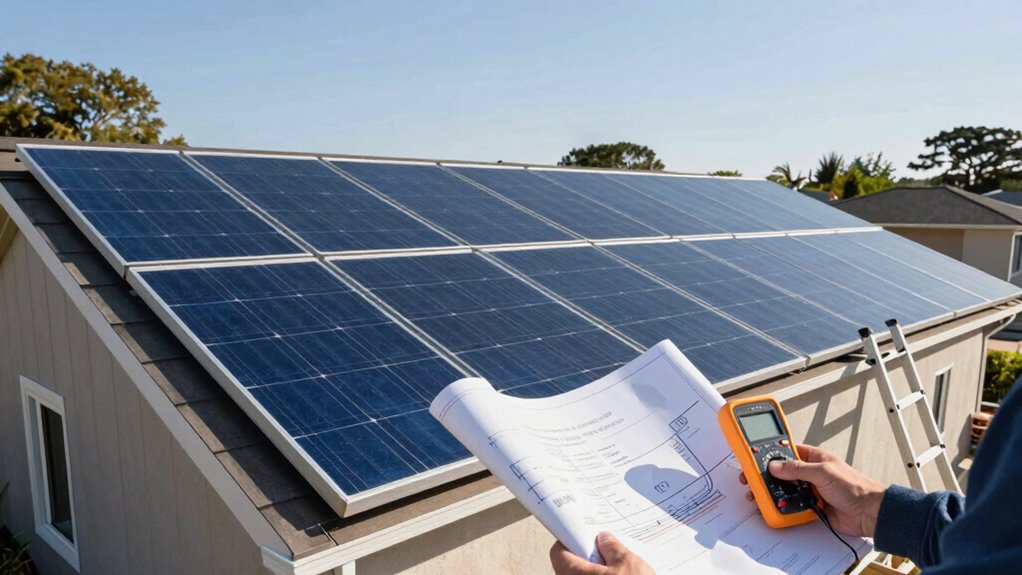
Can Your Electrical Panel Support Solar?
Ensuring your electrical panel can handle solar starts with a straightforward check of capacity and compatibility. You’ll verify three key aspects to see if your system fits within limits.
1) Electrical panel rating — confirm the bus bar and main breaker can accept solar backfeed without overloading.
2) Capacity limits — compare solar output to existing loads and panel rating to prevent overheating.
3) Breaker count — ensure you have available spaces or consider a subpanel with proper labeling.
4) Service drop and wiring size — match conductors to the solar need and code requirements for safe operation.
If you spot any mismatch, consult a licensed electrician before proceeding.
A correctly assessed panel prevents nuisance trips and fire risk, keeping your solar plan on track.
Inverter and Storage: What You Need to Know
Inverter and storage play a pivotal role in a solar setup, dictating how much energy you can use, store, and depend on when the sun isn’t shining. Your solar inverter converts DC to usable AC, coordinating power flow between panels, battery storage, and your home loads.
Choose a unit sized for your peak needs and compatible with your battery chemistry. Energy storage buffers daytime surges and outages, maximizing self-consumption and resilience.
Consider battery capacity, discharge depth, cycle life, and maintenance needs. When sizing, account for nighttime uses, weather variability, and future expansion.
A smart inverter with monitoring software helps you track performance, manage charging, and optimize savings. Prioritize reliability, efficiency, and safety standards to ensure predictable, economical operation of your solar system.
Permits, Interconnection, and HOA Considerations
Permits, interconnection, and HOA considerations are essential steps before you go solar, and handling them early can prevent delays. You’ll navigate a predictable path, but you must stay organized and precise.
- permits process: Submit documentation to your local building department and utility for system approval.
- interconnection: Ensure your inverter and panel specs meet utility requirements for grid connection.
- HOA approval: Check covenants and obtain written consent if your homeowner association governs exterior changes.
- timelines: Align permit approvals, HOA reviews, and utility interconnection to avoid hold-ups.
Budget, ROI, and Financing Options
Understanding the financial picture is essential: you’ll weigh upfront costs against long-term savings, assess payback time, and choose financing that fits your budget.
When evaluating budget, itemize system price, installation, permits, and potential incentives, then compare to expected energy bill reductions.
ROI analysis helps you see how quickly your investment pays off and where you gain or lose value.
Consider financing options that align with your cash flow—home equity loans, solar leases, PPAs, or power purchase agreements, each with different risk and ownership outcomes.
Tax credits and utility rebates can shorten payback, so model scenarios with and without incentives.
Don’t neglect maintenance costs and inverter or battery replacements over time.
Choose a plan that minimizes risk while maximizing predictable savings and long-term reliability.
Shading and Long-Term Durability: Planning for the Future
Shading matters now and long-term: even small changes in sun exposure can dramatically affect system output over the life of your solar array. You guide the future by spotting shading issues early and planning for durability.
By recognizing potential trees, vents, or skylights that’ll cast shadows seasonally, you prevent efficiency loss and costly fixes later. Consider these points:
- Map annual shade patterns to estimate annual energy loss.
- Choose modules with robust warranties to support material longevity.
- Schedule pre-install pruning or barrier adjustments to minimize persistent shading.
- Plan for the long term by evaluating roof health and possible replacements before aging components fail.
Shading controls output now and in years ahead, safeguarding your investment.
Choosing the Right Installer and System Type
Choosing the right installer and system type starts with clear criteria for both sides: evaluate installer qualifications, warranties, and service commitments. Then match system choices to your roof, energy goals, and budget.
Look for installers who document plans, provide transparent pricing, and insist on system type options that fit your usage and site conditions.
This discussion will focus on the installer evaluation criteria and system type considerations to help you make a confident, informed decision.
Installer Evaluation Criteria
Selecting the right installer and system type is essential for a reliable, cost-effective solar setup. You’ll evaluate providers by credibility, credentials, and past performance to ensure solid installation safety and long-term results. Use these criteria to compare options:
- Credentials and licenses
- Warranty terms and service promises
- References and recent project feedback
- Clear, itemized quotes with expected timeline
Focus on solar panel options and system design compatibility with your home, including electrical load, roof condition, and shading. Expect on-site assessments and measurements, not vague estimates.
Ask about permitting support and inspection readiness, plus post-installation maintenance plans. Check for safety records, incident history, and safety training.
Favor installers who communicate plainly, provide detailed contracts, and stand behind workmanship with responsive support. Your goal: a transparent, risk-aware choice that aligns with budget, safety, and performance expectations.
System Type Considerations
To pick the right system type, you’ll align your home’s electrical load, roof condition, and shading with available solar configurations. You’ll consider how panel compatibility affects performance and how system scalability supports future needs.
Start by evaluating whether you need a simple grid-tied setup or a hybrid with storage, then match inverter options to your load profile.
If your roof has limited space or high shading, compact, high-efficiency panels and microinverters may outperform larger strings.
For larger homes or anticipated expansion, choose modular inverters and scalable layouts that allow adding capacity later without reworking the entire system.
Make certain the installer confirms wiring, grounding, and code compliance.
Prioritize transparent cost estimates, warranty coverage, and service availability to avoid future compatibility issues.
Incentives, Rebates, and Tax Credits You May Qualify For
If you’re considering going solar, you may qualify for incentives, rebates, and tax credits that can substantially cut your upfront costs and shorten payback periods. You’ll see how these programs *release* value for your system, from cash backs to ongoing savings.
- solar incentives that reduce installation costs and boost your ROI
- tax credits you can claim on your federal return, plus state programs
- rebates offered by utilities or local governments that offset equipment or labor
- financing options and performance-based incentives tied to system output
Keep in mind eligibility varies by location, system size, and installation date. Research local incentives, consult your installer, and track deadlines to maximize benefits.
With smart planning, you’ll use solar incentives and tax credits to accelerate your investment’s payoff.
Conclusion
You’re closer to solar than you think. By verifying roof condition, shading, panel capacity, and a future-proof inverter, you can cut your energy bills and boost home value. One striking stat: homes with solar see a median price bump of about 4–6% at sale, alongside utility savings. Align your budget with ROI and explore incentives now, then choose a trusted installer and system type that fits your home’s sun exposure and long-term plans. Your solar-ready future starts today.


