
If you’re clearing a clog beyond the P‑trap, start by choosing a snake that matches your pipe size and clog type, then wear sturdy gloves, eye protection, and a mask. Inspect for corrosion, feed the snake slowly, and rotate as you advance to reengage the line. Don’t force it—ease past bends and back off if resistance grows. After clearing, reassemble, test drainage, and check for leaks. With careful steps, you’ll gain solid results and safer, longer-lasting pipes—more tips await.
What a Drain Snake Can Fix Beyond the P-Trap (and What It Can’t)
A drain snake can clear many clogs beyond the P-trap, but it has limits you should know. You’ll encounter root intrusion when roots pressurize or squeeze the line, and a snake may break or push the blockage, not permanently fix the growth. It can also encounter pipe corrosion, where metal or old PVC walls crumble, risking further damage if you force it aggressively.
With vertical stacks or long runs, you may meet mineral deposits that resist snaking, requiring stronger tools or professional service. Don’t rely on a snake to remove heavy grease or collapsed piping; those scenarios demand assessment and alternatives.
Use steady, controlled motion, and stop if you feel resistance that suggests an obstruction beyond your reach. Prioritize safety and evaluate the results after each pass.
When Snaking Is the Right Move for Your Clog
Snaking is the right move when the clog is hair, soap scum, or other common blockages located beyond the P-trap but within the main sewer line’s reach.
You assess symptoms like recurring backups, sluggish flow, or lingering odors that don’t respond to basic plunging. If you can access the line with a snake and feel confident guiding it through the trap, your effort may clear the obstruction without tearing out fixtures.
This approach is practical for DIY plumbing tasks, provided you follow step‑by‑step safety and manufacturer instructions. When resistance or tight bends appear, or the clog returns after a single pass, opt for professional intervention to avoid pipe damage.
Reserve professional help for uncertain conditions or complex builds.
Choosing the Right Snake for Pipe Size and Clog Type
To choose the right snake, match pipe size to tool diameter and use the smallest effective option to avoid damage.
Consider clog type—biological build-up, hair, or grease—and pick a tool designed for that resistance.
Select your tool with clear, practical confidence, ensuring you can control it safely and efficiently.
Pipe Size Considerations
When selecting a snake, match the tool size to the pipe diameter and the clog type to avoid damage and maximize effectiveness. You’ll choose snake gauge and head type based on pipe material and bend strength.
For smaller drain pipes (¾ inch to 1¼ inch), use slim, flexible cables to negotiate traps without kink resistance. In metal or PVC systems, consider stainless-steel or high-tensile lines for durability and repeated use, but avoid over-pressuring joints.
Measure pipe diameter before purchasing; incorrect sizing invites scraping, scarring, or ineffective breaks.
For hard clogs, a mid-range coil with a solid auger tip yields better grip on the blockage.
Reserve heavy-duty drums for main lines only, where pipe material and diameter tolerate the added force without compromising integrity.
Clot Type Matching
Choosing the right snake hinges on matching the clog type to pipe size and selecting a compatible head design. You identify the clog type first, then pick a snake with the appropriate diameter and flexibility for the pipe.
For soft organic buildup, use a flexible auger with a low-friction head to minimize damage and maximize contact.
For mineral or fibrous plugs, opt for a rigid or semi-rigid cable and a blade or coil head designed to cut or coil through tough material.
Always consider drain material considerations, as metal pipes may resist certain heads, while PVC or ABS benefits from gentler, smooth-surfaced tips.
Validate alignment with the trap and bends, then apply steady, controlled rotation to avoid snags.
Appropriate Tool Selection
Selecting the right snake starts with the clog type and pipe size, then matching a head design to the material you’re clearing. You’ll choose auger type, length, and coil stiffness based on the obstruction and pipe materials.
For kitchen drains with PVC or metal, a compact, flexible auger works best to negotiate elbow joints without wall damage. For cast iron or sewer lines, opt for a heavier duty spring with longer reach to break stubborn buildup.
Always verify tool length exceeds the run and that the head is appropriate for the material you’re clearing. Use a reinforced drum for durable control, and keep a backup tip in case of wear.
This approach supports drain maintenance and minimizes risk to pipe materials.
Safety Gear You Actually Need Before You Snake
You should gear up with what actually protects you: sturdy gloves, eye protection, and a dust- and splash-resistant mask, plus hearing protection if you’re running a noisy auger.
Before you snake, inspect your gear and select safe, appropriately rated PPE, focusing on fit and comfort for prolonged use. Personal protective equipment isn’t optional; it’s your first line of defense against splashes, debris, and bacteria.
Check gloves for tears and choose chemical-resistant pairs if you’re dealing with cleaners. Eye protection should seal well against spray and splatter. Maintain a clean, dry mask and replace it if it’s damp or damaged.
After use, perform tool maintenance and store gear properly to preserve effectiveness and readiness for the next job.
Preparing Your Workspace and Tools for Snaking
First, gather your tools and lay them out within easy reach to avoid interruptions.
Next, clear the workspace so you have a clean, stable area to work and inspect the drain.
Finally, set up a straightforward workflow that keeps your tools organized and your focus on the task.
Gather Your Tools
Gathering the right tools sets the tone for a smooth snaking job. You choose quality, purpose-built gear that fits the task and minimizes guesswork.
Start with a drain snake or auger appropriate for the pipe diameter you’re addressing, plus a drill or manually powered crank if needed. Have rubber gloves, safety glasses, and a bucket to catch water, plus rags for cleanup.
Add a coarse brush, a utility knife, and a spare PVC cutter in case you need small adjustments. Keep a flashlight for visibility and a cheap bucket of towels to protect floors.
Know Plumbing system basics so you don’t force tools where they don’t belong. Avoid harsh drain cleaning chemicals that can damage lines.
Clear Workspace Setup
With the workspace clear, you can move efficiently and minimize mistakes. Set up two zones: inspection-ready tools at hand, and spare items in a labeled tray. Verify you have your drain cleaning chemicals accessible, and store them upright in a secure, cool area away from kids.
Lay a wide-bore bucket, rags, gloves, eye protection, and a flashlight within easy reach. Position the trap, bucket, and P-trap removal tools so you don’t twist or stretch during the sweep.
Clear clutter from the cabinet and work surface to prevent drops. Do a quick plumbing inspection to confirm no leaks or corrosion before you begin.
Keep a record of actions and outcomes for maintenance references and future snaking sessions. Maintain steady, deliberate movements for consistent results.
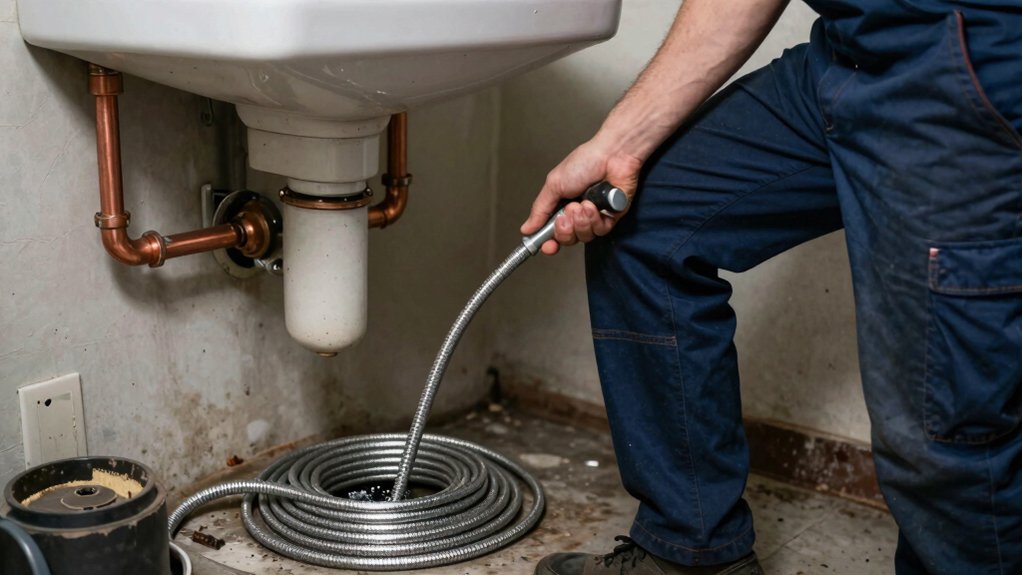
Accessing the Clog Beyond the P-Trap: Entry Points and Access Blocks

Accessing the clog beyond the P-trap requires locating accessible entry points and removing any blocks that hinder your snake. You’ll assess the trap area for screws, caps, or cleanouts you can safely open, ensuring the line isn’t pressurized. Maintain steady water pressure as you proceed, avoiding forceful jerks that could damage fittings or cause leaks.
Be mindful of pipe corrosion signs near joints; if you detect flakes, stop and reassess to prevent further harm.
- Identify and open removable access points without forcing
- Clear or loosen debris blocking the path, not the pipe
- Inspect for pipe corrosion and test water pressure after partial clearance
Proceed with controlled advances, pausing if resistance increases, and recheck for hidden caps before continuing.
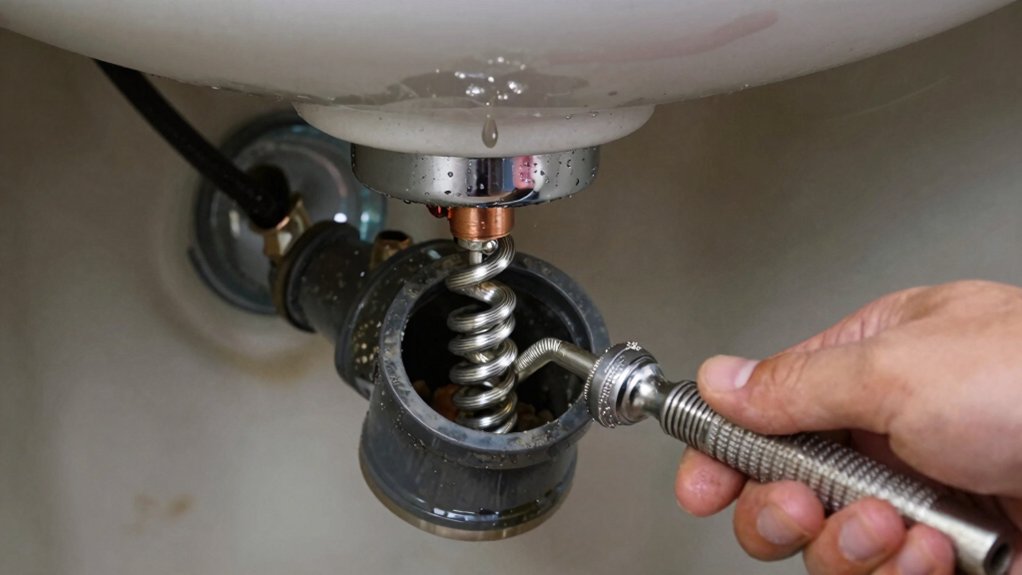
Feeding Past Bends: Step-By-Step With the Right Techniques
Feeding past bends requires deliberate control and technique to keep the auger moving smoothly. You’ll start with a steady, slow feed, letting the cable advance until you meet resistance. Pause briefly, then rotate the drum to reengage the line and push past the bend. Don’t force it; if you meet a stubborn snag, back off and realign the auger’s trajectory before continuing.
Maintain consistent tension so the cable doesn’t whip or kink. As you progress, listen for changes in sound and feel, which signal you’re crossing a junction or loosening debris. After you clear the bend, withdraw slowly to prevent re-snagging.
Address drain maintenance afterward, debunk plumbing myths, and document routine checks to sustain performance.
Breaking Up Clogs Safely: Techniques That Work Without Damaging Pipes
When a clog hits, you don’t need harsh chemicals or destructive methods to clear it. Instead, you break it up with controlled, noninvasive techniques that protect your pipes and drain fluid remains manageable.
You’ll select methods based on material and flow, avoiding actions that force you toward unnecessary replacements. Focus on mechanical disruption, gentle agitation, and progressive clearance to minimize wear on Pipe materials and fittings.
Monitor drainage as you work, stopping if you notice unusual resistance or odors that signal a deeper issue.
- Use a manual snake with steady, short twists to avoid scraping
- Apply a plunger first, then a slim rod to dislodge compacted debris
- Flush with warm water and a mild detergent to carry out loosened material
Drain fluid balance stays controlled throughout the process.
Common Traps and Fittings You’ll Encounter (and How to Navigate Them)
Common traps and fittings show up more often than you think, and knowing what to expect helps you stay in control while you snake a drain. You’ll encounter P-traps, S-traps, and sometimes bottle or offset configurations; identify each before you apply pressure.
For traps, loosen connections carefully to avoid sudden releases of water and sewer gas; replace any worn washers and ensure proper seals.
When fittings resist your snake, switch to a smaller-diameter segment to negotiate bends without kinking. Be mindful of pipe corrosion on metal joints, which can crumble under tension and lead to leaks.
Vent blockages matter too: if air can’t escape, drainage slows or bubbles, signaling limits to your approach. Always verify flow after removal, then reassemble with secure, leak-free joints.
What If the Snake Won’t Reach or Clear the Clog? Troubleshooting and Next Steps
If the snake won’t reach or clear the clog, start by reassessing your setup and technique. Check the auger’s length, orientation, and rotation speed, and verify you’re inserting past the bend.
If resistance persists, pause and re-lubricate the cable with water or a light oil, then reattempt with steady, even pressure. Consider alternative approaches before abandoning the attempt.
- Alternative drain solutions for stubborn blocks
- Steps to minimize future clogs and improve access
- Professional repair options when home methods fail
If repeated efforts fail, you should pursue professional repair options to avoid damaging pipes.
In some cases, a drain snake alone won’t suffice, and a pro may need to use power rodding, camera inspection, or scope-based clearing to identify the exact cause and restore flow safely.
Frequently Asked Questions
Can a Drain Snake Fix Sewer Line Clogs?
A drain snake can fix some sewer line clogs, but it won’t resolve root intrusion or pipe corrosion alone. For persistent blockages, you’ll likely need professional intervention to address root intrusion and assess pipe corrosion.
Will Snaking Damage PVC or Copper Pipes?
Snake compatibility varies, but you won’t damage PVC or copper if you use the right tool and technique. You’ll protect pipe material by avoiding excessive force, choosing a flexible, appropriately sized snake, and going slow around bends.
How Long Does It Take to Snake a Drain?
It takes about 15 to 30 minutes, depending on blockage size. You should follow maintenance precautions, and consider professional assistance if you’re unsure or the clog persists beyond a basic snake.
Can You Snake a Septic Line Safely?
Sure, you can snake a septic line safely, if you follow proper precautions. You’ll perform septic system maintenance and use appropriate drain cleaning methods, staying calm, precise, and aware of pitfalls—even when irony hints at DIY hubris.
Should You Use Chemical Cleaners Before Snaking?
No, you shouldn’t rely on chemical cleaners before snaking; they can mask the issue and cause pipe damage. Opt for mechanical snaking first, then assess for pipe damage if the clog persists, avoiding harsh chemical cleaners.
Conclusion
In short, a drain snake is your reach-and-break tool for clogs beyond the p-trap, not a cure-all. Stay precise, follow steps, and don’t force the cable where it shouldn’t go. If you can’t clear it, call a pro—persistence isn’t worth a ruined pipe. Treat the snag as a signal, not a failure. Like a compass needle in a storm, your method points you toward safe, effective resolution.


