
Choosing the right deck stain starts with your climate and wood type. For sunny, dry areas, use UV-stabilized, higher‑solids stains; for humid or coastal sites, pick breathable, water‑repellent formulas with mold resistance. Decide transparent, semi‑transparent, or solid based on how much grain you want to show and your maintenance tolerance. Prep thoroughly—clean, repair, and dry the surface. Apply evenly with brushes, rollers, or a controlled sprayer, and plan recoats. If you keep at it, you’ll gain longer color and protection.
Decide: Choose the Right Deck Stain for Your Climate and Wood
Choosing the right deck stain starts with your climate and wood type. You evaluate exposure, moisture, and sun, then match a stain with your wood grain and porosity.
In dry, sunny areas, choose UV-stabilized, higher solids formulations to minimize fading. In humid or coastal climates, prioritize mold resistance and breathable, water-repellent options.
For softwoods, select a penetrating stain to guard against swelling and tannin bleed; for hardwoods, favor deeper penetration and color-fast binders.
Consider sheen as part of stain color; semi-transparent offerings reveal the grain while providing protection, whereas solid stains hide flaws but require more maintenance.
Check warranty guidelines and recoat intervals to align with your deck’s use and environmental conditions.
Assess Your Wood Type and Local Weather Impacts
Assess your wood type and local weather by identifying how the wood behaves under moisture and sun. You’ll determine moisture tolerance, warp tendencies, and grain response, then map these to stain needs.
Consider plain-sawn versus rift or quartered wood, noting how wood grain directs water absorption and drying rates. In humid climates, expect higher swelling and more frequent checking; in dry, hot environments, UV exposure accelerates weathering.
Check for preexisting splits, softness, or decay to gauge preparation efforts. Assess surface texture and resin content, which influence adhesion.
Record exposure: shade, sun hours, precipitation, and temperature swings. By understanding wood grain behavior and weather impact, you tailor prep and stain selection to maximize durability and finish longevity.
This foundation keeps maintenance predictable and results consistent.
Transparent, Semi-Transparent, or Solid: Which Stain to Use
Your stain choice hinges on how much you want the wood’s natural characteristics to show through. Transparent, semi-transparent, and solid finishes each offer distinct visibility and protection. Your goal determines the option you select, not just color appeal.
- Transparent shows the grain most and yields the lightest color shift.
- Semi-transparent blends color with grain while offering more UV protection.
- Solid hides grain entirely for uniform color and maximum concealment.
- Finish types affect upkeep: lighter options fade faster; higher hide requires more frequent maintenance.
Consider Color options and Finish types together to match climate and exposure. If you want subtle enhancement, choose transparent or semi-transparent. For a uniform look, pick solid. Balance appearance with durability needs for best results.
Pick the Sheen and Longevity That Fit Your Deck
Choose the right sheen by considering how much UV exposure and foot traffic your deck gets, because sheen options vary in appearance and durability. Match longevity to your environment, weighing factors like humidity, temperature swings, and moisture exposure to avoid premature wear.
Here’s the concise guide: weigh the pros and cons of each option for deck-specific needs, so you can pick a finish that lasts and looks right.
Sheen Options By Deck
Choosing the right sheen for your deck hinges on how you use the space and how much maintenance you’ll commit to. Your choice affects appearance, protection, and cleaning frequency, so pick wisely. Consider how visible grain will be, and whether you want a subtle or bold finish.
Sheen options range from low-gloss to high-gloss, each balancing durability and clarity of wood grain enhancement.
Choose a sheen that matches your climate, foot traffic, and cleaning tolerance.
- Low-gloss for natural look and quicker maintenance
- Medium-gloss for balanced wood grain enhancement and durability
- Semi-gloss for moderate visibility and easier cleaning
- High-gloss for maximum sheen and standout color, with higher upkeep
Longevity Matching Environment
A deck’s environment largely dictates which sheen and longevity pairing lasts since weather, sun exposure, and moisture accelerate aging. You select a finish that aligns with your climate and deck exposure to guarantee durability.
For sunny, hot sites, choose high-UV resistance and longer service life, avoiding early chalking or fading. In shaded, damp regions, prioritize mildew resistance and moisture tolerance to prevent swelling and peeling.
Consider climate-specific stains that resist cracking under temperature swings and repeated wet-dry cycles. Verify wood compatibility with the stain you intend, ensuring the finish bonds properly to your species and condition.
If you’re unsure, test a small area first and follow manufacturer recoat intervals to maintain color and protection without overcoating. Regular maintenance sustains appearance and longevity.
Pros And Cons Overview
So which sheen and longevity best fit your deck? Weigh pros and cons to guide decisions on deck aesthetics and stain color. A finish with higher gloss highlights grain and color, but may emphasize surface wear; it cleans easier yet shows scratches sooner. A flat or satin finish hides imperfections and ages more gracefully, yet needs more frequent maintenance to preserve color depth. Consider UV exposure, foot traffic, and climate when choosing durability.
1) Higher sheen improves color tone and clarity, but demands meticulous prep.
2) Lower sheen softens contrast, masking flaws while requiring periodic reapplication.
3) Longer-lasting formulas resist peeling, but may alter stain color subtly over time.
4) Easy-to-clean finishes aid upkeep but may reduce initial depth of deck aesthetics.
Prep the Deck: Clean and Repair Before Staining
You clean the deck before staining to remove dirt, grime, and old finishes that can prevent adhesion.
Next, repair any loose boards, cracks, or rot so the stain penetrates evenly and lasts.
Start with a thorough inspection, then fan out to targeted fixes and a fresh surface for peak results.
Clean Before Staining
To guarantee even staining, clean the deck thoroughly before any repair or application. You’ll remove dirt, mold, and mildew so wood grain and texture read true, preventing blotches in stain color. Use a high-quality cleaner, follow the label, and scrub with a stiff brush or mop.
Rinse completely and allow drying until surfaces are dry to the touch. If you see gray wood or loose fibers, plan for light sanding after cleaning, not before coating. Avoid pressure washing on delicate boards, which can force water into grain and cause warping.
- Choose a cleaner appropriate for your deck’s material
- Scrub with proper brush and technique
- Rinse thoroughly and dry fully
- Inspect for moisture before staining
Repair Any Deck Defects
After cleaning, inspect the deck for defects and address them before staining. Begin with a thorough wood examination to identify loose boards, protruding nails, and cracked or splintered framing. Tighten fasteners, remove rust, and replace damaged boards with comparable material.
Check for soft spots indicating rot; cut away compromised wood and treat nearby joists if needed. Sand rough edges and flush splinters to prepare a smooth surface. Gaps between boards should be minimal; consider filler or replacement to prevent moisture intrusion.
Clean holds and re-check for hidden damage after repairs. Ensure joist and railing connections are solid and code-compliant. Document repairs for future maintenance. Performing deck repairs now reduces future maintenance and enhances stain longevity.
deck repairs, wood inspection.
Protect Surroundings and Hardware During Staining
Protecting the area and hardware is essential to a clean, durable finish. You’ll minimize damage by isolating nearby surfaces and securing fixtures before you stain.
Follow these steps to safeguard surroundings and hardware during staining:
- Cover adjacent plants, siding, and glass with drop cloths or plastic sheeting to prevent stain overspray.
- Tape off railings, gaps, and hardware with painter’s tape, ensuring clean edges and easy removal.
- Remove or shield hardware where feasible, or apply a barrier around fasteners to prevent staining.
- Clean any drips quickly, and dispose of masking materials properly to avoid staining unintended areas.
Employ proactive protection to ensure long-lasting results and minimize cleanup.
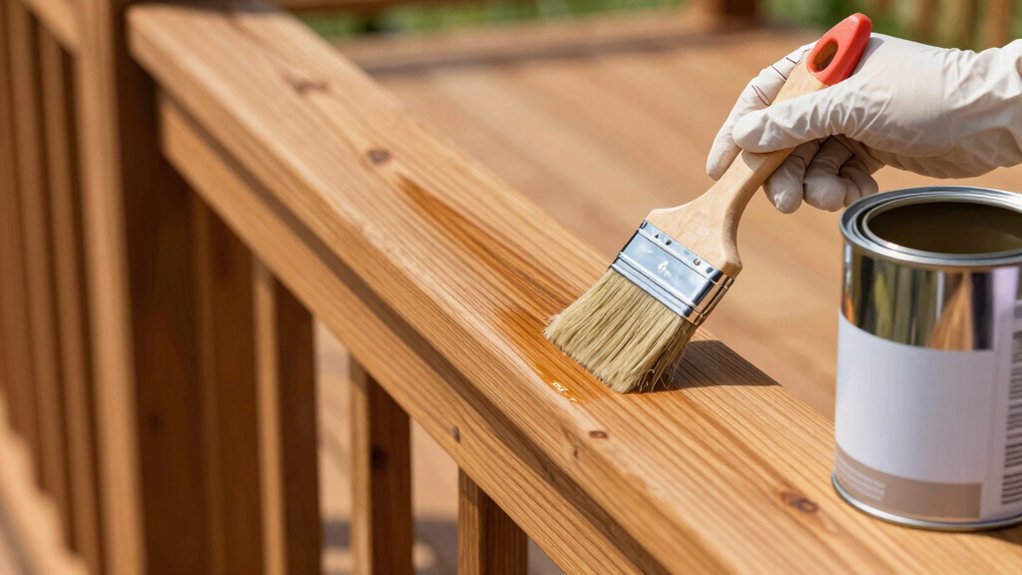
Tools for Even Coverage: Brushes, Rollers, and Sprayers
To achieve even coverage, you’ll prioritize brush precision tips and roller ease techniques that suit your deck’s grain and boards.
Use steady, overlapping strokes and maintain a consistent pace to avoid laps and blotches.
Sprayers can supplement application, but combine them with controlled brushing or rolling for uniform results.
Brush Precision Tips
Choosing the right brush, roller, or sprayer is essential for even deck coverage; start by matching your tool to the product and surface. You’ll control brush strokes and stain absorption by applying consistent pressure and maintaining a wet edge. Use the bristles or nap that suit your stain’s viscosity, and keep strokes parallel to the board length for uniform color.
1) Start with light, even coats to prevent pooling.
2) Maintain a steady pace to reduce lap lines.
3) Overlap slightly to ensure continuous coverage.
4) Clean between passes to preserve tool integrity and finish quality.
Roller Ease Techniques
Rollers deliver even coverage when you’re staining a deck, so pick a nap length that matches the stain’s viscosity and the wood’s open pores. Use a consistent, overlapping pattern to prevent lap marks, and work in small sections to maintain a wet edge.
Load the roller evenly; avoid overloading, which causes drips and uneven color. For tighter boards, roll with the grain to reduce streaks and emphasize wood grain texture. Back-roll after applying to flatten fibers and even out thickness, especially on porous wood.
Choose tools based on stain color and desired finish, testing on a scrap area first. Sprayers offer rapid, uniform coats but require masking and technique control to prevent runs. Maintain airflow, inspect for thin spots, and adjust application to preserve long-term durability.
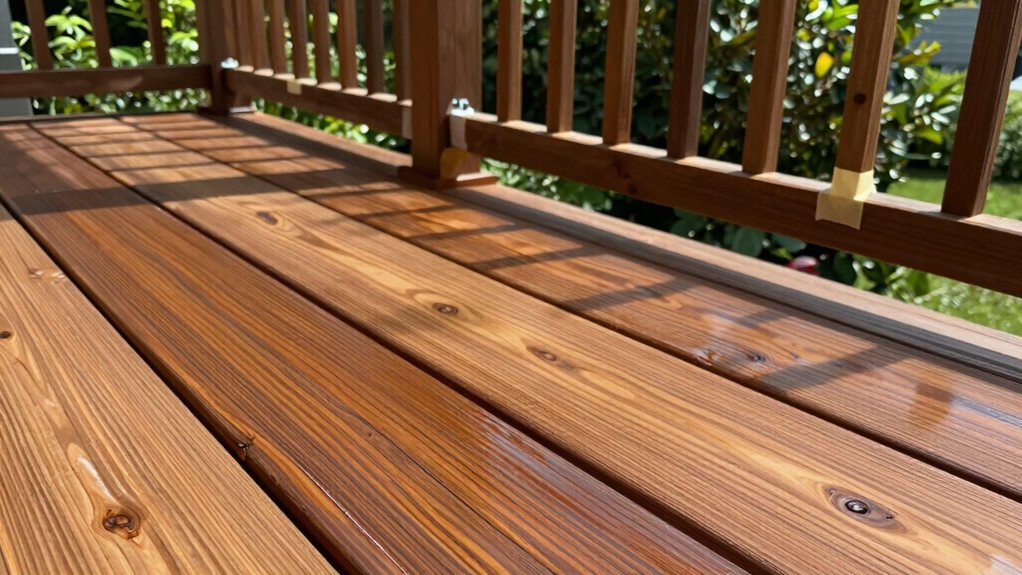
Application Steps: Stain, First Coat, and Recoats
Stain your deck in clear, even coats, starting with the first coat applied evenly along the grain and edge-to-edge coverage. You’ll guarantee color consistency and durability by controlled application, and by choosing a stain suited to your wood type and climate. Focus on evenness, not heavy layers, to prevent lap marks and pooling.
Color choices and application techniques combine to determine final look and protection. Recoats should occur within manufacturer guidelines to maintain film integrity and color depth.
- Follow manufacturer timing for first coat and recoats
- Maintain even stroke direction with consistent pressure
- Monitor color uniformity across boards
- Back-felled edges and end grain for uniform absorption
Maintenance Schedule to Extend Color and Protection
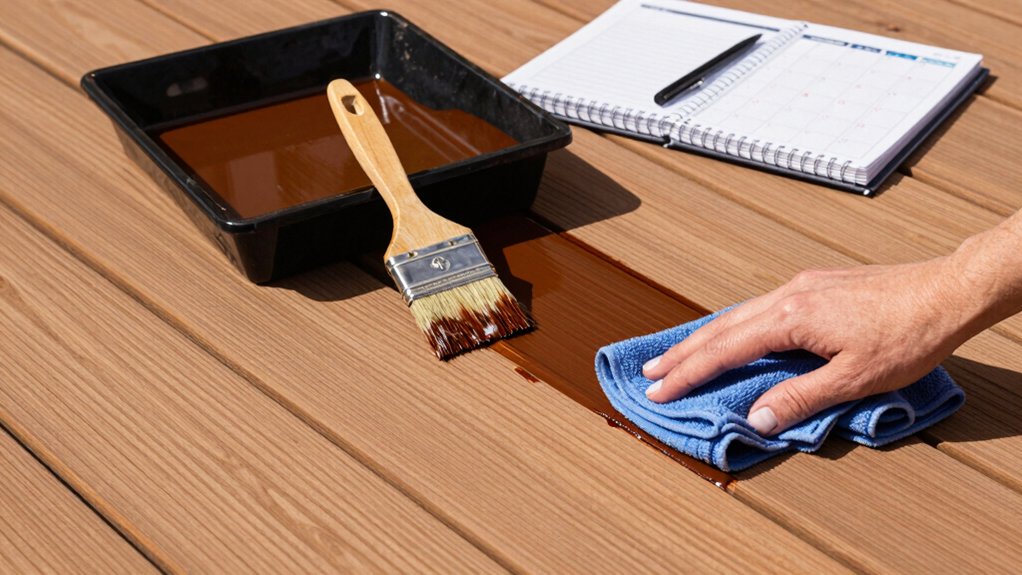
Maintenance schedules protect color and durability by planning reapplications before the finish dulls or washes away. You establish a baseline based on climate, usage, and product lifetime, then set clear intervals for inspection, cleaning, and recoating.
Schedule annual checks for surface wear, loose boards, and water beading, noting any color fading or uneven gloss. Align maintenance with manufacturer guidance for cure times and product compatibility to guarantee stain longevity.
Prioritize cleaning before reapplication, using a deck-safe cleaner and thorough rinse to remove dirt, mildew, and residues that hinder adhesion. Avoid excessive moisture before recoats; allow proper drying.
Document each cycle, tracking product type, coat count, and date. A disciplined routine yields consistent color, protection, and extended deck maintenance.
Troubleshooting Common Staining Issues
When stains fail to take or perform as expected, start by pinpointing root causes such as surface contamination, improper cleaning, moisture, or incompatible products. You’ll spot color fading and stain blotching when prep was rushed, boards aren’t dry, or the stain isn’t compatible with the deck type. Address these issues first before reapplying.
- Confirm the surface is clean, dry, and free of oils or sealers before staining.
- Use the right stain for your wood species and weather conditions, and avoid layering incompatible finishes.
- Test a small area to confirm color and penetration, addressing blotching or uneven absorption.
- Allow proper dry time between coats and between cleanings to prevent moisture trapping.
Frequently Asked Questions
Can You Stain in Direct Sun or Wind Gusts?
Direct sun and wind gusts aren’t ideal; avoid staining in them. You should wait for calmer, shaded conditions. Prioritize sun protection and weather considerations to guarantee even absorption and durable results. Drying times shorten indoors, extend outdoors? Plan.
How Long Between Coats for Reapplication?
Nearly 60% of decks show ideal stain adhesion after a 24-hour cure; you should wait 24 hours between coats. Guarantee coat preparation, then reapply, focusing on stain penetration for durable, even coverage.
Is Staining Over Painted or Sealed Surfaces Possible?
Yes, you can stain over painted or sealed surfaces, but you must remove sealant and flaking paint first; perform sealant removal, sand smooth, and prime before applying stain to guarantee adhesion and lasting color.
Do Color Choices Affect Deck Slip Resistance?
Color influence does matter: lighter colors can reveal slickness and darker tones often mask it, but slip resistance depends more on texture and topcoat than hue. You should test surface friction and choose grippy, durable finishes.
Can I Stain a New, Rough-Sawn Deck?
Yes, you can stain a new, rough-sawn deck. You’ll prep, then apply evenly, watching for full stain penetration and enhanced wood grain definition while preventing blotching on the rough texture. Clean, seal, and maintain for durability.
Conclusion
In protecting your deck, choose the right stain for climate and wood, then prep meticulously. You’ll see durability rise when you’re honest about wear: transparent fades, solid seals, yet appearance matters as much as protection. Mix, apply, and recoat with discipline, not haste. Juxtapose beauty with longevity: quick color today, lasting defense tomorrow. If things go wrong, troubleshoot calmly and adjust—clean, repair, reapply. The between-times—maintenance—keeps both color and structure resilient, year after year.


