
You’ll start by evaluating the joints, then clean and dry the surfaces before choosing a flexible, archival-grade chinking material that fits your log profile and climate. Inspect gaps for size and movement, document dimensions, and remove old sealant. Prepare joints with a clean, sound base, then apply a steady bead and smooth to a shallow, convex finish. Guarantee proper curing and matching color. With careful technique, you’ll preserve integrity and authenticity—and you’ll find more guidance ahead.
Assessing the Cabin’s Chinking Needs

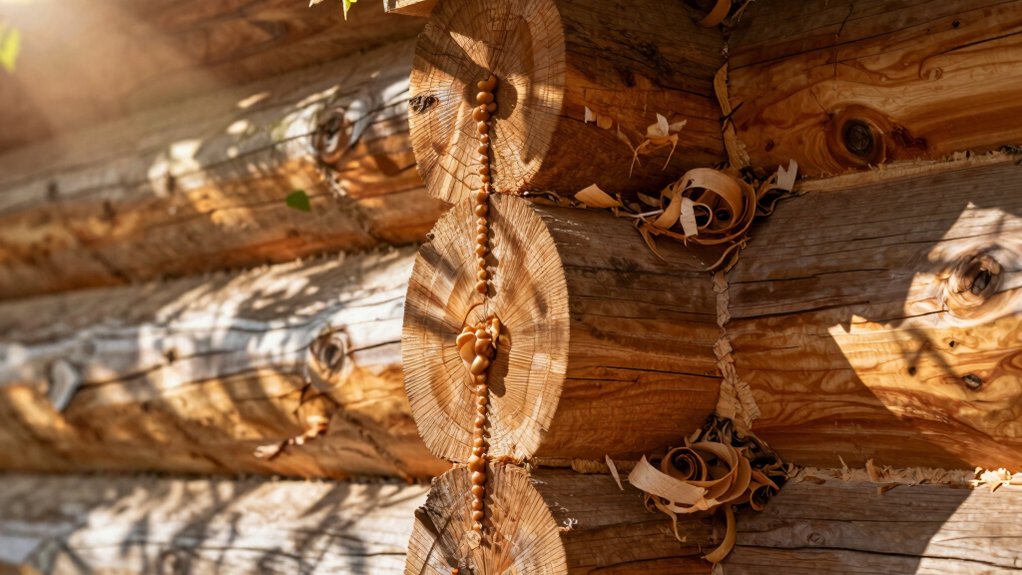
Evaluating the cabin’s chinking needs starts with a careful inspection of gaps between logs and any signs of intrusion or moisture. You methodically document dimensions, locations, and progression of any cracks, noting whether gaps exceed typical seasonal movement. Look for exposed fibers, rot, or insect damage that could undermine seal integrity.
Assess the original chinking profile if visible, comparing it to archival records or builder notes to judge historical accuracy. Record joint geometry, log settlement indicators, and drainage patterns around the foundation to anticipate moisture ingress. Prioritize areas where animals or wind exposure concentrate leakage.
Determine if chinking durability is compromised by material degradation or weathering, and flag sections needing resealing or replacement. This assessment guides repairs that respect traditional construction while preserving effectiveness.
Tools and Materials for Chinking
To proceed with chinking, assemble a vetted set of tools and materials that align with the cabin’s profile and your documented assessment. You’ll select a chinking gun or caulking gun, putty knives, stiff brushes, and calibration shims for consistent joints.
Stock a compatible sealant or mortar mix suitable for exterior exposure, plus safety gear: gloves, goggles, and a respirator. Include backer rods, mineral wool or fiberglass as appropriate, and a priming or sealing primer if required by the product.
Documentation should specify curing times, exterior compatibility, and substrate prep steps. Maintain records of batch numbers and storage conditions to support reproducibility.
This phase anchors Chinking techniques and confirms the project’s historical approach, while acknowledging Chinking historical significance in standard practice and archival reference.
Preparing the Joints for Repair
You begin by cleaning the joint area to remove loose chips and dust, ensuring a clean surface for inspection.
Next, you assess wood damage to identify cracks, rot, or soft spots that could affect repair quality.
Finally, you dry and prep the area, setting up proper moisture control and readying the joints for accurate chinking.
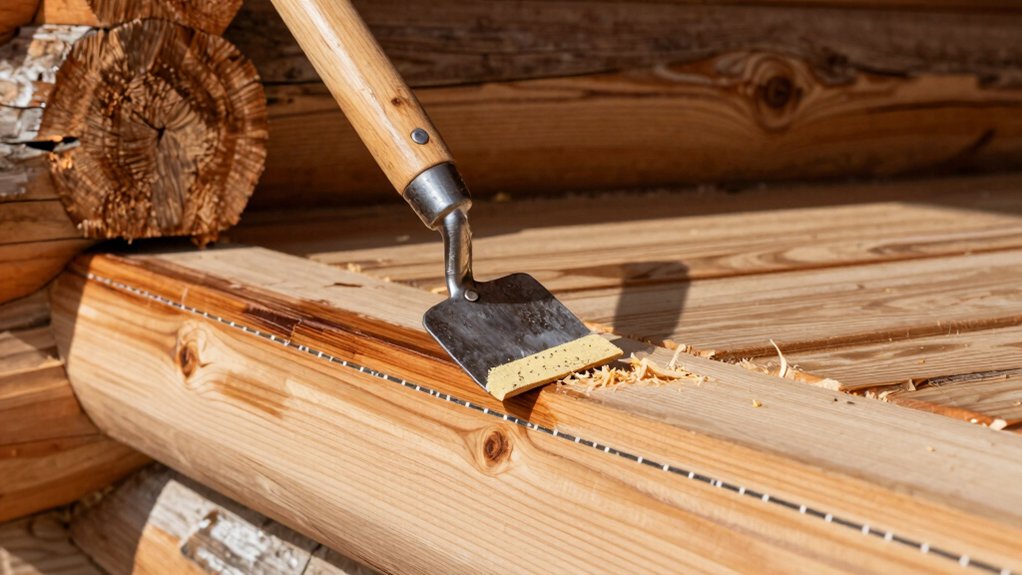
Cleaning the Joint Area
Clean the joint area thoroughly to remove dust, pollen, and loose material before any repair. You survey the joint line with a keen eye, noting gaps, crumbly deposits, and protruding fibers.
With a stiff brush, you sweep the surface methodically, then wipe with a damp rag to eliminate fine particulates. You avoid abrasive tools that could damage timber fibers.
Document observed irregularities, focusing on edge integrity and dry-rot indicators without venturing into remediation steps. This phase emphasizes preparation: concrete results hinge on clean surfaces.
Perform a final quick inspection, ensuring no residue remains that could impede sealant application. Record conditions for future reference.
Your method supports durable joint cleaning and prepares for consistent sealant application outcomes.
Assessing Wood Damage
Evaluating wood damage sets the baseline for repair planning. You inspect joints methodically, noting all irregularities that affect seal integrity. Start with a close visual scan for cracks, splits, and softened fibers, then probe with a small tool to confirm softness beyond surface. Record locations and dimensions to guide material choices and replacement scope.
Identify wood rot by its crumbly, damp feel and darkened edges, distinguishing it from sound timber. Look for insect damage indicators such as exit holes, frass, or bore tunnels under paint or chinking. Assess moisture pathways, including gaps at corners and along sill plates, to determine drainage improvements.
Prioritize replacing severely compromised members, long-lead components, and any rot-prone zones, ensuring compatible grain, density, and treatment before proceeding to sealing.
Drying and Prep Work
Before applying repairs, thoroughly dry the work area and prepare the joints to guarantee reliable adhesion and long-term performance. You assess the joint faces for cleanliness, structural integrity, and any residual moisture indicators.
Employ consistent drying techniques: heat, low humidity, and ventilation, avoiding rapid temperature shifts that cause surface cracking.
Remove dust, old sealant, and loose fibers with a stiff brush, then wipe with a lint-free cloth.
Establish a uniform prep surface by sanding lightly to expose sound wood and create a micro-rough texture that promotes adhesive grip.
Check for hidden voids or gaps, injecting filler where needed before final drying.
Reassess moisture levels with a meter, and re-clean the surface after any additional drying.
Document results for archival accuracy and future reference.
Choosing the Right Chinking Mix
Choosing the right chinking mix requires matching the product to your climate, wood species, and movement. You assess expansion rates of logs, seasonal humidity, and temperature swings, then select a material with compatible elasticity and cure time.
For hot climates, pick a flexible, faster-setting mix to minimize cracking; for cold regions, prioritize low-temperature workability and enduring bond. Consider wood species and resin content, since some woods demand higher adhesion or shear tolerance.
Confirm surface prep follows archival standards: clean, dry, and free of dust before application.
Evaluate chinking durability by reviewing substrate compatibility, freeze–thaw resilience, and long-term substrate movement.
Review available pigments to balance Chinking color options with cabin aesthetics, while maintaining a neutral base for future maintenance needs.
Applying Chinking With Skill
You tighten the seal with steady technique, ensuring a consistent bead and complete gaps for a durable bond.
You apply caulking smoothly, guiding the tip for uniform depth and clean edges to prevent air leakage.
You evaluate the joint for evenness and contact, ready to adjust pressure and technique as needed for lasting performance.
Proper Seal Technique
To seal a log cabin effectively, you apply chinking with precision, ensuring a continuous, weather-tight gasket between logs. Your technique begins with surface preparation, cleaning joints and removing dust, oils, and loose fibers.
Measure gaps with a calibrated gauge, selecting a sealant color that matches the exterior profile while preserving historic accuracy. Load the applicator with steadiness, maintaining a consistent bead width and avoiding air pockets.
Tool the sealant smoothly, shaping the joint to a shallow, convex profile that sheds water and accommodates slight log movement. Check chinking longevity by monitoring thickness over time and rechecking after seasonal fluctuations.
Document cure times and conditions, recording color consistency and adhesion. Finish with a cured, integral seam that remains flexible and durable.
Applying Caulking Smoothly
Applying Caulking Smoothly: The key is a steady rhythm as you lay the bead, maintaining consistent width and depth to form a continuous, water-shedding seal. You execute technique with deliberate control, stopping short of overfill to prevent bronze or white wash damage to the chinking joints.
Work from corner to corner, aligning the bead with the contraction gaps and feathering edges for a clean *progression* into the adjacent wood. Use a firm, steady pressure to avoid gaps that invite moisture intrusion.
Record the sequence for future restoration, noting chinking color selection and the measured results. Prioritize historical accuracy by matching historically appropriate profiles and finishes.
After tooling, wipe excess sheen promptly to preserve the joint’s archival appearance and long-term integrity.
Finishing Touches and Smoothing the Seal
Finishing touches and smoothing the seal require careful attention to detail to guarantee long-term durability. You apply final caulking where joints meet, then tool the surface to a uniform, tight profile that confirms contact with the chinking. You wipe excess material promptly, maintaining a clean line across courses and resisting texture irregularities that invite moisture retention.
You verify the sealant’s even spread, ensuring no air pockets beneath the surface and that adhesion remains uninterrupted by dust or oil residues. Historical accuracy guides color and texture choices, aligning the finish with traditional framing while preserving structural integrity.
Aesthetic considerations drive neat, unobtrusive progressions between logs and chinking, producing an appearance that respects historical context yet withstands weathering.
Inspecting for Gaps and Cracks
Inspecting for gaps and cracks is a targeted, methodical check that confirms the integrity of the chinking system. You move along each joint, note any daylight, and press tested sections for resilience.
With steady pace, you identify compression inconsistencies, misalignments, and voids that could admit air or moisture. Use a bright flashlight to reveal fine fissures, especially at corners and top plates where settling concentrates stress.
Document findings with precise measurements, labeling each location for future reference. Consider wood expansion as seasonal movement factors; anticipate small enlargements in summer and contractions in winter.
Prioritize moisture control implications, since moisture intrusion accelerates deterioration and seals must respond accordingly. Record recommended actions, including resealing or retooling adjacent chinking, and update the maintenance log promptly.
Seasonal Maintenance and Reapplication Schedule
Seasonal maintenance follows a disciplined, calendar-driven approach to preserve chinking integrity and minimize vulnerability to moisture and temperature fluctuations. You chart yearly cycles, aligning inspections, cleaning, and resealing with predictable seasonal weather windows.
In spring, you assess post-winter cracking and reapply compacting chinking where needed, ensuring joints remain watertight before thaw.
Summer demands humidity-aware application—avoid excessive thickness that traps moisture—and you verify flashing, sealants, and substrate cleanliness.
Autumn brings a final moisture check, testing for adhesion after drying periods and updating maintenance intervals based on observed wear.
Winter readiness focuses on protecting against freeze–thaw stress, covering exposed sections when temperatures dip.
Document outcomes, dates, product batches, and results to sustain consistency across years. This archival record guides proactive decisions and minimizes surprise failures.
Common Mistakes to Avoid During Chinking
Common chinking mistakes typically involve improper substrate prep, incorrect butyl vs. hydraulic chinking selection, and applying material too thick or too soon after moisture exposure. You should align substrate surfacing with manufacturer guidelines, ensuring clean, dust-free joints and dry timber prior to application.
Inadequate curing time or surface moisture leads to poor adhesion and cracking, so verify ambient conditions before work begins. Avoid overlooking drainage, as standing water worsens joint failure and timber decay.
Use proper tools for masking, filling, and smoothing; using improper tools creates inconsistent bead profiles and trapped air. Select the correct chinking formulation for your climate, and follow recommended thickness and joint-backer depth.
Document each step, monitor for reduction in gaps, and schedule inspections after seasonal cycles to maintain a durable seal.
Conclusion
In short, keeping your log cabin watertight hinges on disciplined maintenance and proper technique. You’ll extend life and reduce drafts by rechecking joints annually and re-chinking as needed. An eye-opening stat: untreated gaps can double heat loss within five years, underscoring why timely resealing matters. By following precise steps—assessing, preparing, choosing the right mix, applying cleanly, and finishing with a smooth seal—you preserve archival integrity and comfort for generations. Stay vigilant, schedule reminders, and document each repair.


