
To boost pressure and flow, start by diagnosing any upstream or valve issues and clean aerators or debris. Choose a compatible showerhead with the right flow rate (GPM) and a type that suits your spray preference, ensuring standard 1/2 inch NPT threads. Gather a wrench, Teflon tape, and a cloth, then remove the old head, inspect the arm, and clean threads. Install the new unit snugly, test for leaks, and tweak flow or pattern a bit for better feel—you’ll pick up more tips as you go.
Diagnose Low Water Pressure Before Replacing
If you’re experiencing weak or inconsistent water flow after a showerhead’s in place, start by diagnosing the cause before you replace it. Begin with Water flow checks from the main line: confirm the valve is fully open and the supply is steady.
If pressure issues persist, inspect aerators, screens, and any debris at the shutoff valve, then clean or replace as needed. Test both hot and cold lines to identify partial blockages or mixed flow problems.
Consider measuring pressure with a gauge if you have one, comparing to your home’s typical range. Note that low pressure can stem from upstream issues, municipal supply limits, or shared lines, not just the showerhead.
Only replace components once you’ve verified the root cause and corrected obvious blockages.
Choose the Right Showerhead: Size, Flow, and Compatibility
When selecting a showerhead, consider how size, flow, and compatibility affect performance and installation. You’ll balance spray coverage, water pressure, and the fixture’s reach to the wall. Choose a size that fits your shower’s footprint and user preferences, avoiding bulky heads if space is tight.
Flow matters: look for gallons per minute (GPM) guidelines that suit your water pressure and local codes. If you’re replacing an existing head, ensure the threads match (standard 1/2 inch NPT in most homes) or use a compatible adapter.
Showerhead types matter for desired experience—restrictive ecoheads reduce flow but maintain comfort, while multi-jet designs target specific zones. Prioritize water conservation without sacrificing pressure, and verify compatibility with adjustable brackets or rigid arms before purchasing.
Gather Tools and Prep Your Space
Grab the right tools first—handful items you’ll actually use and can grip easily. Clear the area, turn off the water, and protect surfaces to prevent slips or damage.
Have everything at arm’s reach so you can work smoothly without delays.
Gather Tools Quickly
Gather your tools now to avoid delays: have a basic wrench or pliers, adjustable pliers, a screwdriver (flathead and Phillips), Teflon tape, a new showerhead, and a towel or rag ready to catch drips.
Once you’ve gathered essentials, move with purpose—you’ll minimize trip wasted time and keep water in check.
Check your showerhead materials to match fittings and avoid cross-threading, which wastes water and can damage seals. Keep a spare washer or gasket if you encounter a different model.
Prepare a quick plan: shut off supply, remove old fixture, inspect pipe threads, wrap Teflon tape, then thread the new unit securely.
Prioritize water conservation by choosing a model with spray settings suitable for efficient flow.
Proceed deliberately, stay organized, and test for leaks before finishing.
Prep Space Safely
Set up your workspace safely by laying out all tools within arm’s reach and protecting the floor with a towel or drop cloth. Gather the essentials: adjustable wrench, plumber’s tape, replacement showerhead, and a small dish for parts. Clear the area around the shower, remove any obstructions, and ensure you have adequate lighting. Wear gloves if you’re sensitive to sharp edges, and keep rags handy for spills.
Inspect the new showerhead for defects before install. Begin with a quick plan: align fittings, apply toilet or plumbing tape evenly, and avoid over-tightening. During setup, minimize water exposure to surrounding fixtures.
After installing, perform a test: run the water, check for leaks, and document initial performance. This prep supports Cleaning showerhead and Water pressure testing with reliable results.
Remove the Old Showerhead Safely

First, turn off the water supply to avoid leaks during removal.
Protect the shower arm by wrapping it with a cloth to prevent damage as you loosen the head.
Use a wrench to loosen the old showerhead, applying steady, even pressure to avoid stripping threads.
Turn Off Water Supply
To turn off the water supply safely, locate the shutoff valve closest to the shower and close it completely. This prevents water flow to the fixture during removal, mitigating leaks and mess.
Test by turning the spout a half turn to confirm zero drips, then open the tub or sink faucet nearby to relieve pressure in the line. If no local valve exists, shut off the main supply and relight hot-water controls afterward.
Wear safety glasses to protect against sudden splashes. Keep a towel handy for spills and note the valve’s position for future maintenance.
This step supports Water conservation and cleaner Shower customization, ensuring you can replace the head without unexpected water damage or wasteful flow. Proceed with care.
Protect Shower Arm
Protecting the shower arm is essential to prevent damage as you remove the old head. Start by holding the arm steady with one hand while you loosen the showerhead with the other. Grip the faucet pipe firmly but gently to avoid twisting fittings or stressing the wall.
If there’s grime, wipe it away so the washer seats evenly when you reinstall. Use a cloth or non-scratch pad to shield against metal on metal contact. Then unscrew counterclockwise, applying steady, even pressure. Don’t force with excessive torque, which can bend the arm and reduce water pressure later.
Once free, inspect the threads for damage and clean debris. With the shower arm protected, you’ll preserve alignment and ensure consistent water pressure after installation.
Loosen With Wrench
With the arm stabilized, you’re ready to loosen the old showerhead using a wrench. This step requires steady pressure and proper grip to prevent arm damage.
Follow these steps for safe, effective wrench tightening and removal:
- Protect the finish with a cloth, then place the wrench on the shower nut.
- Turn counterclockwise, applying steady, even torque to avoid strip risk.
- Hold the shower arm with your other hand to prevent twisting.
- Loosen until the head loosens, then unscrew by hand to finish.
Inspect and Clean the Shower Arm and Threads
Inspect the shower arm and its threads for corrosion, buildup, or damage, since a clean connection guarantees a proper seal and easier removal later. Start by wiping the arm with a dry cloth to reveal any hidden residues. If you see mineral deposits, apply white vinegar or a commercial descaler for a few minutes, then scrub gently with a nylon brush. Rinse thoroughly to remove loosened debris.
Check the threads for nicks or deformation; if damaged, replacement may be needed to prevent leaks. Ensure thread tape is available and compatible with your plumbing standards. When reassembling, align the showerhead compatibility with the arm’s threading: mismatches create leaks and poor flow.
Address pipe corrosion signs promptly to preserve system integrity and avoid future failures.
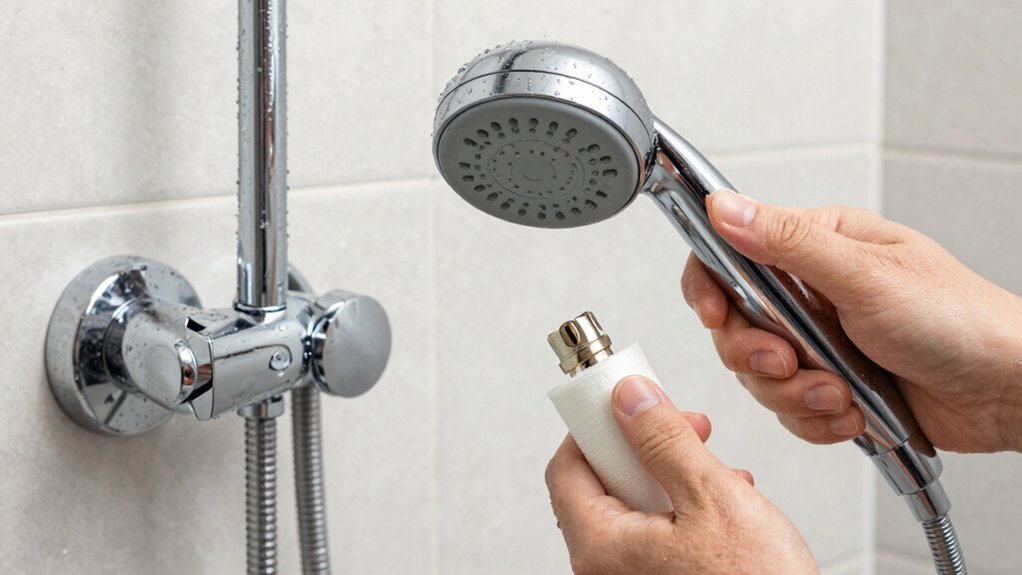
Install the New Showerhead: Step-by-Step

Now you’ll install the new showerhead by first gathering the right tools and parts, then preparing for a leak-free connection.
Make sure you have pliers or a wrench, plumber’s tape, a compatible showerhead, and a washer if required, and have a rag handy to wipe spills.
Once you’re set, install the head, check for flow, and test for leaks to confirm a proper seal.
Prepare Tools and Parts
Before you start, gather all necessary tools and parts to guarantee a smooth install. You’ll streamline the process and avoid delays, keeping focus on performance, not stoppages.
1) Adjustable wrench and pliers
2) Teflon tape, plumber’s tape
3) New showerhead with gasket or washer
4) Thread sealant if required by model
Ensure compatibility with your shower arm and current plumbing. Check for Water conservation features on the new unit and whether it supports low-flow settings.
Inspect the mounting surface for corrosion or mineral buildup and clean as needed. Have a cloth handy to protect fixtures and wipe excess sealant. Keep instructions nearby, as some models require specific threading or flow regulators.
This preparation reduces leaks, speeds up installation, and supports Aesthetic design by preserving the visual finish. You’ll install confidently, knowing you’ve covered fit, seal, and style considerations.
Install and Test Flow
How should you begin installing and testing your new showerhead? Start by threading the new unit clockwise onto the shower arm with plumber’s tape to seal joints. Hand-tighten firmly, then use a wrench for a quarter-turn, taking care not to over-tighten.
Turn on the water slowly to observe for leaks at the connection and around the fixture. If leaks appear, tighten a touch more, but stop if the faucet handles feel stiff.
Once dry, run the shower to check flow rate and spray pattern from all nozzles. Adjust water efficiency by switching to a low-flow setting or a model with aeration if needed.
Note any changes in pressure and confirm the overall performance meets your needs.
Maximize Shower Flow: Flow Rates and Water-Saving Options
To maximize shower flow while conserving water, you should understand how flow rate is measured and what options exist to meet both performance and efficiency goals. You’ll balance pressure, nozzle design, and water-saving features to achieve satisfactory showers without waste.
Use efficient fixtures that don’t compromise feel, and verify ratings before installing. Eco-friendly fixtures and water flow restrictors can be paired to preserve pressure while trimming usage.
1) Compare flow ratings (gpm) across models to pick the right balance of spray and conservation.
2) Choose heads with multi-jet or adjustable patterns for versatility without added consumption.
3) Install water flow restrictors or check for built-in eco modes that limit maximum output.
4) Consider a low-flow showerhead paired with a larger orifice for perceived pressure, not increased flow.
Address Scale and Mineral Deposits Build-Up
Minerals can accumulate in your showerhead and plumbing, reducing flow and altering spray patterns; tackling scale early keeps performance consistent.
Scale buildup reduces or blocks tiny orifices, which lowers your perceived pressure and creates uneven spray. To address this, inspect screens and inlet holes for mineral deposits and clean with a stiff brush or a toothpick, avoiding harsh tools that could scratch fixtures.
Soak hardware in a vinegar solution (one part white vinegar to one part water) for 30 minutes to loosen mineral deposits, then rinse thoroughly. If buildup is stubborn, repeat or use a commercial descaler following label directions.
Consider replacing metal-components with corrosion-resistant options if deposits recur. Regular maintenance—flush lines, wipe spray surfaces, and run hot water briefly after use—prevents persistent scale issues without compromising flow.
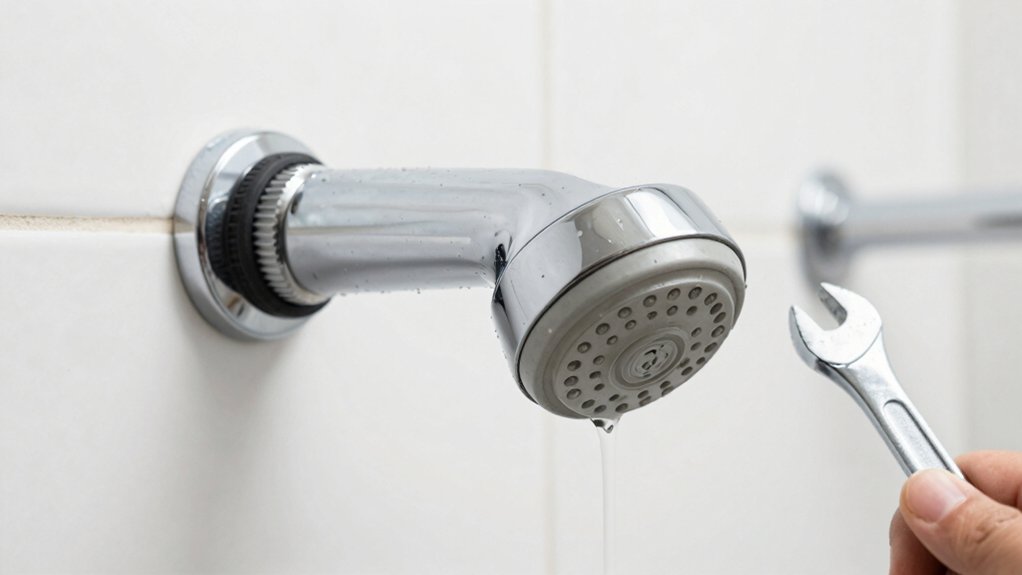
Troubleshoot Leaks and Do Dry-Run Tests
After addressing scale buildup, it’s time to verify the system for leaks and confirm everything seals properly. You’ll perform precise checks to catch hidden issues early, focusing on leak identification and reliable seals. This step also includes dry run testing to ensure flow remains steady when active. Follow these steps to confirm performance without replacing parts again.
- Inspect connections for dripping or seepage at the shower arm, escutcheon, and valve.
- Tighten fittings by a quarter-turn increment, testing between adjustments.
- Run the water briefly to observe any sudden pressure drops or leaks.
- Validate that the showerhead delivers even spray without wobble.
Maintain Pressure for Long-Term Performance
Maintaining consistent water pressure is essential for reliable shower performance and long-term system health. To preserve pressure, inspect hoses and fittings for wear, and tighten connections without overtightening to avoid leaks.
Clean or replace aerators and showerheads periodically to prevent mineral buildup that reduces flow. Monitor your water heater’s temperature and ensure it’s set to an efficient level to minimize pressure fluctuations.
If you notice pressure drops, inspect the supply line for partial blockages or a failing pressure regulator, and correct issues promptly.
Practice water conservation by scheduling shorter, strategic showers and using low-flow settings when appropriate; this helps sustain pressure while reducing overall demand.
Consistent maintenance supports pressure maintenance and extends both performance and efficiency.
Frequently Asked Questions
Can Flexible Hoses Affect Showerhead Pressure and Flow?
Flexible hoses can cause pressure loss and reduce water flow if they’re old, kinked, or too long. Check hose quality, diameter, and connections; replace with a properly rated hose to restore consistent pressure and steady water flow.
Will Installing a High-Flow Showerhead Void Warranties?
Installing a high-flow showerhead may affect warranty implications; check your manufacturer’s terms. You’ll want to verify installation restrictions, approved fittings, and any impact on coverage before proceeding to avoid voiding limited warranties. Always consult product documentation first.
How Do Air Inlets in Some Heads Impact Performance?
Air inlets help maintain pressure balance, stabilizing flow when water pressure fluctuates. You’ll notice steadier, evenly distributed spray, less pressure drop during shifts in demand, and reduced sudden jolts as the system compensates for pressure changes.
Do Water Heater Settings Influence Perceived Shower Pressure?
Like a tuned engine, your water heater settings can affect perceived shower pressure. Yes: Water heater temperature and pressure adjustment influence flow; set modest temps and proper pressure to avoid reduced shower performance.
Can New Showerheads Affect Water Conservation and Hot Water Usage?
New showerheads can boost water savings by using low-flow designs, while maintaining satisfactory pressure; you’ll also reduce hot water usage. You’ll conserve energy, cut costs, and still enjoy comfortable showers with efficient, responsible water use and hot water management.
Conclusion
You’ve learned how to upgrade your showerhead for better pressure, flow, and efficiency. By diagnosing pressure, choosing the right model, and prepping the space, you’ll avoid common pitfalls and enjoy a steadier spray. One interesting stat: high-efficiency showerheads can cut water use by up to 20% without sacrificing perceived force. With proper installation and a quick mineral-clean, you’ll sustain performance and curb leaks. Keep testing, maintain the setup, and your shower will perform consistently.


